Compared to simple metrics, formula metrics let you perform more complex mathematical and logical operations on events and customer attributes. The result is always a number.
You can use metrics in [histograms](/docs/analytics/histograms/introduction-to-histograms) and [reports](/docs/analytics/reports/introduction-to-reports). Before proceeding, familiarize yourself with the limits and constraints that apply to metrics used in these analyses:
- [Allowed metrics in histograms](/docs/analytics/histograms/creating-histograms#allowed-metrics)
- [Allowed metrics in reports](/docs/analytics/reports/creating-reports#allowed-metrics)
## Requirements
---
A tracking code implemented into your website.
## Creating a formula metric
---
 1. Go to
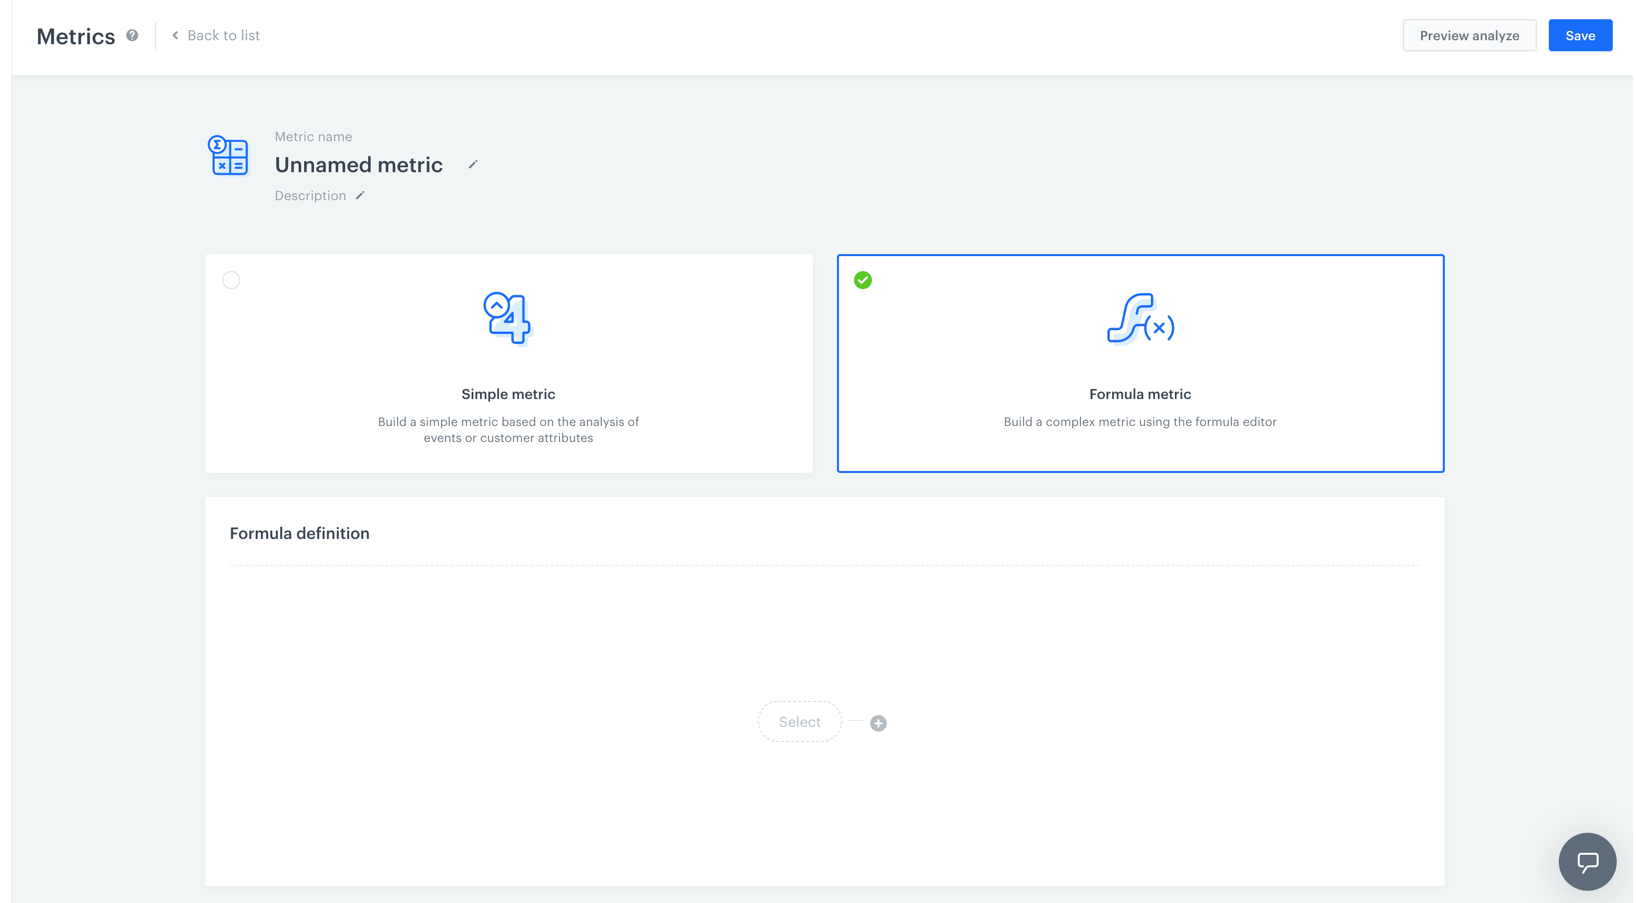
  **Decision Hub > Metrics > New metric**.
2. Enter a name of the metric.
3. Optionally, to let other users know about the purpose of the metric, you can write a short description.
4. Choose **Formula metric**.
5. To start creating a mathematical operation, click the **Select** button.
6. You can choose one of four elements: profile, event, number or a [function](/docs/crm/expressions/functions-in-expressions).
7. To define the settings of the chosen element, click this element.
8. **If you chose an event**, perform the following steps:
- To choose the context of data analyzed in the metric, next to the **Type** option, click the arrow. You can analyze events or profiles.
- To choose the type of results, next to the **Aggregator** option, click the arrow. [The full list of aggregators and their description is available here](/docs/analytics/metrics/creating-simple-metrics#aggregators)
- To define the type of occurrence, next to the **Occurrence type** option, click the arrow. This way you can count the first, the last or all occurrences of a chosen event.
- From the dropdown list, select an event. Customers who performed a specific action (that triggers the selected event) are considered in the analysis. To define the details of the event, perform one or two actions described below:
- If you want to narrow down the scope of customers, click the **Enable filter** option. This [profile filter](/docs/analytics/i_client-filter) works as an additional condition a customer has to meet in order to be counted in the metric.
- If you want to be more specific and analyze a particular aspect of the event, select [event parameters](/docs/analytics/i_events-parameter-value) by clicking the **Where** button.
9. To add another element, click the plus button.
10. To define the mathematical operation between the elements, click the plus button.
10. To determine the time range from which the data will be analyzed, click the calendar. Confirm the settings by clicking **Apply**.
11. To complete the process, click the **Save** button.
**Decision Hub > Metrics > New metric**.
2. Enter a name of the metric.
3. Optionally, to let other users know about the purpose of the metric, you can write a short description.
4. Choose **Formula metric**.
5. To start creating a mathematical operation, click the **Select** button.
6. You can choose one of four elements: profile, event, number or a [function](/docs/crm/expressions/functions-in-expressions).
7. To define the settings of the chosen element, click this element.
8. **If you chose an event**, perform the following steps:
- To choose the context of data analyzed in the metric, next to the **Type** option, click the arrow. You can analyze events or profiles.
- To choose the type of results, next to the **Aggregator** option, click the arrow. [The full list of aggregators and their description is available here](/docs/analytics/metrics/creating-simple-metrics#aggregators)
- To define the type of occurrence, next to the **Occurrence type** option, click the arrow. This way you can count the first, the last or all occurrences of a chosen event.
- From the dropdown list, select an event. Customers who performed a specific action (that triggers the selected event) are considered in the analysis. To define the details of the event, perform one or two actions described below:
- If you want to narrow down the scope of customers, click the **Enable filter** option. This [profile filter](/docs/analytics/i_client-filter) works as an additional condition a customer has to meet in order to be counted in the metric.
- If you want to be more specific and analyze a particular aspect of the event, select [event parameters](/docs/analytics/i_events-parameter-value) by clicking the **Where** button.
9. To add another element, click the plus button.
10. To define the mathematical operation between the elements, click the plus button.
10. To determine the time range from which the data will be analyzed, click the calendar. Confirm the settings by clicking **Apply**.
11. To complete the process, click the **Save** button.