By default, the use of JS SDK and event aggregation takes place without authentication (except for `form.submit` events). You can configure authentication requirements so that some (or even all) events can only be sent by customers who confirmed their identity.
We highly recommend using this option, especially for events which involve personal data and/or events of high importance.
The customer's identity is verified by your own backend, which informs Synerise that the user is authenticated. For technical details of the authentication, see the [developer documentation](/developers/web/jwt-auth).
Users can create lists of events sent by JS SDK which require the JSON Web Token (JWT) authentication. Users can create three-level authentication of events in the form of lists that contain:
- Events accepted for anonymous customers which don't require JWT authentication
- Events that modify customer data which don't require JWT authentication
- Events that modify data and require JWT authentication
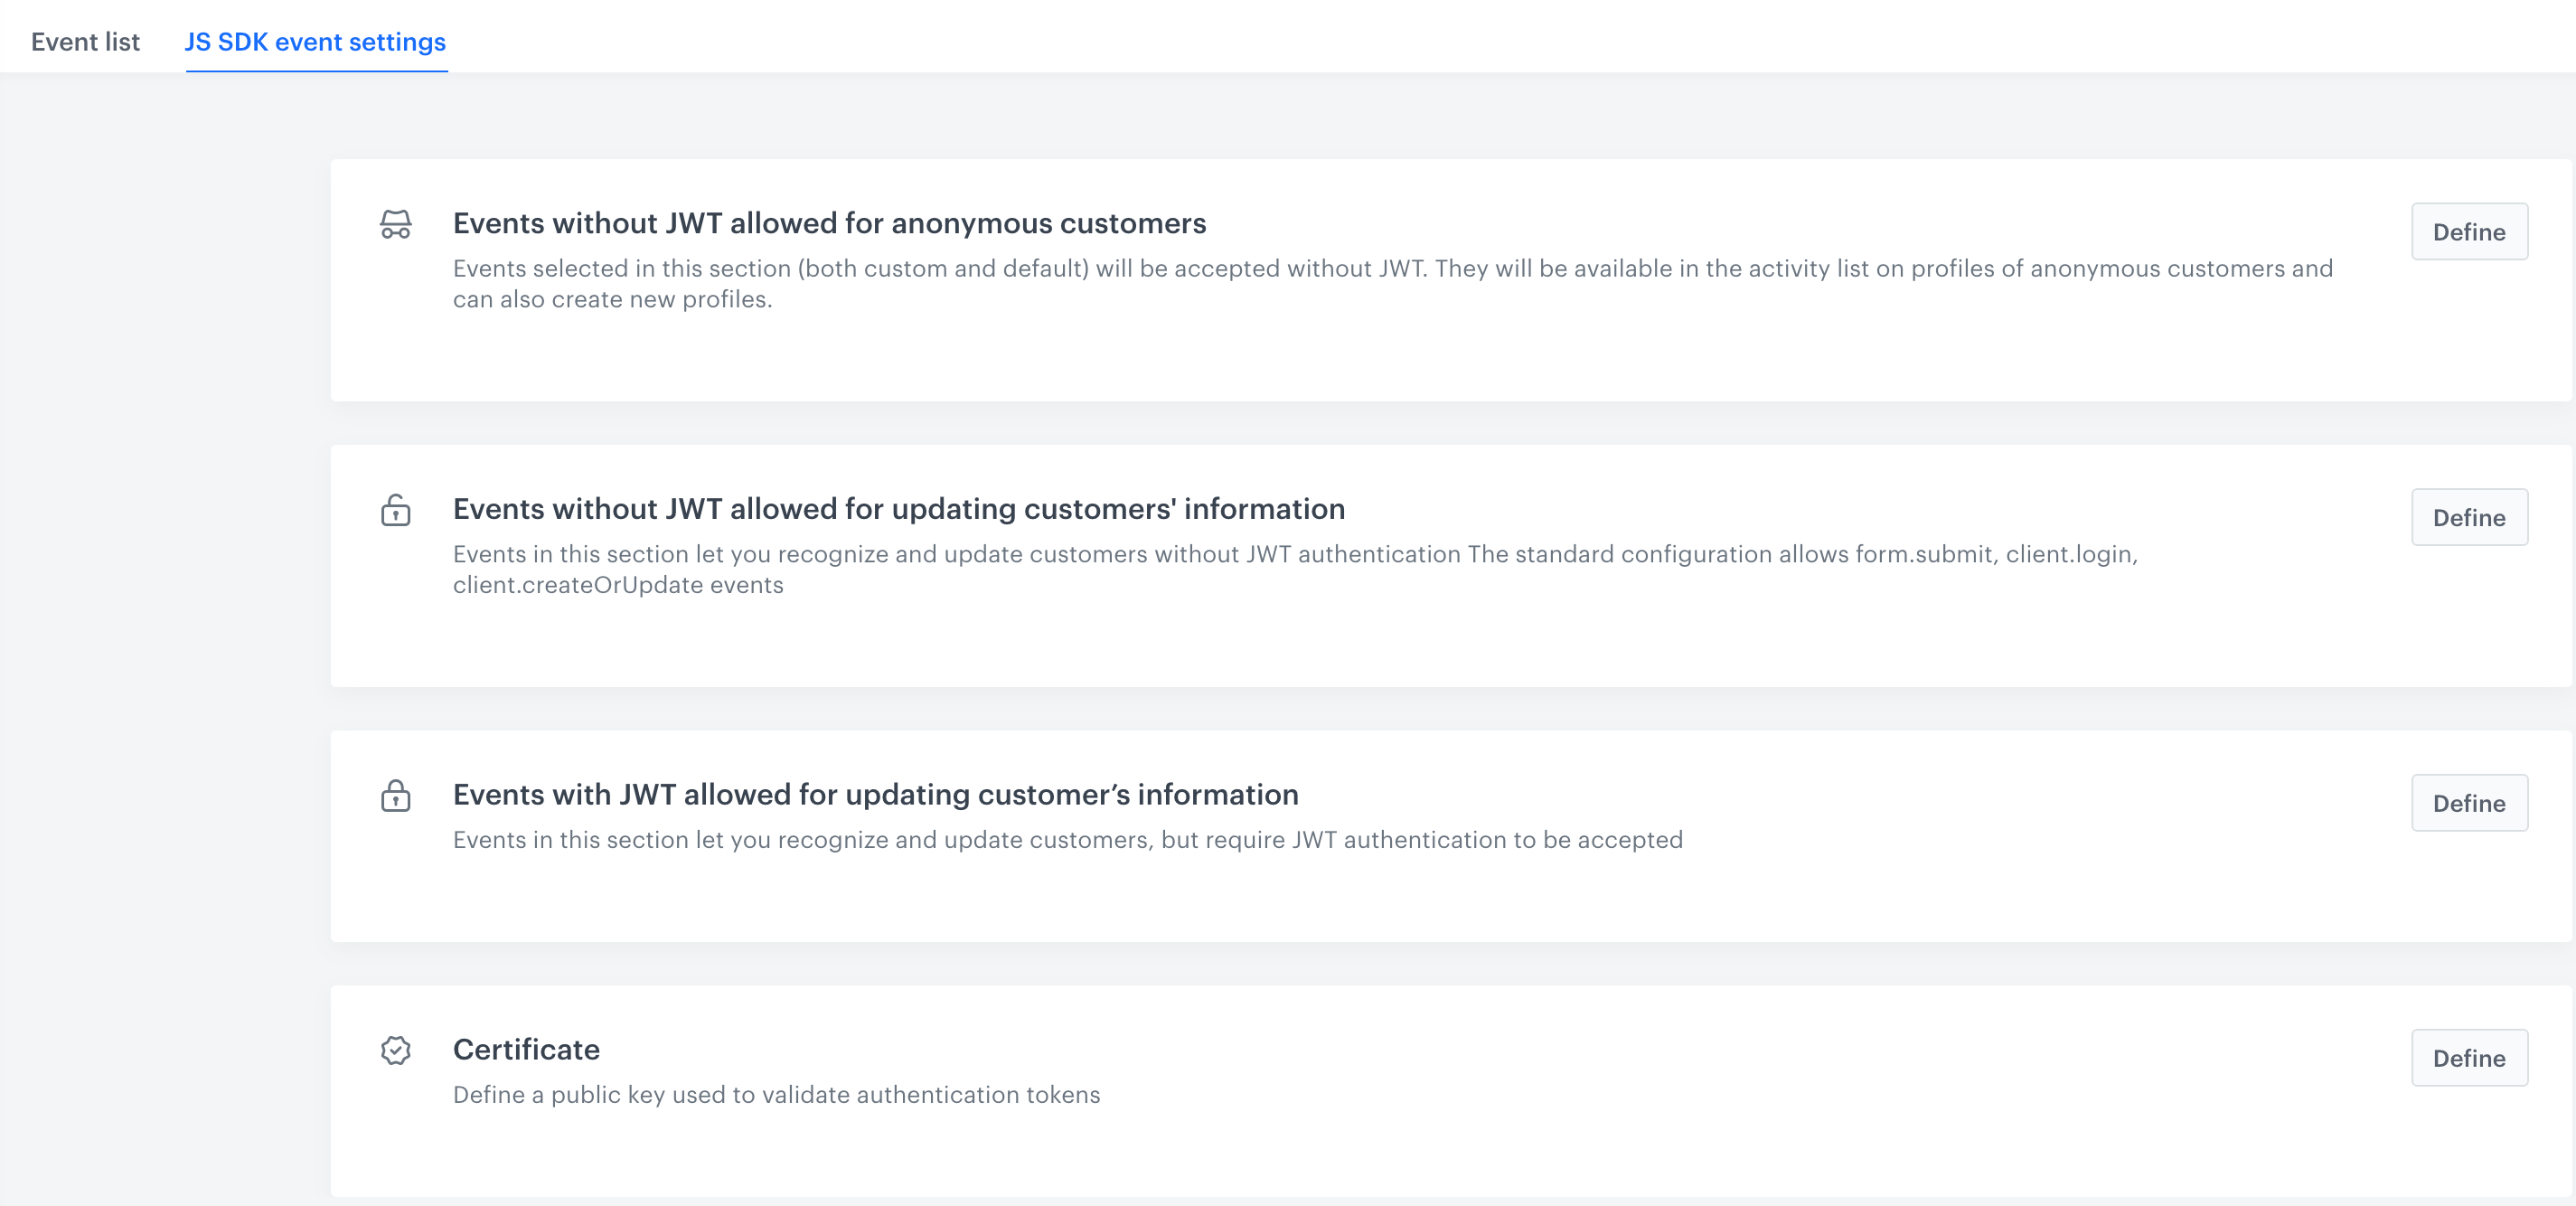
## Add a certificate
---
Before you can authenticate events with JWT, you must add a certificate and implement your own logic for [generating JWT tokens signed with that certificate](/developers/web/jwt-auth).
2. Go to **Data Modeling Hub > Events**.
3. On the **JS SDK event settings** tab, in the **Certificate** section, click **Define**.
4. If a certificate is already added, perform one of the following actions
- Keep using the existing certificate, no further actions are required.
- Overwrite the existing certificate by continuing to step **4**.
Overwriting a certificate requires providing the new certificate in your backend implementation! JWT tokens signed with the old certificate are rejected!
1. Open the terminal.
1. Generate public and private RSA keys by using these commands:
1. `openssl genpkey -out private.pem -algorithm RSA -pkeyopt rsa_keygen_bits:2048`
2. `openssl pkcs8 -topk8 -inform pem -in private.pem -outform DER -nocrypt -out private.der`
3. `openssl rsa -pubout < private.pem > public.pem`
5. Perform one of the following actions:
- To enter the certificate as text, in the **Certificate code** field paste the certificate **with the header and footer**.
The header and footer are: `-----BEGIN PUBLIC KEY-----`; `-----END PUBLIC KEY-----`
The pasted certificate cannot contain line breaks or spaces.
To open the certificate in the terminal, you can usually use `cat public.pem` in the root directory.
- To upload the certificate as a file, click **Upload Certificate > Upload certificate code** and select a file from your computer.
6. Click **Apply**.
## Event configuration
---
1. Go to **Data Modeling Hub > Events > JS SDK event settings**.
Event settings
### Events for anonymous customers without JWT authentication
1. To define events which are accepted for anonymous users and don't require JWT authentication, in the **Events without JWT allowed for anonymous customers** section, click **Define**.
2. Use a search box to find an event.
3. Click the event you want to add to the list.
4. If you want to add more, search them and click them to add to the list.
5. Confirm your choice by clicking **Add**.
**Result**: The event appears on the **Event list**.
6. To save the list of events, click **Apply**.
**Result**: The selected events will be visible on the activity list on the profile of anonymous customers and they will create new profiles. If the list is empty, it means that all events sent through JS SDK are accepted for anonymous customers without JWT authentication.
### Events which change customer data and don't require authentication
Using non-authenticated events for changing customer data is enabled for backwards compatibility. You should not add events to this list unless absolutely necessary and allowed by your security policies.
1. To define events that modify customer data and don't require a JWT, in the **Events without JWT allowed for updating customer's information** section, click **Define**. The standard configuration of this section includes the following events: `form.submit`, `client.login`
2. Use the search box to find an event.
3. Click the event you want to add to the list.
4. If you want to add more, search them and click them to add to the list.
5. Confirm your choice by clicking **Add**.
**Result**: The event appears on the **Event list**.
6. To save the list of events, click **Apply**.
**Result**: The events added on the list will be accepted without JWT authentication. If this list is empty, all events sent through JS SDK are accepted without JWT authentication (only if the section below is empty as well).
### Events which change customer's data and require authentication
1. To define events that modify customer data and require JWT authentication, in the **Events with JWT allowed for updating customer's information** section, click **Define**. Example of such an event: `form.submit` (this event is added to this list by default)
2. Use search box to find an event.
3. Click the event you want to add to the list.
4. If you want to add more, search them and click them to add to the list.
5. Confirm your choice by clicking **Add**.
**Result**: The event appears on the **Event list**.
6. To save the list of events, click **Apply**.
**Result**: The events on the list will require JWT authentication. If this list is empty, all events sent through JS SDK won't require JWT authentication.