Click here to see the instructions
- Click Select connection.
- In the connection list:
- If the connection you want to use is in the list, select it and proceed to Defining the request section in this article.
- If the connection list is empty or you don't see a connection, you must:
At the bottom of the dropdown list, click Add connection.
In the Authorization request tab, click Define.
Result: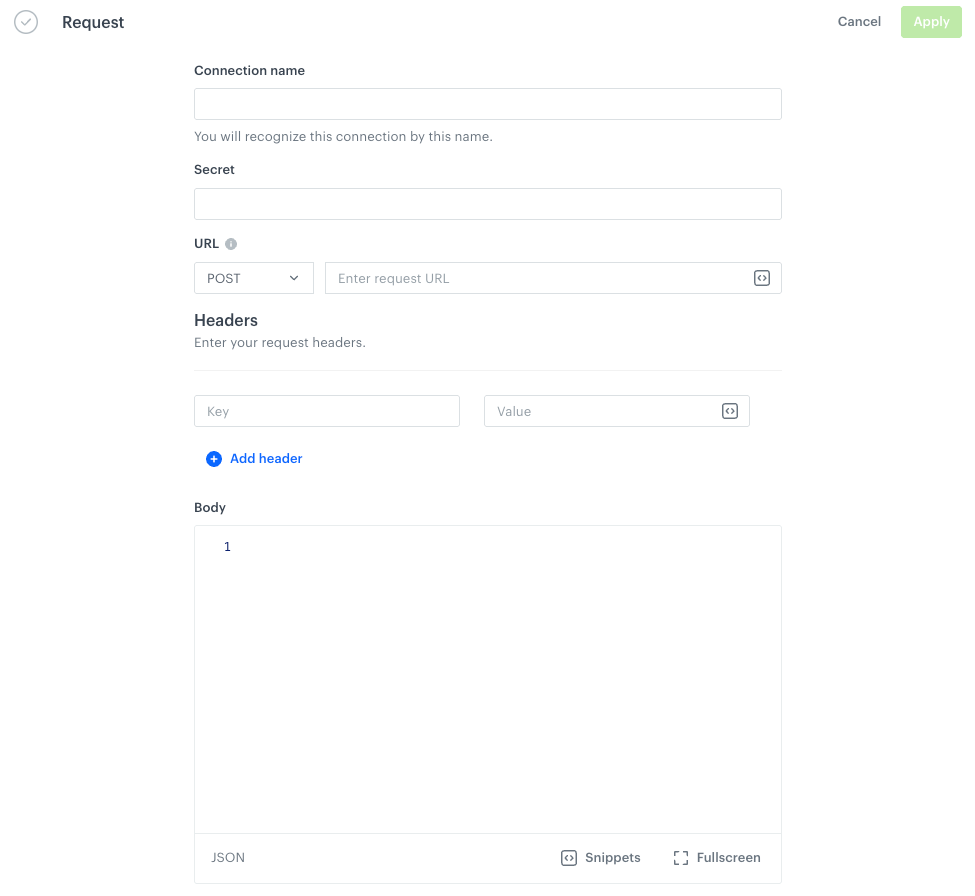
The Request section in the configuration of a custom connection In the Connection name field, enter the name of your connection (it's visible only on the Select connection dropdown list or on the list of connections in Settings > Connections).
In Secret, enter a value which is required in the request to obtain a token. This value will be anonymized and displayed as asterisks.
In the Headers section, add request headers (in the left field, enter the key; in the right, enter its value).
In the Body field, enter the request body.
For example:{ "api-key": "{{secret}}" }where
{{secret}}retrieves the value of the Secret field to anonymize the token.Confirm the settings in the Authorization request tab by clicking Apply.
In the Token placement settings section, click Define.
Click Retrieve response.
Result: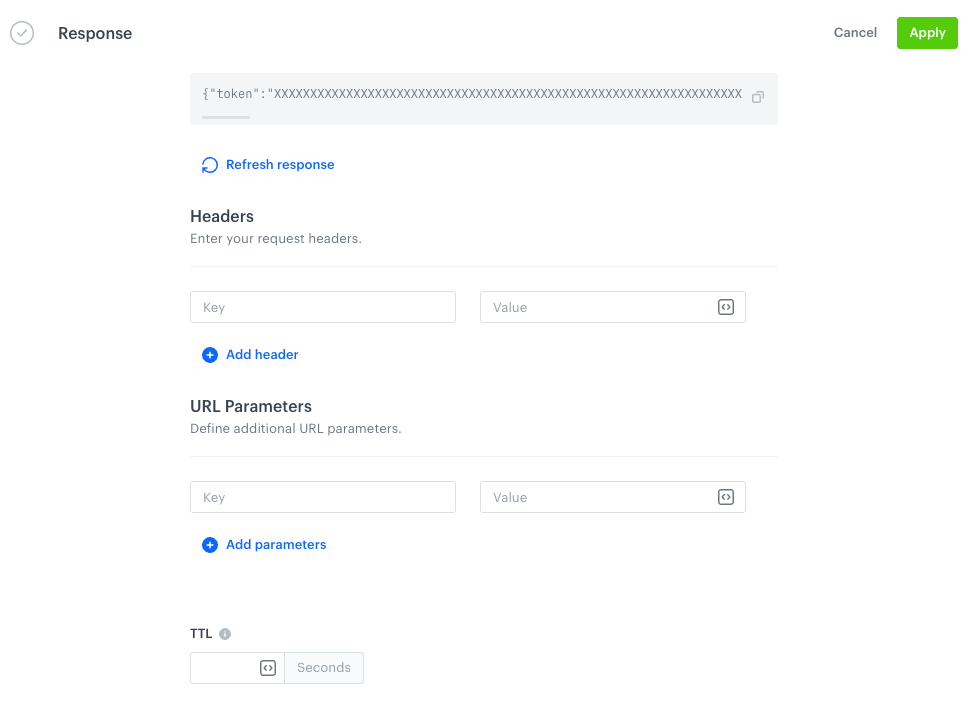
Retrieved token in the Response section in the custom connection configuration form If you:
specify the value in the Headers section, the extracted authorization data from the response will be added as a header to the target request.
provide the value in the URL Parameters section, the data will be appended to the target request’s URL as a parameter.
You can use the following values to retrieve values from the response:authResponseBody- a variable that contains the full body of an authentication responseauthResponseStatusCode- a variable that contains the status code of an authentication responseauthResponseHeaders- a variable that contains the headers of an authentication response
For example:Bearer {{ authResponseBody | fromjson | attr("token") }}
It takes the
JSONresponse body stored inauthResponseBody, parses it into a usable structure, and extracts the value of thetokenfield. Outputs a string like:Bearer "eyJhbGciOiJIUzI1NiIsInR5cCI6IkpXVCJ9..."
- In TTL field, specify the how long the cached response from the external request will be valid.
If you leave this field empty, it's 60 seconds. - Confirm by clicking Apply.