This is the final node that must be added as the last element of the transformation workflow. Apart from showing the outcome of the transformation, in the **Data Output** node, you can:
- [change the data type for every column in the file](#change-data-type)
- [define the behavior of the transformation when the data type change fails](#handle-errors)
## Node configuration
---
To configure the **Data Output** node, click it twice.
In the configuration of this node:
#### Change data type
1. Click **Select column**.
2. From the dropdown list, select a column or columns whose type of value you want to change.
**Result**: The list of selected columns appear.
3. Next to the column name, click the icon.
4. From the dropdown list, select the data type.
5. Perform steps 3 and 4 for the rest of selected columns.
The default output data type for `.CSV` files is string. For `.XML`, `.JSON`, or `.JSONL` files, output data type is the same as before transformation.
If you want to cast a string to an array in a `.csv` file, the values must be delivered in the following form: `"value1,value2,value3"` (values must be separated by commas). Regardless of the value, data is always cast to an array of strings
The paragraph above applies only to the default metacharacters.
#### Handle errors
You can define what to do with failed values (for example, as a result of Jinja rendering or in other cases) in cells where data type modification failed.
In the **Handle incomplete data** section, select one of the following options:
- **Skip row if error occurred** - It omits the row when an exception occurs.
- **Skip if result is null or empty string** - It omits rows with empty strings and `null` (which may be the result of rendering Jinja)
- **Stop further transformation** - The transformation stops at the row with an error. The data before the line that caused the error is transformed (and imported if the transformation rule is used in the Data Transformation node).
- **Insert null if error occurred** - Wrong values are replaced with `null`. If you use such a transformation for the import of profiles, the existing value of an attribute is cleared and replaced with the `null` value.
- **Insert empty string if error occurred** - Wrong value is removed and the cell remains empty.
## Example of use
---
You can create a transformation of a sample file with customers' data by adding a `marketing_agreement` column.
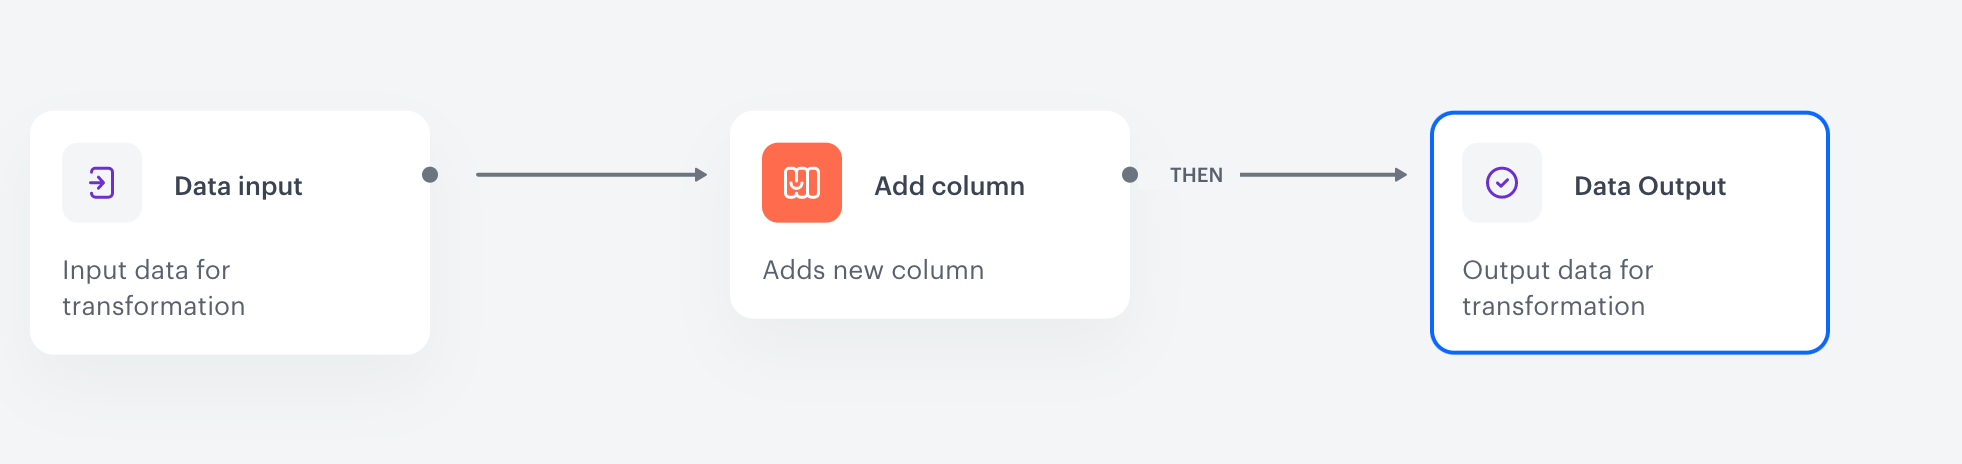
Transformation of a sample file with customer's data
1. Start the transformation with the **Data Input** node.
2. Click the node.
3. In the configuration of the node, upload a sample file with customer data.
4. Add the **Add column** node and join it with the **Data Input**.
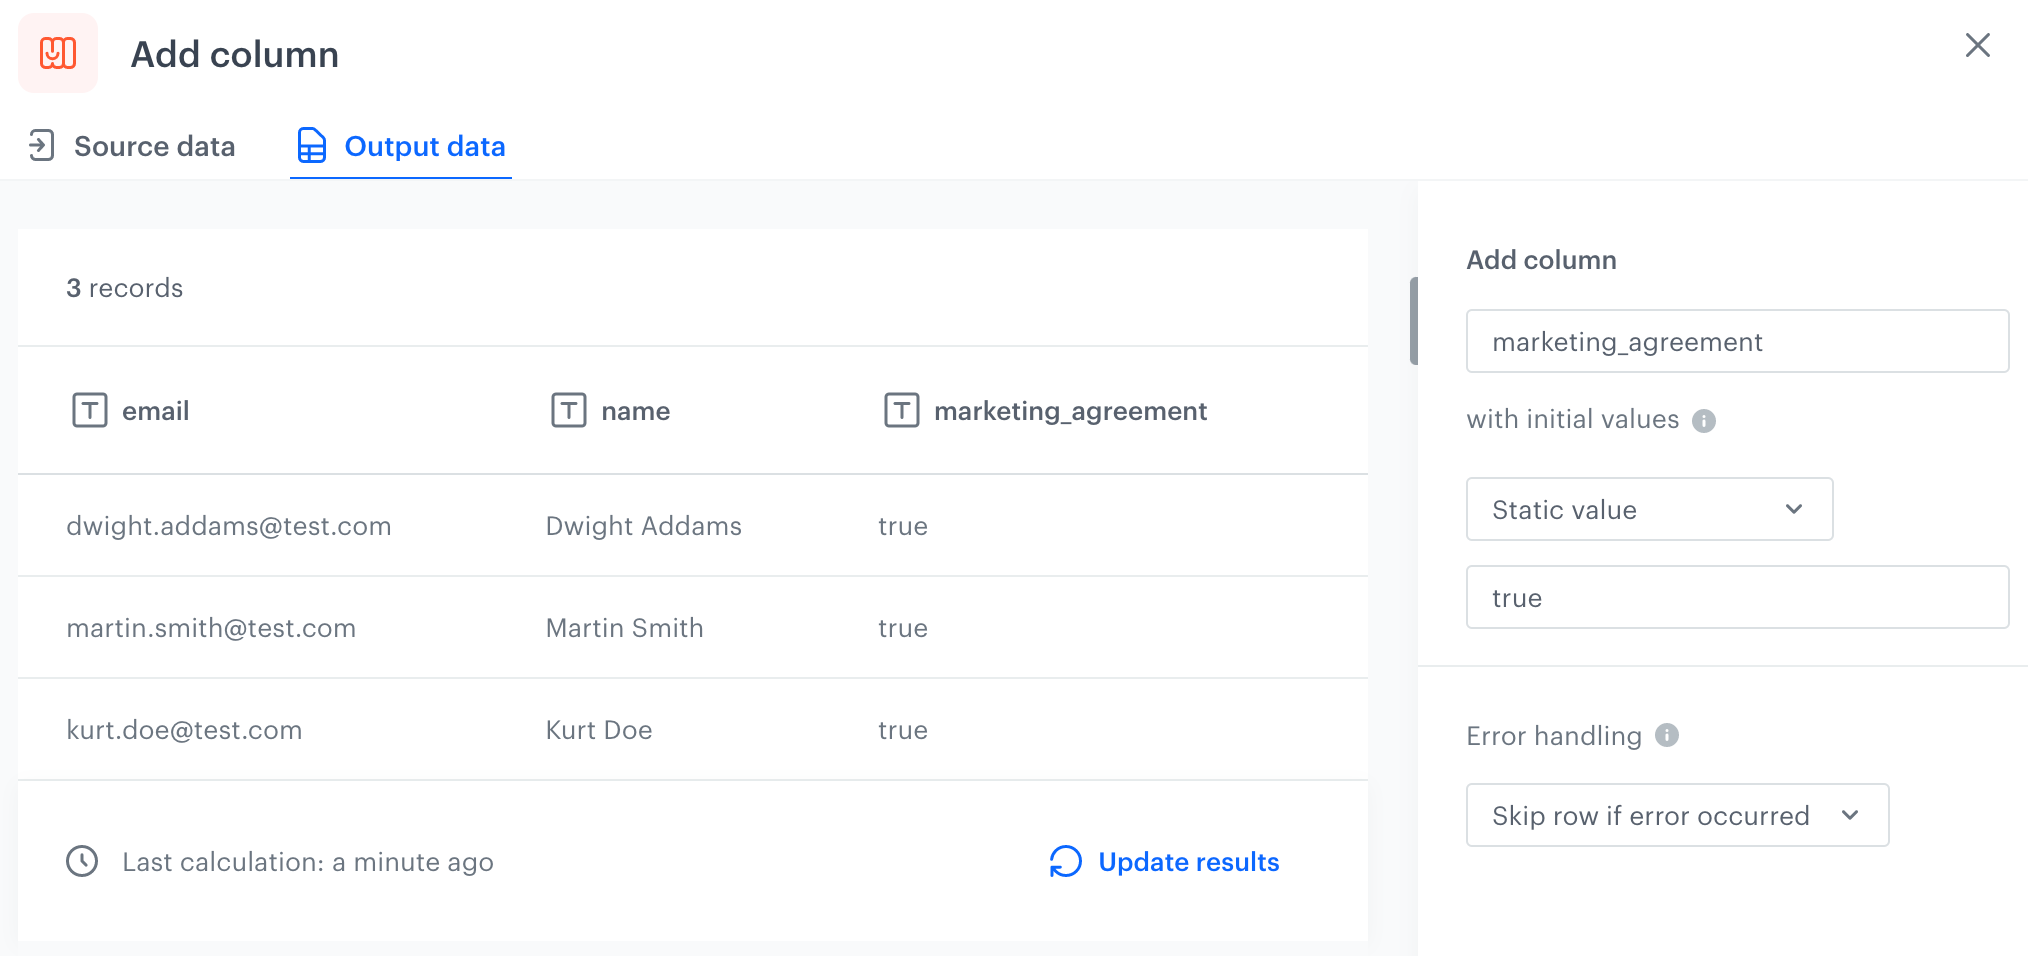
5. In the configuration of the **Add column** node:
1. In the **Add column** field, enter `marketing_agreement`.
2. Leave the **Defined** option selected.
3. Next to the **Defined** option, in the field, enter `true`.
Configuration of the Add column node
6. Confirm by clicking **Apply**.
5. Add the **Output data** node and join it with the **Add column** node.
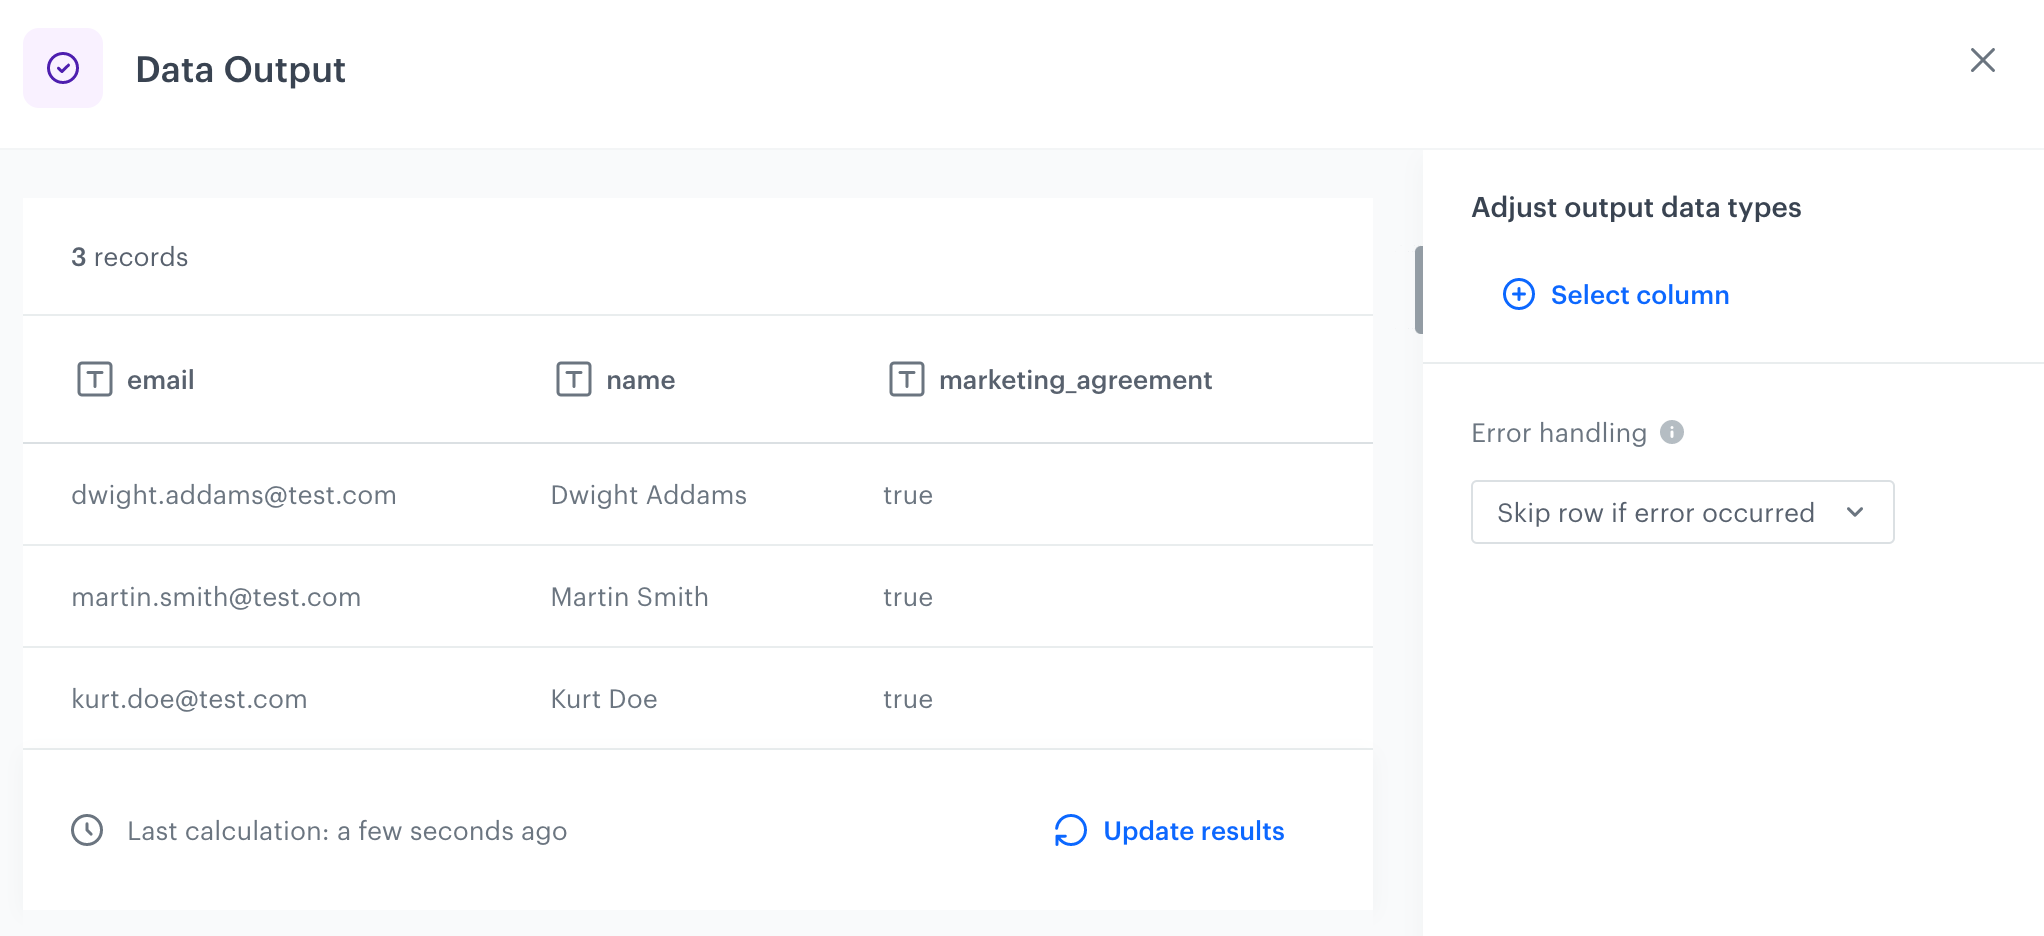
Preview of the file in Data Output