
This node allows you to create a new column based on the values from other columns and to define the separator between the merged values.

In the settings of this node, you must select the columns that will be merged. You can do this by:
- Selecting the column names.
- Creating a condition (referred to as a _dynamic condition_ further in this article) that the column names must meet in order to be transformed, for example, the column name must start with the letter "A".  

Dynamic conditions are especially helpful when using a JSON file as a sample in the ["Data Input" node](/docs/automation/data-transformation-and-imports/transformations-and-data-operators/data-input). When a JSON file contains an object deeper than the root object, its items will be transferred to the Data Input node as separate columns named `{object}.{parameter}`. When choosing columns manually, you can't add those new columns from a JSON list to the transformation. Dynamic conditions can be set up to include those columns, for example by including columns whose name includes the name of the object they were created from.

## Node configuration
---

<figure><img src="/api/docs/image/54176ad07f146575310749eba44b7c2f42c1b327/docs/automation/_gfx/merge-columns.png" class="large" alt="Merge column operation on an example file"><figcaption>Merge column operation on an example file</figcaption></figure>

1. Click **Add rule**.  
2. Select one of the **Include** options, by clicking the <img src="/api/docs/image/54176ad07f146575310749eba44b7c2f42c1b327/icons/blue-arrow-down.png" alt="Arrow down icon" class="icon" >  icon next to **these**:  
    - **these** - the default; it lets you select the columns for merging.
    - **all except these** - this option lets you select the columns which you do NOT want to merge. Values from all the other columns will be merged into a new column.

3. Select columns to include/exclude (according to the **Include** setting above) in one of the following ways:
    - **Select column** - from the dropdown list, you can select the columns which will be included or excluded from the operation.
    - **Define conditions** - you can create a dynamic condition which columns must meet to merge their values in a new column; for this purpose, you can use logical operators such as contain, starts with, ends with, and so on.  
    
   <div class="admonition admonition-important"><div class="admonition-icon"><svg xmlns="http://www.w3.org/2000/svg" fill="none" viewBox="0 0 24 24" stroke="currentColor" stroke-width="2.5"><path stroke-linecap="round" stroke-linejoin="round" d="M12 8v4m0 4h.01M21 12a9 9 0 11-18 0 9 9 0 0118 0z" /></svg></div><div class="admonition-body"><div class="admonition-content">

   You can't combine dynamic conditions with the **Include all except these** option.

   </div></div></div>


    For further instructions, select one of the tabs below, depending on the option you have chosen in step 3.

    
<div class="content-tabs" data-tab-group="tabgrp-1275">
<div class="tab-buttons"><button class="tab-button" data-tab-id="tabgrp-1275-0" data-tab-group="tabgrp-1275" data-tab-active="true">Select column</button><button class="tab-button" data-tab-id="tabgrp-1275-1" data-tab-group="tabgrp-1275">Define conditions</button></div>

<div class="tab-panel" data-tab-id="tabgrp-1275-0" data-tab-group="tabgrp-1275" data-tab-active="true">

<figure><img src="/api/docs/image/54176ad07f146575310749eba44b7c2f42c1b327/docs/automation/_gfx/merge-column-select.png" class="small" alt="Select column option"><figcaption>Select column option</figcaption></figure>

4. From the dropdown list, select the first column.
5. To add more columns, click <img src="/api/docs/image/54176ad07f146575310749eba44b7c2f42c1b327/icons/dt-plus-icon.png" alt="Adding new icon" class="icon" > icon and select the column from the list.
5. In the **New column name** field, enter the name of the column that will be added.
    - If you selected **Include these** at the beginning of the procedure, the new column will contain values from columns you selected for merging.
    - If you selected **Include all except these** at the beginning of the procedure, the new column will contain values from all the other columns that you didn't select.
6. In the **Separator** field, enter the character which will function as a separator among values of the columns that are being merged.

</div>

<div class="tab-panel" data-tab-id="tabgrp-1275-1" data-tab-group="tabgrp-1275">

<figure><img src="/api/docs/image/54176ad07f146575310749eba44b7c2f42c1b327/docs/automation/_gfx/merge-column-dynamic.png" class="medium" alt="Define condition option"><figcaption>Define condition option</figcaption></figure>

 1. Select one of the following logical operators to define the conditions which column name must meet to be included in merging:
    - **Ends with** - If a column name ends with a specified string, for example, `a`, then the operation will be performed on the columns whose names end with `a`.
    - **Starts with** - If a column name starts with a specified string, for example, `pro`, then the operation will be performed on the columns whose name starts with `pro`.
    - **Contain** - If a column name contains a specified string, for example `xyz`, then the operation will be performed on the columns whose name contains `xyz`.
    - **Not contain** - If a column name doesn't contain a specified string, for example, `123`, then the operation will be performed on the columns whose names doesn't contain `123`.
    - **Regex** - You can perform the operation on the column whose name matches the regular expression. 
5. In the **New column name** field, enter the name of the newly created column in which the merged data will be placed.
    The new column will contain values from the columns which meet the dynamic condition.
6. In the **Separator** field, enter the character which will function as a separator between values of the columns that are being merged.

   </div>
   </div>

            
4. Optionally, you can delete the original columns by enabling the **Remove original columns** option on.  
5. You can check the preview of the file after changes in the **Output data** tab.
5. To define what happens if rows contain errors, select one of the options available in the [Error handling](#handle-errors) section.
6. Confirm the settings by clicking **Apply**.

### Handle errors

You can define what to do with failed values (for example, as a result of Jinja rendering or in other cases) in cells where data type modification failed.
In the **Handle incomplete data** section, select one of the following options:
- **Skip row if error occurred** - It omits the row when an exception occurs.
- **Skip if result is null or empty string** - It omits rows with empty strings and `null` (which may be the result of rendering Jinja)
- **Stop further transformation** - The transformation stops at the row with an error. The data before the line that caused the error is transformed (and imported if the transformation rule is used in the Data Transformation node).
- **Insert null if error occurred** - Wrong values are replaced with `null`. If you use such a transformation for the import of profiles, the existing value of an attribute is cleared and replaced with the `null` value.
- **Insert empty string if error occurred** - Wrong value is removed and the cell remains empty.


## Example of use
---
You can use the **Merge columns** node in order to create an event salt. Event salt allows you to avoid duplicating an entry in the database if it is imported more than once. It is especially useful while importing events to Synerise. 


<details class="accordion"><summary>File sample used in the Data Input node</summary><div class="accordion-content"><pre><code class="language-plaintext">
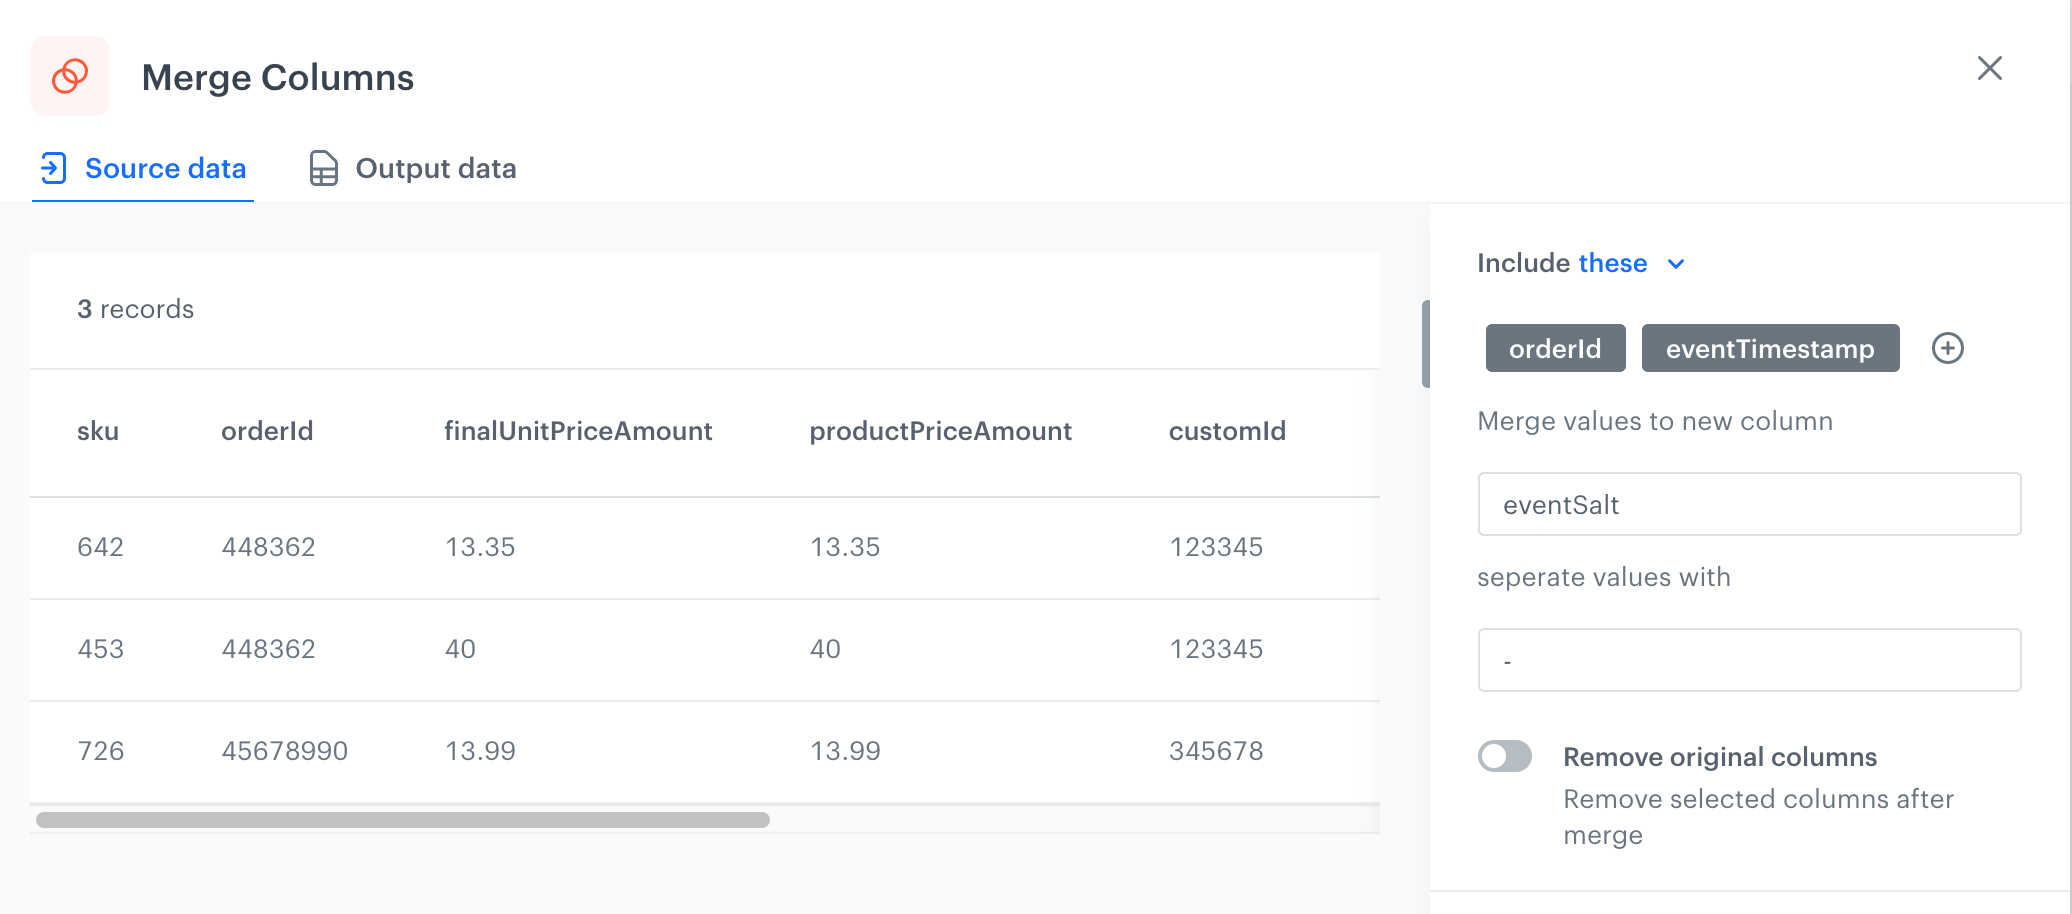
customId,orderId,paymentInfo,finalUnitPriceAmount,productQuantity,sku,eventTimestamp,productName,productPriceAmount 123345,448362,cash,13.35,1,642,13.02.2022,shoe1,13.35 123345,448362,cash,40,1,453,13.02.2022,shoe2,40 345678,45678990,online,13.99,1,726,13.02.2022,shoe3,13.99</code></pre></div></details>


1. As the first node, add **Data Input**.  
2. In the configuration of the node, upload a file on which you want to perform data transformation.  
5. As the next node, add a **Merge Columns** node.
6. In the configuration of the node: 
    - merge the **orderId** and **eventTimestamp** columns together,
    - enter `eventSalt` as the name of the new column,
    - set `-` as a separator.   
    <figure>
    <img src="/api/docs/image/54176ad07f146575310749eba44b7c2f42c1b327/docs/automation/_gfx/merge-columns-example.png" alt="Configuration of the Merge columns node" class="full">
    <figcaption>Configuration of the Merge columns node </figcaption>
    </figure>
7. Leave the rest of the settings at default.
7. As the last node, add **Data Output**.  
    **Result**: You receive a data file with a new eventSalt column.


