The integration allows you to download files embedded on Azure Blob Storage to Synerise. You can use this connection in various scenarios such as importing transactions, event data, customer information (such as marketing agreements).
## Prerequisites
---
- You must have an account on Azure AD.
- Maximum file size: 5 GB (5 000 000 000 bytes).
## Node configuration
---
1. Click **Azure Blob Storage > Get File**.
2. Click **Select connection**.
3. From the dropdown list, select the connection.
- If no connections are available or you want to create a new one, see [Create a connection](#create-a-connection).
- If you selected an existing connection, proceed to [defining the integration settings](#define-the-integration-settings).
### Create a connection
To allow the data exchange, establish a connection between Synerise and Azure Blob Storage.
1. At the bottom of the **Select connection** dropdown list, click **Add connection**.
2. In the **Blob SAS URL**, enter the [Blob shared access signature (SAS) URL](https://learn.microsoft.com/en-us/azure/storage/common/storage-sas-overview) that allows access to a storage account and/or containers and blobs. You can generate it in your Azure AD account.
3. Confirm by clicking **Apply**.
### Define the integration settings
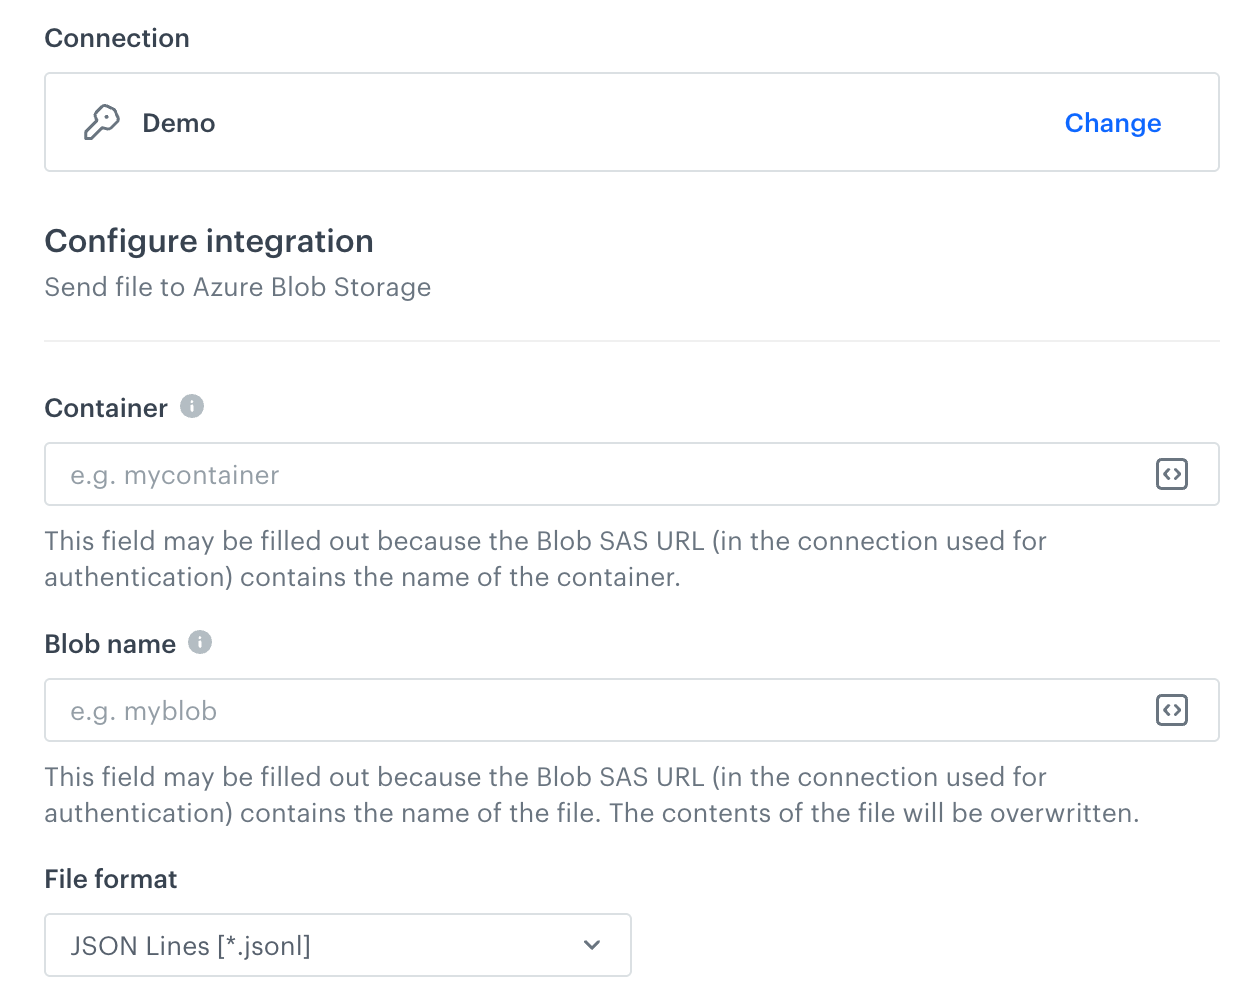
In this step, fill in the form that allows you to get data from Azure Blob Storage.
A blank configuration form for Get File (Azure)
Fields marked with the icon accept [snippets](/docs/assets/snippets) or [inserts](/developers/inserts). But, you can’t use profile-related inserts.
1. In the **Container** field, enter the name of an existing container in your storage.
If this field is already filled out, it means that the URL used in the [connection](#create-a-connection) settings contains the name of the container.
2. In the **Blob name** field, enter the name of the blob (file) you want to get from the storage. You can use Jinjava to build dynamic file name configuration.
If this field is already filled out, it means that the URL used in the [connection](#create-a-connection) settings contains the name of the blob.
3. From the **File format** dropdown list, select the format in which the file will be delivered.
If you select the **CSV [*.csv]** option, follow the instructions below:
1. From the **Delimiter** dropdown, select the character that separates fields in a row.
2. From the **Quotation mark** dropdown list, select the characters that contain the text.
3. From the **Escape character** dropdown list, select the character which changes the default interpretation of a character or a string followed by the escape character.
4. Confirm by clicking **Apply**.
## Example of use
---
You can create a workflow that is triggered one time in order to import the customer database (email addresses and newsletter agreements) to Synerise.
In the configuration of the workflow:
1. Start the workflow with the **Scheduled Run** node. In the configuration of the node, set the **Run trigger** to **one time**. Select the **Immediately** tab.
2. To feed the workflow with data, as the next node, select **Azure Blob Storage > Get File**. Fill in the configuration form in the node.
4. To import data to Synerise, select **Synerise > Import Profiles**. Make sure the data in the retrieved file meet the requirements defined in the Import profile node. If you need to adjust your data, you can use [Data Transformation node](/docs/automation/operation/data-transformation-node) to transform values in your file.
5. Add the **End** node.
**Result**:
Final configuration of the workflow