The integration between Synerise and Google Cloud Storage opens up possibilities of exporting data collected in Synerise. By means of the Send file node, you can push data from Synerise to add it to a storage in your Google Cloud. You can use this connection in various scenarios such as exporting transactions, event data, customer information (such as marketing agreements), results of metrics, aggregates, expressions, reports, and many more to Google Cloud Storage.
## Prerequisites
---
- You must have a Google Cloud account.
- Familiarize with pricing connected with sending data to your storage in Google Cloud.
- Create a project in Google Cloud.
- Create a [Cloud Storage bucket](https://cloud.google.com/storage/docs/creating-buckets).
### Node configuration
---
1. Click **Google Cloud Storage > Send File**.
2. Click **Select connection**.
3. From the dropdown list, select the connection.
- If no connections are available or you want to create a new one, see [Create a connection](#create-a-connection).
- If you selected an existing connection, proceed to [defining the integration settings](#define-the-integration-settings).
### Create a connection
To allow the data exchange, establish a connection between Synerise and Google Cloud Storage.
1. At the bottom of the **Select connection** dropdown list, click **Add connection**.
2. On the pop-up, click **Sign in with Google**.
3. Select a Google account which has write access to the dataset that contains your destination table.
[Learn about required permissions](https://cloud.google.com/bigquery/docs/streaming-data-into-bigquery#required_permissions).
4. Follow the instructions on the interface.
5. After authentication, click **Next**.
6. In the **Connection name** field, enter the name of the connection.
It's used to find the connection on the list.
7. Click **Apply**.
**Result**: A connection is created and selected.
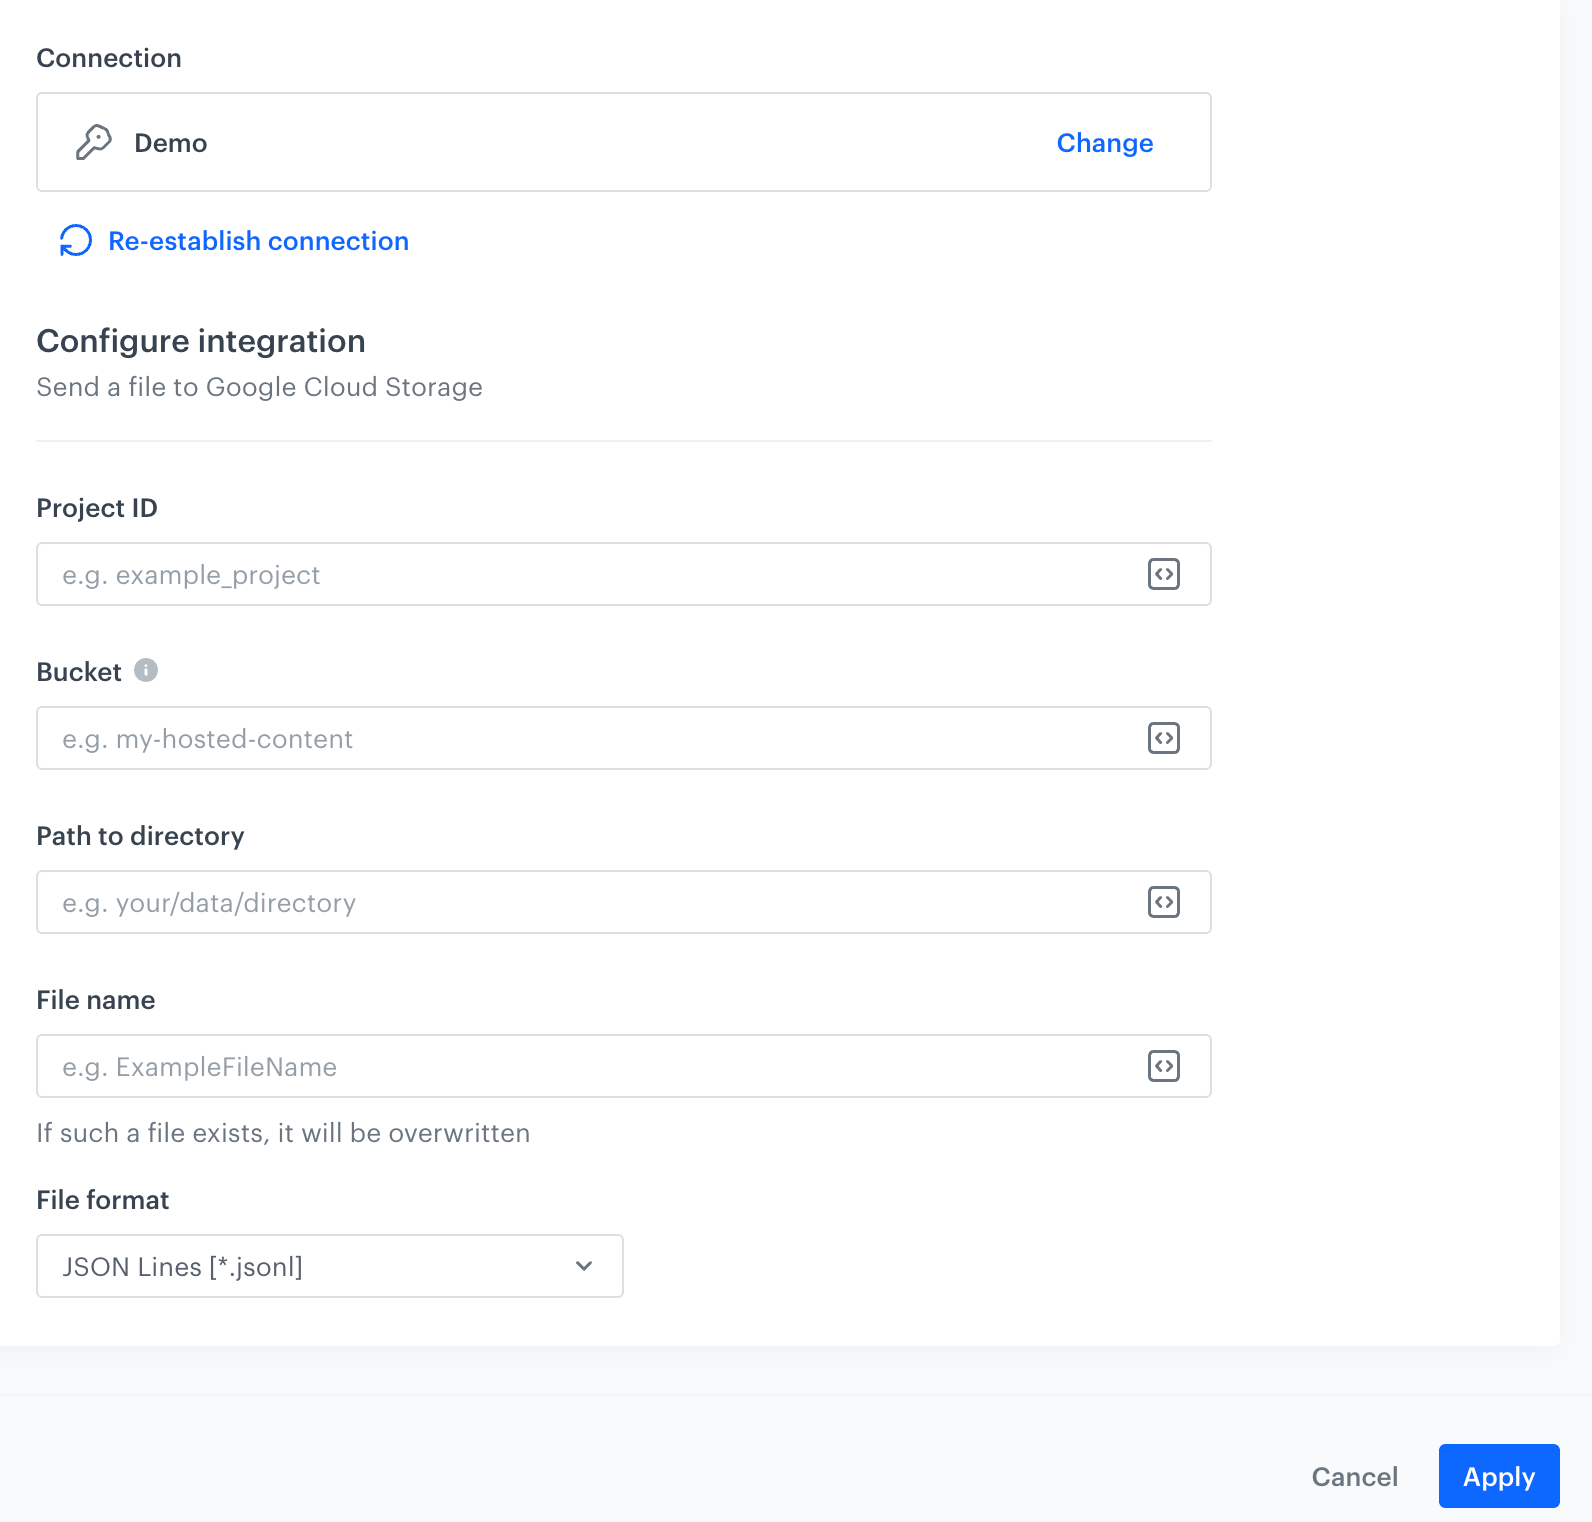
### Define the integration settings
In this step, fill in the form that allows you to send a file with data from Synerise to a storage.
A blank configuration form in the Send File node (Google Cloud Storage)
Fields marked with the icon accept [snippets](/docs/assets/snippets) or [inserts](/developers/inserts). But, you can’t use profile-related inserts.
1. In the **Project ID** field, enter the unique identifier of your project in Google Cloud.
You can learn how to find the project ID [here](https://support.google.com/googleapi/answer/7014113).
2. In the **Bucket** field, enter the name of the existing bucket (container) to which you will send a file with data.
3. In the **Path to directory** field, enter the path to the existing bucket in which the file will be saved.
4. In the **File name** field, enter the name of the file you want to send to the storage. If the file already exists, in such case, the contents of the file will be overwritten.
In this field, you can use Jinjava.
5. From the **File format** dropdown list, select the format in which the file will be saved in the storage.
If you select the **CSV [*.csv]** option, follow the instructions below:
1. From the **Delimiter** dropdown, select the character that marks the end of a column.
2. From the **Quotation mark** dropdown list, select the characters that contain the text.
3. From the **Escape character** dropdown lists, select the character changes the default interpretation of a character or a string followed by the character.
5. From the **Line ending** dropdown list, select:
- **Line feed** - This option shifts the cursor to the next line vertically.
- **Carriage return and line feed** - This option points the cursor to the beginning of the line horizontally and shifts the cursor to the next line vertically.
6. The **No Byte Order Mark** option is currently unused.
7. To wrap the values with characters selected in the **Quotation mark** field when the delimiter occurs in the value, select the **Quoting style only if required** option. For example, for the following values:
- one
- two,three,four
The output with the enabled **Quoting style only if required** option will be as follows:
- "one",
- "two,three,four"
6. Confirm by clicking **Apply**.
## Example of use
---
As an example of use, you can create a workflow that is triggered one time in order to export the customer database (email addresses and newsletter agreement) to the storage.
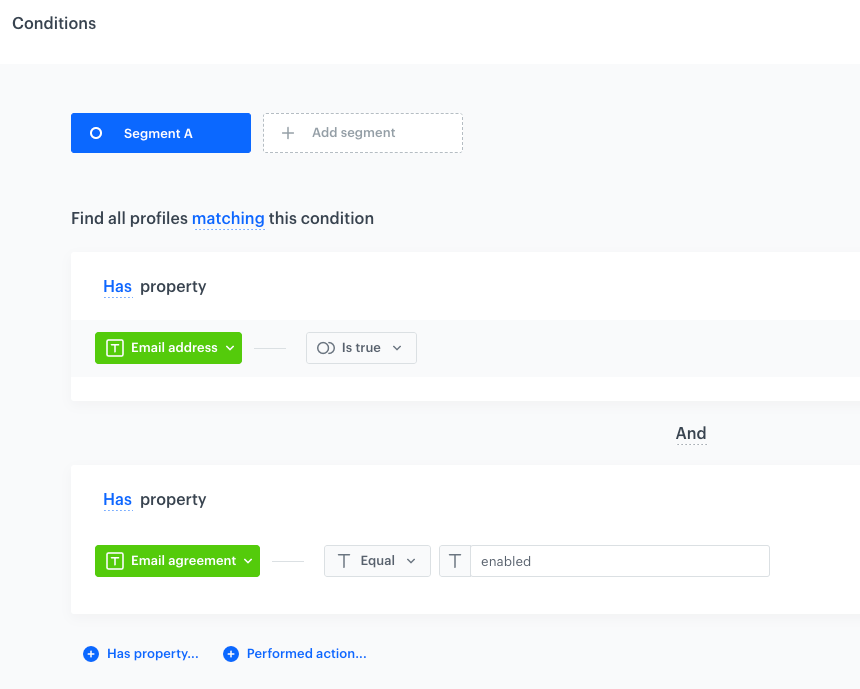
As a prerequisite in this example, create a segmentation of customers who have email addresses and enabled newsletter agreement. This segmentation will be used in the [Get Profiles node](/docs/automation/actions/synerise-integrations/get-profiles) that will be a part of the workflow.
Example of the segmentation conditions
In the configuration of the workflow:
1. Start the workflow with the **Scheduled Run** node. In the configuration of the node, set the **Run trigger** to **one time**. Select the **Immediately** tab.
2. To retrieve customers data to the workflow, as the next node, select **Synerise > Get Profiles**. In the configuration of the node:
1. Select a segmentation from which you want to extract customers' data.
2. Select the customer attributes to be exported. In this example, it's an email address and email marketing agreement.
4. To send the file with customers data, add **Google Cloud Storage > Send File**. Fill in the configuration form in the node.
5. Add the **End** node.
**Result**:
Final configuration of the workflow