The **Get a Lead** node sends a request to Salesforce CRM to retrieve lead information based on a provided lead ID. This node allows you to fetch up-to-date details about a specific lead directly from Salesforce, enabling workflows that require real-time lead data for further processing or decision-making within Synerise.
The response from the Salesforce CRM with lead data will be available in a [salesforce.getLead event](/docs/assets/events/event-reference/integration#salesforcegetlead).
This node is available only in the [customer-oriented workflows](/docs/glossary#profile-oriented-workflow).
## Node configuration
---
1. Go to **Automation Hub > Workflows > New workflow**.
2. Create a workflow by adding nodes and arranging them in an order that aligns with your business requirements and the intended logic.
You can read more about the workflow basics in [Creating workflows](/docs/automation/creating-automation).
3. As one of the nodes, select **Salesforce CRM > Get a Lead**.
2. To allow the data exchange, establish a connection between Synerise and Salesforce CRM, click **Select connection**.
3. From the dropdown list, select the connection.
- If no connections are available or you want to create a new one, see [Create a connection](#create-a-connection).
- If you selected an existing connection, proceed to [defining the integration settings](#define-the-integration-settings).
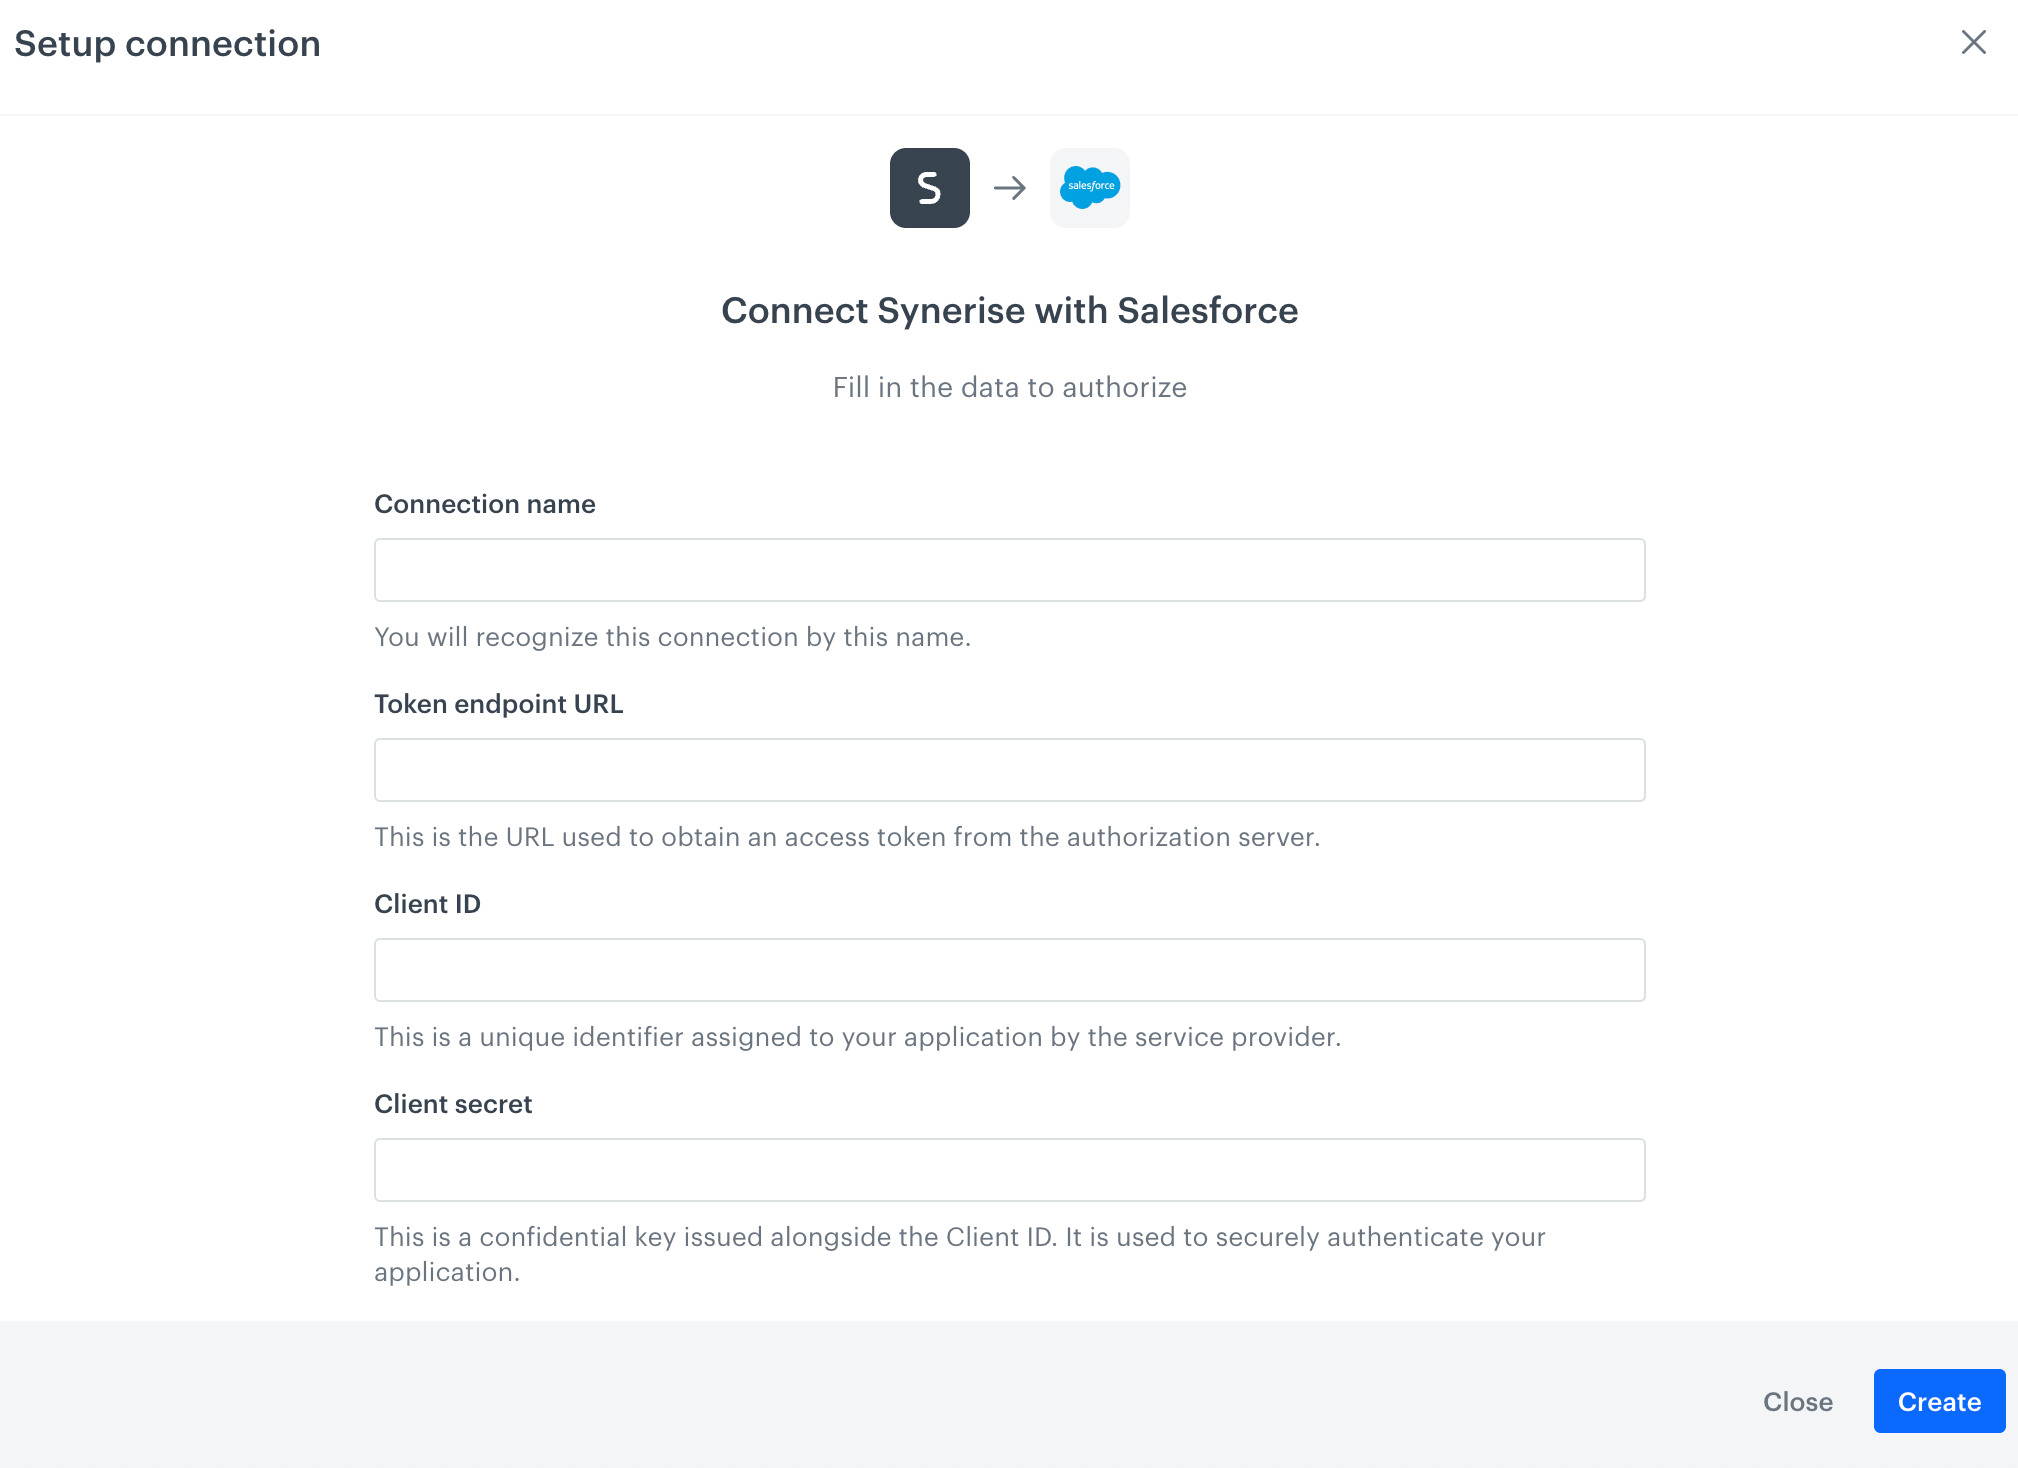
### Create a connection
If you haven't established any connection yet or you want to create another, establish a connection between Synerise and Salesforce CRM that facilitates the exchange of data.
A blank configuration form for establishing connection between Synerise and Salesforce
1. In the **Connection name** field, enter the name of the connection.
It's used to find the connection on the list.
2. In **Token endpoint URL**, enter the URL used to obtain an access token from the authorization server.
2. In **Client ID**, enter a unique identifier assigned to your application by Salesforce CRM.
3. In **Client secret**, enter client secret assigned to your application by Salesforce CRM.
4. Confirm by clicking **Create**.
**Result**: You will be redirected to the form in which you will define the integration settings. The connection you created is available in **Settings > Connections**.
We recommend setting the app-specific token timeout in Salesforce to at least 1 hour. Read more about [Salesforce OAuth Settings](https://help.salesforce.com/s/articleView?id=xcloud.connected_app_create_api_integration.htm&type=5).
## Define the integration settings
In this part of the process, fill in the configuration form so that you can retrieve lead data.
A blank configuration form of the Get a Lead node
1. In **Lead ID**, provide the lead identifier.
- You can use Jinjava in this field
- You can check how to find a lead ID in the [Salesforce documentation](https://trailhead.salesforce.com/trailblazer-community/feed/0D54S00000A7yrrSAB).
1. In the **Additional event parameters** section, you can add parameters (jinjava in values not allowed) which will be added to the automatically generated [salesforce.getLead](/docs/assets/events/event-reference/integration#salesforcegetlead) event.
1. In the **Parameter** field, provide the name of the event parameter.
2. In **Value**, provide the value of the event parameter.
8. Confirm by clicking **Apply**.
**Result**: When the Get a Lead node is executed, a [`salesforce.getLead` event](/docs/assets/events/event-reference/integration#salesforcegetlead) is generated on the activity list of the profile who is the actor in the workflow. The event contains information about lead in Salesforce CRM.
## Example of use
---
You can create a workflow targeting a specific group of Synerise profiles. Within this workflow, you retrieve the lead IDs of the selected profiles and then send their information to Salesforce CRM.
1. As the first node, add **Audience**. In the settings of the node, define the group of profiles for whom the workflow will be triggered.
More instructions on the node is available in ["Audience" node](/docs/automation/triggers/audience-node).
2. As the next node, add **Get a Lead**. In the settings of the node, specify the lead ID. You can use inserts to [dynamically retrieve the profile attribute](/developers/inserts/automation#profile-attributes) value in which the lead ID is kept.
3. Add the **Event Filter** node to wait for the response from the Salesforce API. The condition checks whether the lead exists in Salesforce; if it does, it moves on to the next step.
4. Add the **Update a Lead** node. Fill out the configuration of the node according to instructions in ["Update a Lead" node](/docs/automation/integration/salesforce-crm/update-lead).
5. As the final node, add **End**.
**Result**:
Final workflow configuration