**Webhooks from Meta** is an option within the [Incoming integration feature](/docs/automation/integration/incoming-webhook-node). This option lets you set up an endpoint (incoming integration) in Synerise for receiving data from Meta through webhooks. After you create such incoming integration from Meta, you can use it as a trigger in your [workflows](/docs/automation/creating-automation) and further recycle customer data received from the Meta platform, for example:
- for creating a profile in Synerise of a Meta user,
- for generating custom events based on a customer's Meta activity (such as post interactions, comments) directly on the profile card in Synerise.
## Requirements
---
- Data sent to the endpoint must be in the JSON format.
- Retrieve the **App secret** from the Meta console.
[More information on retrieving the App secret](https://developers.facebook.com/docs/development/create-an-app/app-dashboard/basic-settings/).
## Creating a Meta incoming integration
---
This procedure is executed in the Synerise platform and Meta console and describes how to create a webhook from Meta in Synerise.
1. In Synerise, go to **Automation Hub > Incoming > New integration**.
**Result**: A pop-up appears.
2. On the pop-up, select **Webhook from Meta**.
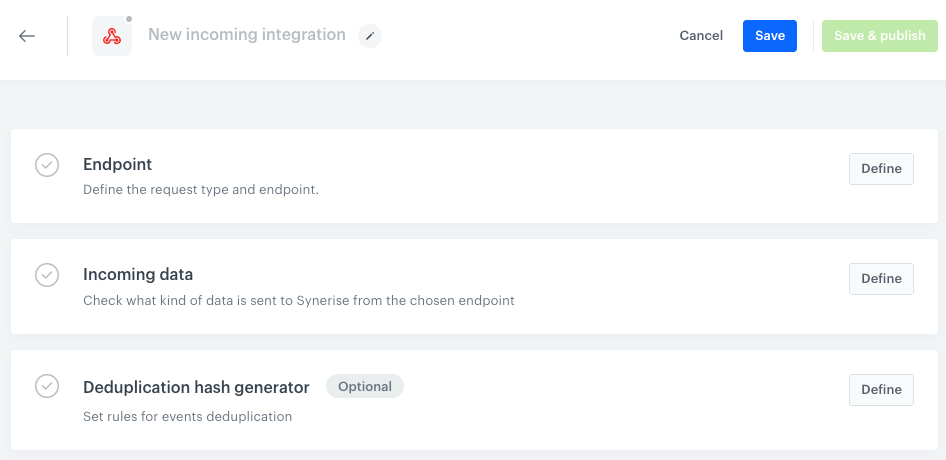
**Result**:
Blank configuration form
### Defining endpoints in Synerise and Meta
3. In the **Endpoint** section, click **Define**.
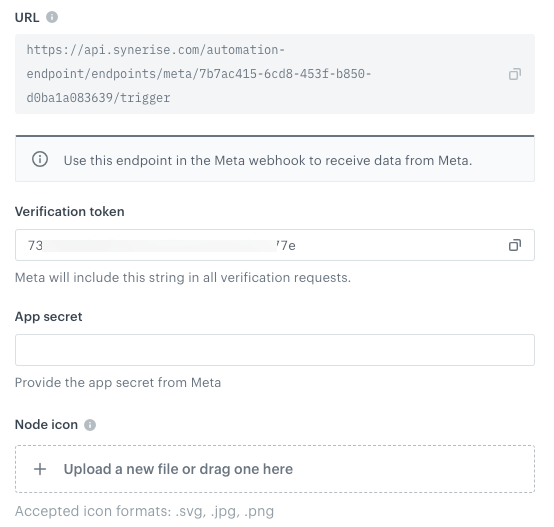
**Result**: A form appears with the **Verification token** field filled out.
Blank Endpoint section
4. In the **App secret** field, enter the app secret you retrieved as a part of [requirements](#requirements).
5. In a notepad, save the values from **URL** and **Verification token** which will be needed further in the process.
3. Optionally, you can personalize the integration by adding an icon in **Node icon**.
6. Confirm the settings by clicking **Apply**.
7. In a new browser tab, open the Meta console.
8. Start creating a Meta Webhook as described in [Configuring the Webhooks Product procedure](https://developers.facebook.com/docs/graph-api/webhooks/getting-started#configure-webhooks-product). During the configuration:
1. In the **Callback URL** field, paste the value of **URL** from Synerise.
2. In the **Verify token** field, paste the value of **Verification token** from Synerise.
3. Confirm the settings by clicking **Verify and save**.
4. Keep the tab with Meta console open for later.
### Retrieving data by sending verification request
10. Go back to the tab with the Synerise configuration form of the incoming integration from Meta.
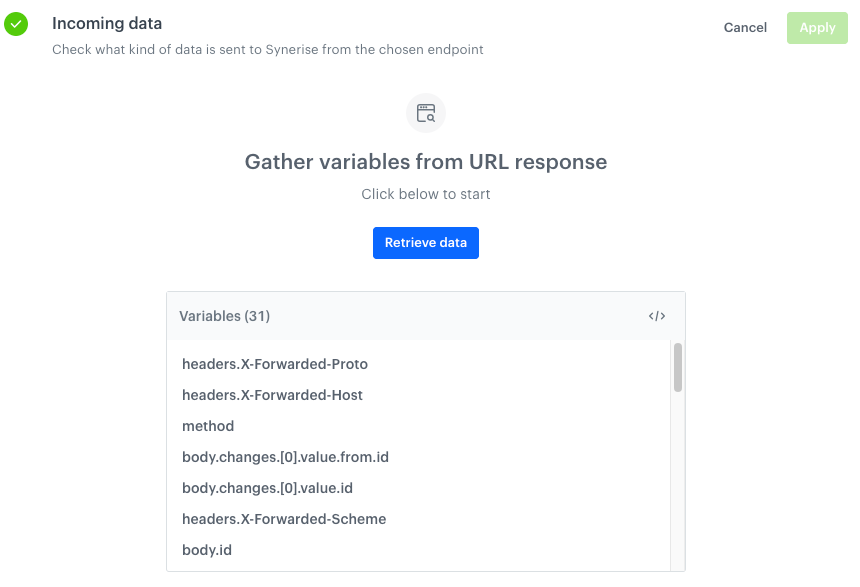
11. On the **Incoming data** section, click **Define**.
12. To receive the verification request from Meta, click **Retrieve data**.
13. Go back to the tab with the Meta console.
14. Next to the action you want to send to Synerise, click **Test**.
In case of any issues, read the [community thread on not receiving test webhooks in development mode](https://developers.facebook.com/community/threads/1422484661684866/).
**Result**: In the **Incoming data** section in the settings of the incoming integration in Synerise, a list of variables is saved.
Example of retrieved data
15. Go back to the tab with the Synerise configuration form of the incoming integration from Meta.
### Deduplicating requests
This part of the process is optional.
Deduplication is the process that Incoming Integration uses to ensure your workflow only triggers for new information, avoiding duplicates. To prevent duplicated requests, it is possible to select the request parameters from which the deduplication hash will be calculated.
1. To select request parameters, you must first perform instructions described in the "Retrieving data by sending verification request" section in this document.
2. In **Deduplication hash generator** section, click **Define**.
3. Select up to 5 parameters from which the deduplication hash is to be built. You can use any incoming data from request body and headers.
2. Confirm the settings by clicking **Apply**.
Before you start using request deduplication, it's worth reviewing the key concepts:
- all deduplication keys are stored for the 7 days. It means that Synerise deduplicates requests with the same deduplication hash for a period of only 7 days from the last sent request.
- if a duplicated request is sent, Synerise will return `204` HTTP status code.
- for non-duplicated request, Synerise will return `200` HTTP status code.
- if you would like to provide your own deduplication hash, you can do so by including it in the request headers. In this case, choose only your header in the **Deduplication hash generator** section in the **Incoming Integration** settings.
### Saving integration
1. To save the integration as a draft, click **Save**.
2. To save the integration and make it available for use in workflows, click **Save and publish**.
**Result**: The integration is added to the list in **Incoming integrations**.
## Further steps
---
You can use this integration in workflows by means of the [**Business Event** node](/docs/automation/triggers/businees-event-trigger). It will be available on the list of integrations in this node.
The ["Request context" section](/developers/inserts/automation#request-context) further describes how to reference parameters received through the webhook and use them in [Outgoing integration node](/docs/automation/actions/webhook-node) to generate an event.