 **Settings > SMS**.
2. Click the sender account you want to use.
3. Copy the ID from the URL of the page.
### Creating the schema
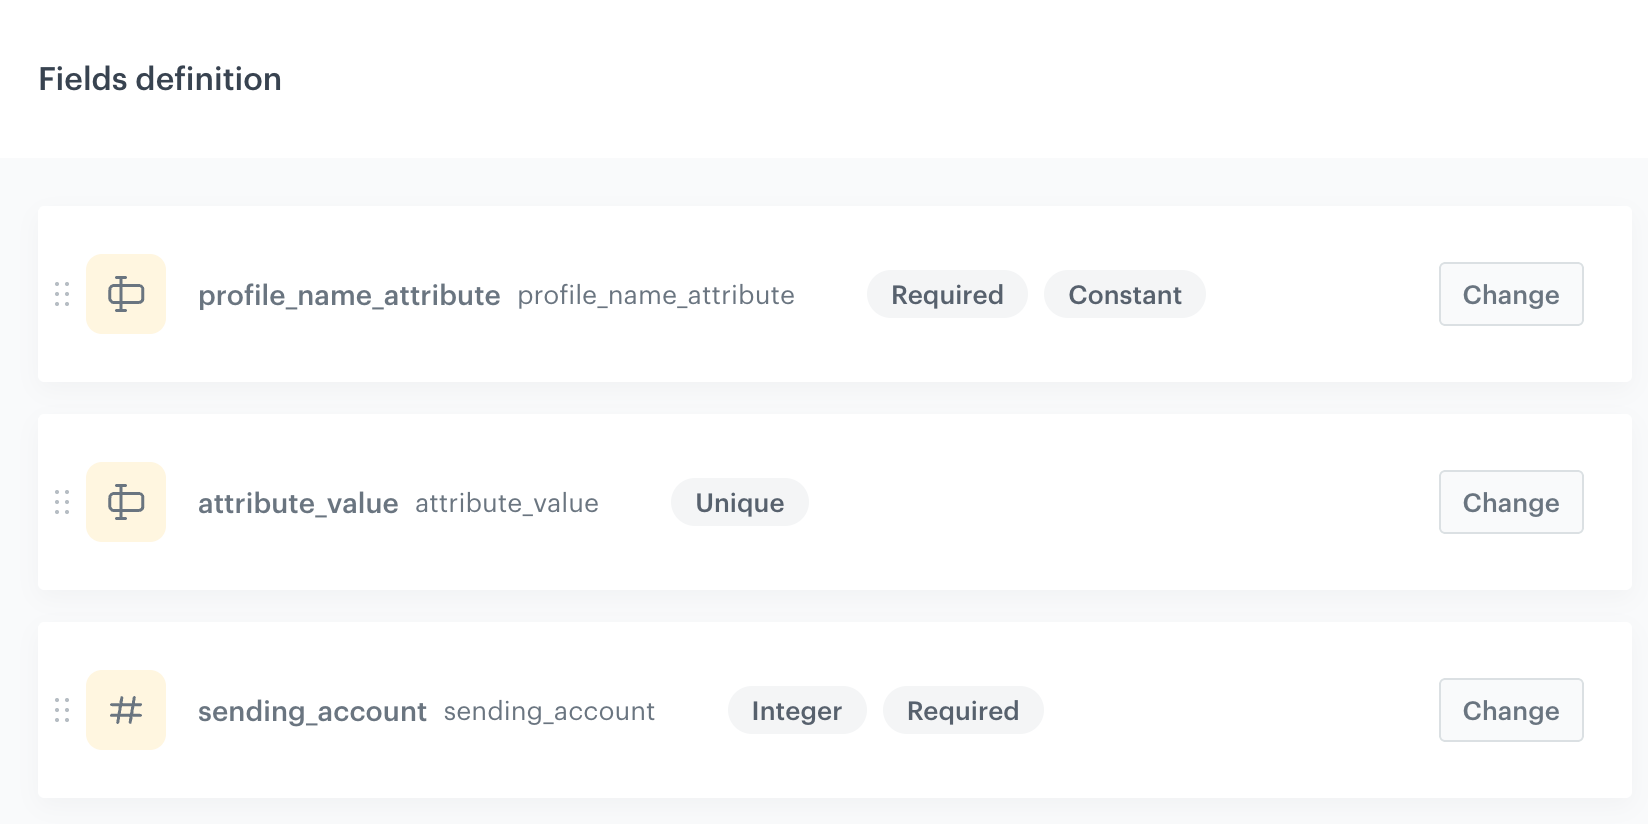
In this part of the process, you will create a schema with the following fields:
| Field | Type | Constraints | Description |
|---|---|---|---|
| `profile_attribute_name` | String | Required, Constant | The name of the profile attribute used for matching. The value must be identical across all records in the schema. |
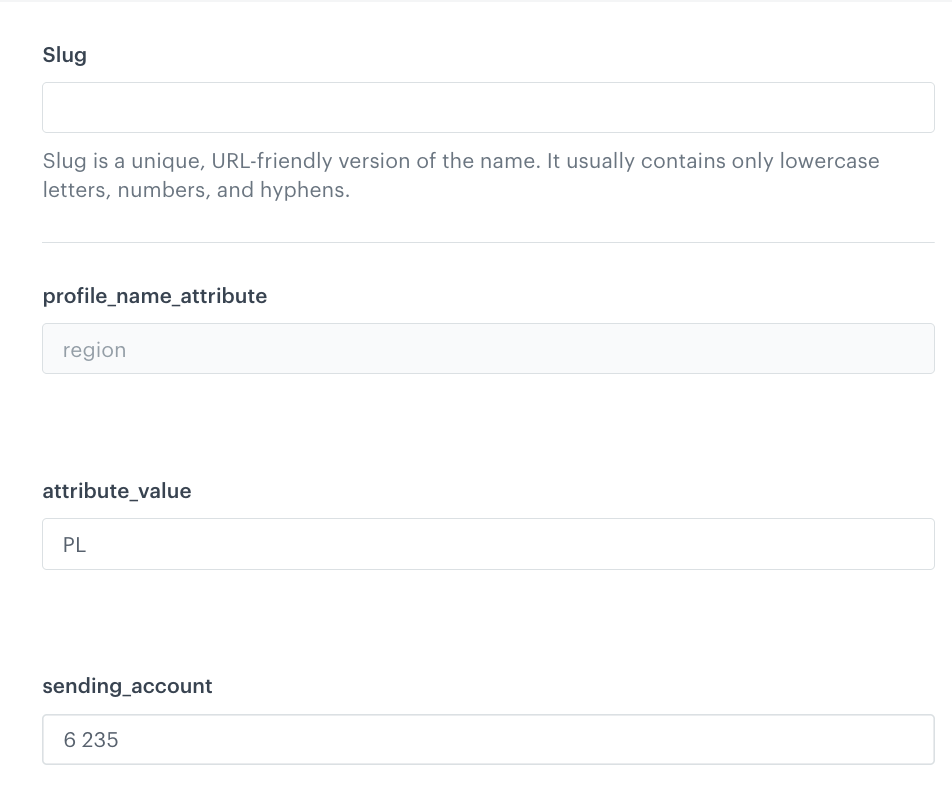
| `attribute_value` | String | Required, Unique | The value of the profile attribute that corresponds to this sender account mapping, for example, a region code such as `PL` or `EN`. |
| `sending_account` | Number (Integer) | Required | The ID of the SMS sender account to use for recipients whose attribute matches the `attribute_value`. |
1. Go to
**Settings > SMS**.
2. Click the sender account you want to use.
3. Copy the ID from the URL of the page.
### Creating the schema
In this part of the process, you will create a schema with the following fields:
| Field | Type | Constraints | Description |
|---|---|---|---|
| `profile_attribute_name` | String | Required, Constant | The name of the profile attribute used for matching. The value must be identical across all records in the schema. |
| `attribute_value` | String | Required, Unique | The value of the profile attribute that corresponds to this sender account mapping, for example, a region code such as `PL` or `EN`. |
| `sending_account` | Number (Integer) | Required | The ID of the SMS sender account to use for recipients whose attribute matches the `attribute_value`. |
1. Go to  **Data Modeling Hub > Brickworks**.
2. Create a new schema. For more information on creating schemas, see:
- [Creating a schema](/docs/assets/brickworks/quick-start/creating-a-schema)
- [Field types](/docs/assets/brickworks/schema-field-types)
3. In the **Fields** tab, add the following fields:
1. Add a **String** field:
- In **API name**, enter `profile_attribute_name`
- Select the following options for this field:
- **Required field**
- **Block record-level overwriting** - This setting requires you to provide a default value for this field in each record — enter the name of the profile attribute used for matching.
2. Add a **String** field:
- In **API name**, enter `attribute_value`
- Select the following options for this field: **Required field** and **Unique values only**.
3. Add a **Number** field:
- Set the type to **Integer**.
- In **API name**, enter `sending_account`
- Select the **Required field** checkbox.
4. Save the schema.
**Data Modeling Hub > Brickworks**.
2. Create a new schema. For more information on creating schemas, see:
- [Creating a schema](/docs/assets/brickworks/quick-start/creating-a-schema)
- [Field types](/docs/assets/brickworks/schema-field-types)
3. In the **Fields** tab, add the following fields:
1. Add a **String** field:
- In **API name**, enter `profile_attribute_name`
- Select the following options for this field:
- **Required field**
- **Block record-level overwriting** - This setting requires you to provide a default value for this field in each record — enter the name of the profile attribute used for matching.
2. Add a **String** field:
- In **API name**, enter `attribute_value`
- Select the following options for this field: **Required field** and **Unique values only**.
3. Add a **Number** field:
- Set the type to **Integer**.
- In **API name**, enter `sending_account`
- Select the **Required field** checkbox.
4. Save the schema.