
After configuring the web push feature and the dynamic content that displays the agreement form, you are ready to create and send a web push. In this process, the main steps are: defining the recipients of the notification, selecting a template, and scheduling the web push notification.

## Requirements
---
You must be granted a set of user permissions that allow access to **Experience Hub** and performing actions with regard to messages.

## Creating web push notifications
---
1. Go to <img src="/api/docs/image/54176ad07f146575310749eba44b7c2f42c1b327/icons/experience-hub-icon.svg" alt="Experience Hub icon" class="icon" > **Experience Hub > Web Push > Create new**.
2. Enter the name of the notification (this name is visible only on the list of the web push notifications).

### Select recipients
---
1. To define recipients, in the **Audience** section, click **Define**.
    - To select all customers (with the web push marketing agreement on) you have in your database, select the **Everyone** tab.
    - To select an existing group of customers, select the **Segment** tab and select the groups. If you select more than one, the customer must belong to at least one of them
    - To define a new group of customers, select the **New audience** tab and follow the procedure described [here](/docs/analytics/segmentations/creating-segmentations).

    
   <div class="admonition admonition-important"><div class="admonition-icon"><svg xmlns="http://www.w3.org/2000/svg" fill="none" viewBox="0 0 24 24" stroke="currentColor" stroke-width="2.5"><path stroke-linecap="round" stroke-linejoin="round" d="M12 8v4m0 4h.01M21 12a9 9 0 11-18 0 9 9 0 0118 0z" /></svg></div><div class="admonition-body"><div class="admonition-content">

   Regardless of the way of selecting the audience, the system limits the audience to those who have agreed to web push marketing.

   </div></div></div>


   <details class="accordion"><summary>Advanced options - explanation</summary><div class="accordion-content"><ul> <li><p><strong>Batch delivery</strong> - It prevents sending web push notifications to all recipients at once. <strong>When to use it?</strong> When there is a risk that sending all of messages at once will result in excessive traffic on your website or the target audience is so large that the messaging provider might not be able to process all messages at once. </p> <div class="admonition admonition-important"><div class="admonition-icon"><svg xmlns="http://www.w3.org/2000/svg" fill="none" viewBox="0 0 24 24" stroke="currentColor" stroke-width="2.5"><path stroke-linecap="round" stroke-linejoin="round" d="M12 8v4m0 4h.01M21 12a9 9 0 11-18 0 9 9 0 0118 0z" /></svg></div><div class="admonition-body"><div class="admonition-content"> <p> If you plan to send messages to an audience larger than 15,000 profiles, we recommend this option.</p> </div></div></div> </li> <li><p><strong>Send without marketing agreement check</strong> - To comply with GDPR resolutions, Synerise by default filters out the recipients with marketing agreement off. This option, however, allows to send an email to those whose marketing agreement is off (after ticking this option, the number in the estimated reach don&#39;t refresh). <strong>When to use it?</strong> While sending messages that don&#39;t contain marketing content, for example, information about delays in shipping.</p> </li> <li><p><strong>Send to all devices</strong> - This option lets you send a message to all devices used by a customer. It&#39;s selected by default. If you want to send a message to the customer&#39;s most recently active device only, unselect this option.</p> </li> <li><p><strong>Enable control group</strong> - It creates a subgroup of the recipients who won&#39;t receive any web push notification variant.<br> <strong>When to use it?</strong> When you send one or several variants of web push (A/B testing). When a customer is assigned to their control group, the information is available in their Profiles card as an event.
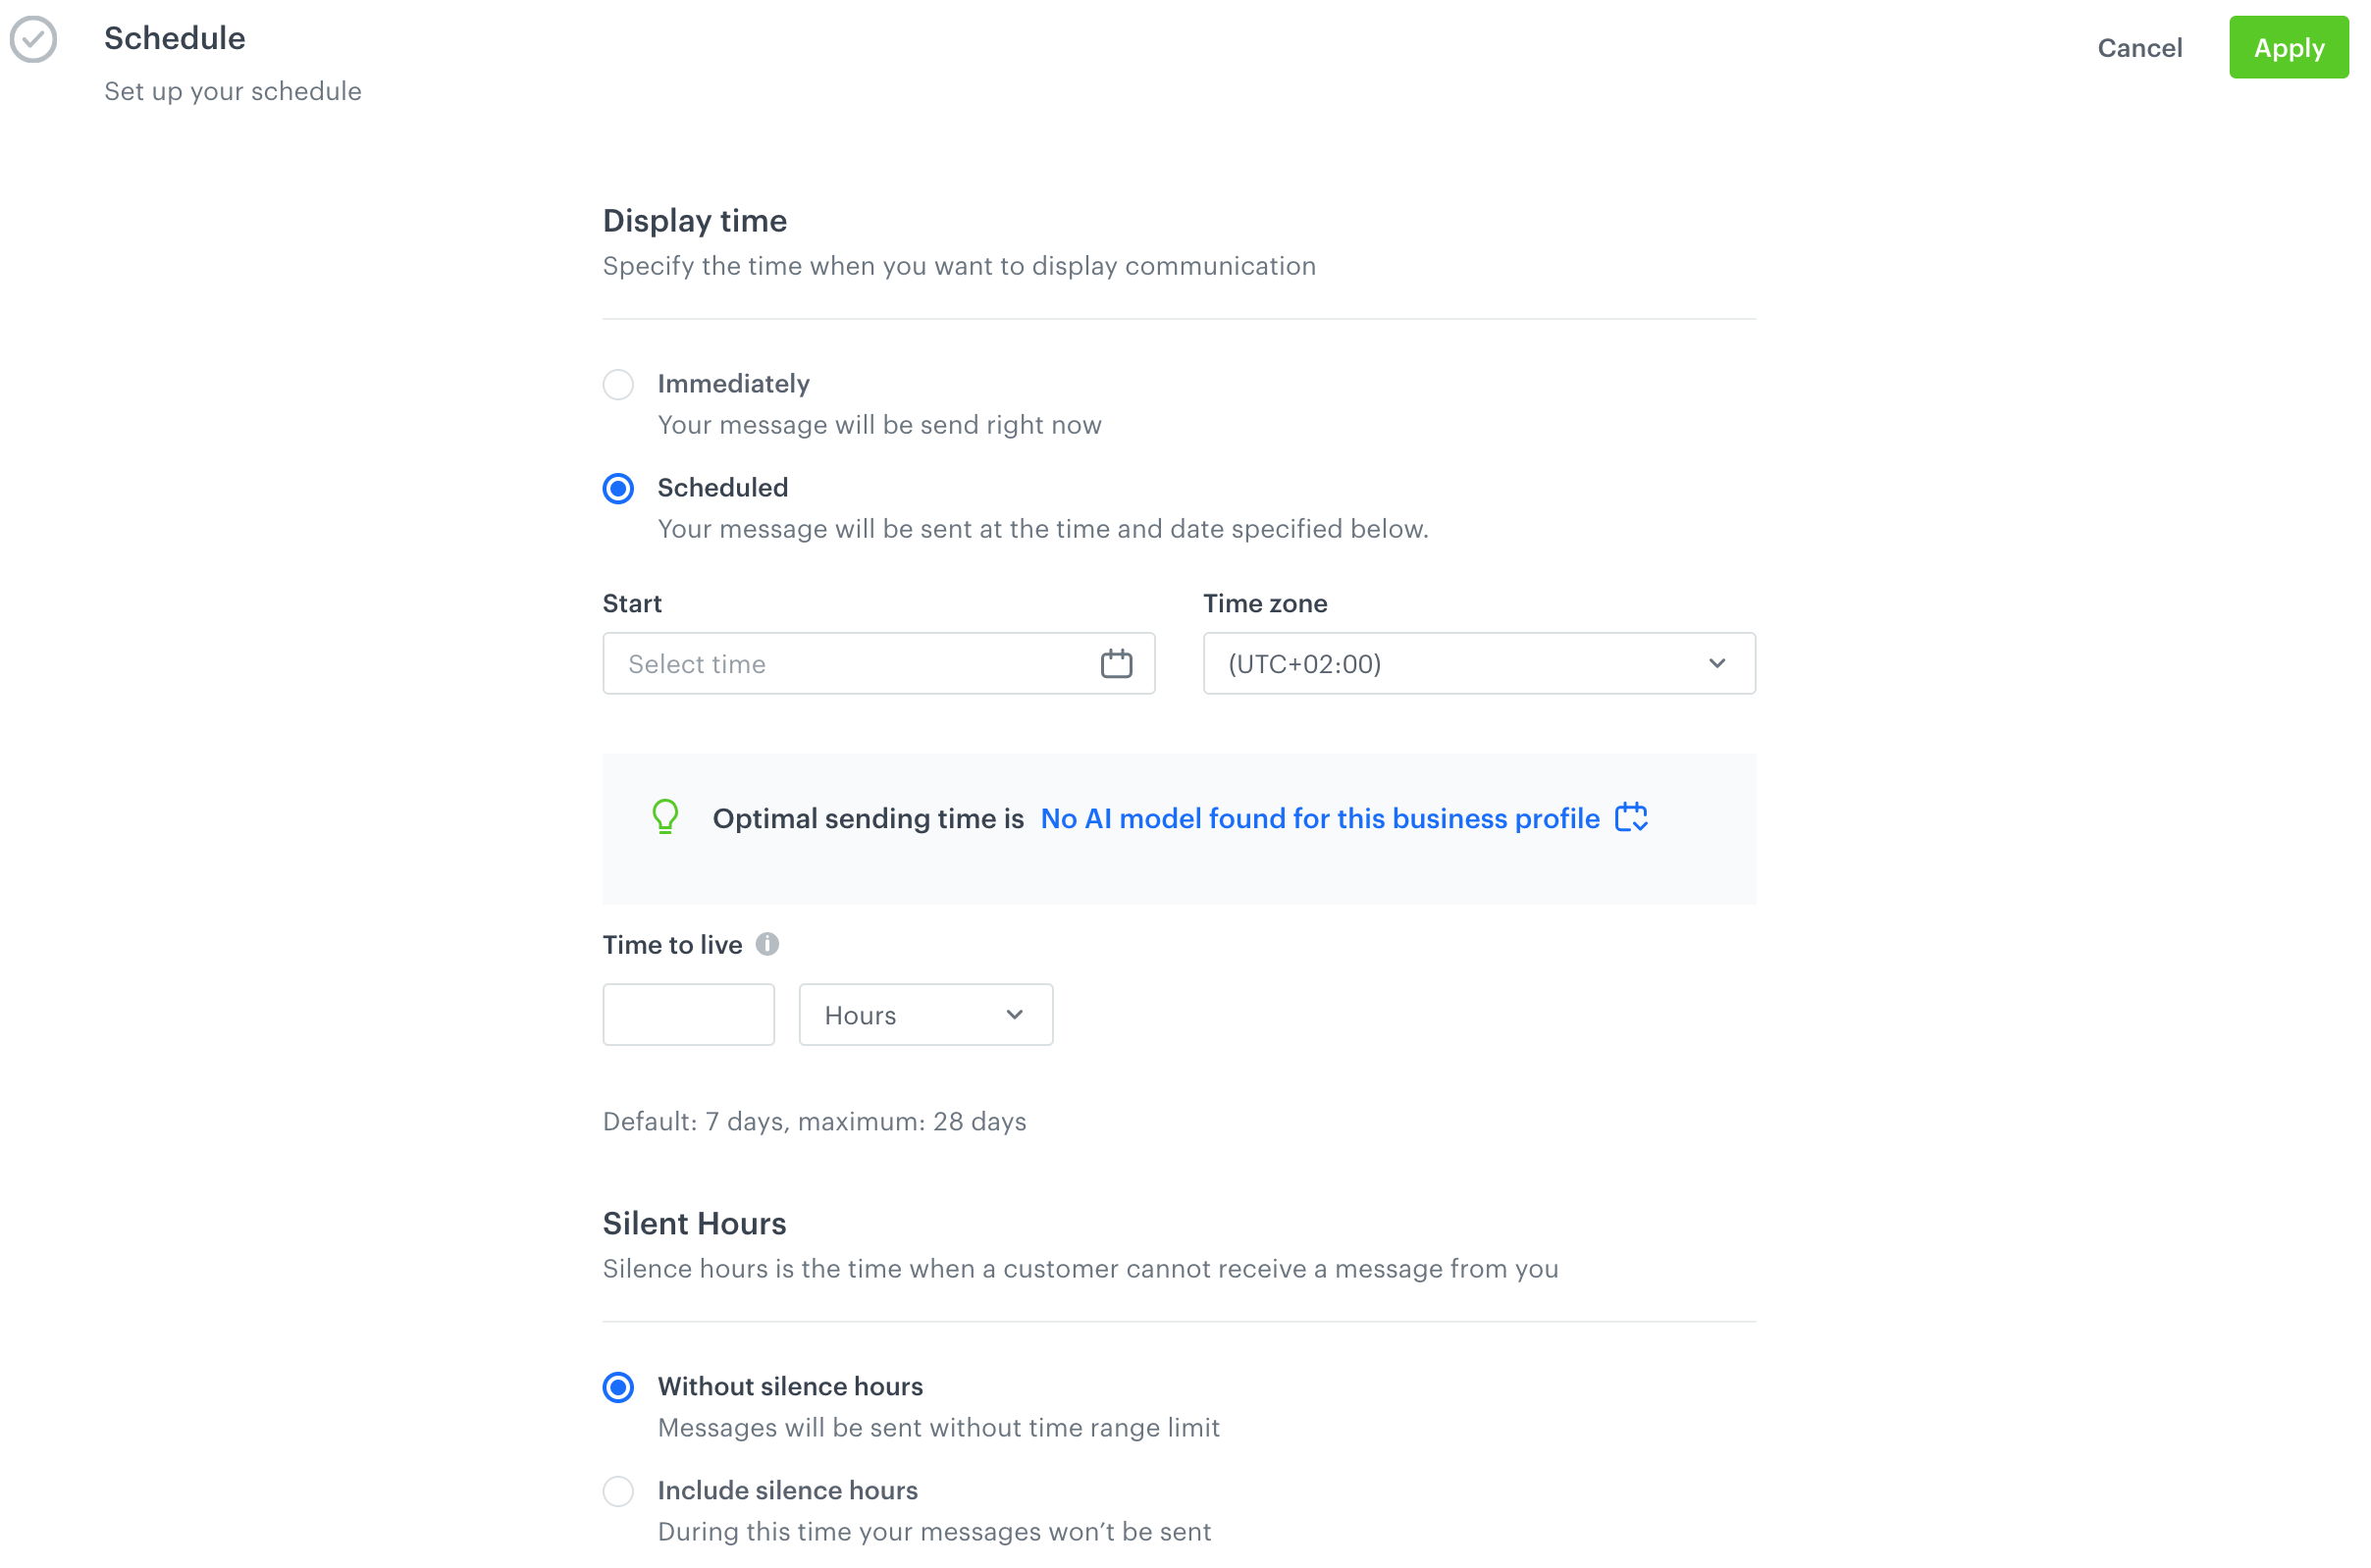
</p> </li> <li><p><strong>Include audience changes</strong> - Available only for scheduled web push notifications. It recalculates the number of recipients right before sending the notification. By default, the size of the customer segment chosen for the notification is the same as in the moment of sending, even if the number of customers in the chosen segment changed between creating the notification and sending. <strong>When to use it?</strong> When the size of the segments of customers selected as the audience of the notification can change dynamically. </p> </li> <li><p><strong>Ignore limits</strong> - If you want to make sure that this message is sent to a customer, even it exceeds the global limit of this type of messages for a single customer per day (more information is available <a href="/docs/settings/configuration/campaign-limits/">here</a>), enable the <strong>Ignore limits</strong> toggle. You may apply it to system messages such as a transaction confirmation, notifications about order delays, and so on.</p> </li> </ul></div></details>

1. Confirm the selection by clicking **Apply**.

   <details class="accordion"><summary>How to check the number of customers who will receive web push?</summary><div class="accordion-content"><p>
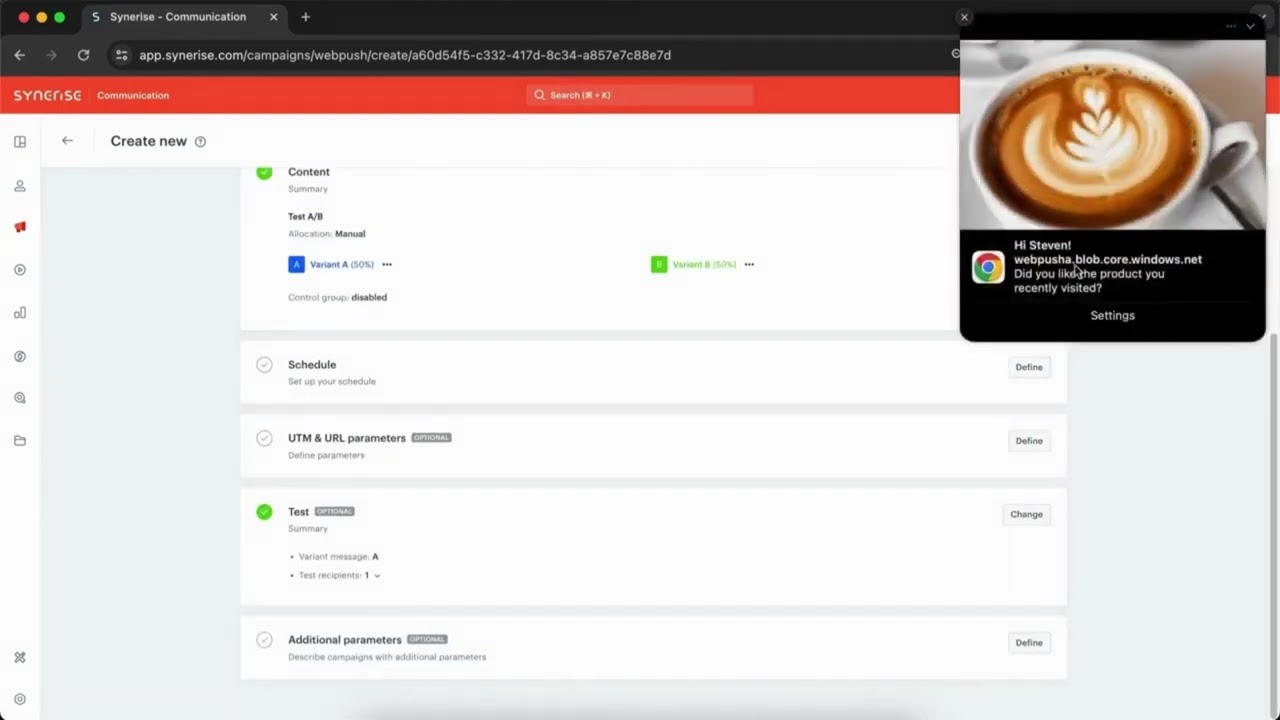
A customer receives a web push notification only if they agreed to receive such notifications (through an <a href="/docs/campaign/Webpush/one-step-agreement-form/">agreement form</a>) and they must have an active token. To verify the number of customers who will receive the notification, perform the following steps:</p> <ol> <li>Create a segmentation.</li> <li>In the first condition, use a <code>receive_webpush_messages</code> attribute set to <code>true</code>.</li> <li>In the second condition, use a <code>snrs_has_webpush_devices</code> attribute set to <code>true</code>. </li> <li>Define the dependency between two conditions as <code>AND</code>.</li> <li>Click <strong>Save</strong> and check the preview.</li> </ol></div></details>


### Select a template

---
1. To select the web push template or create a new one, in the **Content** section, click **Define**. 
2. Click **Create message**.  
    **Result**: You are redirected to the template library.
3. To create:
    - a message from scratch, click **New template**.
    
      <div class="admonition admonition-tip"><div class="admonition-icon"><svg xmlns="http://www.w3.org/2000/svg" fill="none" viewBox="0 0 24 24" stroke="currentColor" stroke-width="2.5"><path stroke-linecap="round" stroke-linejoin="round" d="M9.663 17h4.673M12 3v1m6.364 1.636l-.707.707M21 12h-1M4 12H3m3.343-5.657l-.707-.707m2.828 9.9a5 5 0 117.072 0l-.548.547A3.374 3.374 0 0014 18.469V19a2 2 0 11-4 0v-.531c0-.895-.356-1.754-.988-2.386l-.548-.547z" /></svg></div><div class="admonition-body"><div class="admonition-content">

      The procedure of creating a web push template from scratch is described [here](/docs/campaign/Webpush/creating-webpush-templates).

      </div></div></div>

    - a message based on an existing template, select a template from the list.
        1. Find the folder the template is saved in.
        2. Click the folder.
        3. Select the template.
        4. If needed, make changes to the template.
        4. If the [service approval](/docs/settings/configuration/service-approval) is disabled for your workspace, click **Next**.
        5. If the [service approval](/docs/settings/configuration/service-approval) is enabled and you made changes to the template:
            - The system uses the approved version of the template if you proceed. 
            - You can send the template for approval once again.
2. To add more variants of the notification, click the <img src="/api/docs/image/54176ad07f146575310749eba44b7c2f42c1b327/icons/add-variant-icon.png" alt="Experience Hub icon" class="icon" > icon.
3. Perform actions described in step 3. 
4. Confirm by clicking **Apply**.

### Schedule the notification
---
<figure>
<img src="/api/docs/image/54176ad07f146575310749eba44b7c2f42c1b327/docs/campaign/_gfx/schedule-section-webpush.png" alt="Schedule section" class="full">
<figcaption> Schedule section </figcaption>
</figure>

1. To define when the web push is sent to your customers, in the **Schedule** section, click **Define**.
2. You can choose from two options:
    - To send your notification after clicking the **Send** button on the upper right corner, use the **Immediately** option.
    - To plan a message to be sent at a future date, use the **Scheduled** option. Set the start time and the time zone.  
      Synerise performs best with real-time data. This is why you can't schedule a message for more than 10 days in the future.  
      To select the best time of sending the message, take a look at the suggestion from the AI engine that calculates the best time (for all recipients). If time optimization is disabled, click [here](/docs/settings/configuration/time-optimizer) to learn more how to enable it and use it.
3. In **Time to live**, define the time for how long the push service will keep trying to send the notification to the browser. If the push service can't deliver the notification within that time (for example, due to the user's device being turned off), the notification will be discarded. The notification is only shown to customers whose browsers are running (also in the background) within this time range.   
    If you leave this field empty, it defaults to `7 days`. 
2. Select the **Silence Hours** setting:
    - **Without silence hours** - The communication can be processed and sent out to the recipients at any time during the day.
    - **Include silence hours** - With this option, you can set a time of day when the communication can't be sent:  
        1. In the **From** field, select when the silence hours start.
        2. In the **To** field, select when the silence hours end.  
            The period can't be longer than 12 hours.  
            When a message can't be sent due to silence hours, a `webpush.skipped` event is generated.  

        
   <div class="admonition admonition-important"><div class="admonition-icon"><svg xmlns="http://www.w3.org/2000/svg" fill="none" viewBox="0 0 24 24" stroke="currentColor" stroke-width="2.5"><path stroke-linecap="round" stroke-linejoin="round" d="M12 8v4m0 4h.01M21 12a9 9 0 11-18 0 9 9 0 0118 0z" /></svg></div><div class="admonition-body"><div class="admonition-content">

   - When silence hours are enabled, the **Discard messages** option is always enabled. This means that messages blocked by silence hours are discarded entirely. **The discarded messages are not sent when silence hours end**.
   - If the **Start** time of the schedule is in the silence hours, you can't apply the settings.
   - If communication is scheduled for sending just before silence hours (for example, silence hours start at 22:00 and sending is scheduled at 21:59:59), the communication may be processed, sent, and logged in the events a short time after the silence hours start.

   </div></div></div>

3. To save the changes, click **Apply**. 

### Define UTM parameters
---
You can add UTM and URL parameters to the links provided in the message through the [preparelink insert](/developers/inserts/webpush#adding-utm-and-tracking-parameters-to-link). If the links aren't provided in the preparelink insert, the parameters won't be added to the link in the message.

7. To define UTM parameters, in the **UTM & URL parameters** section, click **Define**.
    1. Fill in the following fields: **UTM campaign**, **UTM medium**, **UTM source**, and **UTM term**.  
    2. To add URL parameters, in the **URL parameters** section, click **Add parameter**.  
    3. Enter the parameter and value pair in the **Parameter** and **Value** fields, respectively.
    4. To save the configuration, click **Apply**

### Testing
---

In this part of the process, for testing purposes, you can send the message or one of its variants to the recipients you indicate in this section.  
- You can send the test message only to the users available in the **Profiles** list and who have the `has_web_push_devices` set to `true`.
- Test messages are not counted towards capping limits.


  <div class="youtube-embed youtube-facade not-prose" data-youtube-id="oDCiXeet1lk" role="button" tabindex="0" aria-label="Play YouTube video"><img src="https://img.youtube.com/vi/oDCiXeet1lk/hq720.jpg" alt="YouTube video" class="youtube-facade-thumb" loading="lazy" /><span class="youtube-facade-play" aria-hidden="true"><svg viewBox="0 0 68 48" width="68" height="48"><path d="M66.52 7.74c-.78-2.93-2.49-5.41-5.42-6.19C55.79.13 34 0 34 0S12.21.13 6.9 1.55c-2.93.78-4.64 3.26-5.42 6.19C.06 13.05 0 24 0 24s.06 10.95 1.48 16.26c.78 2.93 2.49 5.41 5.42 6.19C12.21 47.87 34 48 34 48s21.79-.13 27.1-1.55c2.93-.78 4.64-3.26 5.42-6.19C67.94 34.95 68 24 68 24s-.06-10.95-1.48-16.26z" fill="red"/><path d="M45 24 27 14v20" fill="white"/></svg></span></div>


1. In the **Test** section, click **Define**.  
2. If your message has more than one variant, select the variant of the message which you would like to use for testing.
3. In the **Select the user you want to send the test message to** searchbox, search the recipients by name, surname, email address, custom ID, or UUID.  
    **Result**: A dropdown list with search results appears.
4. On the dropdown list:
    - if you have saved list of recipients in the past, click the **Saved lists** tab.
    - if you want to define a one-off list of recipients, select the users to include in your list.
5. Confirm your choice by clicking **Add** in the searchbox.
6. Optionally, to save the list of recipients for future use, click **Save list**.    
    **Result**: A pop-up appears.  
    1. In the **List name** field, enter the name of the list of recipients.
    2. Confirm by clicking **Apply**.  
        **Result**: The list is available in the **Saved lists** tab on the dropdown of searchbox when it's clicked.
5. To send the message, click **Send test**.  
    **Result**: The message is sent immediately.

### Adding custom parameters
---
You can add up to 10 parameters which will be added to every event generated by this communication. Their values are the same for every event in the communication. You can use this, for example, to create a common parameter for events from different types of communication that belong to one marketing campaign.

The additional parameters will be added to the [web push events](/docs/assets/events/event-reference/webpush).  

1. To define the custom event parameters, in the **Additional parameters** section, click **Define**.  
2. Click **Add parameter**.  
3. In the **Parameter** field, enter the name of the parameter.  
  The following parameters cannot be sent:
    - `modifiedBy`
    - `apiKey`
    - `eventUUID`
    - `ip`
    - `time`
    - `businessProfileId`
    - `correlationId`
    - `clientId`
    - `uuid`
    
4. In the **Value** field, enter the parameter value.  
    - The value is always sent as a string when the event's JSON payload is generated. The maximum length of the string is 230 characters.   
    - You can use Jinjava only in this field with the following restrictions:
      - it will be rendered in the `<messageType>.send`, `<messageType>.notSent`, `webpush.notRegistered`, and `push.notRegistered` events
      - the 230-character limit applies to the **Value** field both before and after Jinjava rendering; if the length exceeds this limit at any stage, the value will be truncated.
      - if a Jinjava does not render, a raw code will be visible in the parameter value.
5. If you want to add more parameters, click **Add parameter**, and repeat steps 3-4.  
   **Result**: the parameters will be added to all events listed above with the values you entered. This is an example event saved in the database. The custom parameter `season` is located in the `params` object: 

   <div class="highlight-code-block" data-hl-lines="6">
   <pre><code class="language-json">{
   "action": ...
   ...
   "params": {
    "clientId": 1111111111,
    "season": "autumn",
    "campaignName": "Back to school",
    "time": 1662392318050,
    "title": "Have you prepared for coming back to school?",
    "businessProfileId": "xxx"
   }
   }</code></pre>
   </div>
   
6. Confirm the settings by clicking **Apply**.

## Send the notification
---
- To send the web push, click **Send**. Depending on your choice in the **Schedule** section, the web push will be sent immediately or at a selected date.
- To save the web push as a draft, click **Finish later**.

The status of web push communication is available on the list of web push notifications. In the [Communication statuses](/docs/campaign/statuses) article, you can check the statuses which can be assigned to web push communication.

## FAQ
---
You can find answers to the most frequently asked questions [here](/troubleshooting/faq/faq_campaign#web-push). If you experience any issues while creating or sending emails, you can try to detect and remove the cause of the issues on your own by following the guides in our [troubleshooting](/troubleshooting/campaign). 


