You can export profiles (both recognized and anonymous) from the Behavioral Data Hub along with the data you collected about them to a file. You can choose from the following file formats:
- `CSV`
- `JSON`
- `JSONL`
### Scope of exported data
You can export profiles with the following information:
- ID of the profile (automatically added),
- [profile attributes](/docs/assets/customer-properties): value of the attributes you select for export or `true`/`false` values for the [tags](/docs/assets/customer-tag) selected for export,
- [aggregates](/docs/analytics/aggregates/introduction-to-aggregates): result of the selected aggregates for every profile,
- [expressions](/docs/analytics/expressions/introduction-to-expressions): result of the selected expressions for every profile,
- [segmentations](/docs/analytics/segmentations/introduction-to-segmentations): `true`/`false` values; true if a profile belongs to the segmentation, false if they don’t.
### Limits
There are some limits you must follow:
- You can export up to 10,000,000 profiles per a single export.
- The file containing profiles cannot exceed 5GB in size.
### Export methods
The export methods are divided in terms of export frequency:
- [**Single export**](#single-export) - This method is recommended if you want to perform a one-off export of profiles and upload a file to your device.
- [**Exports in Automation Hub**](#export-in-automation-hub) with a pre-designed, configurable workflow
- This method is designed for:
- one-off and cyclical exports which generate a file containing profiles and their data, which you can then download.
- individual and cyclical exports of the file with profile data to the following external resources:
- Your server (using SFTP or HTTPS protocols),
- Azure,
- Amazon S3,
- Google Cloud Storage.
- You need to configure these settings of the workflow:
- Define the export frequency.
- Choose the conditions profiles must meet to be included in the export.
- Define rules for transforming the file (if needed).
- Specify the export destination and its specifics.
## Prerequisites
---
Only for **Exports in Automation Hub**:
- If the exported data must follow specific requirements (for example, specific column names), create a [data trasnformation rule](/docs/automation/data-transformation-and-imports/creating-data-transformation).
- You must be assigned with a [user role](/docs/settings/identity-access-management/permissions) with the following [permissions](/docs/settings/identity-access-management/permissions#permissions):
- to preview the **Save File** node configuration: **Data export > Save file** - **Read**
- to run and resume workflows containing the **Save File** node: **Data export > Save file** - **Execute**
- to edit the **Save File** node configuration: **Data export > Save file** - **Edit**
## Single export
---
### Selected profiles
This method is recommended if you want to perform a one-off export of several profiles. The process involves selecting profiles from the list and filling out export configuration form (defining the name of the file to which profile data will be exported and the scope of profile data for export). The `CSV` file will be available for downloading in **Data Modeling Hub > Exports**.
1. Go to **Behavioral Data Hub > Profiles**.
2. To select a profile for export, on the list, next to the profile name, select a checkbox.
**Result**: The **Export selected** button appears.
3. Click **Export selected**.
**Result**: A pop-up appears.
A pop-up with export configuration form
4. In the **Name** field, enter the name of the file to which the profile data will be exported.
5. In **Attribute values**, by clicking **Select attributes**, select profile attribute values you want to export.
6. In **Expression values**, by clicking **Select expressions**, select expressions whose results will be exported.
7. In **Aggregates values**, by clicking **Select aggregates**, select aggregates whose results will be exported.
8. To check if a profile belongs to selected segmentations, under Segmentations, click Select segmentations.
Each selected segmentation creates a property with its name. These properties can be assigned a true or false value;
- true if a profile is belongs to the segmentation,
- false if they don’t.
9. Click **Next**.
**Result**: A summary of export settings is shown.
10. To run export, click **Next**.
**Result**: An export status pop-up appears.
11. To close the window, click **Done**.
**Result**: The `CSV` file is available for downloading in **Data Modeling Hub > Exports**.
### All profiles
---
This method is recommended if you want to perform a one-off export of all profiles. The process involves defining the name of the file to which profile data will be exported, selecting a group of profiles and the scope of data you want to include in the file. The `CSV` file will be available for downloading in **Data Modeling Hub > Exports**.
1. Go to **Behavioral Data Hub > Profiles**.
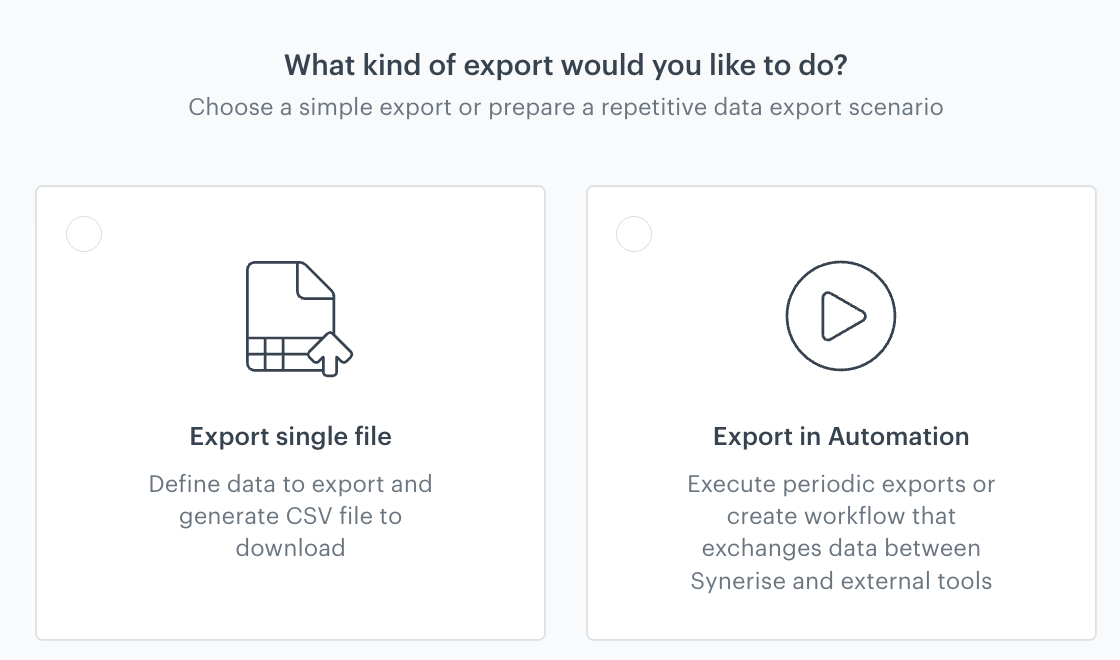
2. In the upper-right corner, click **Export**.
**Result**: A pop-up appears.
You can select the export type
4. On the pop-up, select **Export single file**.
5. Confirm your choice by clicking **Next**.
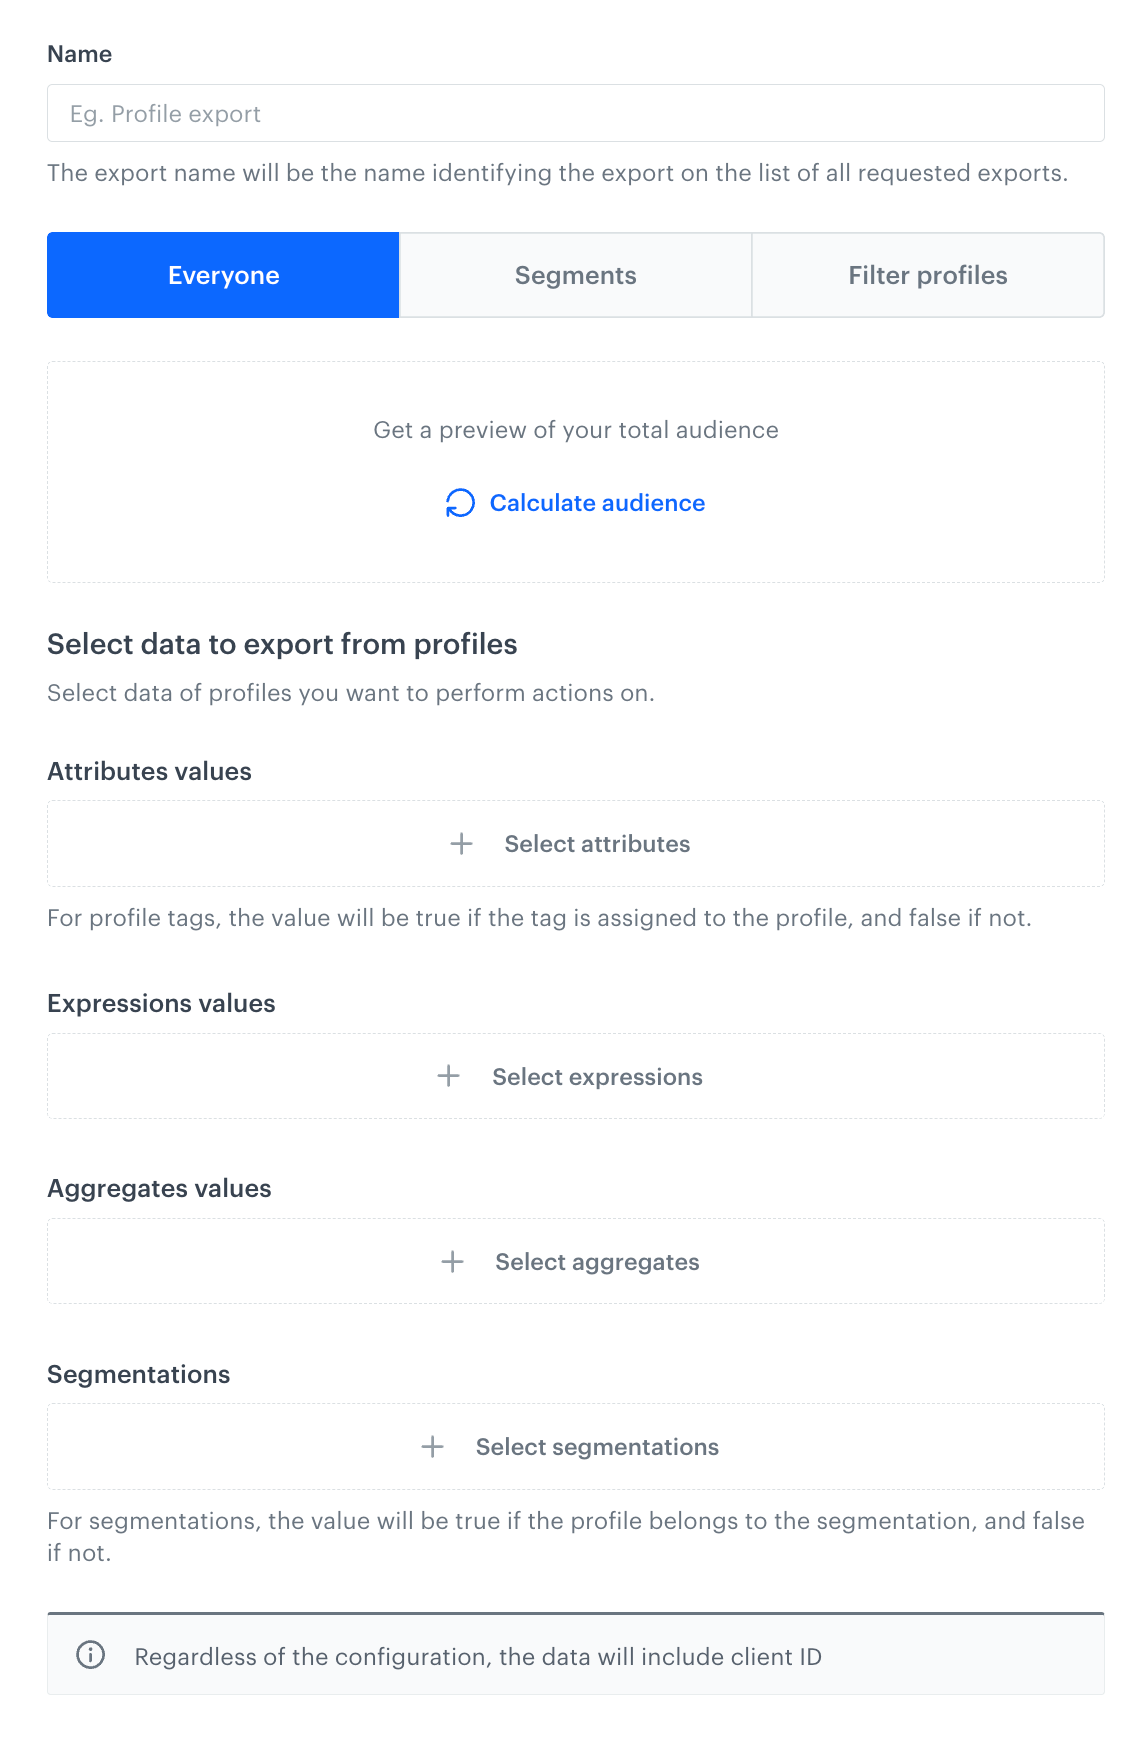
**Result**: An export configuration form appears.
A blank export configuration form
5. In the **Name** field, enter the name of the export.
It will help you identify the export on the list of exports.
2. Select profiles whose data you want to export. There is a limit of 10,000,000 profiles. You can export profiles in the following ways:
Select all recognized profiles
Click the Everyone tab. No further configuration is needed.
Select profiles who belong to specific segmentations
To select profiles who belong to specific segmentations, click the Segments tab.
Click Select segments.
On the pop-up, next to the segmentations you want to include in export, select the checkbox.
Confirm your choice by clicking Apply.
define conditions the profiles must meet to be included in export
To define the conditions profiles must meet to be included in the export, click the Filter profiles tab.
Click Define conditions.
On the pop-up, click Add condition.
You can build conditions based on events, profile attributes, expressions, aggregates, segmentations, and tags. You can read more about building conditions in the Filtering article.
Confirm the conditions by clicking Apply.
3. To add attributes and profile tags whose values you want to retrieve, under **Attributes values**, click **Select attributes**.
- Each attribute is exported as a property with an assigned value.
- Each selected tag creates a property with its name. They can be assigned a `true` or `false` value;
- `true` if a profile is assigned with the selected tag,
- `false` if it isn't.
4. On the pop-up, select the attributes and profile tags.
5. To select expression values you want to retrieve, under **Expressions values**, click **Select expressions**.
4. On the pop-up, select the expressions whose values you want to extract.
5. To select aggregate values you want to retrieve, under **Aggregate values**, click **Select aggregates**.
4. On the pop-up, select the aggregates whose values you want to extract.
5. To check if a profile belongs to selected segmentations, under **Segmentations**, click **Select segmentations**.
Each selected segmentation creates a property with its name. These properties can be assigned a `true` or `false` value;
- `true` if a profile is belongs to the segmentation,
- `false` if they don't.
4. On the pop-up, select the segmentations which you want to check.
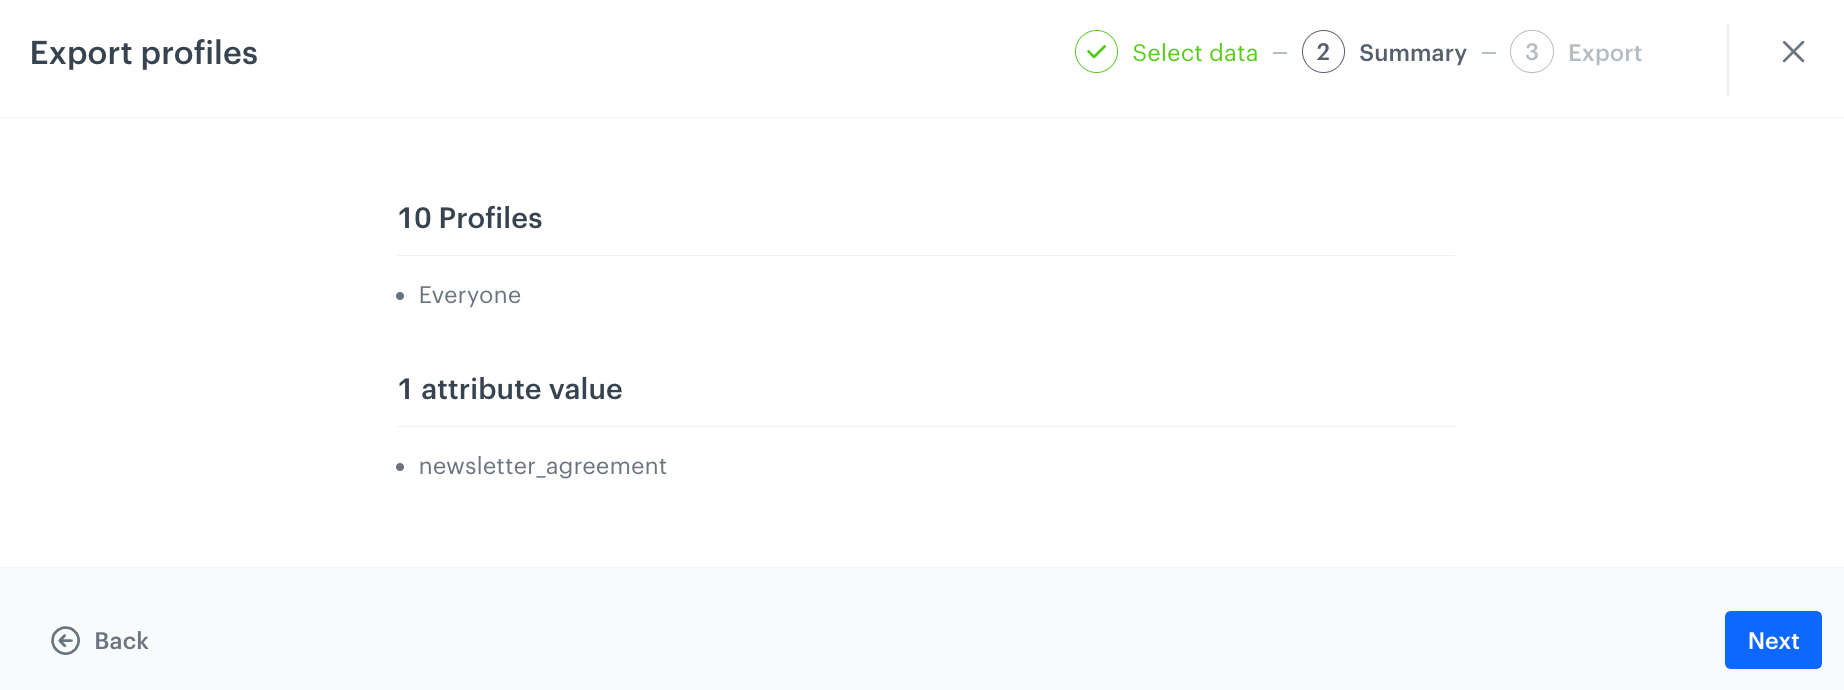
5. After you finish filling out the export form, click **Next** and review the settings.
**Result**: A summary of the export appears.
When you fill out the configuration form, you'll be presented with an export summary that shows you which profile information will be exported
6. If everything is in order, click **Next**.
7. On the confirmation pop-up, click **Run export**.
**Result**: You can see the export logs in **Data Modeling Hub > Exports**. You can download the file from there by accessing the **Save File** logs.
## Export in Automation Hub
---
1. Go to **Behavioral Data Hub > Profiles**.
2. In the upper-right corner, click **Export**.
**Result**: A pop-up appears.
Users can select the export type
4. On the pop-up, select **Export in Automation**.
5. Confirm your choice by clicking **Next**.
6. From **Where do you want to export the file?**, select the place to which a file will be exported:
| Destination | Explanation |
|--------------------------|----------------------------------------------------------------------------------------------------------------------------------------------------------------------------------------------------------------------------------------------------------------------------------------------------------------------------------------------------------------------------------------------------------|
| ["Save File" node](/docs/automation/actions/synerise-integrations/save-file) | - The workflow will contain the Save File node. - The file will be available in the export logs for download. |
| **SFTP Server** | - The workflow will contain a [SFTP - "Send File" node](/docs/automation/integration/sftp-integrations/sftp-send-file). - The file will be sent to your server using secure file transfer protocol. - In further steps, you will be able to provide details such as the server address, port, path to the directory, the name of the file, and its format. |
| **HTTPS Server** | - The workflow will contain a [HTTPS - "Send File" node](/docs/automation/integration/http-integrations/http-send-file). - The file will be sent to your server using hypertext transfer protocol. - In further steps, you will be able to provide details such as the server address, the name of the file and its format, request headers. |
| **Amazon S3** | - The workflow will contain an [Amazon S3 - "Send File" node](/docs/automation/integration/amazon-s3-bucket/send-file-amazon-s3-bucket). - The file will be sent to your Amazon S3 resource. - In further steps, you will be able to provide details such as an address of the container, path to the directory, the name of the file, and its format. |
| **Azure** | - The workflow will contain an [Azure - "Send File" node](/docs/automation/integration/azure-blob-storage/send-file-azure-blob-storage). - The file will be sent to your Azure resource. - In further steps, you will be able to provide details such as an address to the container, path to the directory, the name of the file, and its format. |
| **Google Cloud Storage** | - The workflow will contain a [Google Cloud Storage - "Send File" node](/docs/automation/integration/google-cloud-storage/send-file-to-gcp). - The file will be sent to your Google Cloud Storage resource. - In further steps, you will be able to provide details such as an address of the container, path to the directory, the name of the file, and its format. |
7. Click **Go to workflow template**.
**Result**: You are redirected to a workflow template.
An example workflow template for export to the Save File node before adjusting to the individual needs
8. To configure the **Scheduled Run** node, click the node.
This node starts the workflow at defined data and frequency. Configure it according to the instructions available in ["Scheduled Run" node](/docs/automation/triggers/scheduled-run).
9. To configure the **Get Profiles** node, click the node.
This node retrieves profiles who meet the requirements and profile date defined in the node. Configure it according to the instructions available in ["Get Profiles" node](/docs/automation/actions/synerise-integrations/get-profiles).
10. Optionally, if the file with exported profiles must be modified to meet specific requirements (for example, when you export the data to an external source and data in the file must meet specific nomenclature), configure the **Data Transformation** node by clicking it.
- In the configuration of the node, select [data transformation rule](/docs/automation/operation/data-transformation-node) you prepared as a part of [prerequisites](#prerequisites) according to which the data in the file will be transformed.
- If you don't need to transform the data, remove the node from the workflow.
11. Depending on the choice of the file export destination you made earlier in the process, configure one of the following nodes:
- [Save file](/docs/automation/actions/synerise-integrations/save-file)
- [SFTP - "Send File" node](/docs/automation/integration/sftp-integrations/sftp-send-file)
- [HTTPS - "Send File" node](/docs/automation/integration/http-integrations/http-send-file)
- [Amazon S3 - "Send File" node](/docs/automation/integration/amazon-s3-bucket/send-file-amazon-s3-bucket)
- [Azure - "Send File" node](/docs/automation/integration/azure-blob-storage/send-file-azure-blob-storage)
- [Google Cloud Storage - "Send File" node](/docs/automation/integration/google-cloud-storage/send-file-to-gcp)
11. Leave the configuration of the **End** node at default.
If you edit the workflow template so it contains more than one [**End** node](/docs/automation/flow-control/end-node), then in the configuration of this node, you can define the logic of terminating paths and processes in a workflow.
12. Optionally, you can change the name of the workflow.
12. If you want to:
- save the workflow as a draft, in the upper-right corner, click **Save**.
- save and start the workflow, click **Save & Run**.
## Accessing the exported files
---
To download the exported profile data:
1. Go to **Data Modeling Hub > Export**.
2. On the list of exports, find your export.
3. Click the name of the export.
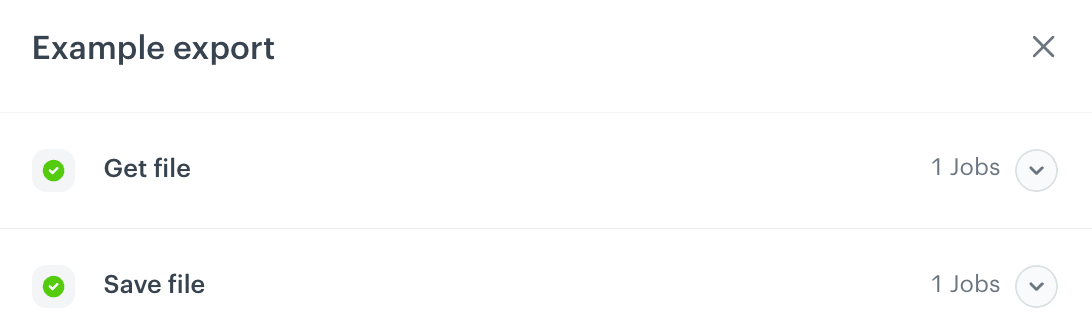
**Result**: A pop-up appears.
A pop-up with export logs appear when you preview the log details; by clicking the arrow down icon, you can access the details of each stage
5. On the pop-up, next to **Save File**, click the downwards arrow.
Download file button shows up
6. Click **Download file**.
7. From the dropdown list, select one of the following file formats:
- `CSV`
- `JSON`
- `JSONL`
8. Confirm the action.
**Result**: A file is downloaded to your device.