You can create an event expression to enrich its parameters while creating different types of analyses (for example, metrics, segmentations, funnels, and so on). This means that you can use the result of the event expression as a special parameter of an event in other types of analytics.
You can use these expressions as event parameters for events in the remaining types of analyses (for example, segmentations, metrics, funnels, and so on).
## Requirements
---
A tracking code implemented into the website.
## Creating an event expression
---
1. Go to **Behavioral Data Hub > Expressions > New expression**.
2. To let other users know about the purpose of the expression, you can add a short description to it.
3. To select the type of expression you want to create, click the icon. From the dropdown list select **Event**.
4. From the **Choose event** dropdown, select an event.
5. To start creating the formula of the expression, click the **Select** button.
5. You can choose one of four elements: customer, constant, dynamic key, or a [function](/docs/crm/expressions/functions-in-expressions).
6. To define the settings of the chosen element, click that element.
- In case you choose a customer, select the customer attribute you want to include in the formula.
- In case you choose a constant, type the number or text (users can write a number in words, `nine` instead of `9`).
- In case you choose a dynamic key, type in the key name (the ID of the key, for example `orderID`) and its default value. The default value will be replaced with the target one indicated in, for example, the request for expression result (when you request the expression result through Synerise Analytics API).
10. Define the dependencies between the elements in the expression by selecting the mathematical operators.
11. To complete creating the expression, click **Save**.
## Example of use
---
**Goal**: To create a metric that counts liters of sold liquid products.
**Prerequisites**: Non-standard attributes for **bought product** event: `product quantity` and `product volume`. Instruction for adding event parameters available at the [link](/docs/assets/events/adding-event-parameters).
**Steps**:
1. Go to **Behavioral Data Hub > Expressions > New expression**.
2. Enter the name of the expression.
The name of the event expression becomes also the name of the parameter of the event.
2. Select **Event** as a type of expression.
2. From the **Choose event** dropdown, select the `Bought products` event.
4. Click the **Select** button.
**Result**: A dropdown list appears.
6. From the dropdown list select **Event attribute**.
5. To display the settings of the event attribute, click it.
6. From the **Choose parameter** dropdown, select `quantity`.
7. Next to the added event attribute, click the plus button.
**Result**: A dropdown list appears.
8. From the dropdown list, select **Event attribute**.
9. To display the settings of the event attribute, click it.
10. From the **Choose parameter** dropdown, select `volume`.
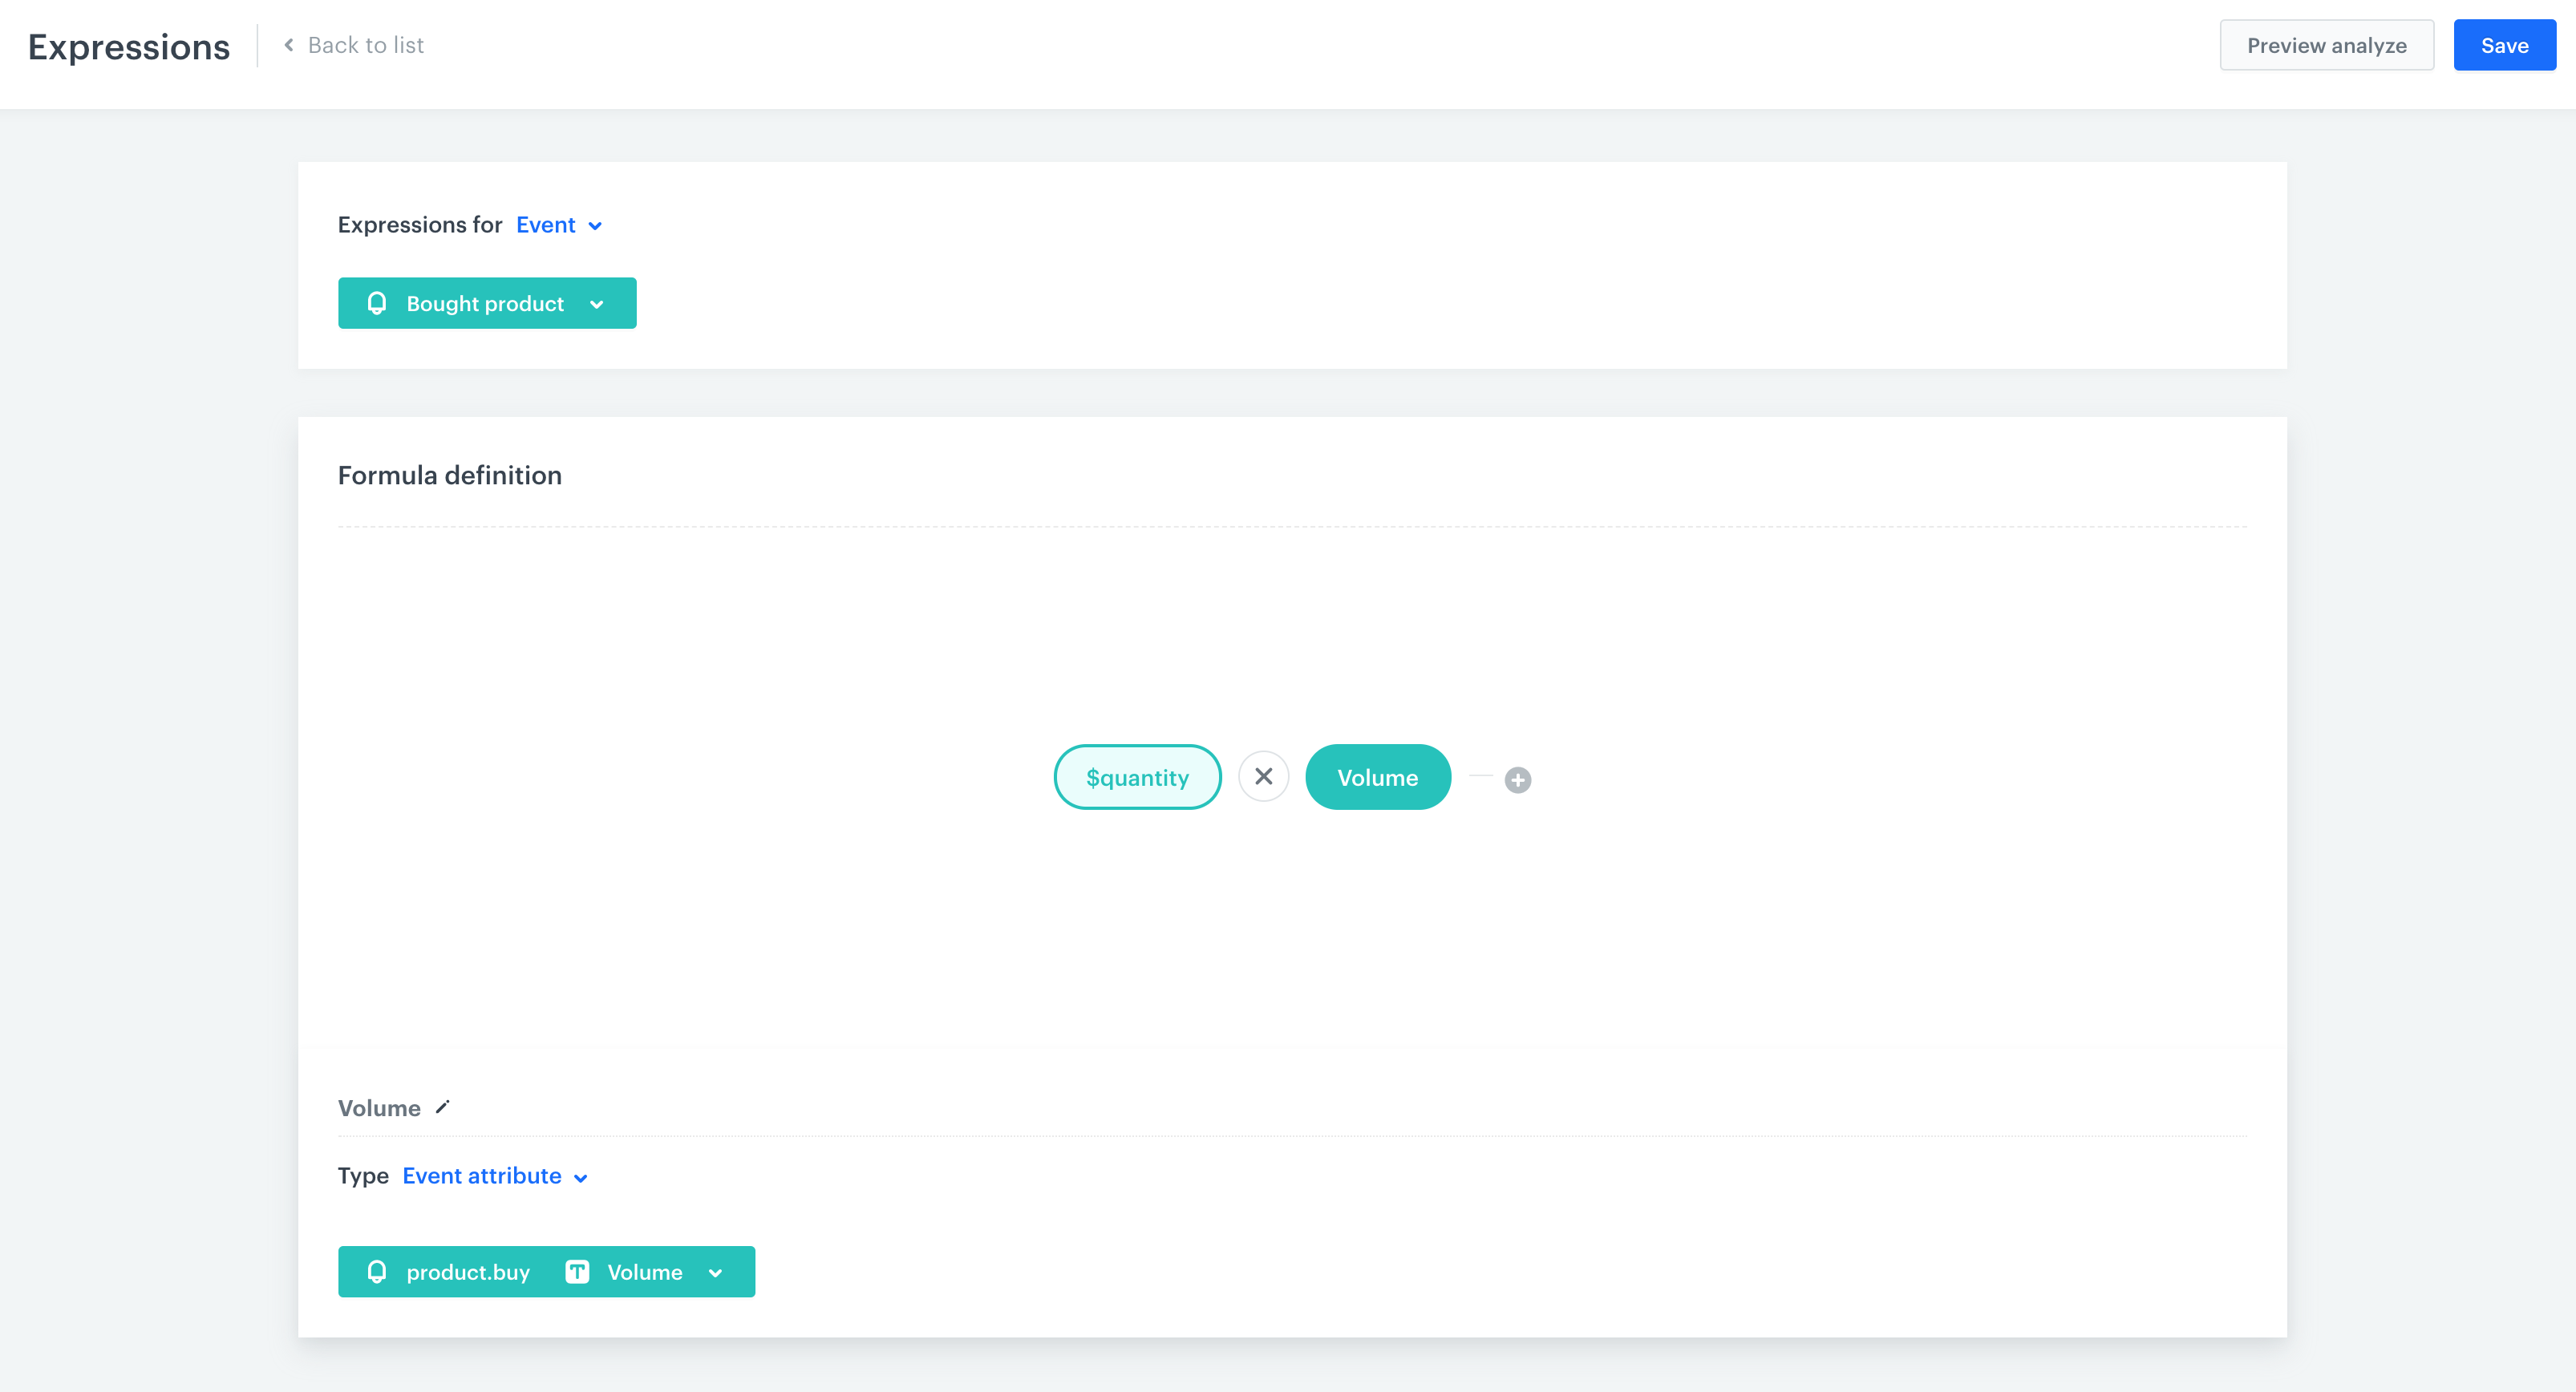
11. Multiply those two attributes, by selecting the multiplication sign between two event attributes.
12. To complete, click **Save**.
A final form of an expression
1. Go to **Decision Hub > Metrics > New metric**.
2. Enter the name of the metric.
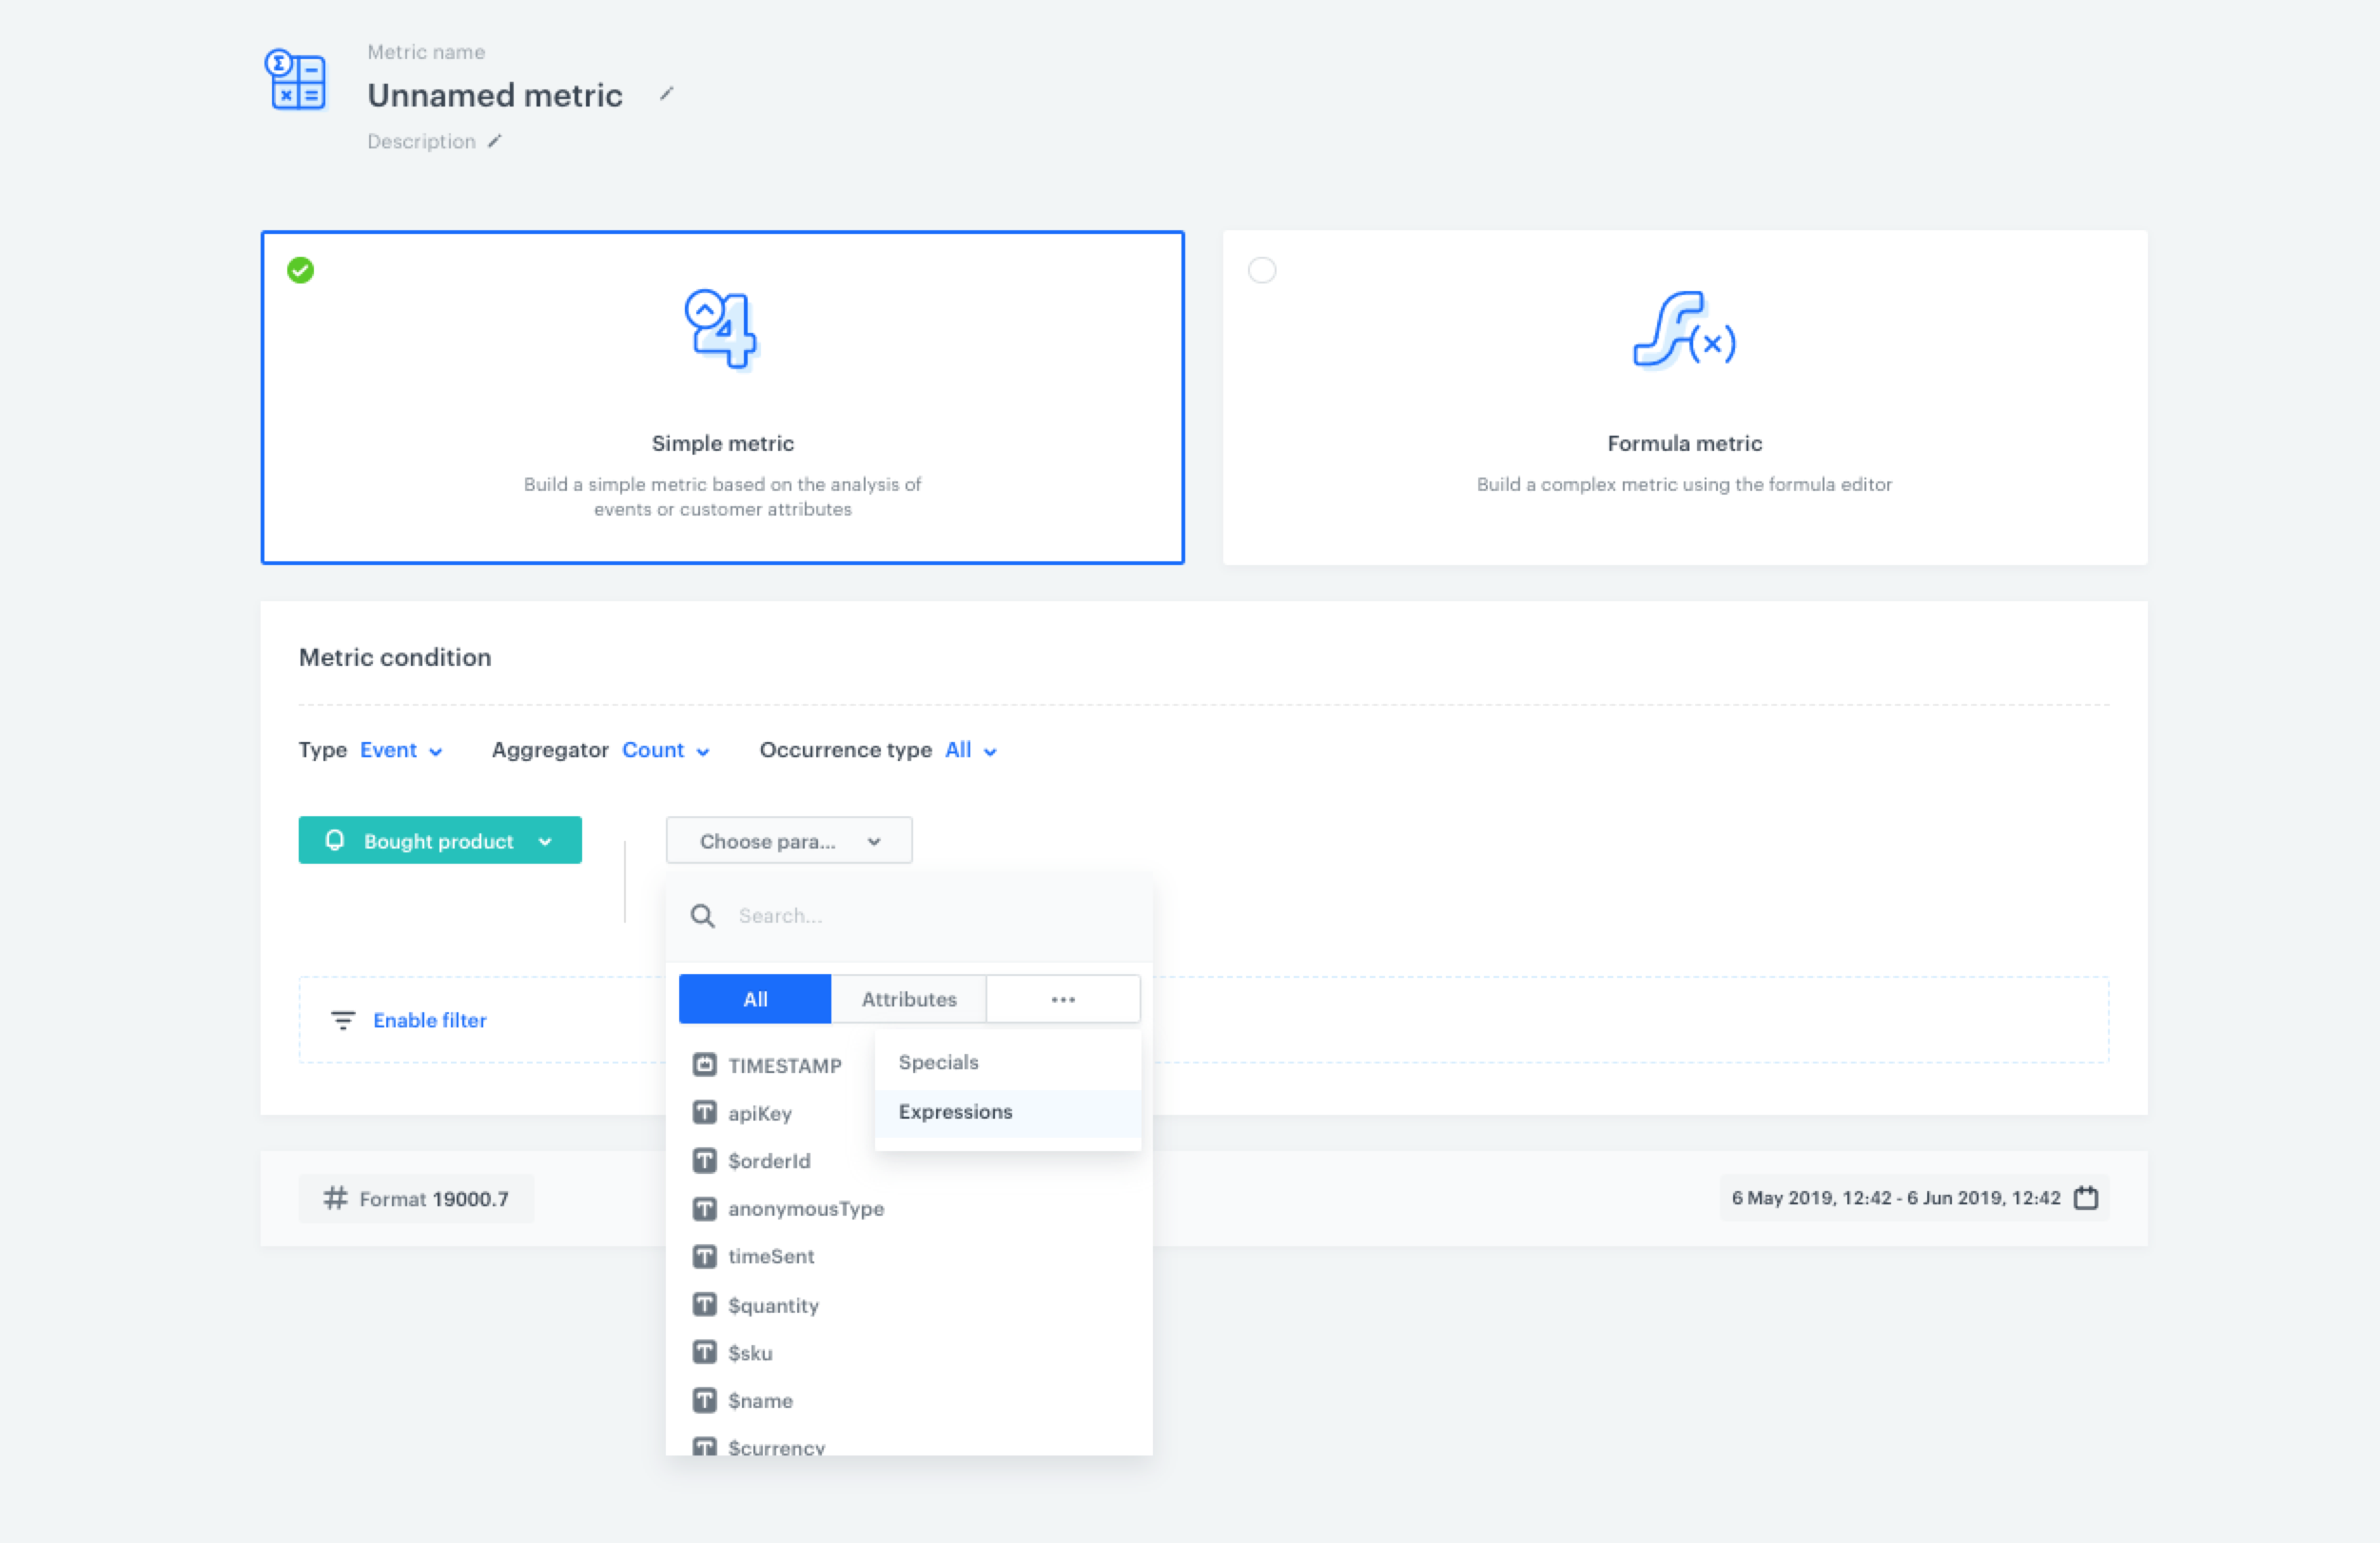
3. As a type, select **Simple metric**.
3. As the aggregator, set `Count`.
4. As the occurrence type, set `All`.
5. From the **Choose event** dropdown list, select `Bought product`.
6. Click button.
**Result**: The **Choose parameter** button appears.
7. Click the **Choose parameter** button.
**Result**: A pop-up appears.
8. On the pop-up, click the three-dot button.
**Result**: A dropdown shows.
9. From the dropdown, select **Expressions**.
10. In the list of expressions, find the event expression you have just created.
11. To select a specific time range, click the calendar icon. Confirm your choice with the **Apply** button.
12. To complete the process, click **Save**.
A final form of a metric
**Output**: The metric counts the number of liters of purchased products in the form of a liquid from 6th of May to 6th of June. In this example, the number of purchased products is changeable, however, the product capacity is always the same and sourced from the product feed.