By default, the [Personalized](/docs/ai-hub/recommendations-v2/recommendation-types#personalized), [Next interaction](/docs/ai-hub/recommendations-v2/recommendation-types#next-interaction), [Section page](/docs/ai-hub/recommendations-v2/recommendation-types#section-page), and [Attribute](/docs/ai-hub/recommendations-v2/recommendation-types#attribute) recommendation models are trained on standard events, as described in [requirements for recommendations](/docs/ai-hub/recommendations-v2/introduction-to-recommendation-campaigns#requirements). On the **Training data** tab, you can additionally select up to 5 [custom events](/glossary#custom-events) which contain an item identifier (by default, the `SKU` value) to be used for training and retraining these models alongside the standard events.


<div class="admonition admonition-tip"><div class="admonition-icon"><svg xmlns="http://www.w3.org/2000/svg" fill="none" viewBox="0 0 24 24" stroke="currentColor" stroke-width="2.5"><path stroke-linecap="round" stroke-linejoin="round" d="M9.663 17h4.673M12 3v1m6.364 1.636l-.707.707M21 12h-1M4 12H3m3.343-5.657l-.707-.707m2.828 9.9a5 5 0 117.072 0l-.548.547A3.374 3.374 0 0014 18.469V19a2 2 0 11-4 0v-.531c0-.895-.356-1.754-.988-2.386l-.548-.547z" /></svg></div><div class="admonition-body"><div class="admonition-content">

For the frequency of model retraining, see [model status](/docs/settings/configuration/ai-engine-configuration/model-status#training-frequency).

</div></div></div>


## Enabling custom events for training
---

1. Go to **Settings > AI Engine Configuration > Training data**.
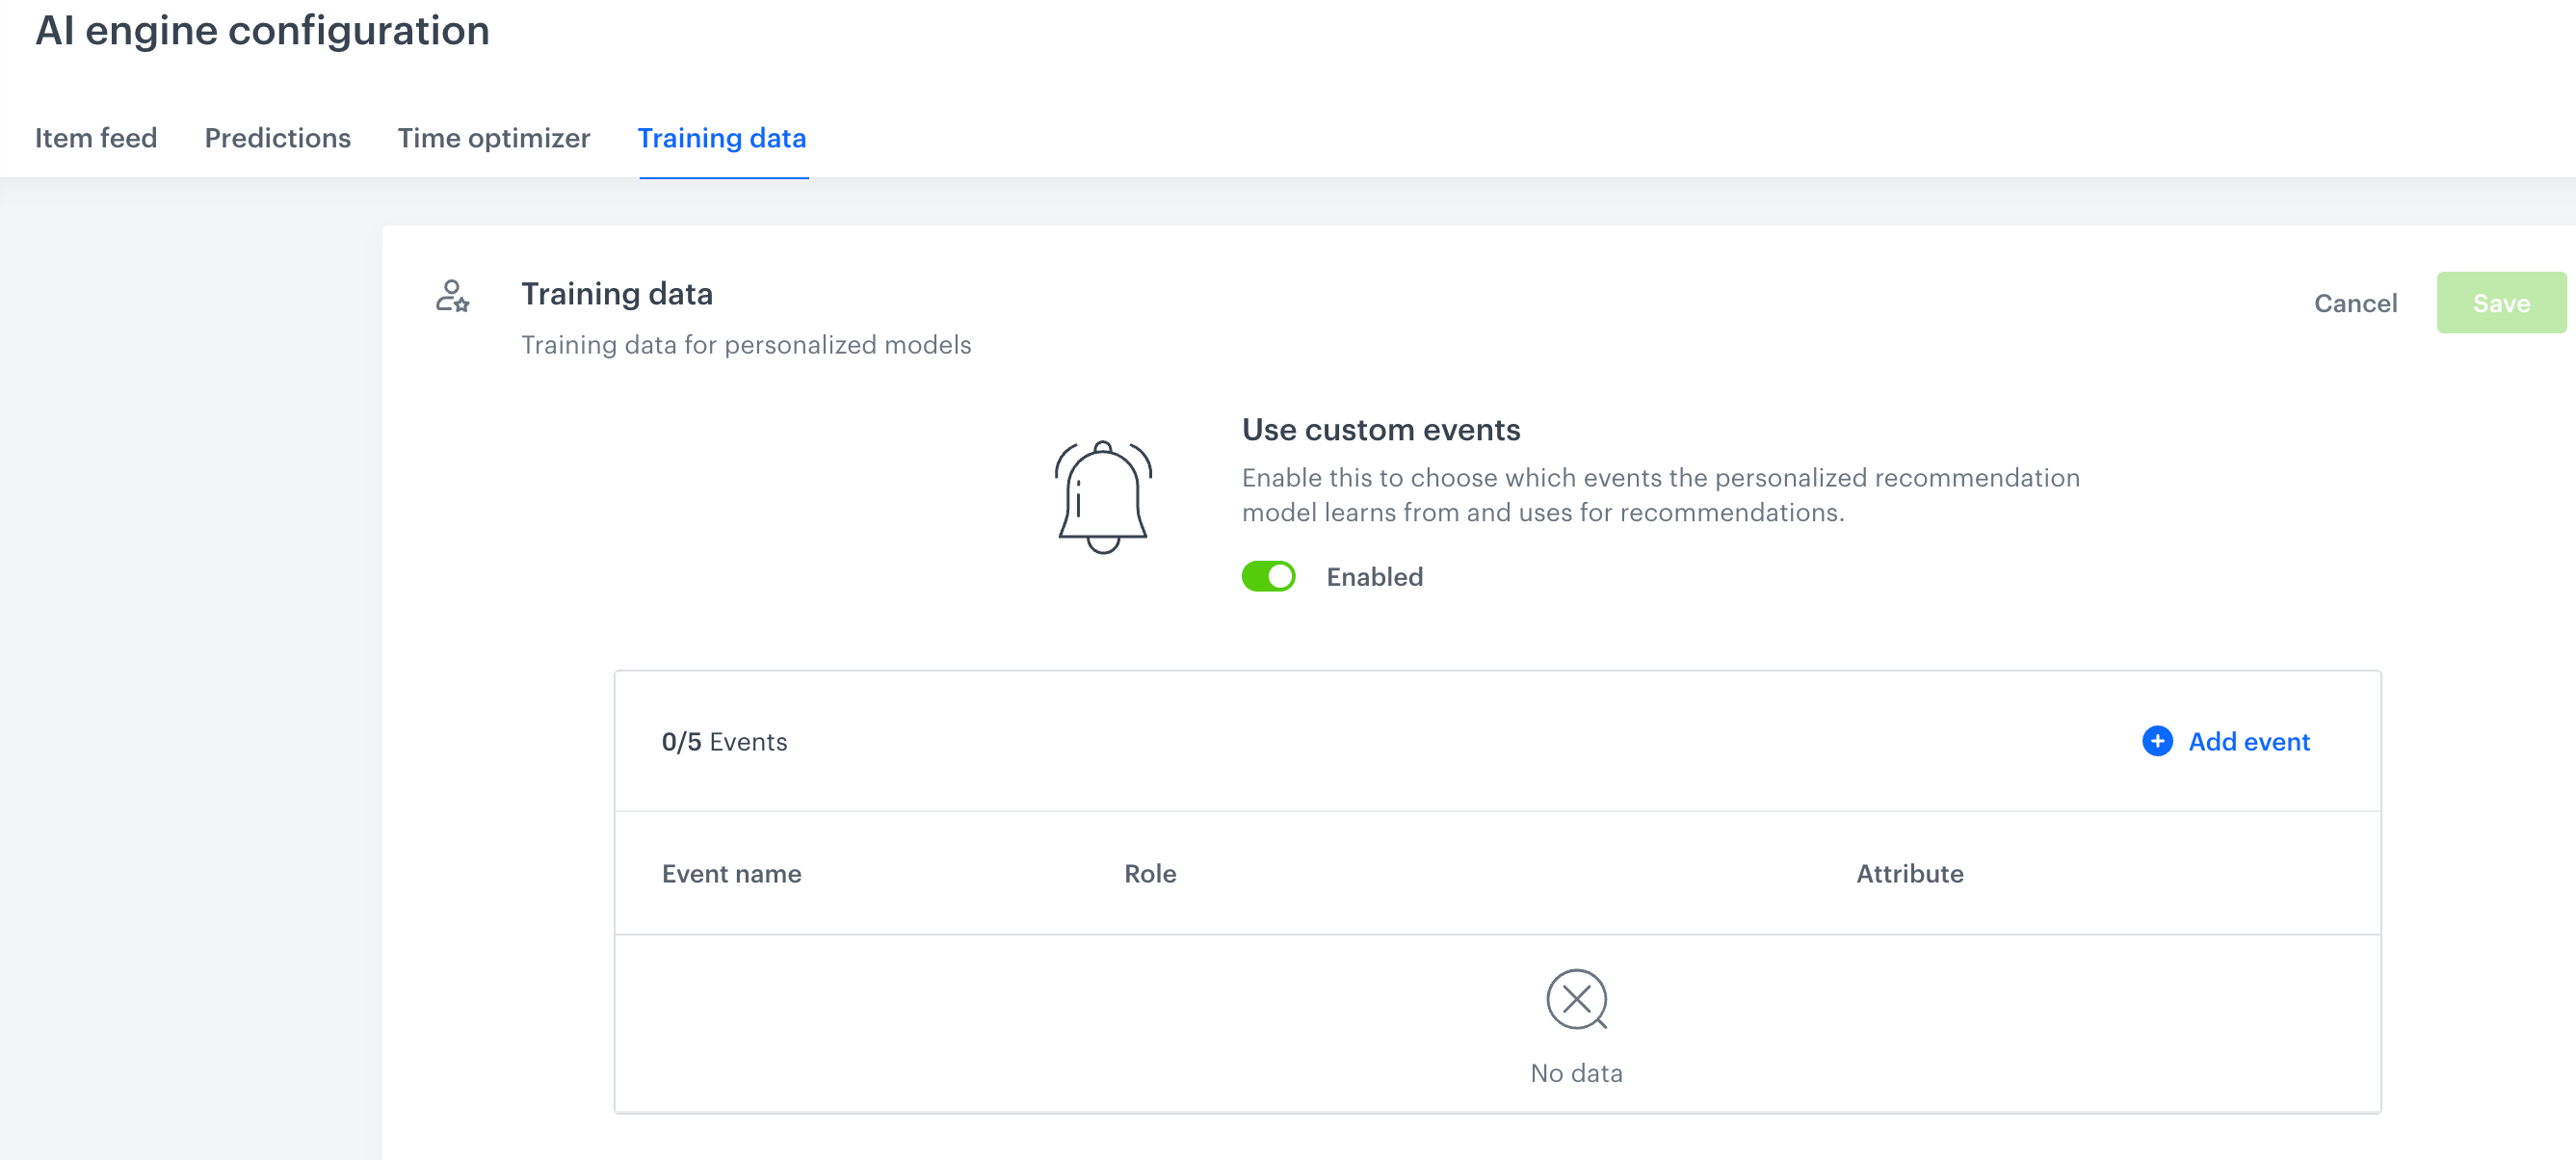
2. Switch the **Use custom events** toggle on.  
    **Result**: The events table appears, where you can add up to 5 custom events.  

    <figure><img src="/api/docs/image/5ca0bce10a328bc11e3fc52f7787988316f562c3/docs/settings/_gfx/enable-custom-train-data.png" class="medium" alt="Training data tab in AI engine configuration with the Use custom events toggle enabled and an empty events table"><figcaption>Enabling custom events on the Training data tab</figcaption></figure>

## Adding a custom event
---

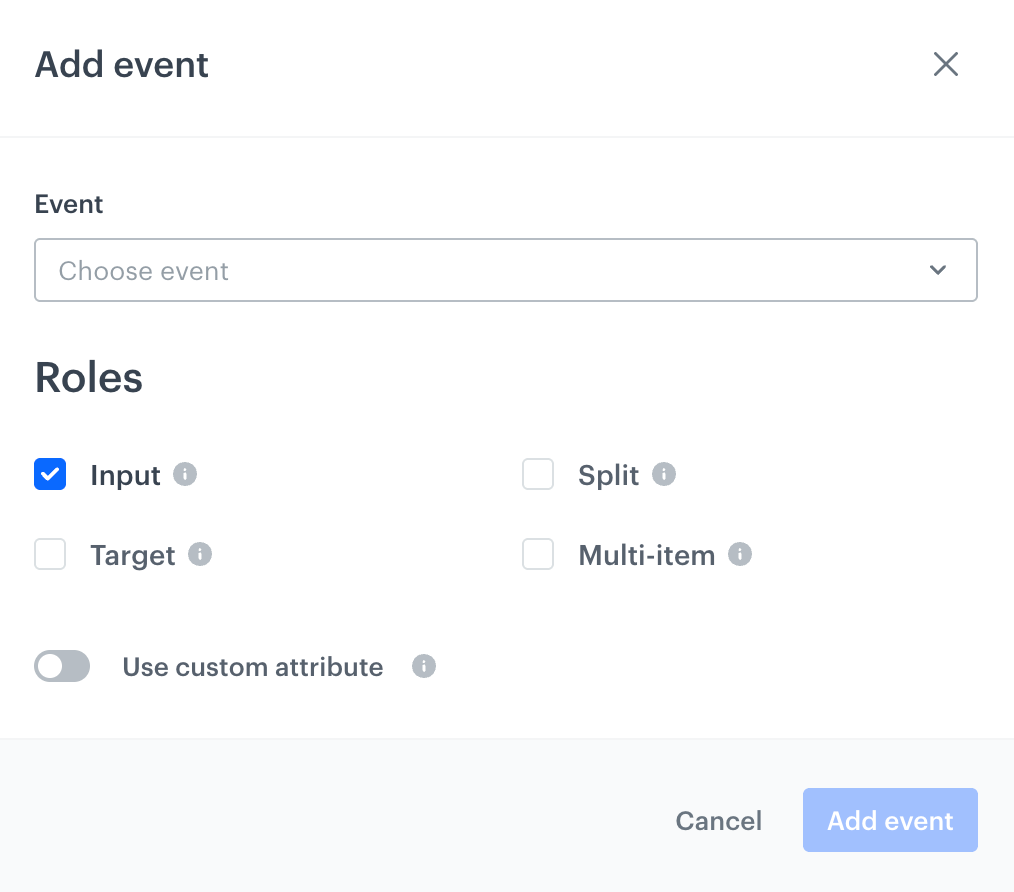
1. On the **Training data** tab, click **Add event**.  
    **Result**: A pop-up appears.  

    <figure><img src="/api/docs/image/5ca0bce10a328bc11e3fc52f7787988316f562c3/docs/settings/_gfx/custom-training-add-event.png" class="medium" alt="Add event pop-up with the Event dropdown list, the Input, Target, Split, and Multi-item role checkboxes, and the Use custom attribute toggle"><figcaption>Adding an event on the Training data tab</figcaption></figure>

2. From the **Event** dropdown list, select the event you want to use for training.  
    The list only includes [custom events](/glossary#custom-events) that you defined in Synerise - it doesn't include [default events](/docs/assets/events/event-reference).  
    
   <div class="admonition admonition-note"><div class="admonition-icon"><svg xmlns="http://www.w3.org/2000/svg" fill="none" viewBox="0 0 24 24" stroke="currentColor" stroke-width="2.5"><path stroke-linecap="round" stroke-linejoin="round" d="M13 16h-1v-4h-1m1-4h.01M21 12a9 9 0 11-18 0 9 9 0 0118 0z" /></svg></div><div class="admonition-body"><div class="admonition-content">

   If the event you want to use isn't listed yet, you must first add it, either as a [custom event definition](/docs/assets/events/event-definitions#in-the-web-application) in the web application, or by sending it through the [Custom event](https://hub.synerise.com/api-reference/data-management#operation/CustomEvent) API method, which creates the event definition automatically.
   </div></div></div>

3. Select one or more roles for the event:
    - **Input** - The event is used as an input to the model, both during training and serving. By default, [page.visit](/docs/assets/events/event-reference/web-and-app#pagevisit) and [transaction.charge](/docs/assets/events/event-reference/items#transactioncharge) are used as input.
    - **Target** - The model learns to predict interactions with the items included in this event.
    - **Split** - The event is used to split sessions during training: everything that happens before the event becomes the input, and everything after it becomes the target (for the events you already selected as **Input** or **Target**). In most cases, a random split within the session gives the best results, so use this role only if you have a specific reason to define a custom split point.
    - **Multi-item** - Use this role for events which carry information about more than one item, for example, an event that reports the status of a cart. This role works best combined with the **Target** role.
4. If the item identifier in the event is stored in a parameter other than `SKU`, switch the **Use custom attribute** toggle on and select the parameter which contains the item identifier.
5. Confirm by clicking **Add event**.  
    **Result**: The event appears on the list on the **Training data** tab.
6. Click **Save**.

## Excluding periods from training
---

Optionally, you can exclude one or more time periods from training the [Personalized](/docs/ai-hub/recommendations-v2/recommendation-types#personalized), [Next interaction](/docs/ai-hub/recommendations-v2/recommendation-types#next-interaction), [Section page](/docs/ai-hub/recommendations-v2/recommendation-types#section-page), and [Attribute](/docs/ai-hub/recommendations-v2/recommendation-types#attribute) recommendation models. Events collected during an excluded period are not used for training or retraining. This is not required for the models to work, but it can be useful if the data collected during a specific period does not represent normal customer behavior, for example:
- You duplicated events during a specific period (for example, to avoid deduplicating data afterwards) and you want to exclude that period instead of cleaning up the duplicated events.
- You ran aggressive promotions during a specific period, which led customers to buy items they would not normally buy outside of the promotion, and you don't want the model to treat this behavior as standard.

### Enabling period exclusion

1. Go to **Settings > AI Engine Configuration > Training data**.
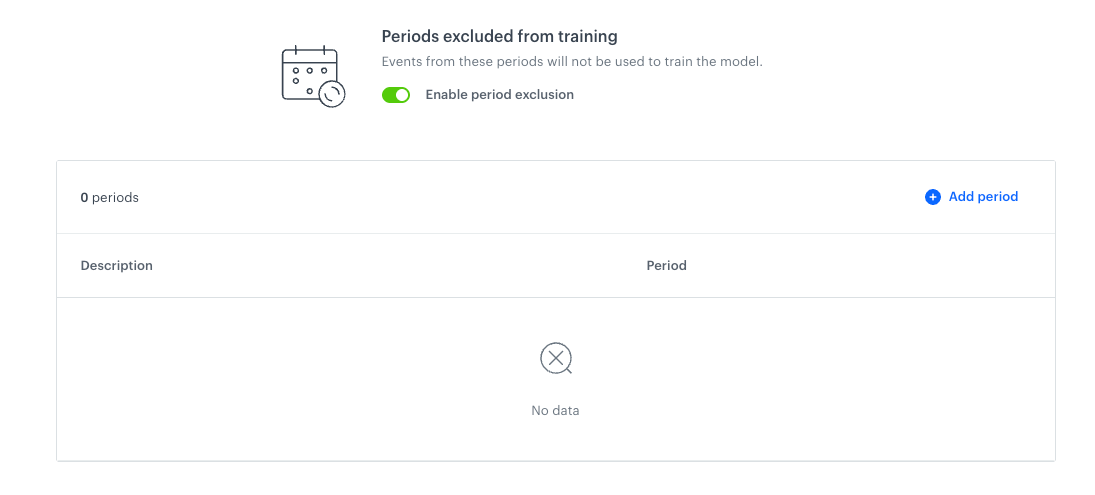
2. Switch the **Enable period exclusion** toggle on.  
    **Result**: The periods table appears, where you can add the periods you want to exclude.  

    <figure><img src="/api/docs/image/5ca0bce10a328bc11e3fc52f7787988316f562c3/docs/settings/_gfx/exclude-periods-custom-training.png" class="medium" alt="Training data tab in AI engine configuration with the Enable period exclusion toggle enabled and an empty periods table"><figcaption>Enabling period exclusion on the Training data tab</figcaption></figure>

### Adding an excluded period

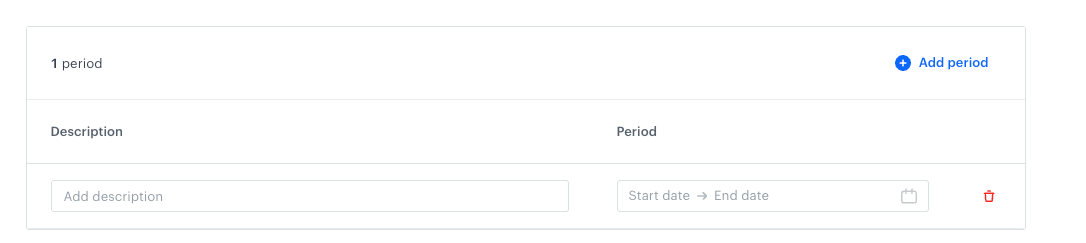
1. On the **Training data** tab, click **Add period**.  
    **Result**: A row for the period appears in the table.  
    <figure><img src="/api/docs/image/5ca0bce10a328bc11e3fc52f7787988316f562c3/docs/settings/_gfx/adding-excluded-period.png" class="medium" alt="Periods table on the Training data tab with a new row containing the Description field and the Start date - End date period selector"><figcaption>A new period added to the periods table</figcaption></figure>  
    
2. Optionally, in the **Description** field, add a description of the period, for example, the reason for the exclusion.
3. In the **Period** field, select the **Start date** and **End date** of the period you want to exclude.  
    Click **Now** to select the entire current day; you cannot select individual hours.  
    
   <div class="admonition admonition-note"><div class="admonition-icon"><svg xmlns="http://www.w3.org/2000/svg" fill="none" viewBox="0 0 24 24" stroke="currentColor" stroke-width="2.5"><path stroke-linecap="round" stroke-linejoin="round" d="M13 16h-1v-4h-1m1-4h.01M21 12a9 9 0 11-18 0 9 9 0 0118 0z" /></svg></div><div class="admonition-body"><div class="admonition-content">

   You don't have to add periods in chronological order.

   </div></div></div>

4. Confirm by clicking **Apply**.  
    **Result**: The period appears on the list on the **Training data** tab. To remove a period from the list, click the trash icon next to it.
5. Click **Save**.