Before you can use [Personalized Promotions](/docs/ai-hub/personalized-promotions/introduction-to-ai-promotions), you must configure the AI engine.
## Prerequisites
---
- At least 1,000 profiles.
- At least 10,000 events in total, of either:
- [`page.visit`](/docs/assets/events/event-reference/web-and-app#pagevisit) events from item pages and [`product.view`](/docs/assets/events/event-reference/web-and-app#productview) events from item views in a mobile application
- or [`transaction.charge`](/docs/assets/events/event-reference/items#transactioncharge) events
If you don't meet these prerequisites yet, you can [import profiles](/docs/assets/imports/importing-clients) and [transaction history](/docs/assets/imports/importing-transactional-data) to fulfill them.
To configure the AI engine, you must perform the following steps in order:
1. [Adding item feed](#adding-item-feed)
2. [Selecting an item feed](#selecting-item-feed)
3. [Enabling the model](#enabling-the-model)
4. [Selecting attributes for distinct filters](#selecting-attributes-for-distinct-filters) (optional)
You can use the same item catalog for Personalized Promotions, Recommendations, AI Search, and Predictions, however, in each workspace, only one catalog can be used for Personalized Promotions.
## Adding item feed
---
he first step is selecting the feed from which items will be sourced. You can either select a catalog that contains a feed or use Google Merchant Feed. Make sure, the item feed includes the following attributes:
- `itemId` - The identifier of the item
- `title` - The name of the item
- `category` - The category of the item
You can read about requirements for item feed:
- [uploaded to a catalog](/docs/ai-hub/item-feed/item-feed-in-catalog)
- [pulled from an URL](/docs/ai-hub/item-feed/google-merchant-feed)
Grouping feed attributes is available for this feed type.
If you previously configured a feed which you want to use now, you can omit this step.
- We recommend using Google Merchant XML instead of XML files due to the size limits (an XML file cannot exceed 10 MB).
- If you're enabling AI engine for visual similarity recommendation model, select the item feed which contains less than 1,000,000 items.
1. Go to **Settings > AI engine configuration**.
2. Click **Add feed**.
**Result**: A pop-up appears.
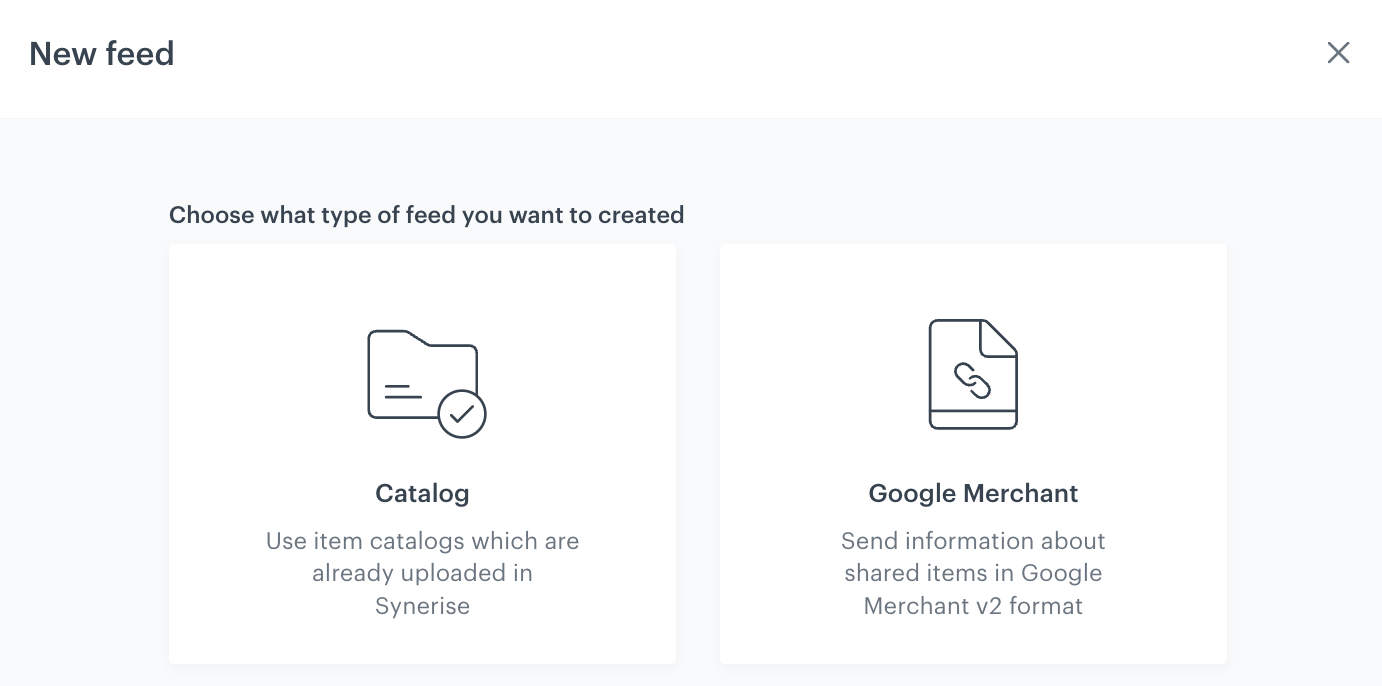
A pop-up with feed type selection
3. Select the product feed you want to use.
- **Catalog**
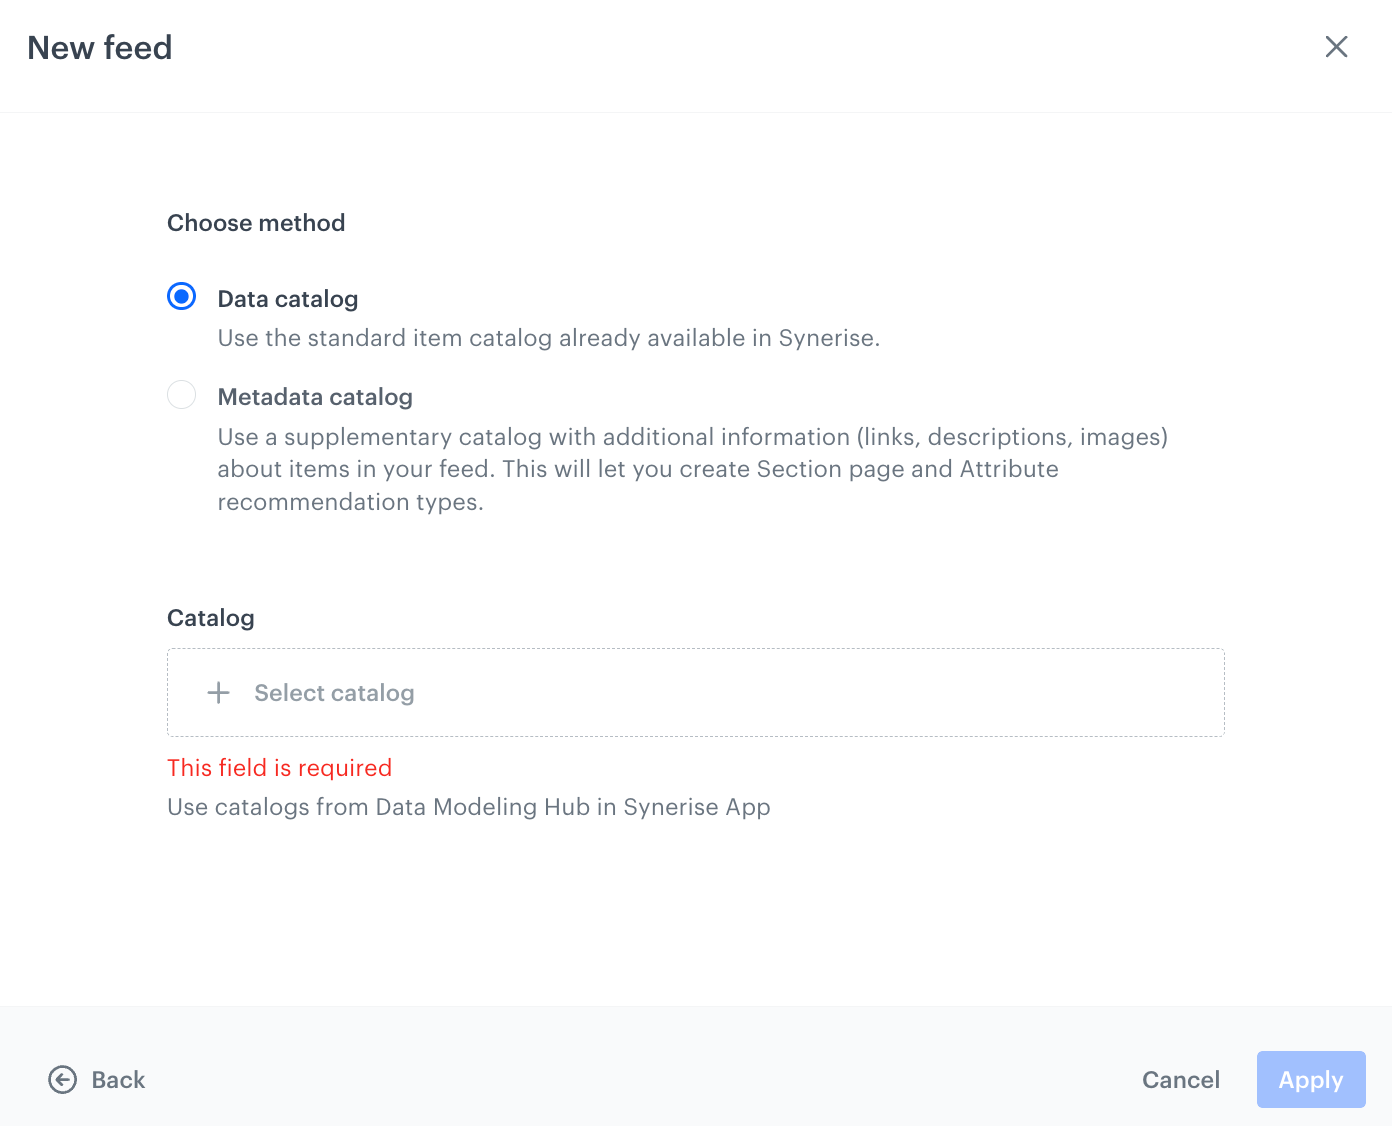
1. On the pop-up, select the type of catalog:
- Data catalog
- [Metadata catalog](/docs/ai-hub/item-feed/metadata-catalog)
2. From the dropdown list, select a catalog.
A pop-up with catalog type selection
3. Confirm by clicking **Apply**.
**Result**: An item feed based on the contents of the selected catalog appears on the list in **Settings > AI Engine configuration**.
- **Google Merchant**
Include the [Last-Modified](https://developer.mozilla.org/en-US/docs/Web/HTTP/Headers/Last-Modified) header to enable detection of whether the product feed import is necessary, this will help you reduce data transmission costs.
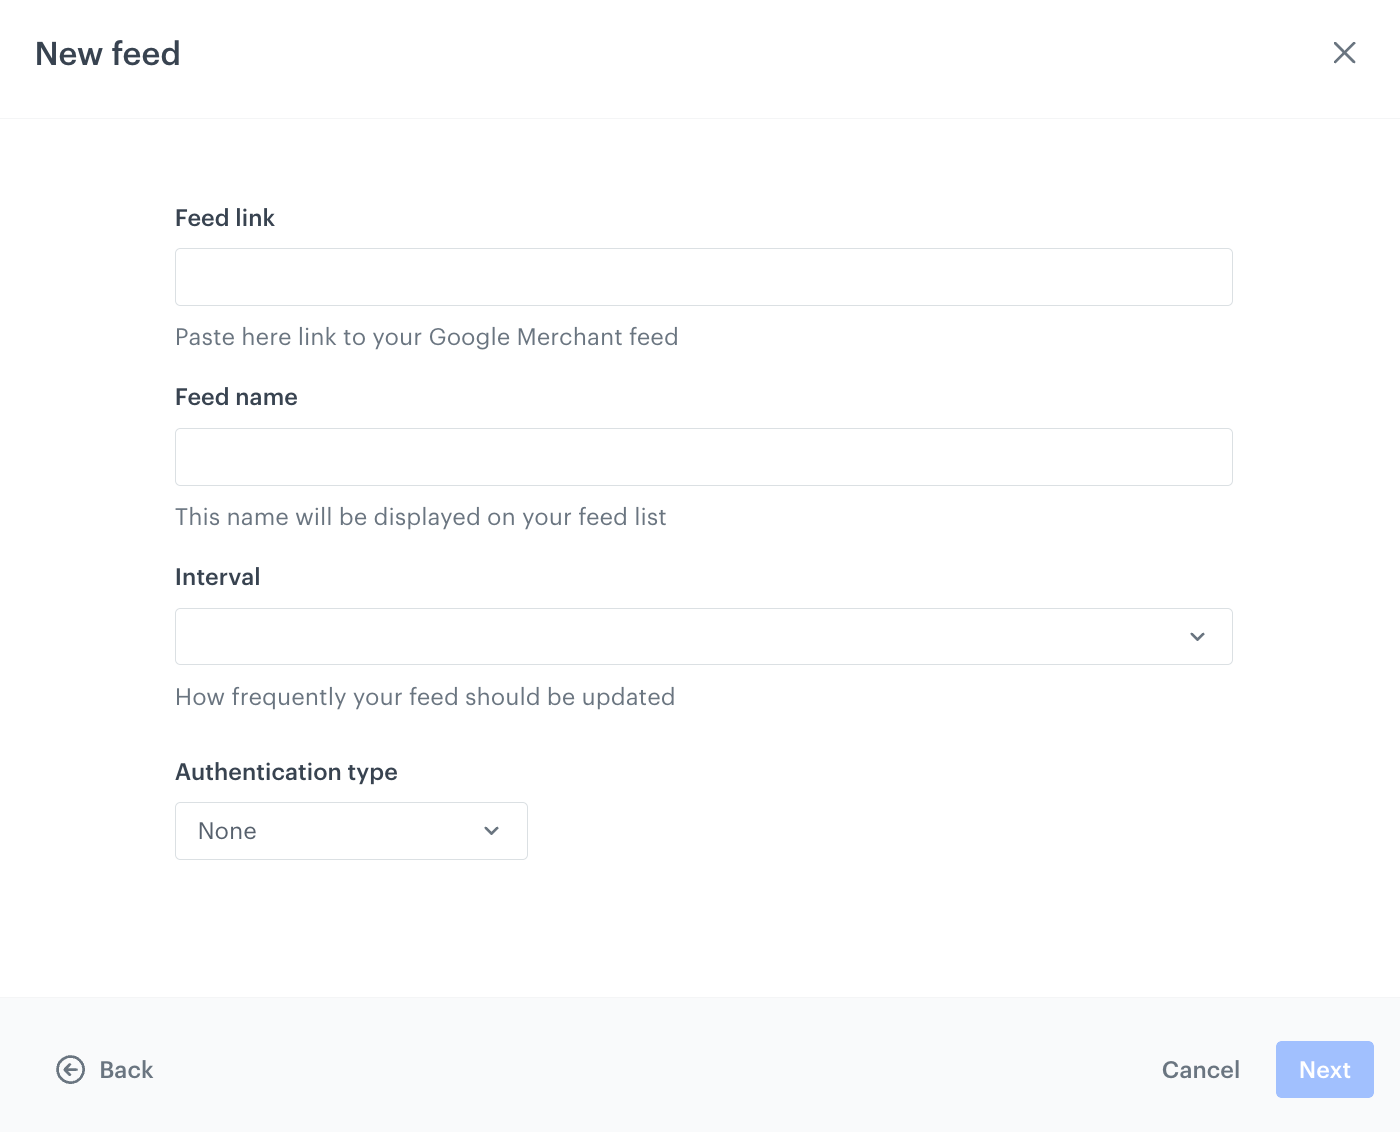
1. Provide the following information:
- the link to the Google Merchant feed (**Feed link**),
- the name of the field (**Feed name**),
this name will be visible on the list of item feeds in Synerise in **Settings > AI Engine Configuration**
- the frequency of pulling updates from the feed to Synerise (**Interval**),
- authentication type (**Authentication type**),
- username and password (**Basic** authentication type)
- username, password, token type, URL (**Bearer** authentication type)
A pop-up with configuration of pulling data from Google Merchant Feed
2. Proceed to the next step by clicking **Next**.
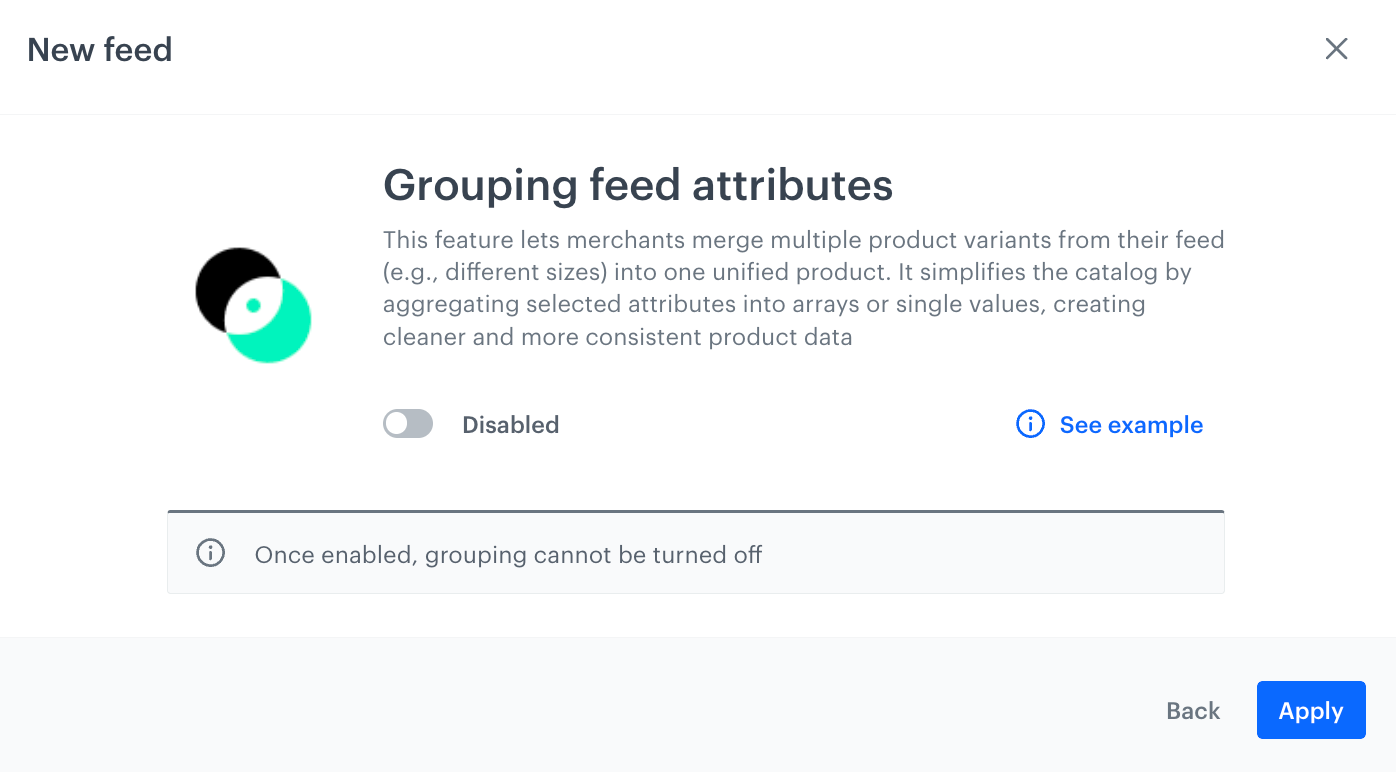
3. If you want to group feed attributes, enable the toggle. Further [grouping settings are defined](/docs/settings/configuration/ai-engine-configuration/engine-configuration-for-recommendations#grouping-feed-attributes) after adding the feed.
Grouping feed attributes refers to organizing the attributes or fields within an item feed into logical groups. Instead of treating each product variant — such as different sizes or colors — as a separate item in the feed, all variants of a product are combined and grouped into a single item.
A pop-up with enabling grouping feed attributes
This action is irreversible after applying.
4. Confirm by clicking **Apply**.
**Result**: The feed appears on the list in **Settings > AI Engine configuration**.
## Selecting item feed
---
1. In **Settings > AI Engine Configuration**, on the list of feeds, click the feed you added according to the [Adding item feed](#adding-item-feed) procedure.
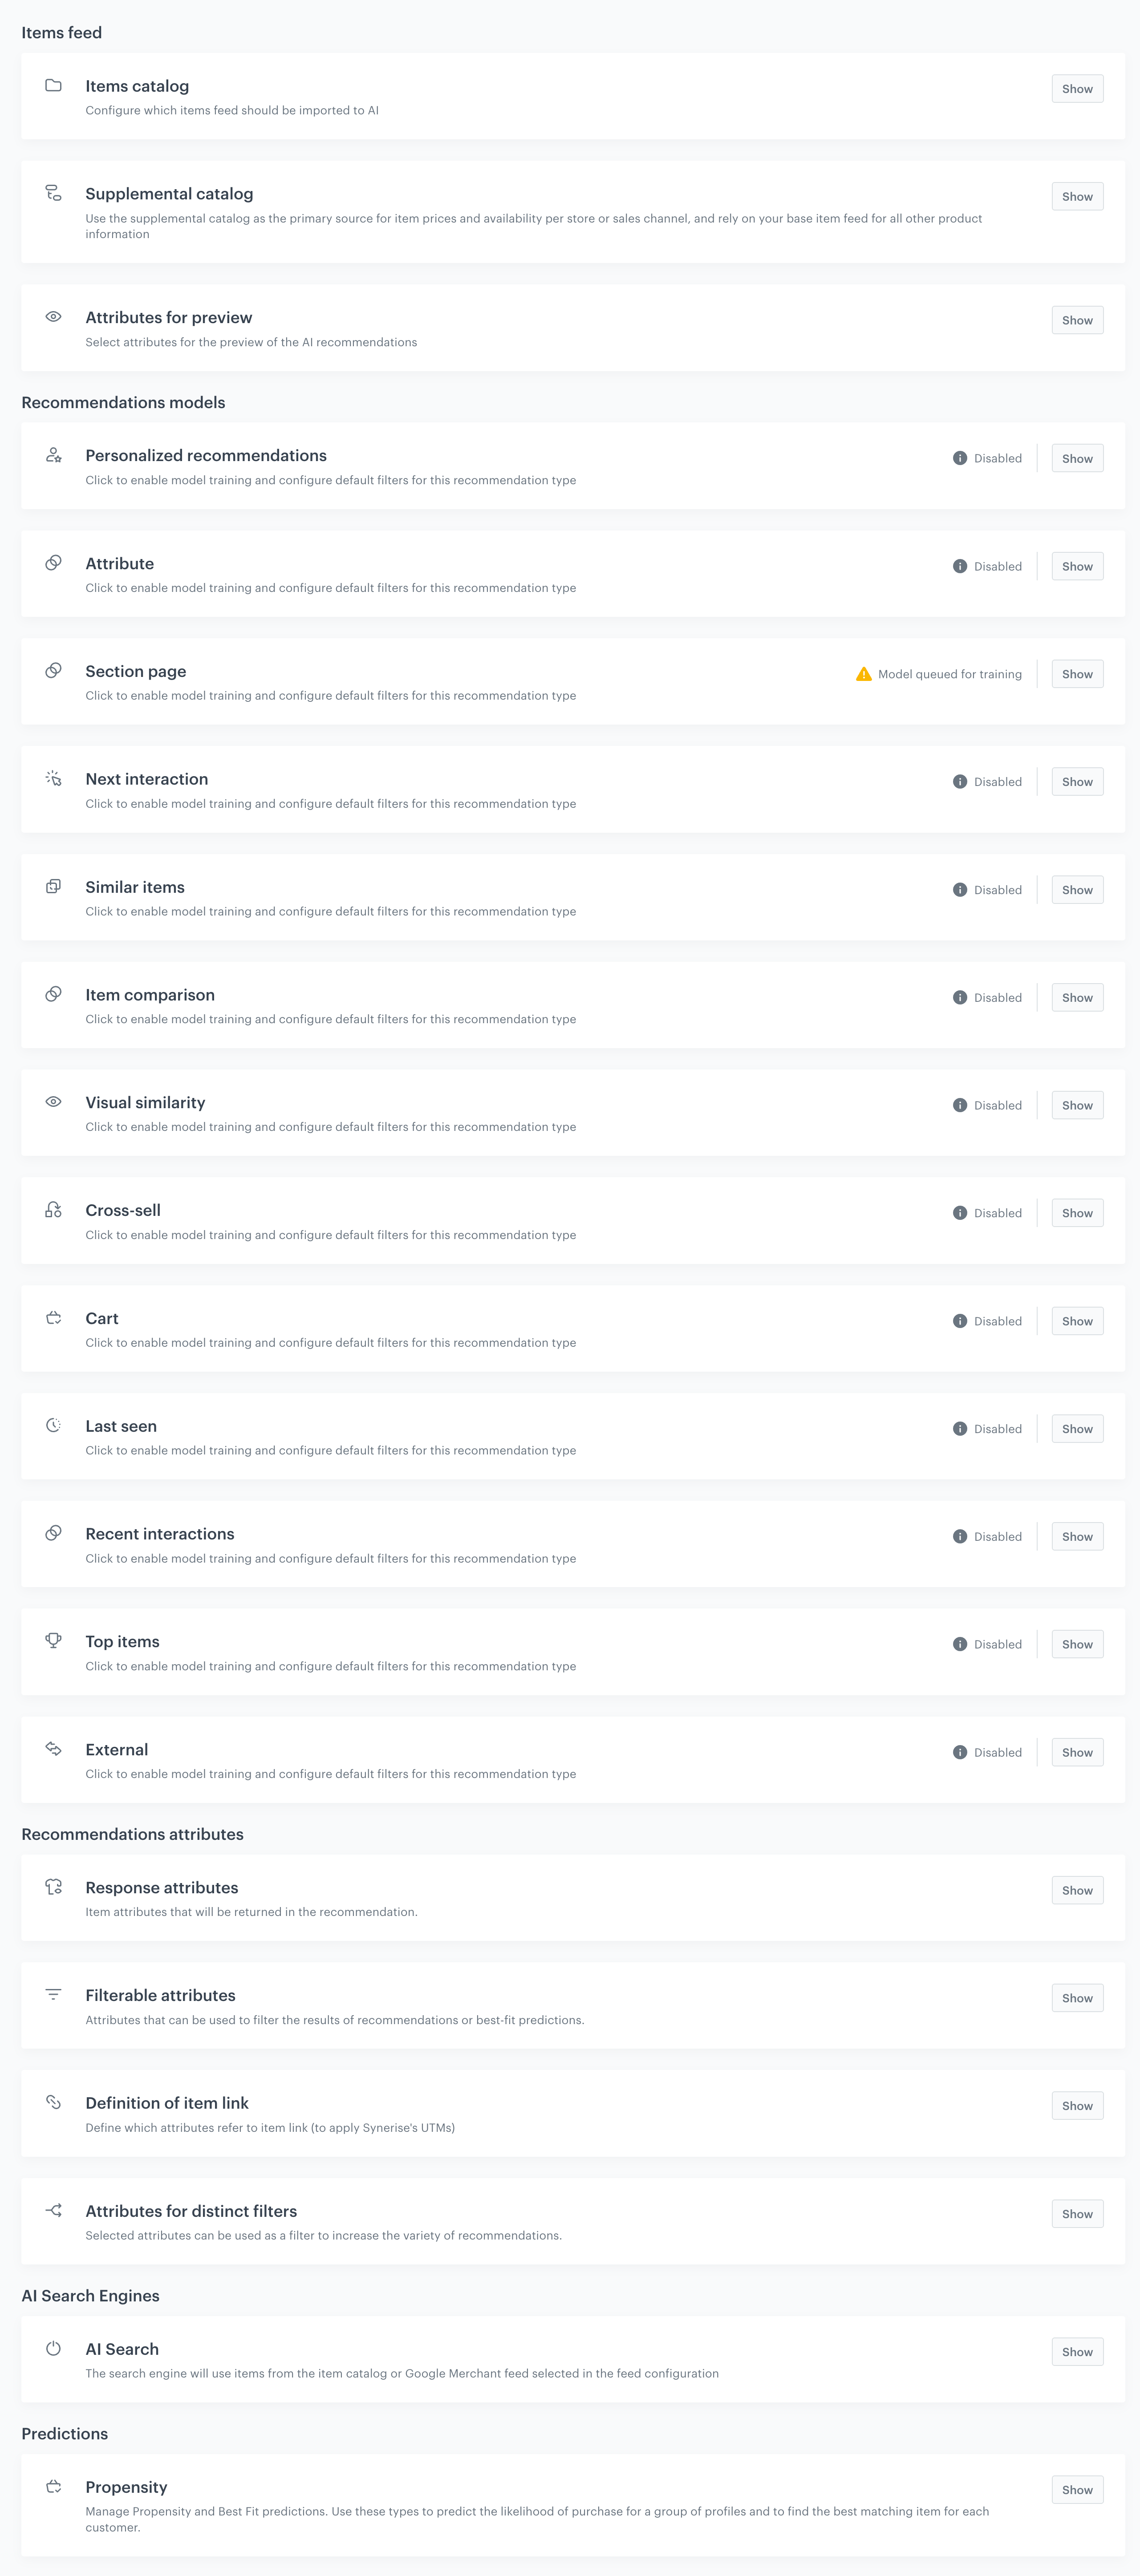
The configuration form opens. In the **Item catalog** section, the feed you are configuring is selected automatically and you can proceed to the next part of the configuration.
Blank model configuration form
## Enabling the model
---
The list of promotion candidates considered by the AI model is refreshed every 3 to 24 hours. When you add or edit a promotion, the model isn't aware of the change immediately.
1. In the **Recommendation models** section, on **Personalized recommendations**, click **Show**.
2. Switch the **Model enabled** toggle on.
After the configuration:
1. Contact the Synerise support to enable the model for a workspace - provide your workspace name and the ID of the catalog you selected as the item feed.
2. Once Synerise support confirms that the model is active, you can [create a personalized promotion](/docs/ai-hub/personalized-promotions/creating-ai-promotions).
## Selecting attributes for distinct filters
---
Attributes for distinct filters are shared with [AI Recommendations](/docs/settings/configuration/ai-engine-configuration/engine-configuration-for-recommendations#selecting-attributes-to-increase-item-variety) - if you already configured them for the same item feed, you can skip this step.
The attributes you select here become available in the **Choose attribute** dropdown when [defining a distinct filter](/docs/ai-hub/personalized-promotions/creating-ai-promotions#distinct-filter) for a personalized promotion.
1. On the **Attributes for distinct filters** tab, click **Show**.
2. Click **Select attributes**.
3. On the pop-up, from the list, choose up to 5 attributes.
4. Click **Apply**.
5. Confirm the settings of the tab by clicking **Apply**.
## Removing item feed
---
You can remove item feeds from the list. While removing item feeds, any Synerise objects that rely on the feed as a source of information (such as predictions, recommendations, AI search) will be automatically disabled. Prior to confirming the removal operation, you will be presented with a list of objects that are currently using the feed to be removed. The feed will be removed after 7 days from confirming the action. During this transitional period, the feed and the objects associated with it will remain active. In the case of a feed within a catalog, the contents of the catalog will be deleted, while the catalog itself will be retained.
1. Go to **Settings > AI engine configuration**.
2. Next to the name of the feed you want to remove, click
3. From the dropdown list, select **Delete**.
**Result**: A pop-up appears with the list of objects that are currently using the feed.
4. To confirm the operation, click **Yes, delete feed**.
 3. From the dropdown list, select **Delete**.
**Result**: A pop-up appears with the list of objects that are currently using the feed.
4. To confirm the operation, click **Yes, delete feed**.
3. From the dropdown list, select **Delete**.
**Result**: A pop-up appears with the list of objects that are currently using the feed.
4. To confirm the operation, click **Yes, delete feed**.