Connect Synerise with Google Wallet to let your customers add [wallet passes](/docs/campaign/wallet-passes) to Google Wallet.
## Requirements
Obtain the following information from Google Cloud Console and the Google Pay & Wallet Console:
| Value | What is it? | Where to find it? |
| --- | --- | --- |
| Issuer ID | The unique identifier assigned to your Google Wallet issuer account. | In the Google Pay & Wallet Console. |
| Issuer name | The name configured for your Google Wallet issuer account. | In the Google Pay & Wallet Console. |
| Service account JSON key | The JSON key file of the service account Synerise uses to authenticate requests to the Google Wallet API. | Generated for the service account in Google Cloud Console. |
Instead of connecting your own Google Wallet credentials, you can choose to use Synerise managed credentials when enabling the integration - see step 6 in [Enabling Google Wallet in Synerise](#enabling-google-wallet-in-synerise). In that case, you don't need to collect the values above.
## Collecting integration parameters from Google Cloud
1. Go to [Google Cloud Console](https://console.cloud.google.com/).
2. Select an existing project, or create a new one.
3. In the **IAM & Admin** section, create a service account.
4. Generate a JSON key for the service account, and save the downloaded file—you'll upload it to Synerise as the **service account JSON key**.
5. Go to the Google Wallet API and configure your issuer account.
6. In the Google Pay & Wallet Console, copy the **Issuer ID** and **Issuer name** of your issuer account.
## Enabling Google Wallet in Synerise
1. [Collect the integration parameters from Google Cloud](#collecting-integration-parameters-from-google-cloud).
2. Go to **Settings > Apps & Services**.
3. In the list of integrations, click **Google Wallet**.
4. Click **New connection**.
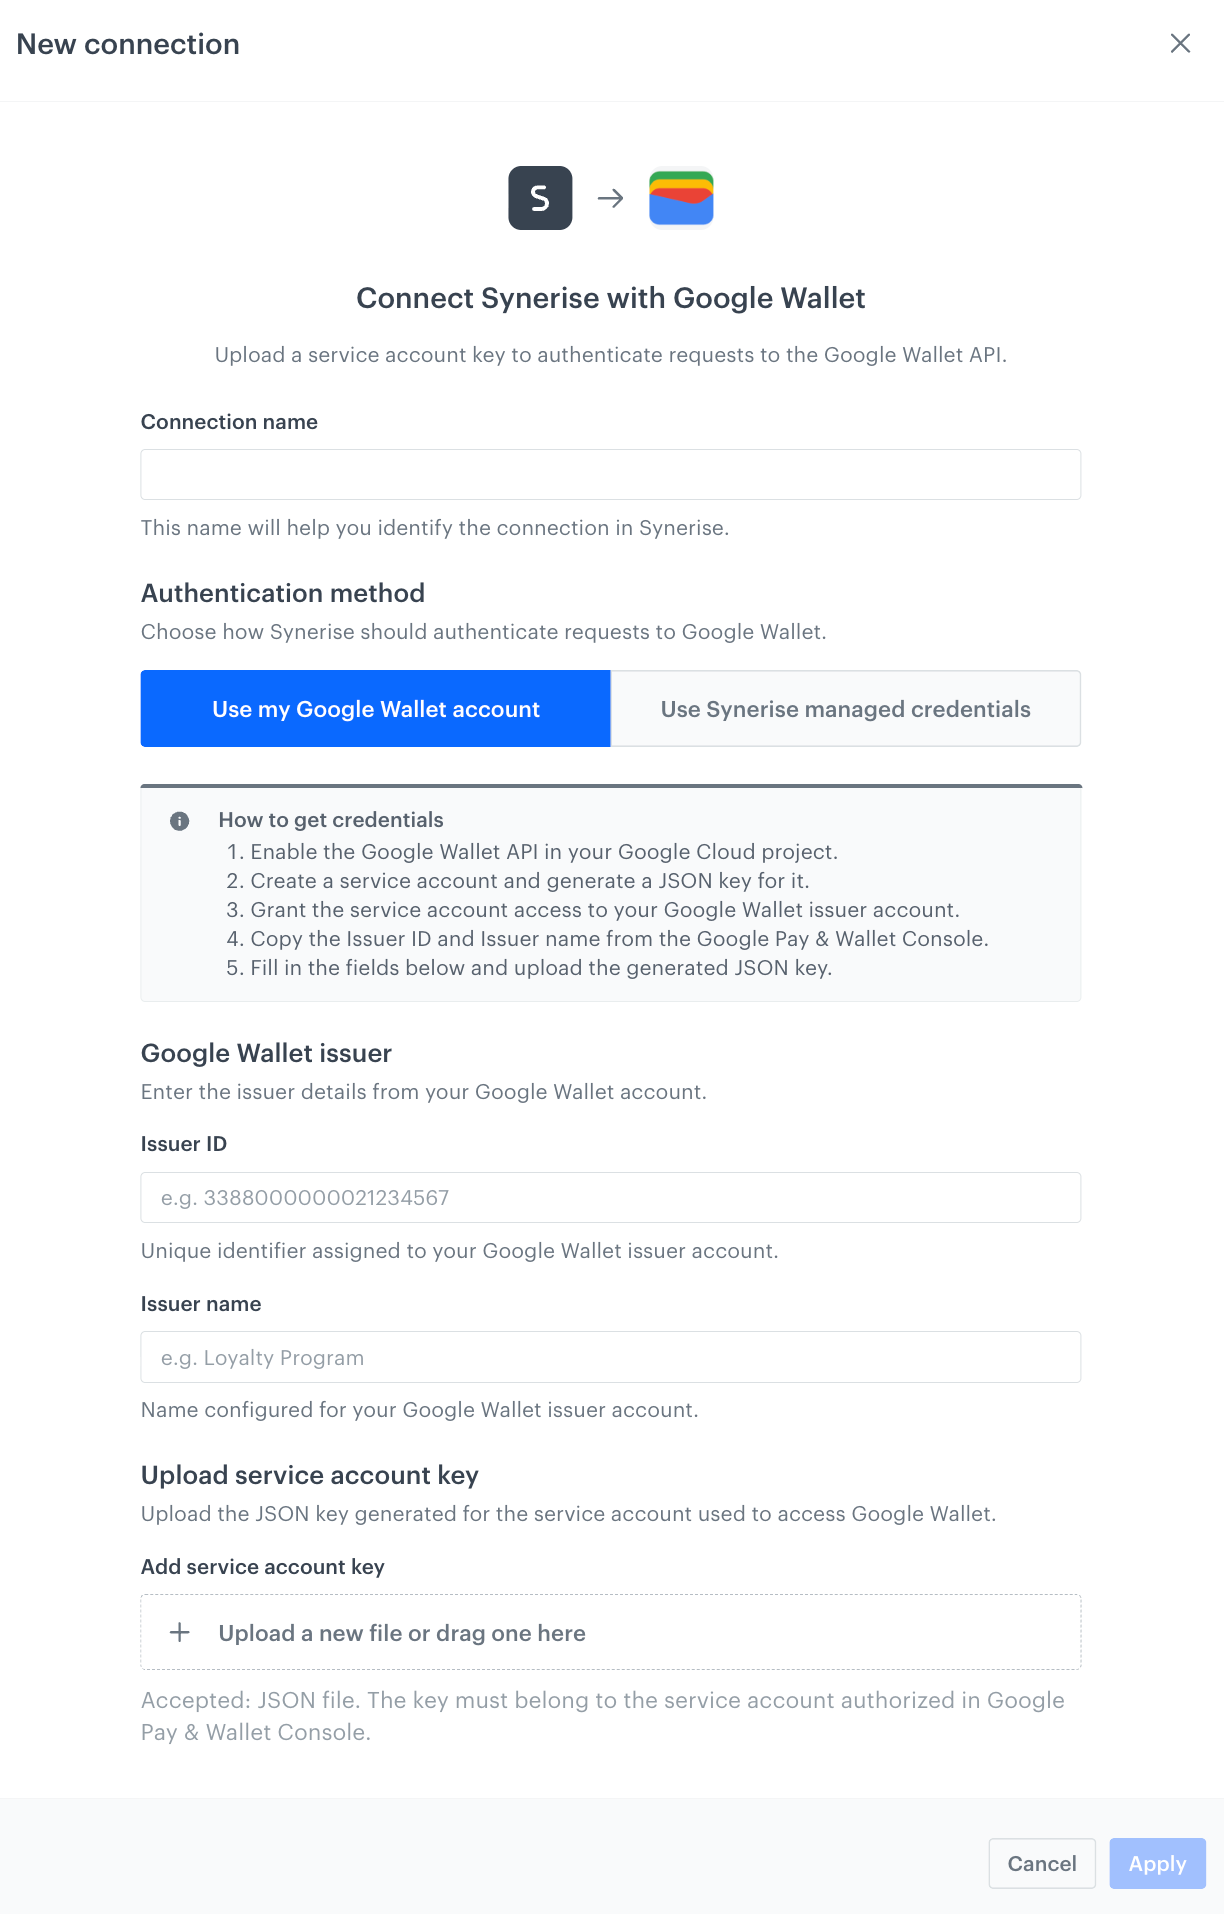
**Result**: A configuration form opens.
The Google Wallet connection configuration form
5. In the **Connection name** field, enter a name to identify the connection in Synerise.
6. Under **Authentication method**, choose how Synerise should authenticate requests to Google Wallet:
- **Use my Google Wallet account** - connect using the credentials you collected above.
- **Use Synerise managed credentials** - switch the **Enable integration using Synerise credentials** toggle on. Synerise configures and manages the credentials required to access Google Wallet, so no additional setup is required. Skip the remaining steps below.
Use **Synerise managed credentials** for the fastest setup, for example for a proof of concept:
- Practically instant onboarding.
- No need to create a Google Wallet Business account.
- No credentials for you to manage.
- Lower risk of misconfiguration.
Use **your own Google Wallet account** if you need full control:
- Full independence from Synerise's shared issuer.
- Your own Google Wallet issuer account.
- You manage access to the credentials on your side.
7. If you selected **Use my Google Wallet account**, under **Google Wallet issuer**:
1. In the **Issuer ID** field, enter the issuer ID you copied from the Google Pay & Wallet Console.
2. In the **Issuer name** field, enter the issuer name you copied from the Google Pay & Wallet Console.
3. Upload the service account JSON key file you generated in Google Cloud Console.
8. Click **Apply**.
**Result**: The connection with Google Wallet is created and ready to use as the **Google credential ID** when [configuring a wallet pass's credentials](/docs/campaign/wallet-passes/creating-wallet-passes#configuring-credentials).
 **Settings > Apps & Services**.
3. In the list of integrations, click **Google Wallet**.
4. Click **New connection**.
**Result**: A configuration form opens.
**Settings > Apps & Services**.
3. In the list of integrations, click **Google Wallet**.
4. Click **New connection**.
**Result**: A configuration form opens.