This document covers integration instructions for the deprecated v1.x plugin version. Support is available only for Magento versions 2.4.x and 2.3 (backward compatibility). Keep up-to-date with Magento's recommended updates. Documentation for the v2.x plugin version integration is available [here](/docs/settings/tool/magento/magento-integration-multistore-support).
The Synerise users can integrate their websites built on the Magento platform. The scope of integration involves the transmission of the following data from Magento to Synerise:
- information about the customers (their activity, identification of a customer throughout the whole journey),
- information about the transactions,
- information about the items
## Prerequisites
---
1. You must be granted user permissions to access API key section and add the key in Synerise.
2. You must have access to admin panel in the Magento platform.
## Configuration in Synerise
---
Log in to your workspace in Synerise and perform the steps described below:
### Create an API key
---
1. In Synerise, go to **Settings > API Keys > Add API key**.
2. On the pop-up:
1. Enter the name of the API key (it will be visible on the list of API keys).
2. Select **Workspace**.
3. Optionally, enter the description of the key (it will be visible on the list of API keys).
Adding a new API key for the Magento integration
3. Confirm by clicking **Save**.
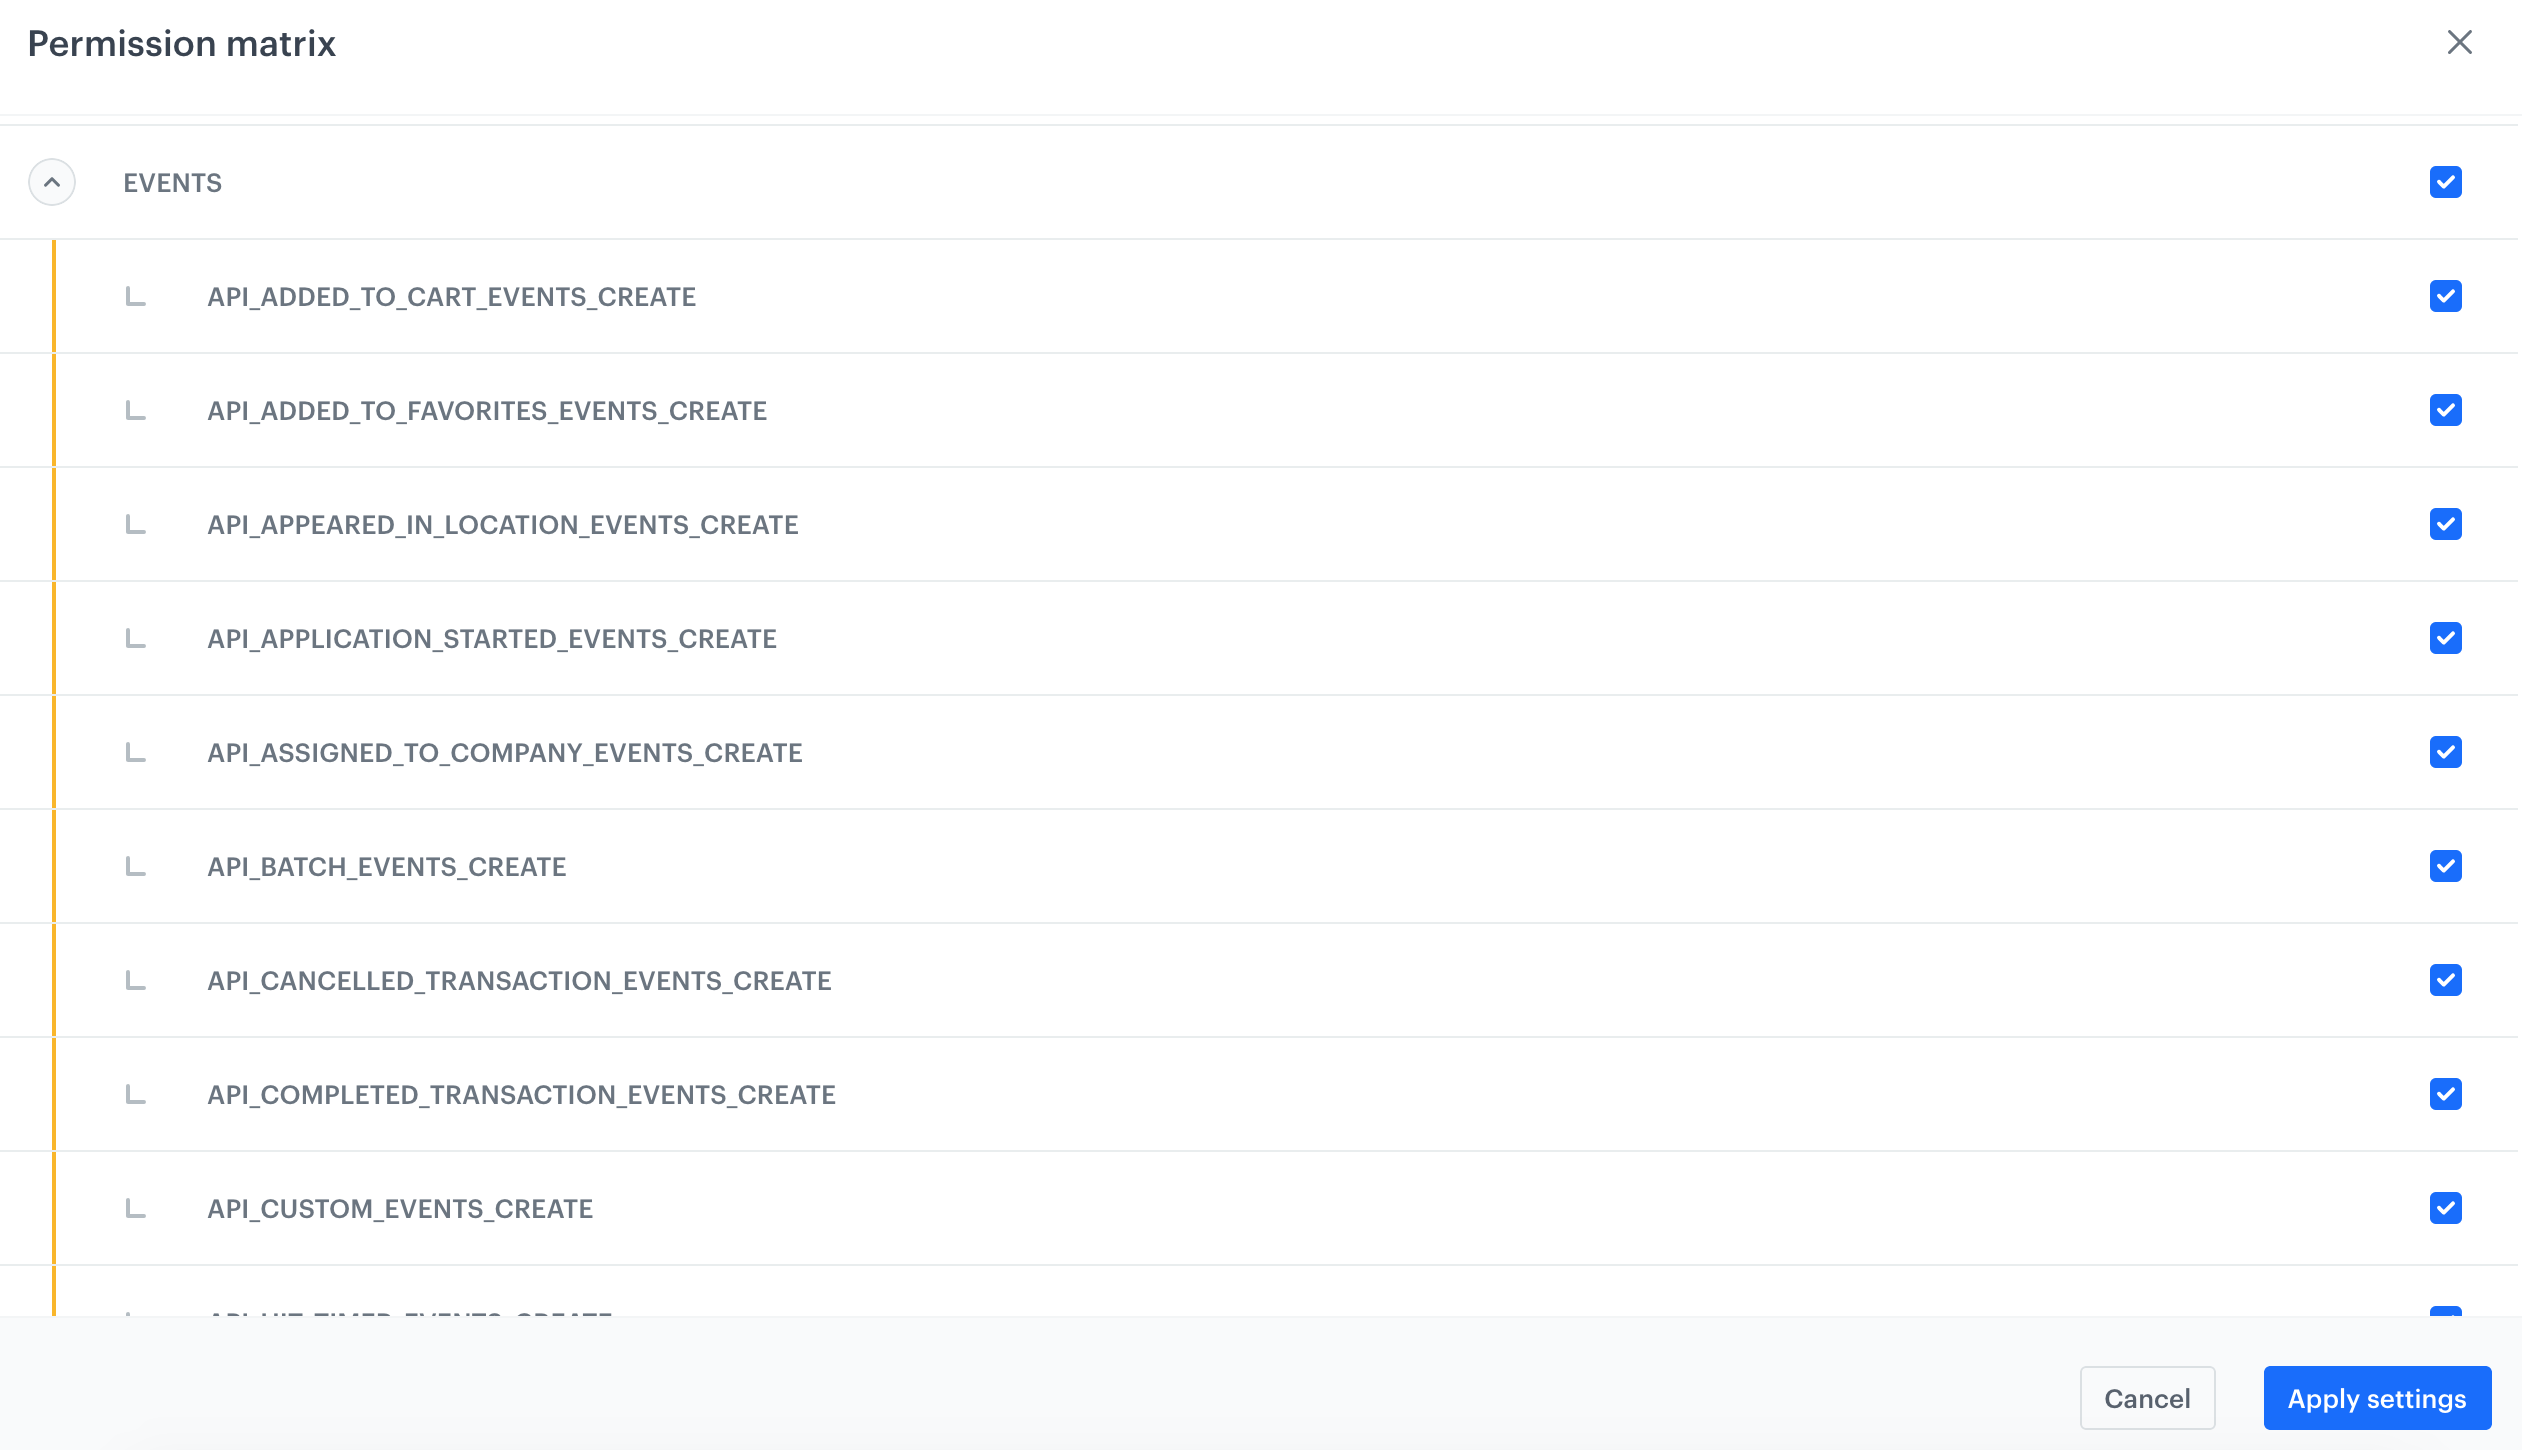
4. Find the key on the top of API key list and click **Permissions**.
5. On the pop-up, select the whole **EVENTS**, **CLIENT**, and **TRANSACTION** sections.
Permissions for the API key required by the Magento integration
6. Confirm by clicking **Apply settings**.
7. On the list of API keys, double-click the key you created.
8. On the **General** section, click **Show**.
9. Copy the API key and paste to the notepad.
Details of the API key
### Add the tracking code
---
1. In Synerise, go to **Settings > Tracking codes** and add a tracking code.
Full instruction on adding tracking codes is available at the [link](/developers/web/installation-and-configuration).
You can select any feature configuration for the tracking code.
2. Copy the tracking code and save it in the notepad.
A blank tracking code form
## Configuration in the Magento panel
---
Log in to your administration panel in Magento and perform the steps described below:
### Download the Synerise plugin
---
To download the Synerise plugin in Magento, click [here](https://github.com/Synerise/magento2-integration)
### Configure the Synerise plugin
---
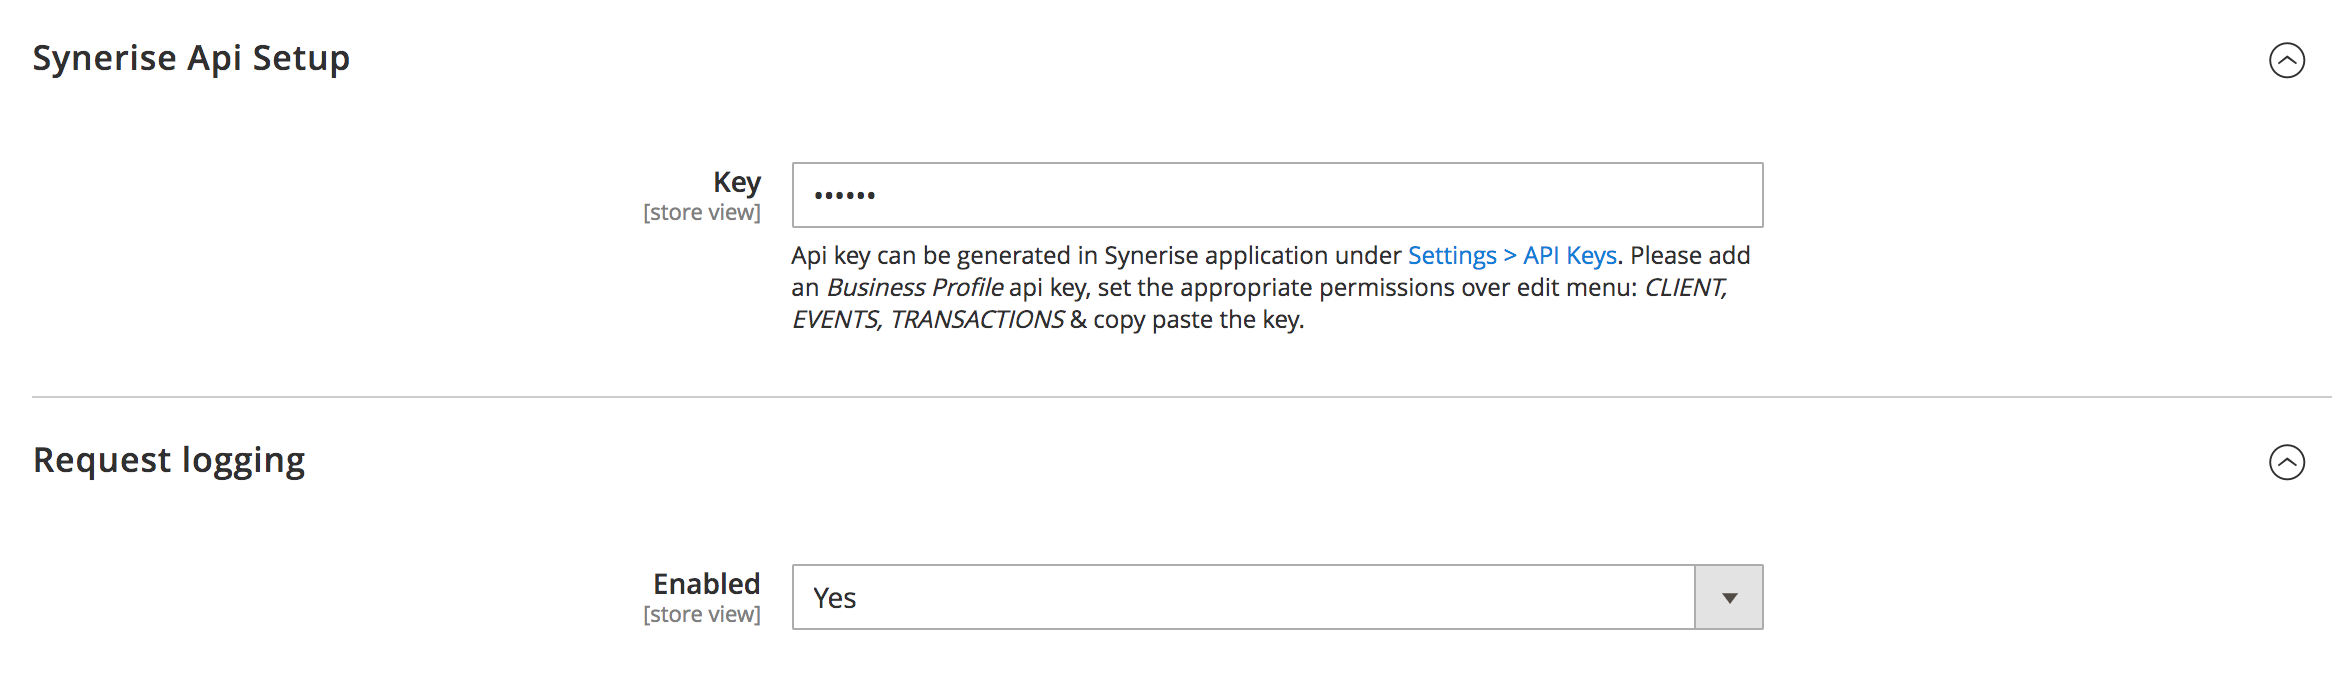
1. In your Magento administration panel, go to **Stores > Configuration > Synerise**.
2. In the **Synerise API** section, paste the API key from the [Create an API key](#create-an-api-key) procedure. The key is required to enable communication with the Synerise API.
3. To save full request and response from Synerise API, set the **Request logging** option to **Yes**.
It is recommended to enable this option only while debugging.
A blank tracking code form
3. Enable tracking of the events (in the next step, you will define the scope of tracked events). In the **Page tracking** section:
1. Set the **Enabled** option to **Yes**.
2. Paste the tracking code you added in the [Add the tracking code](#add-the-tracking-code) procedure.
3. **Recommended**: Set the **Open Graph** option to **Yes**.
**Result**: Magento sends the following OG tags to Synerise:
- `product:retailer_part_no` which is the SKU of the item,
- `product:original_price:amount` which is the original price (before discounts, if any)
- `product:price:amount` which is the current price of the item
- `product:category` which is the category of the item
You can switch off this option, however if the page misses `product:retailer_part_no`, you won't be able to track visits to product pages.
A blank tracking code form
3. Select the scope of tracked events. In the **Event tracking** section:
1. Set the **Enabled** option to **Yes**.
2. Select the events (`command + click` or `ctrl + click`) that will be tracked by Synerise and available in the [customers' profiles](/docs/crm/crm-profile). You can choose from the following events:
We recommend selecting all the events.
| Event | Description | Event name in Synerise |
|------------------------------------|------------------------------------------------------------------------------------------------------------------------------------------------------|-------------------------------------|
| Customer login | This event is generated when a customer logs in to their account on your website. | client.login |
| Customer logout | This event is generated when a customer logs out from their account on your website. | client.logout |
| Customer account edited | This event is generated when a customer makes changes to their account (for example, updates information about birthday, location, and so on). | client.updateData |
| Customer registration | This event is generated when a customer creates an account on your website. | client.register |
| Customer places order | This event is generated when a customer makes a purchase. | transaction.charge / product.buy |
| Customer adds product to cart | This event is generated when a customer adds an item to the cart. | product.addToCart |
| Customer removed product from cart | This event is generated when a customer removes an item from the cart. | product.removeFromCart |
A blank tracking code form
4. Synchronize additional data apart from those which are sent to Synerise through customer actions (synchronization is triggered by cron jobs). Go to the **Synchronization** section.
Synchronization is disabled by default. Before enabling, verify the configuration of each item attribute to make sure it contains all data you want to include.
#### Data Synchronization
This subsection allows you to synchronize the data collected prior to integration. On the first run, the last item ID of each data type (before the integration) is recorded to mark the end of the data sets that need to be synchronized. You can also reset last ID to current one manually from integration dashboard, using the **Send additional** option.
This process is also responsible for resending the full data sets, which can be triggered through integration dashboard by using the **Resend all items** option in **Magento > Marketing > Synerise > Dashboard**.
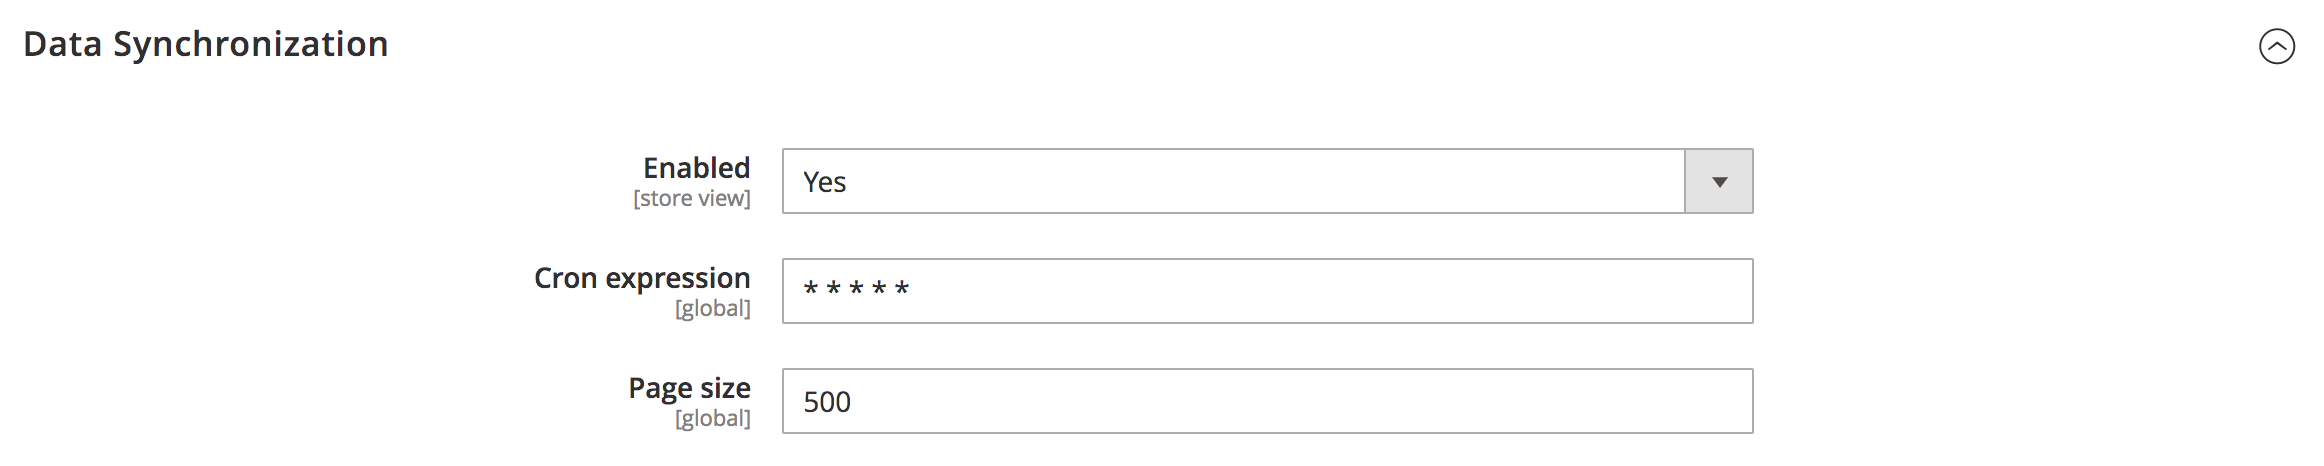
1. In the **Data Synchronization** subsection, set the **Enabled** option to **Yes**.
2. In the **Cron expression** field, enter the time of the synchronization in the form of the cron expression.
3. In the **Page size** field, enter the size of a batch of items that will be sent in a single request.
Extending the default size might speed up synchronization process, but it also means heavier database usage.
A blank tracking code form
#### Update Synchronization
This subsection allows you to synchronize ongoing item updates. It is based on the item queues, which are built by data update events (such as `product.updated` event).
It is highly recommended to keep update synchronization process running, while the data synchronization can be disabled when unused.
1. Set the **Data synchronization** option to **Yes**.
2. In the **Cron expression** field, enter the time of the synchronization in the form of the cron expression.
3. In the **Page size** field, enter the size of a batch of items that will be sent in a single request.
Extending the default size might speed up synchronization process, but it also means heavier database usage.
A blank tracking code form
#### Products
In this subsection, select the product attributes to be synchronized.
Product attributes in Magento are qualities assigned to items. You can send to Synerise all attributes, including those which are custom. The list excludes the required attributes which are sent by default:
- itemId (sku),
- price,
- productUrl,
- parendId,
- deleted,
- category,
- additionalCategories,
- image,
Before enabling, verify the configuration of each item attribute to make sure you synchronize all necessary attributes for you.
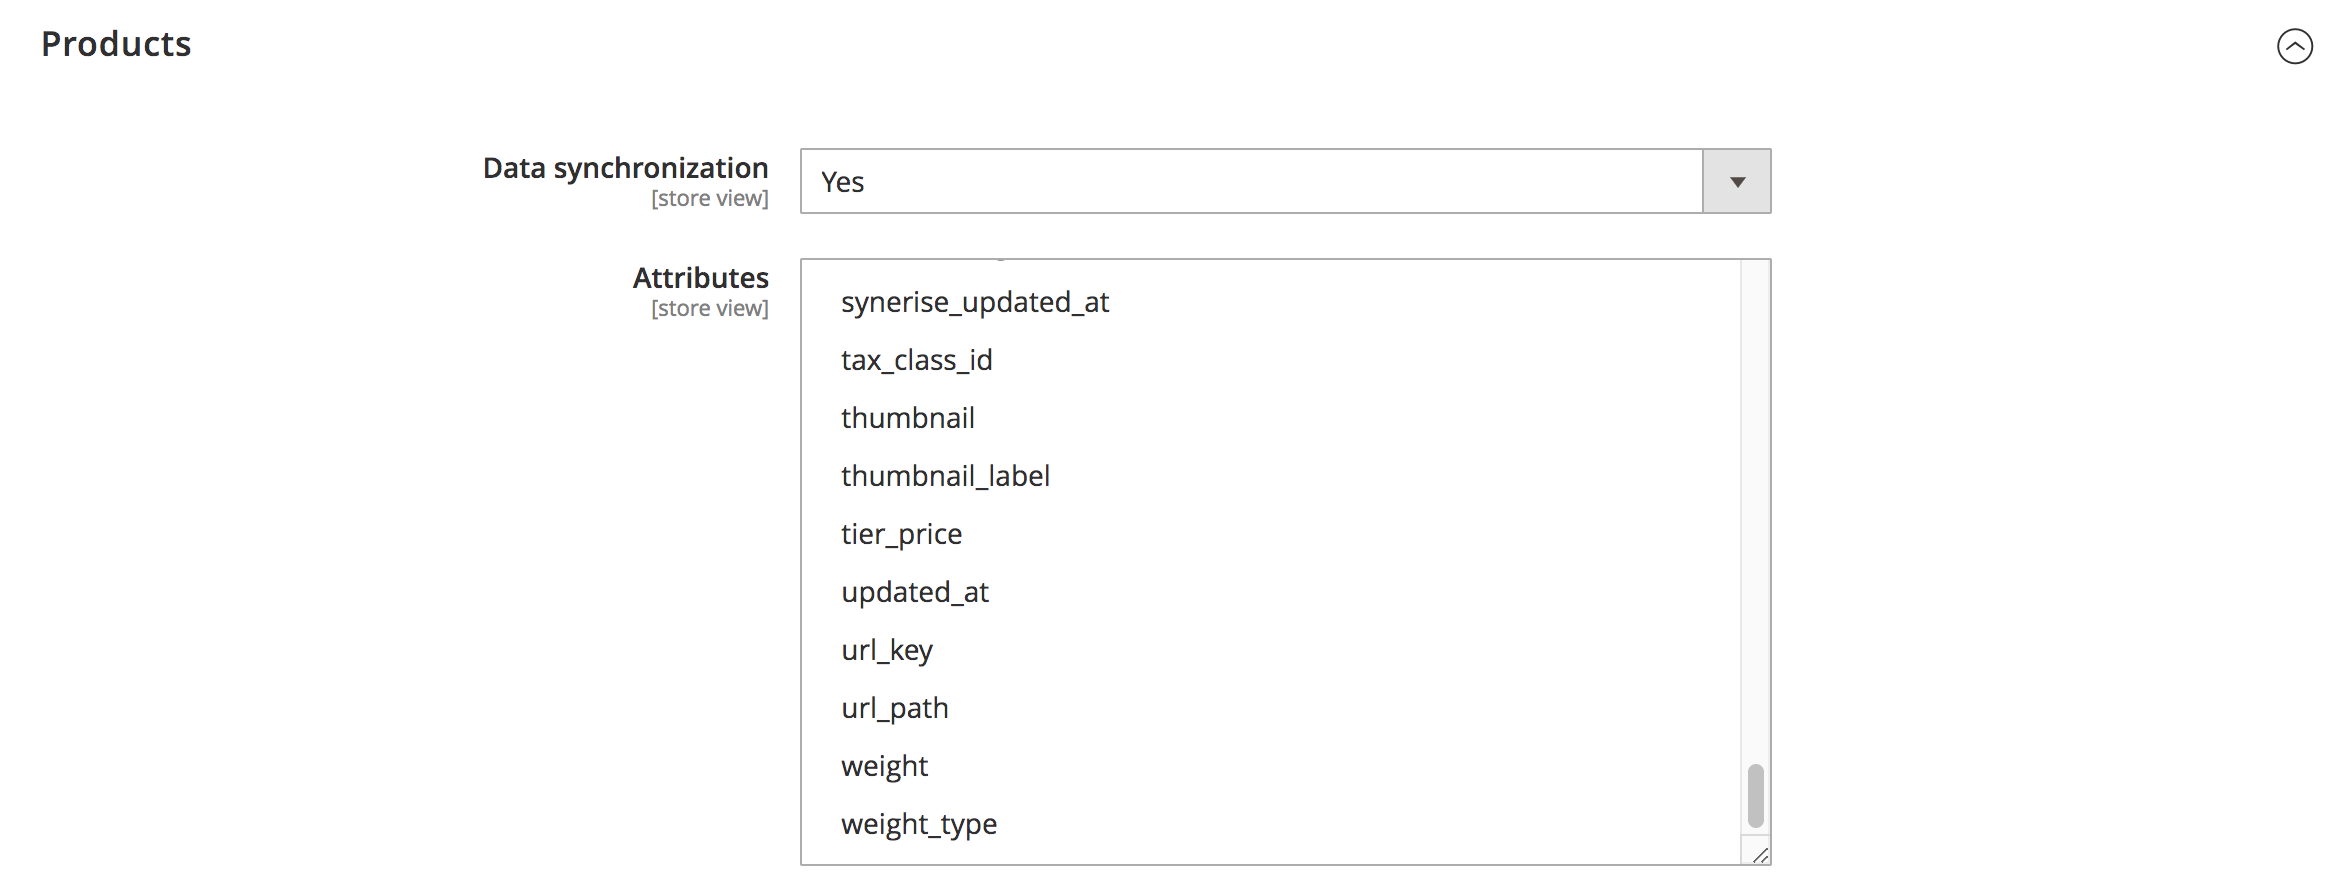
1. Set the **Data synchronization** option to **Yes**. The frequency of sending data is predefined in the **Update Synchronization** subsection.
2. Select the attributes of items (`command + click` or `ctrl + click`) which will be imported to the [catalogs](/docs/assets/catalogs) in Synerise.
**Result**: The catalog will be created automatically and it will be updated.
The changes of attribute selection will apply only for those items that haven't been sent to Synerise yet. To apply the changes to the whole item catalog, go to **Marketing > Synerise > Dashboard** and use **Resend all items** option.
A blank tracking code form
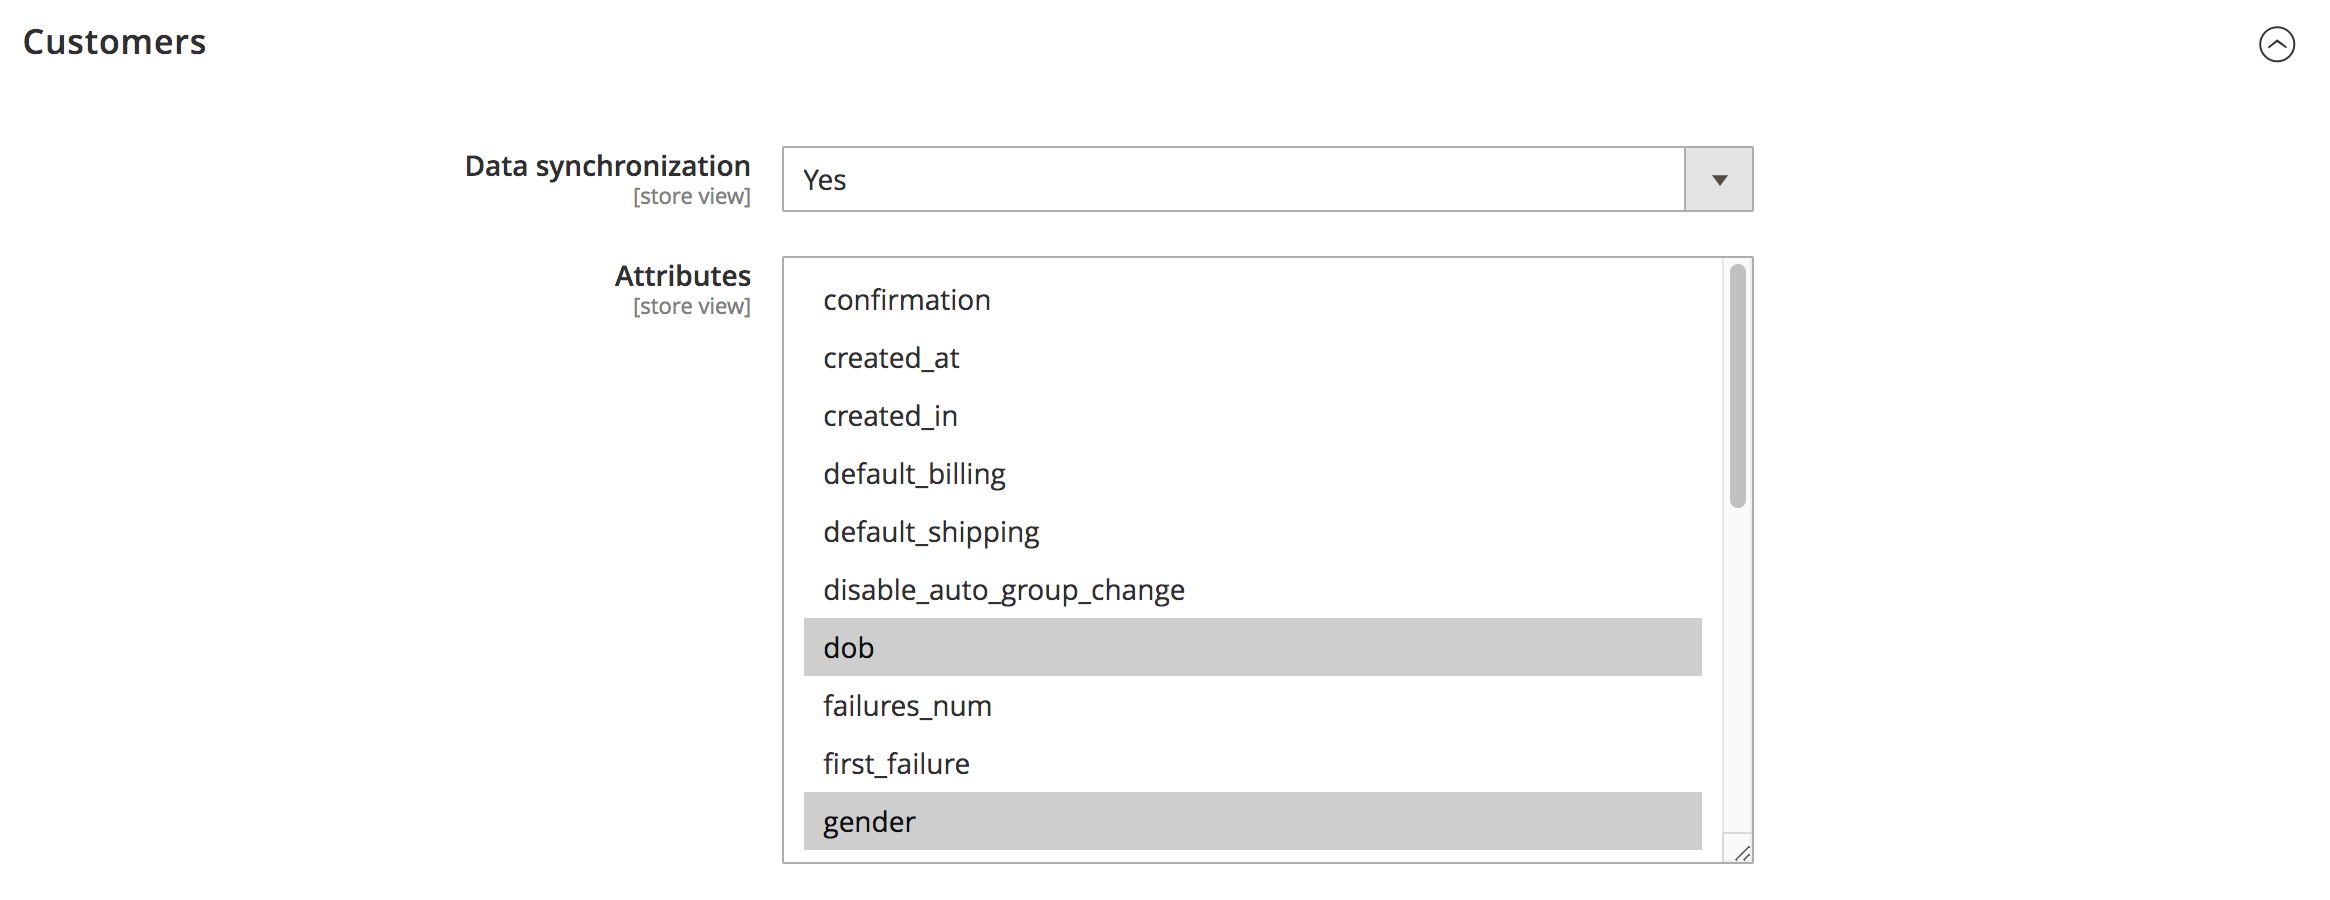
#### Customers
In this subsection, select the customer attributes to be synchronized.
Customer attributes in Magento are qualities assigned to customers. You can send to Synerise all attributes, including those which are custom. The list excludes required attributes which are sent by default:
- email,
- entity_id,
- firstname,
- lastname,
Before enabling, verify the configuration of each item attribute to make sure you synchronize all necessary attributes for you.
1. Set the **Data synchronization** option to **Yes**. The frequency of sending data is predefined in the **Update Synchronization** subsection.
2. Select the custom attributes of customers (`command + click` or `ctrl + click`) which will be imported to Synerise and available in [Profile attributes](/docs/assets/customer-properties).
The changes of attribute selection will apply only for customers who haven't been sent to Synerise yet. To apply the changes to all customers go to **Marketing > Synerise > Dashboard** and use **Resend all items** option.
A blank tracking code form
#### Orders
In this subsection, you can enable or disable sending information about orders to Synerise. This information in Synerise is stored as `product.buy`/`transaction.charge` events on the profile of a customer who placed the order.
1. Set the **Data synchronization** option to **Yes**.
A blank tracking code form
#### Subscribers
In this subsection, you can enable or disable sending information about the value of the subscription attribute of a customer. This information in Synerise is stored on the profile of a customer.
1. Set the **Data synchronization** option to **Yes**.
A blank tracking code form