| Model | Description | Location of data in Synerise |
|---|---|---|
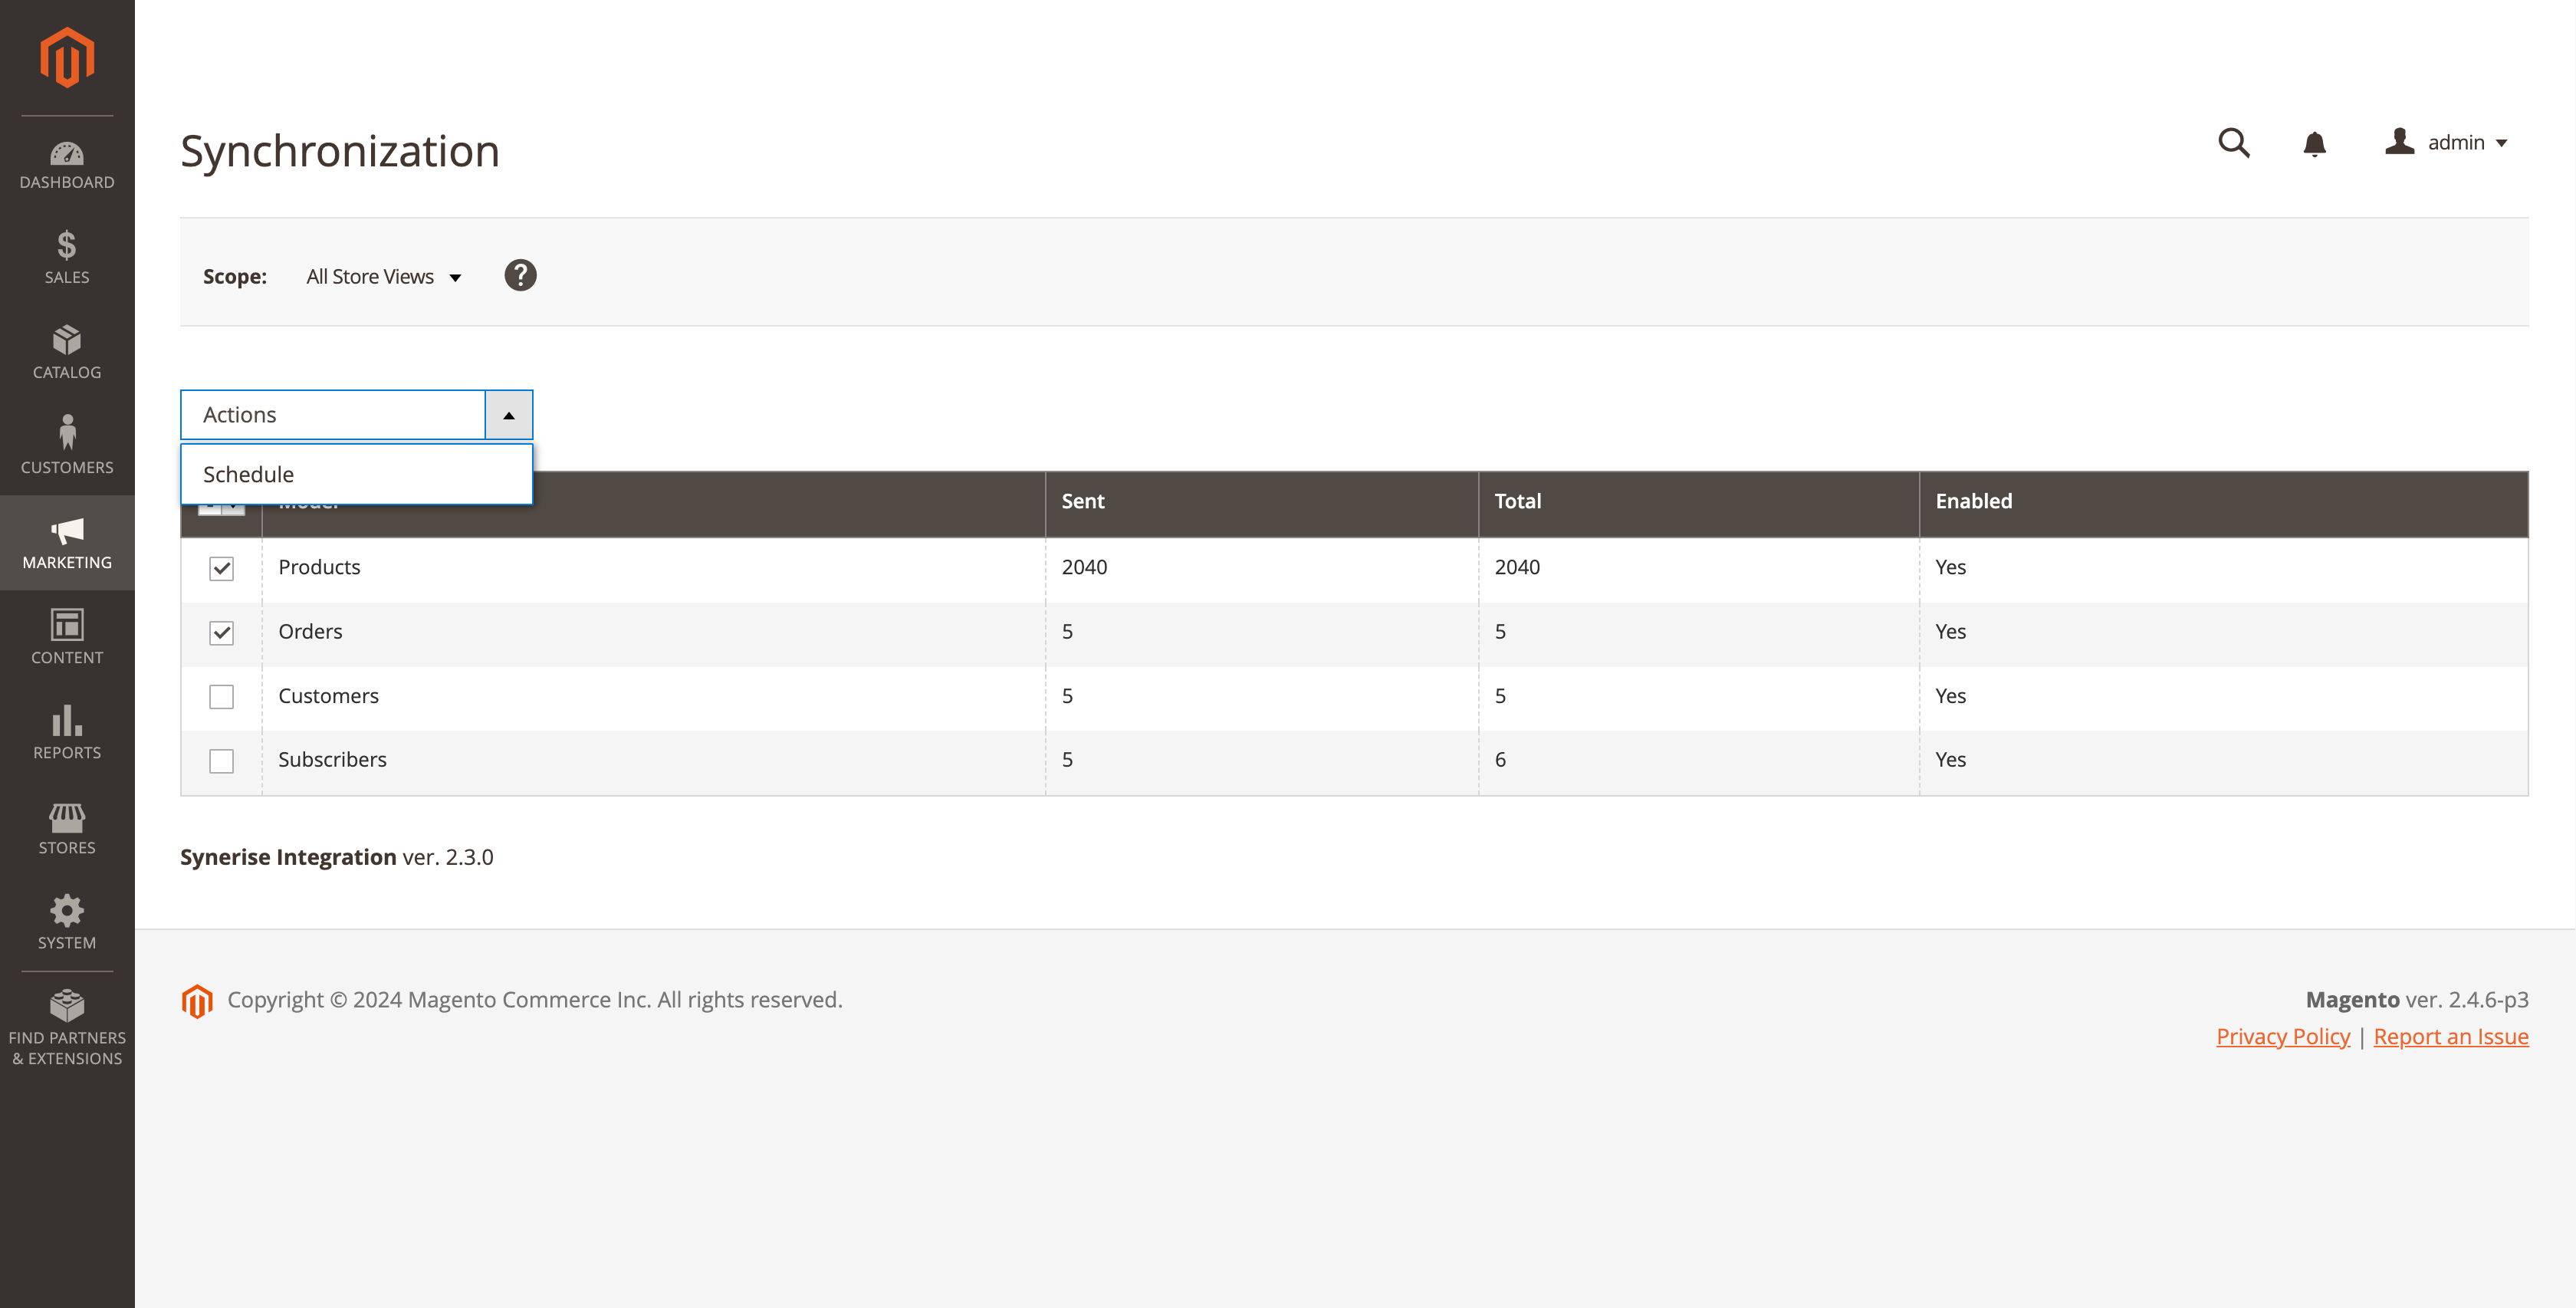
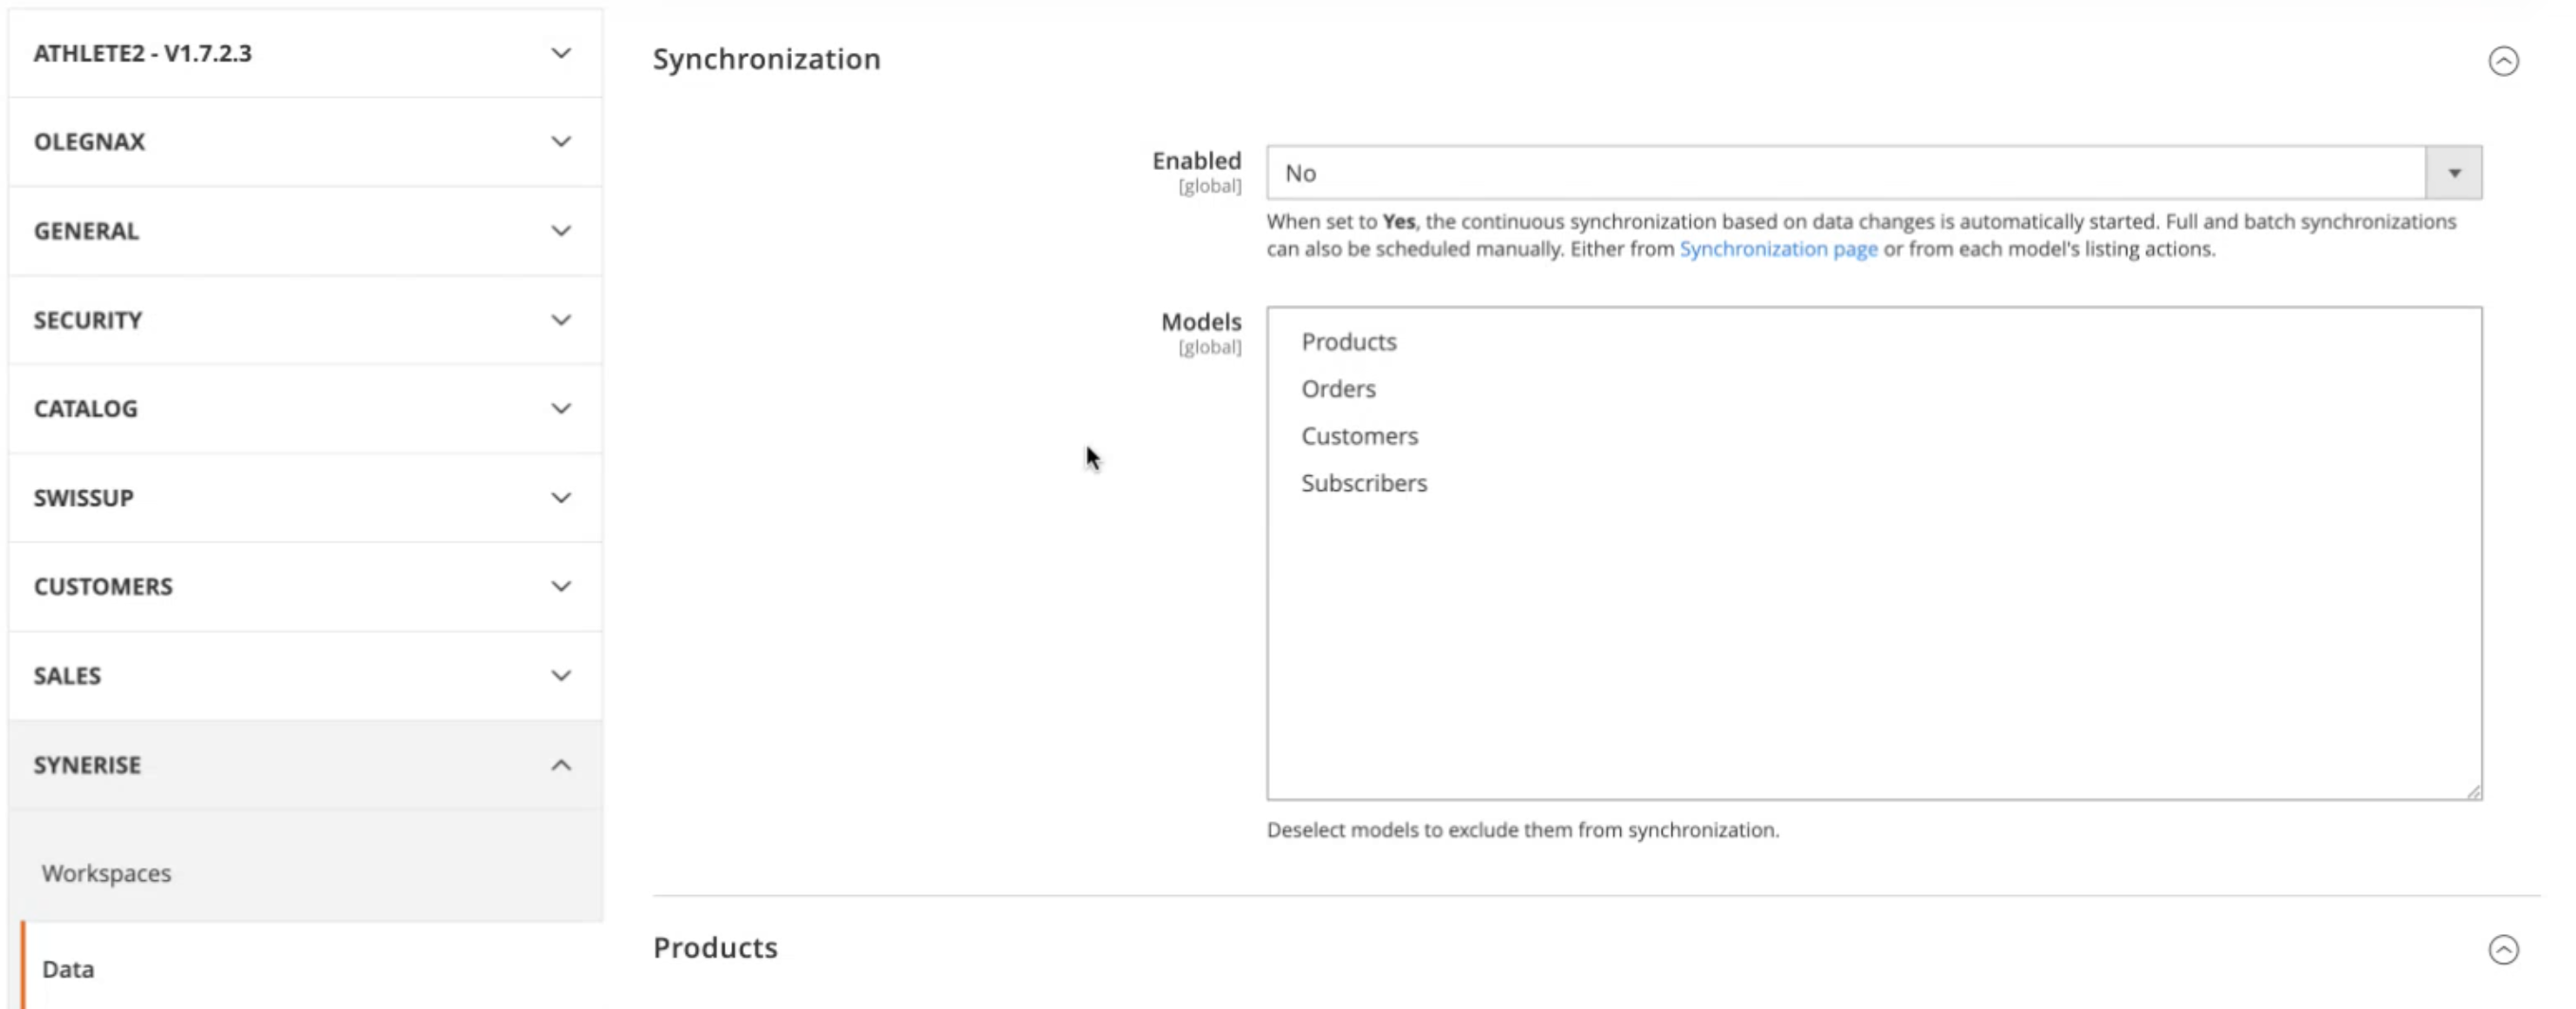
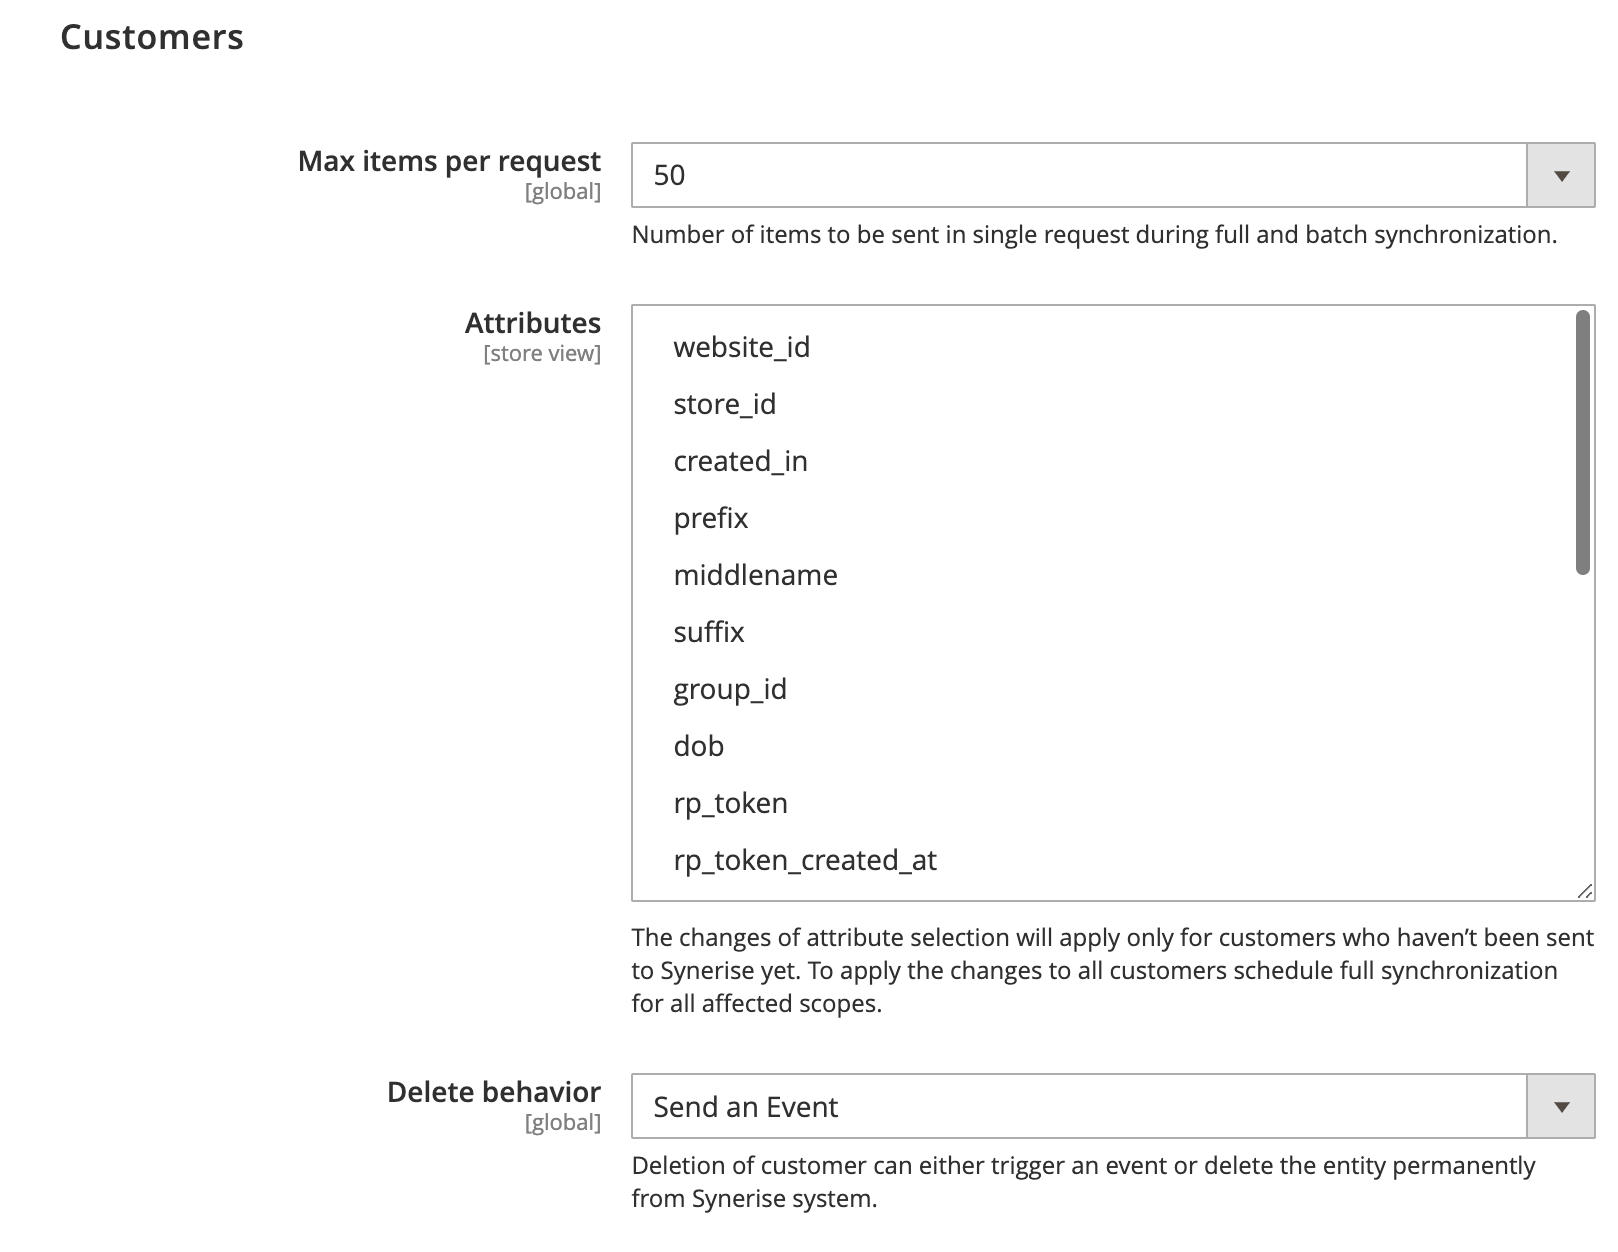
| Customers | Customer attributes in Magento are qualities assigned to customers. You can send all attributes to Synerise, including custom ones. The list in the Attributes section excludes the required attributes which are sent by default: - email, - entity_id, - firstname, - lastname, To deselect or select the attributes, go to Stores > Synerise > Configuration > Data. The changes of attribute selection will apply only for customers who haven't been sent to Synerise yet. To apply the changes to all customers, run full synchronization. | The Behavioral Data Hub |
| Orders | Information about orders are stored as product.buy/transaction.charge events. | Activity list on the profile of a customer in Behavioral Data Hub > Profiles |
| Products | Product attributes in Magento are qualities assigned to items. You can send all attributes to Synerise, including custom ones. The list in the Attributes excludes the required attributes which are sent by default: - itemId (sku), - price, - productUrl, - parendId, - deleted, - category, - additionalCategories, - image, To include tax value in a product price sent to Synerise, set the Calculate tax field to Yes. To enable sending the text values and IDs of the attribute options, set the Selectable attribute value to ID & Labels. If this option is set to ID, the values are sent to Synerise in the form of IDs, for example, for the color attribute, Magento sends the following values: 1, 2, 3 instead of black, white, grey. To deselect or select the attributes go to Stores > Synerise > Configuration > Data. The changes of products selection will apply only for products which haven't been sent to Synerise yet. To apply the changes to all products, run full synchronization. | Data Modeling Hub > Catalogs |
| Subscribers | The value of the subscription attribute of a customer. | Profile of a customer in Behavioral Data Hub > Profiles |
<config>
       <type name="Synerise\Integration\SyneriseApi\Mapper\Data\OrderCRUD">
           <plugin name="synerise_order_prepare_request" type="CompanyName\ModuleName\Plugin\OrderAttributes" />
       </type>
</config><?php
namespace CompanyName\ModuleName\Plugin;
use Magento\Sales\Model\Order;
use Synerise\ApiClient\Model\CreateatransactionRequest;
use Synerise\Integration\SyneriseApi\Mapper\Data\OrderCRUD;
class OrderAttributes
{
public function afterPrepareRequest(
OrderCRUD $subject,
CreateatransactionRequest $request,
Order $order,
?string $uuid = null,
array $snrsParams = []
): CreateatransactionRequest
{
$metadata = $request->getMetadata();
$metadata['customAttribute'] = 'Custom Value';
$request->setMetadata($metadata);
return $request;
}
}