


| Event name in VTEX | Description | Event in Synerise |
|---|---|---|
| Client login | This event is generated when a customer logs in to their account on your website. | client.login See details in Event reference |
| Client logout | This event is generated when a customer logs out from their account on your website. | client.logout See details in Event reference |
| Add to cart | This event is generated when a customer adds an item to the cart. | product.addToCart See details in Event reference |
| Remove from cart | This event is generated when a customer removes an item from the cart. | product.removeFromCart See details in Event reference |
| Cart status | This event is generated when the customer changes the contents of the cart. | cart.status See details in Event reference |
| Newsletter subscription | This event is generated when a customer enables the email marketing agreement. | marketingAgreement.turnOn See details in Event reference |
| Add to favorite | This event is generated when a customer adds an item to wishlist. | product.addToFavorite See details in Event reference |
| Remove from favorite | This event is generated when a customer removes an item from wishlist. | product.removeFromFavorite See details in Event reference |
| Page visit | This event is generated when a customer visits any page within the tracked domain. | page.view See details in Event reference |
| Product review | This is a custom event; it is generated when a logged-in customer submits a product review. If VTEX allows syncing reviews from anonymous customers, no events will be generated in Synerise due to the lack of customer identifiers needed to match reviews with customers. | product.addReview See details in Event reference |
const ThirdPartyScripts = () => {
    return (
        <script
        dangerouslySetInnerHTML={{
            __html: `
                function onSyneriseLoad() {
                    SR.init({
                        trackerKey: "XXXXXXXX-XXXX-XXXX-XXXX-XXXXXXXXXXXX",
                        plugin: "faststore",
                    }).then(function () {
                        SR.event.pageVisit().then(function () {
                            SR.dynamicContent.get();
                        });
                    });
                }
                (function(s,y,n,e,r,i,se){s["SyneriseObjectNamespace"]=r;s[r]=s[r]||[],
                s[r]._t=1*new Date(),s[r]._i=0,s[r]._l=i;var z=y.createElement(n),
                se=y.getElementsByTagName(n)[0];z.async=1;z.src=e;se.parentNode.insertBefore(z,se);
                z.onload=z.onreadystatechange=function(){var rdy=z.readyState;
                if(!rdy||/complete|loaded/.test(z.readyState)){s[i]();z.onload = null;
                z.onreadystatechange=null;}};})(window,document,"script", "//web.snrbox.com/synerise-javascript-sdk.min.js", "SR", "onSyneriseLoad");
            `,
        }}
        />
    )
    }
    export default ThirdPartyScripts
{
          "id":"{!id}"
}{
"id":"{!id}"
}{
"email":"{!email}",
"userId": "{!userId}"
}In the administration panel, select Apps > App Management.
On the list of installed apps, locate the Synerise Integration plugin.
Results:

On the Synerise Integration plugin, click Settings.
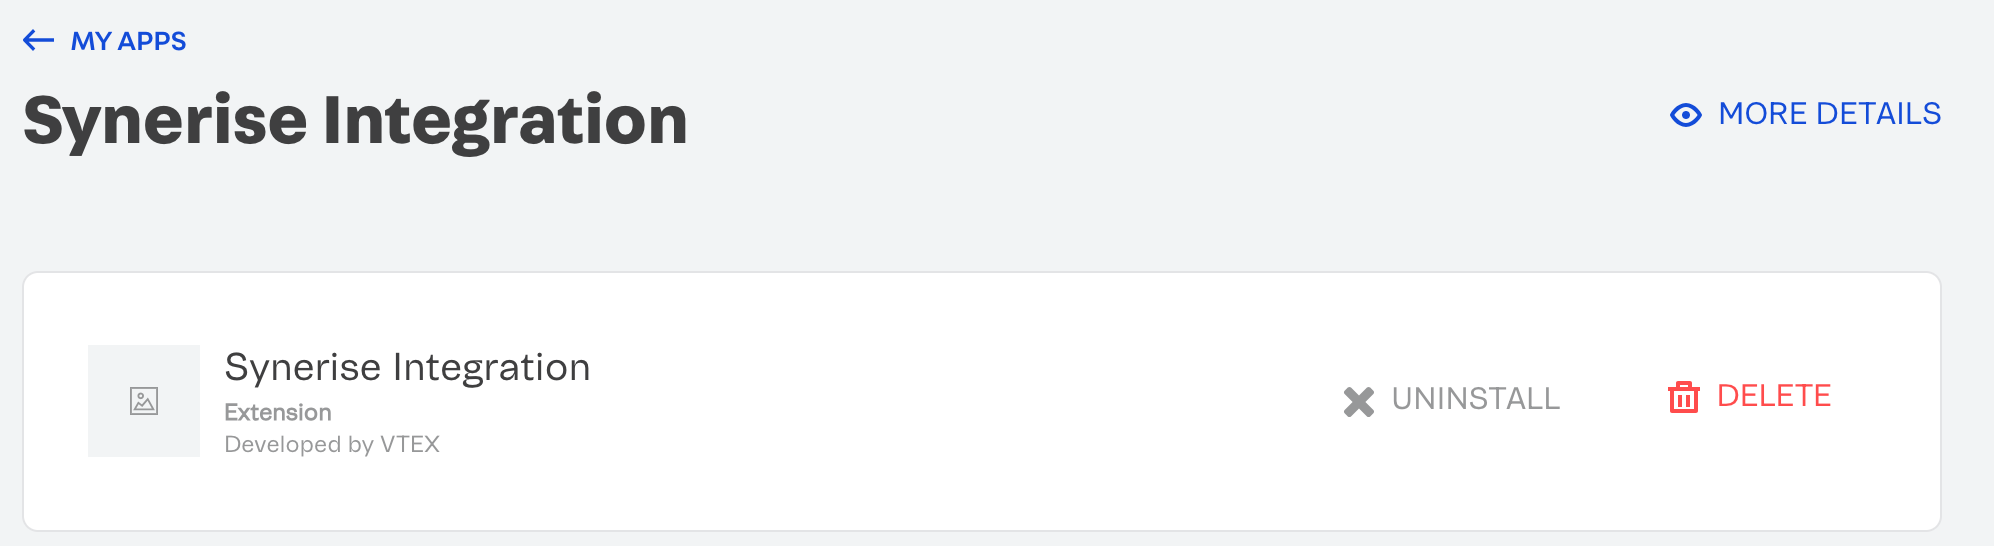
Click Delete.
Result: A pop-up appears.
On the pop-up, confirm the action by clicking Delete.
vtex uninstall synerisepartnerar.synerise-integration{
"paymentConfiguration": {
"requiresAuthenticationForPreAuthorizedPaymentOption": false,
"allowInstallmentsMerge": null,
"blockPaymentSession": null,
"paymentSystemToCheckFirstInstallment": null,
"defaultPaymentSystemToApplyOnUserOrderForm": null,
"alwaysShowMarketplacePaymentSystems": false
},
"taxConfiguration": null,
"minimumQuantityAccumulatedForItems": 1,
"decimalDigitsPrecision": 2,
"minimumValueAccumulated": null,
"apps": [
{
"fields": [
"snrs_params",
"uuid",
"source"
],
"id": "synerise",
"major": 1
},
{
"fields": [
"cartEtag"
],
"id": "faststore",
"major": 1
}
],
"allowMultipleDeliveries": true,
"allowManualPrice": null,
"savePersonalDataAsOptIn": false,
"maxNumberOfWhiteLabelSellers": null,
"recaptchaValidation": "vtexcriteria",
"recaptchaMinScore": null,
"recaptchaKeys": null,
"maskStateOnAddress": true,
"enableSecureCookies": true,
"useOwnershipCookie": null,
"ignoreProfileData": null,
"useIndividualShippingEstimates": false
}