
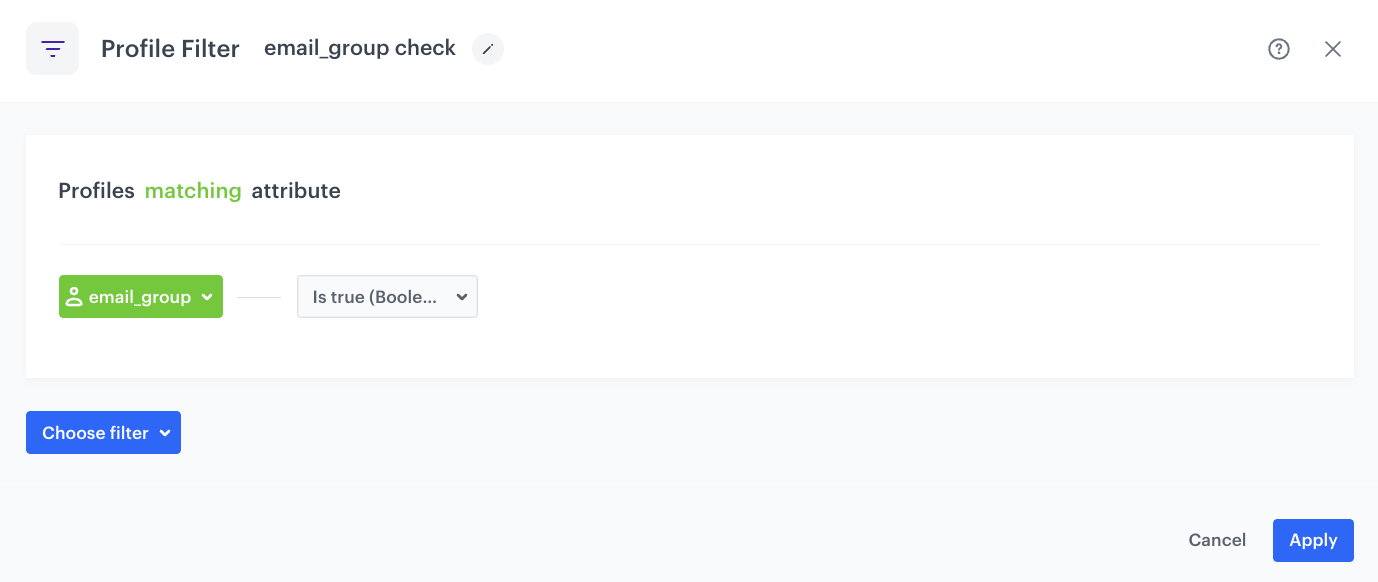
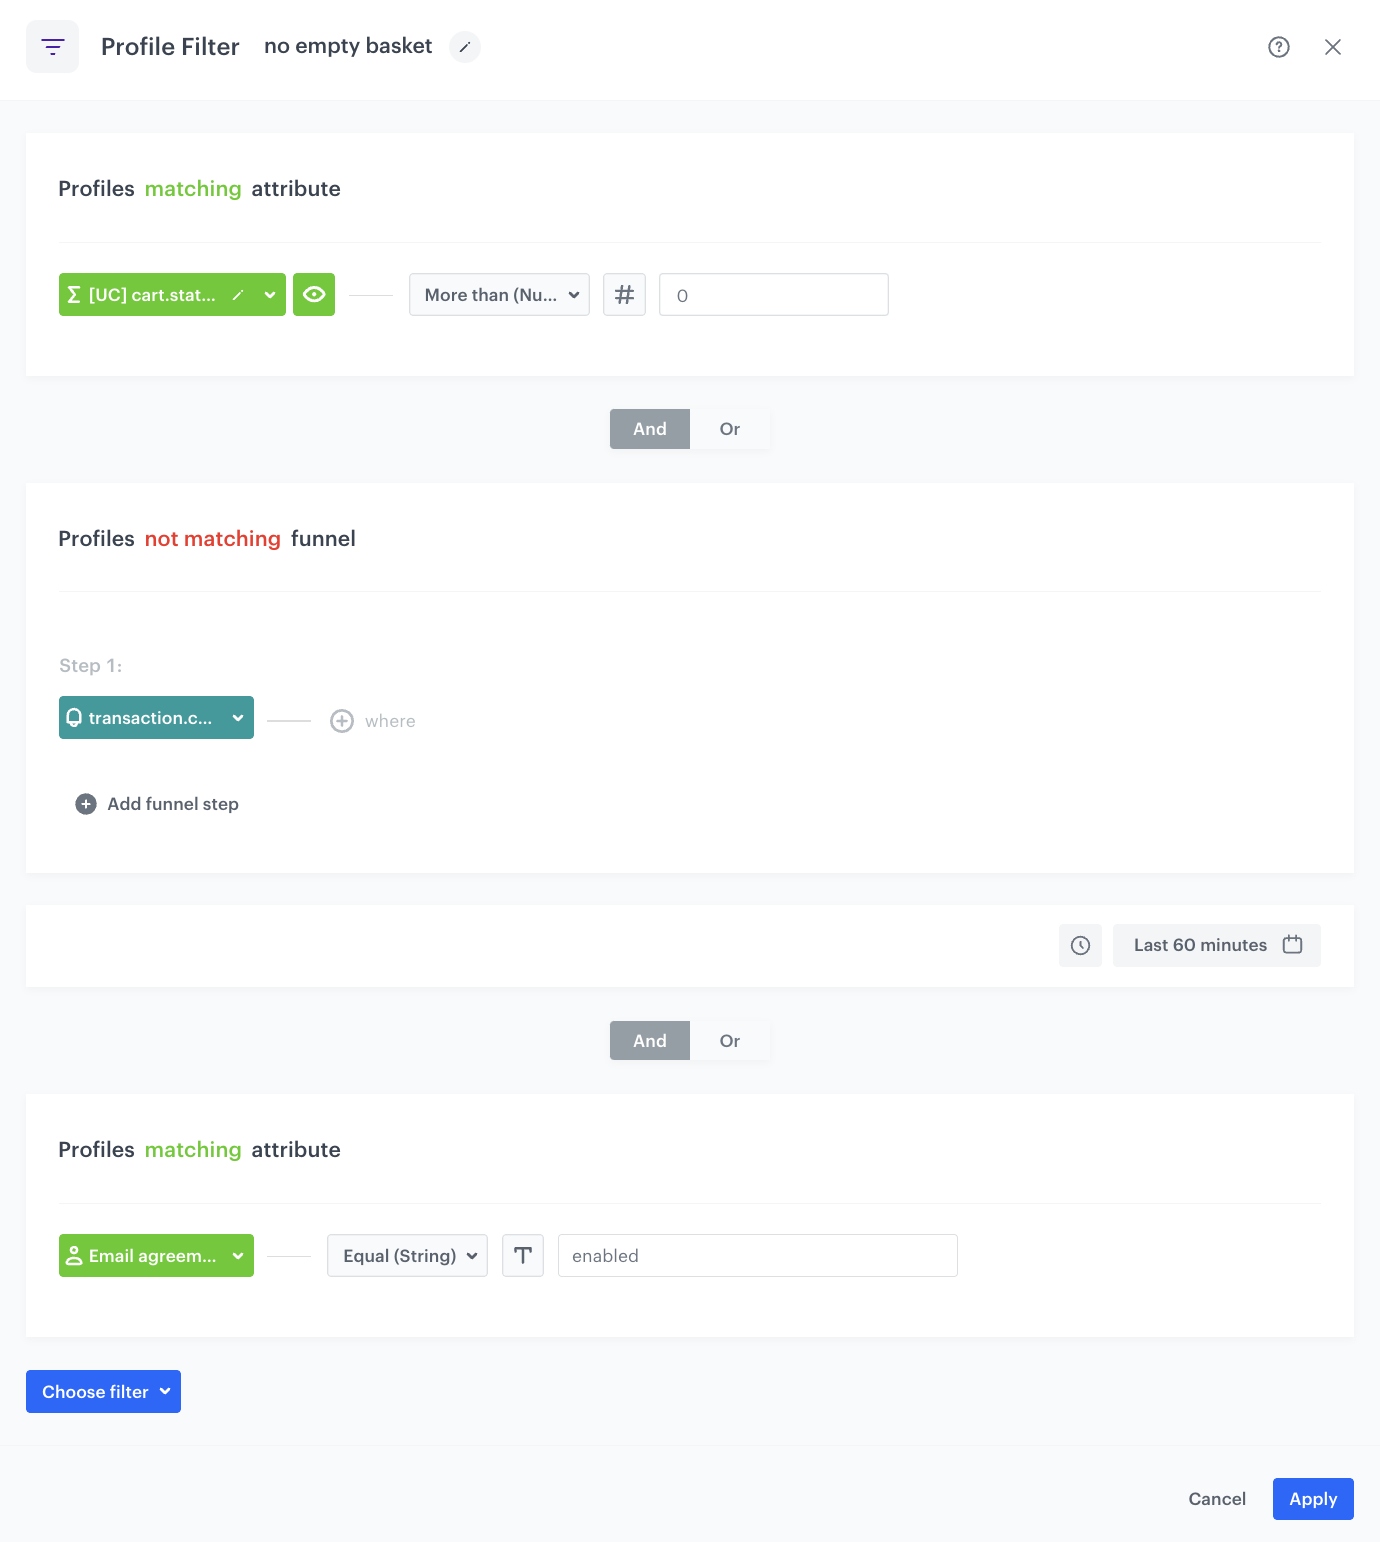
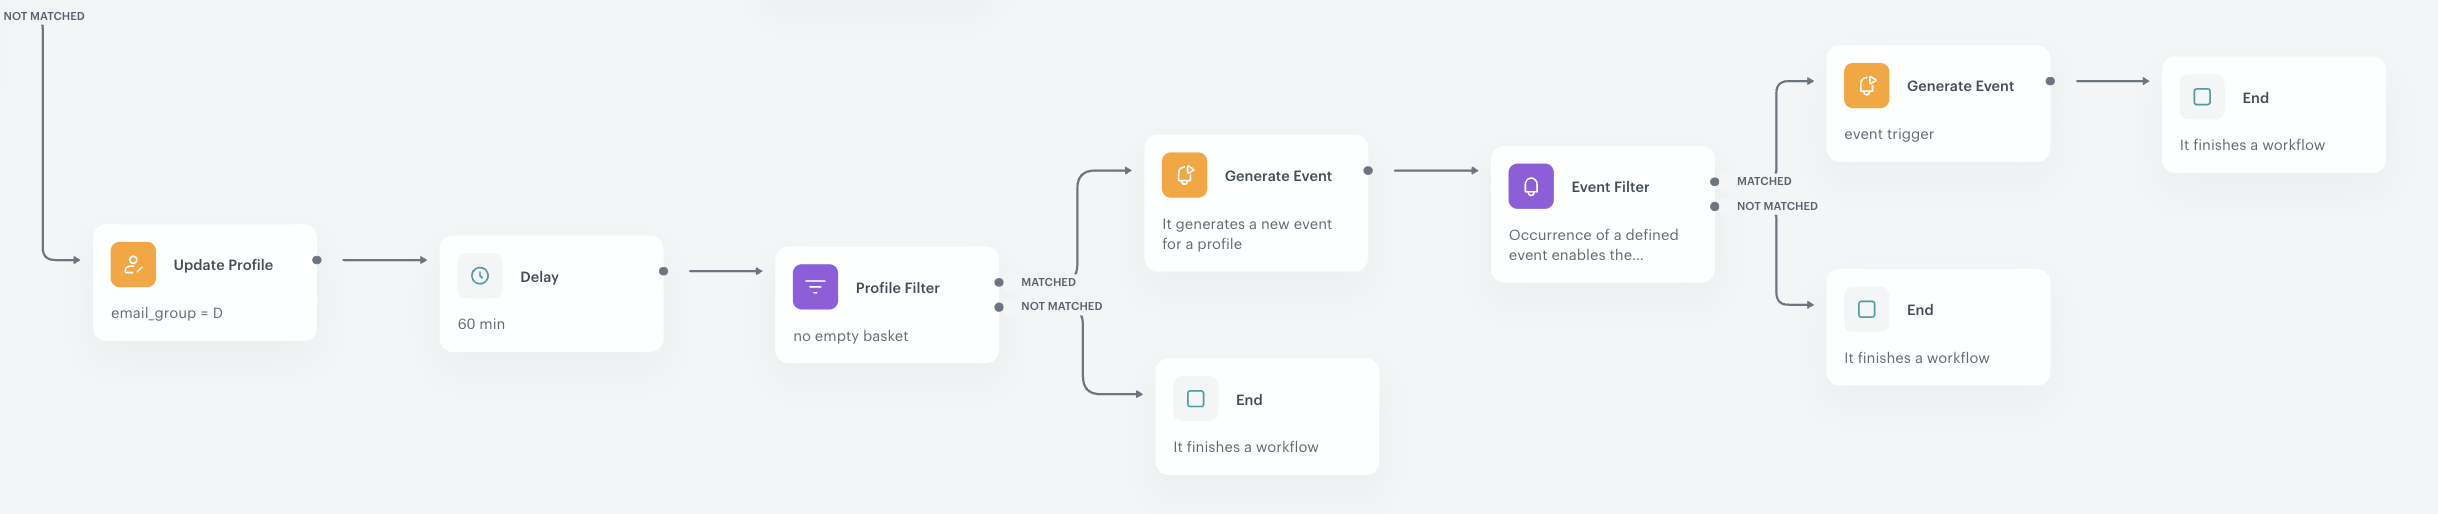
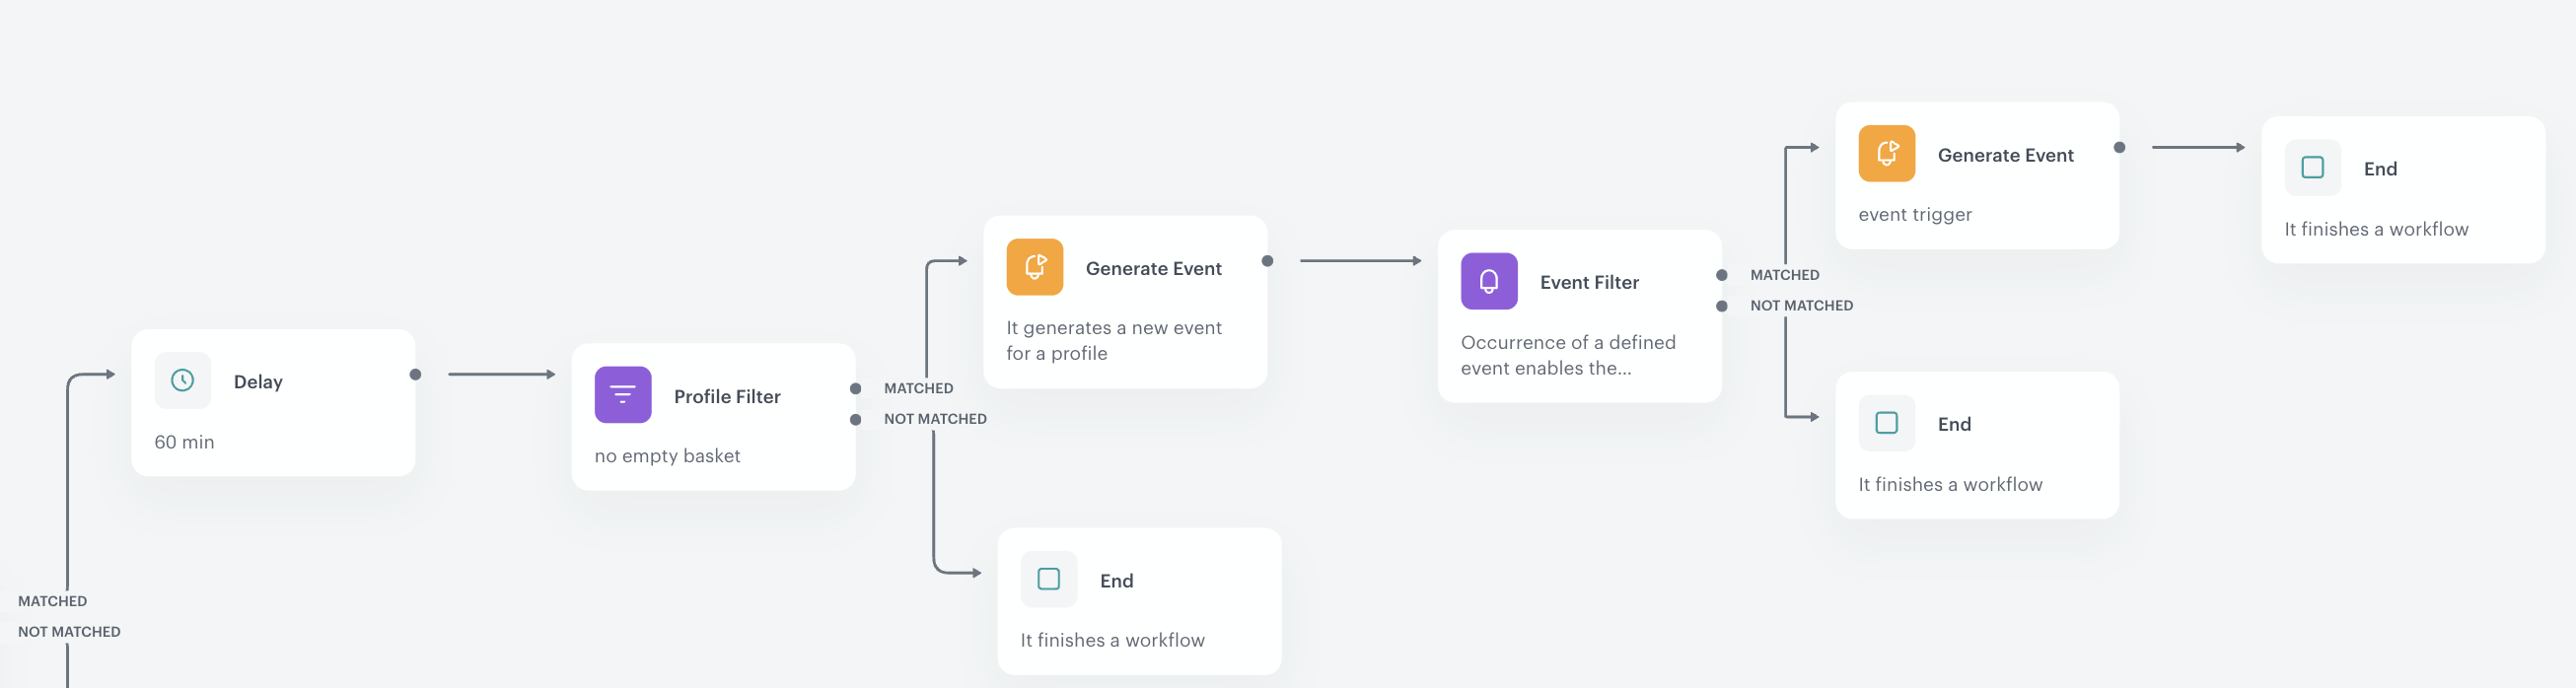
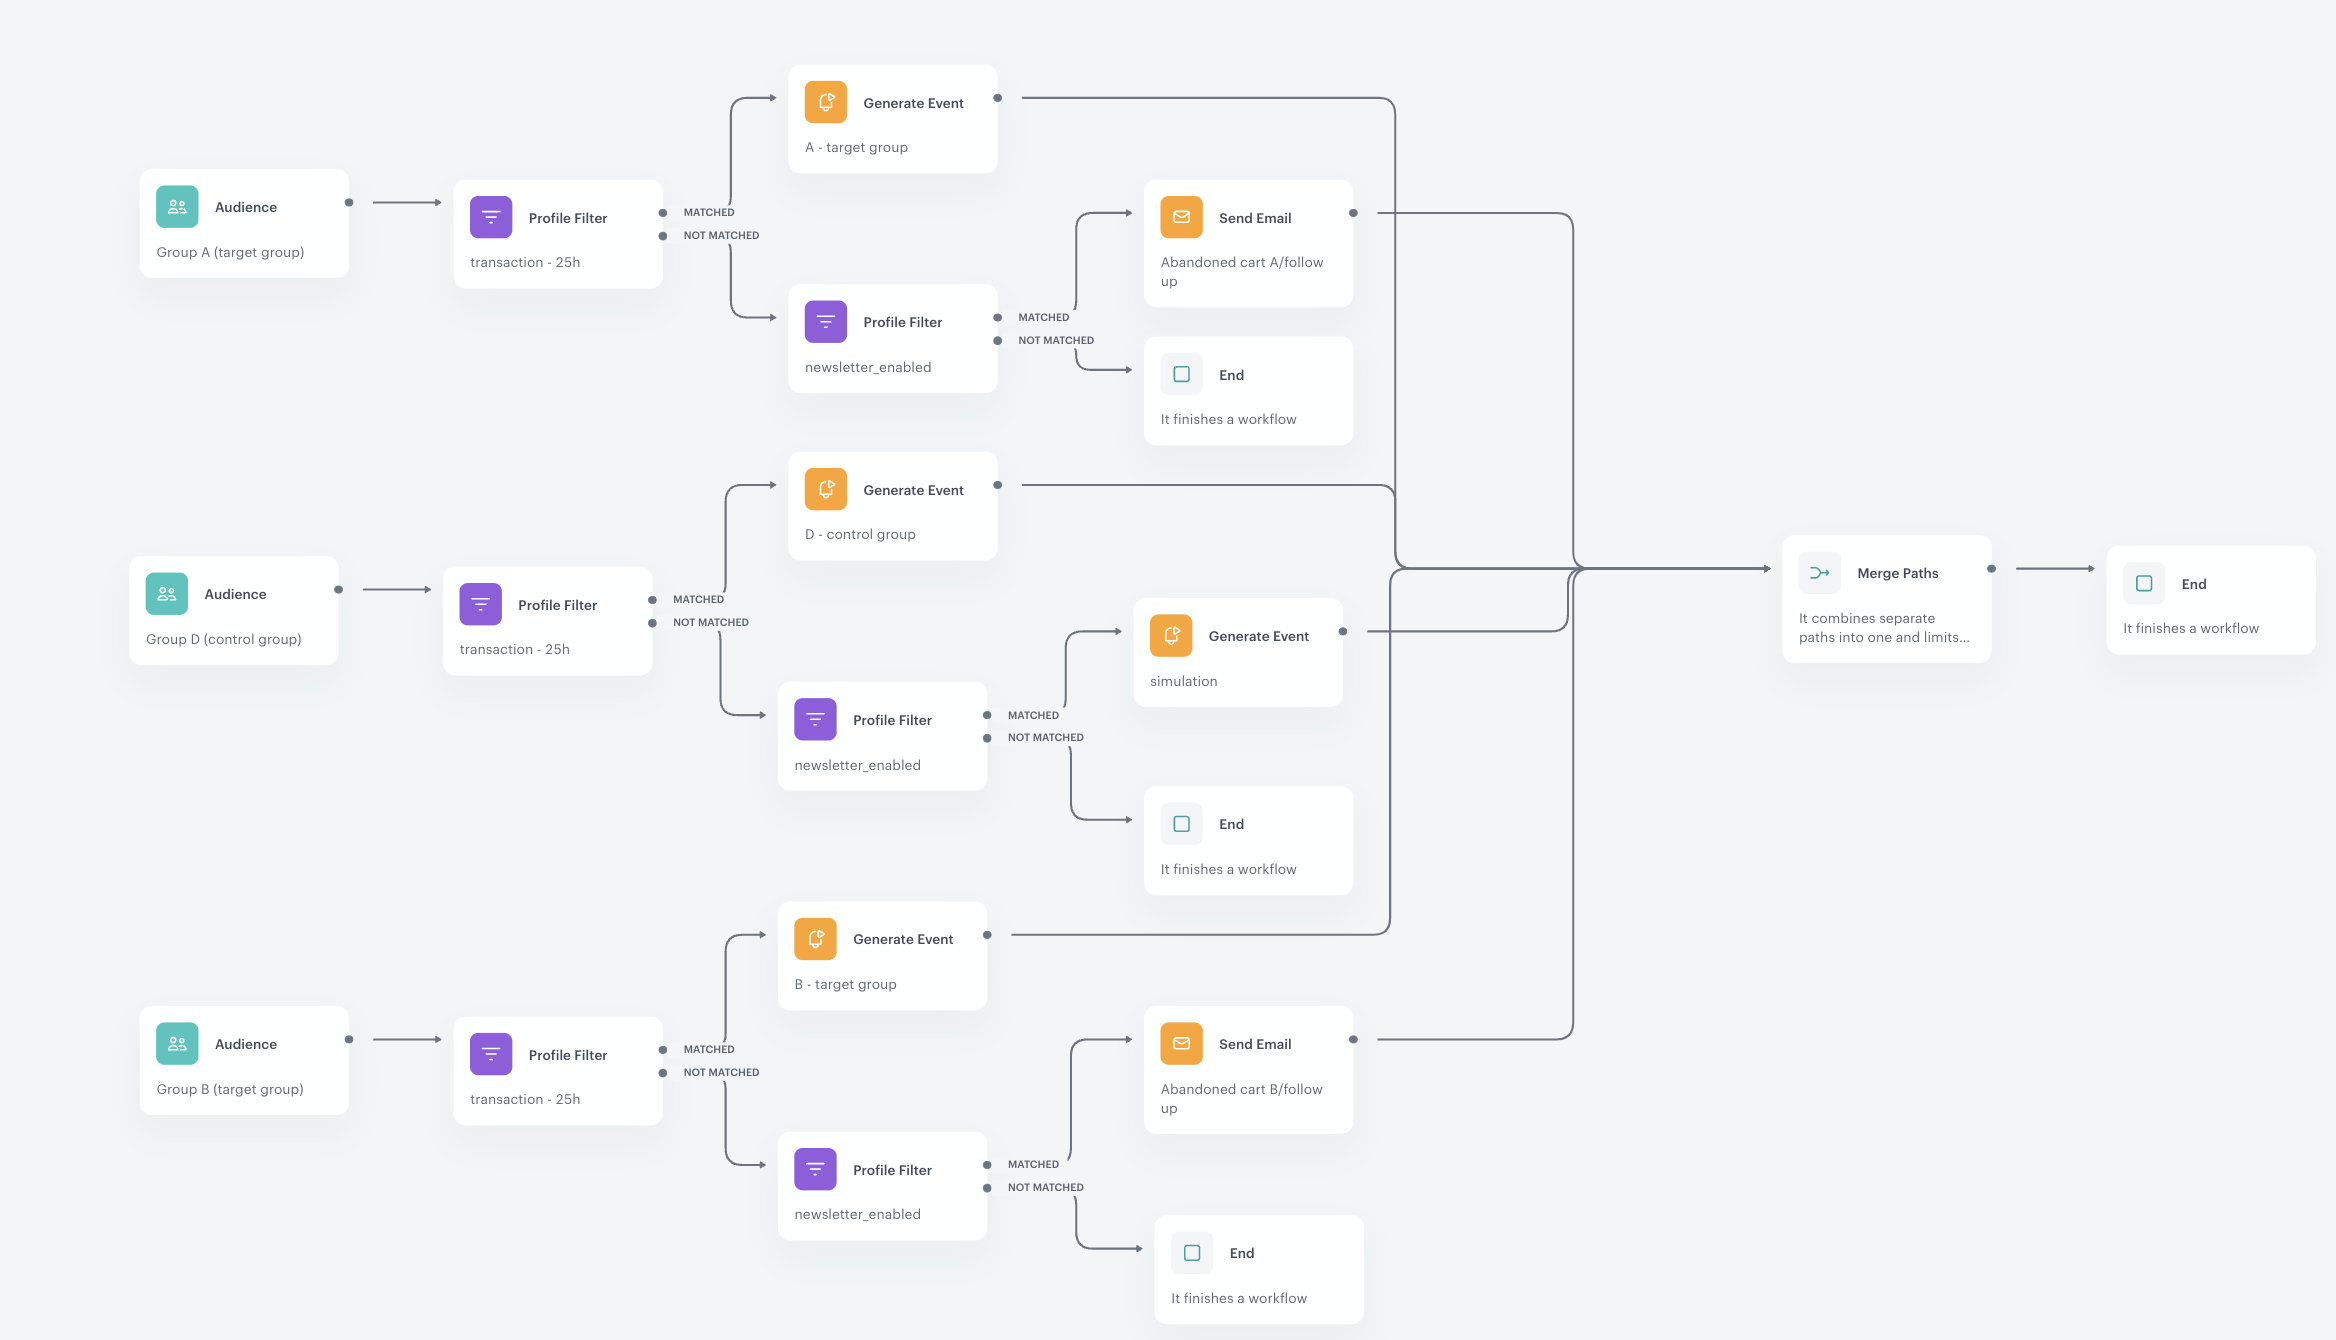
The dispatcher is essentially a piece of software that intelligently manages content distribution. It uses the DC template, which is like sets of rules, to determine which content to display to different users.
Behind the scenes, this dispatcher employs JavaScript. JavaScript code within the template dynamically updates the webpage based on predefined user allocations. This means that when someone visits the webpage, the dispatcher instantly decides which version of content they should see, whether it's 'A' or 'B,' according to the rules set in the DC template.
Moreover, it attaches a special 'data-test-snrs' attribute to each user's experience. This attribute acts as a marker, helping us later identify which version of content each user was exposed to. This kind of tracking is valuable for understanding how different messages perform and for tailoring future interactions based on users' previous experiences.


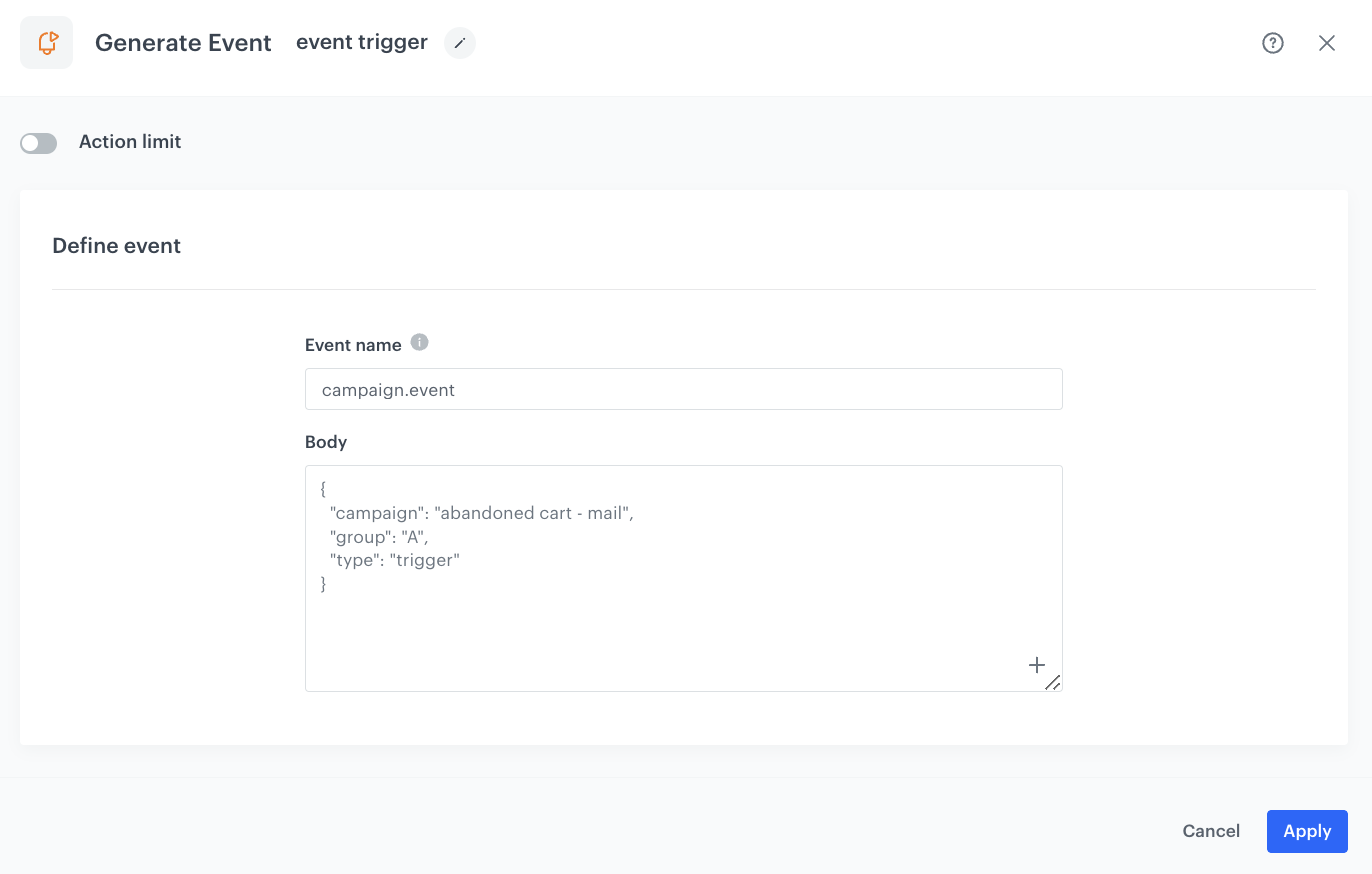
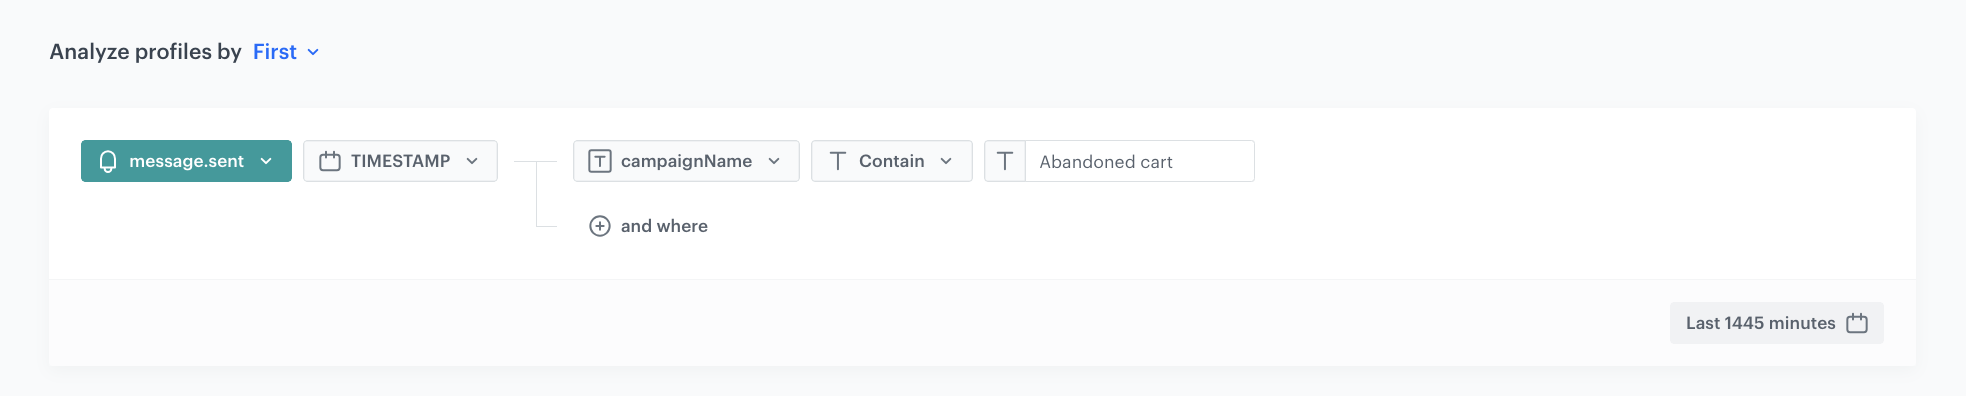
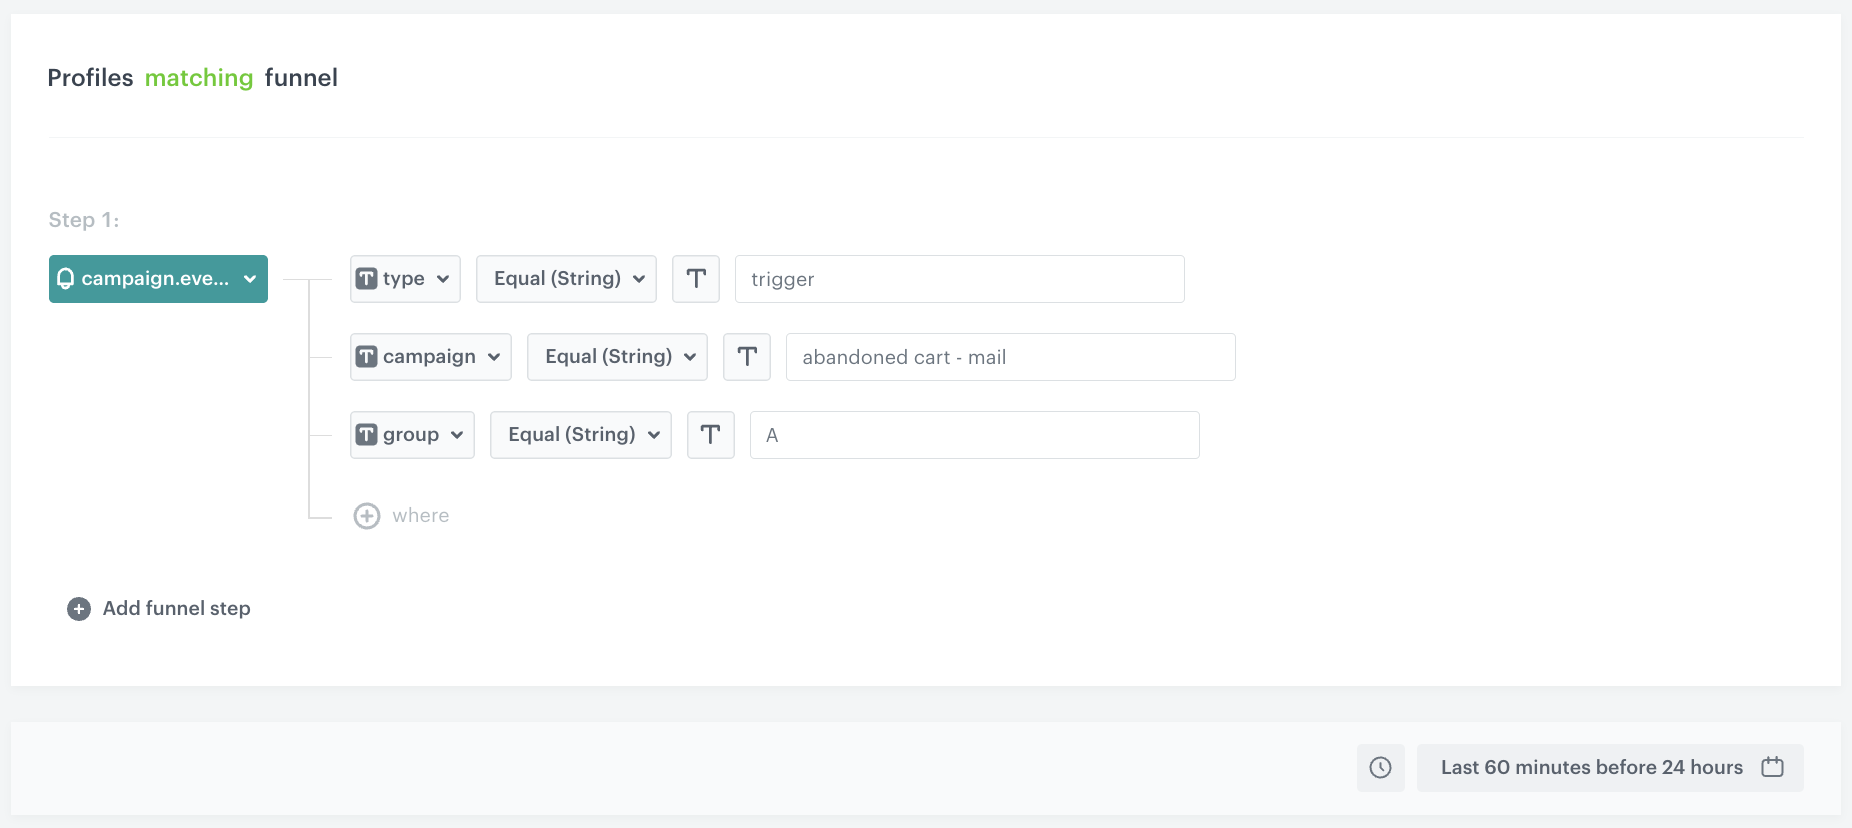
{
     "campaign": "abandoned cart - mail",
     "group": "A",
     "type": "trigger"
   }


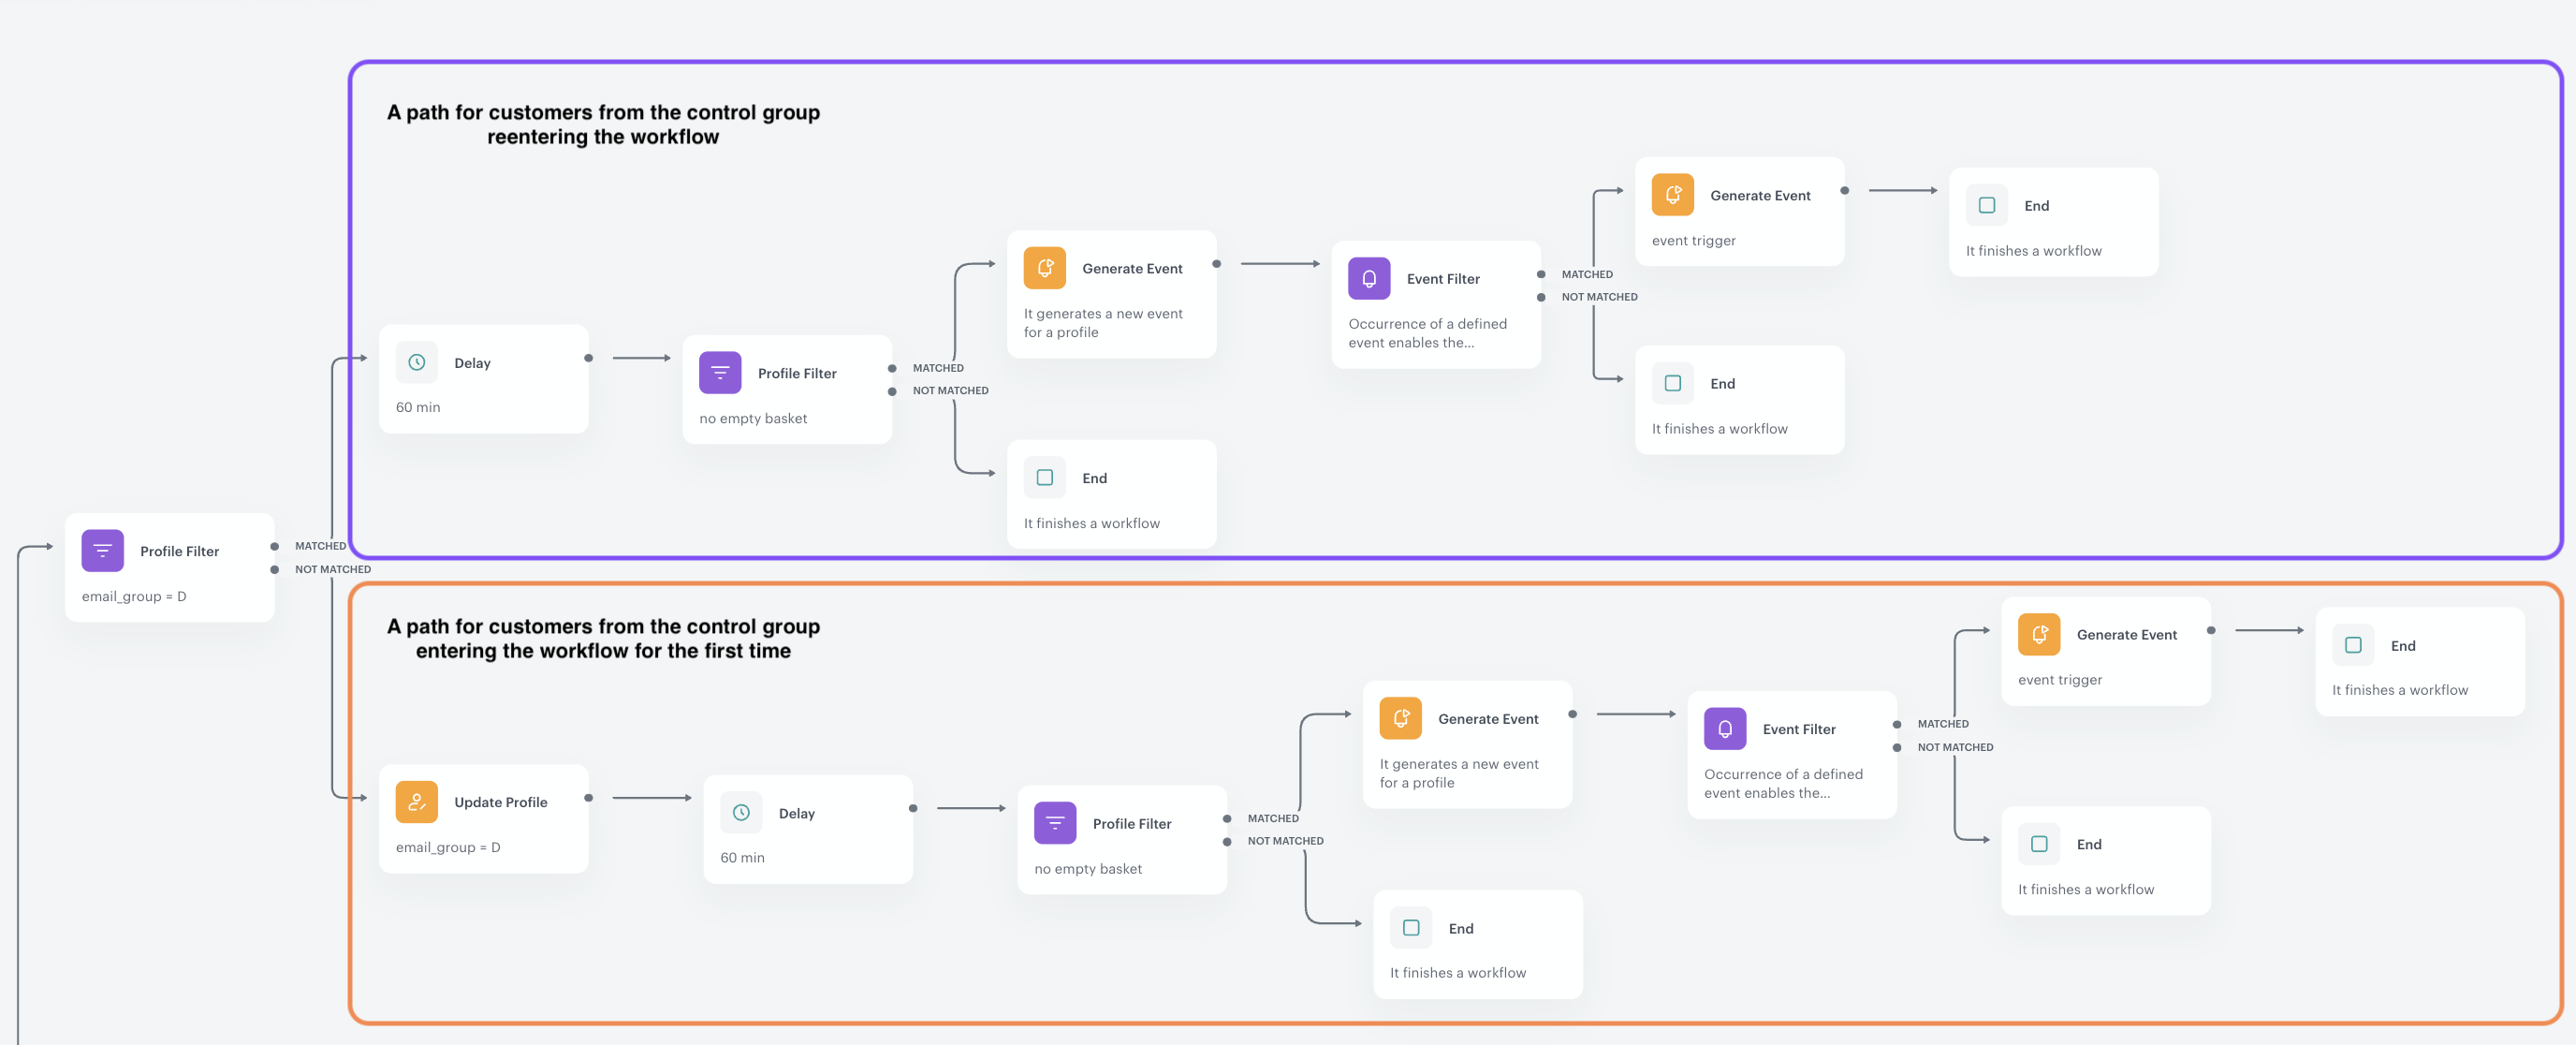
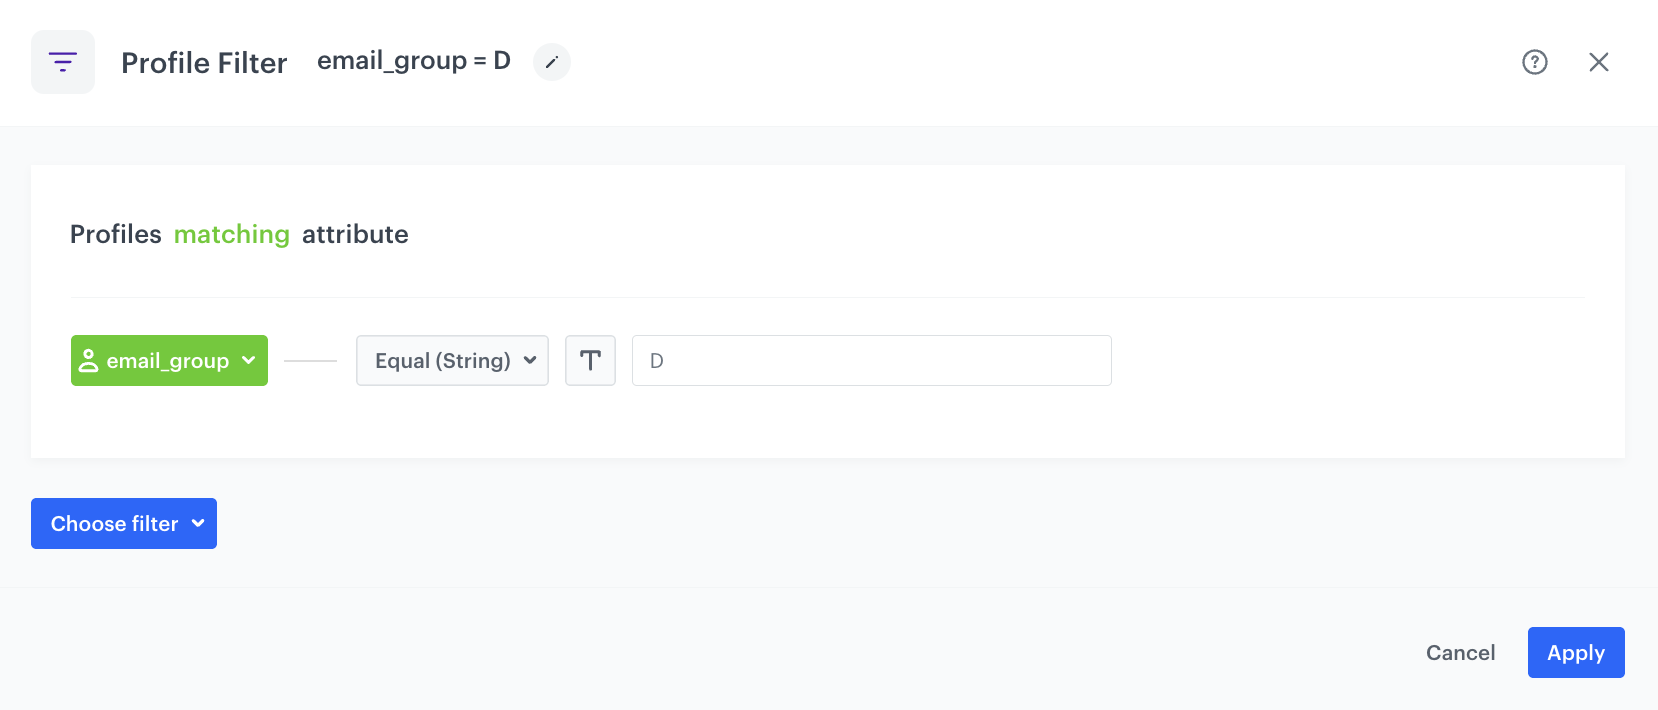
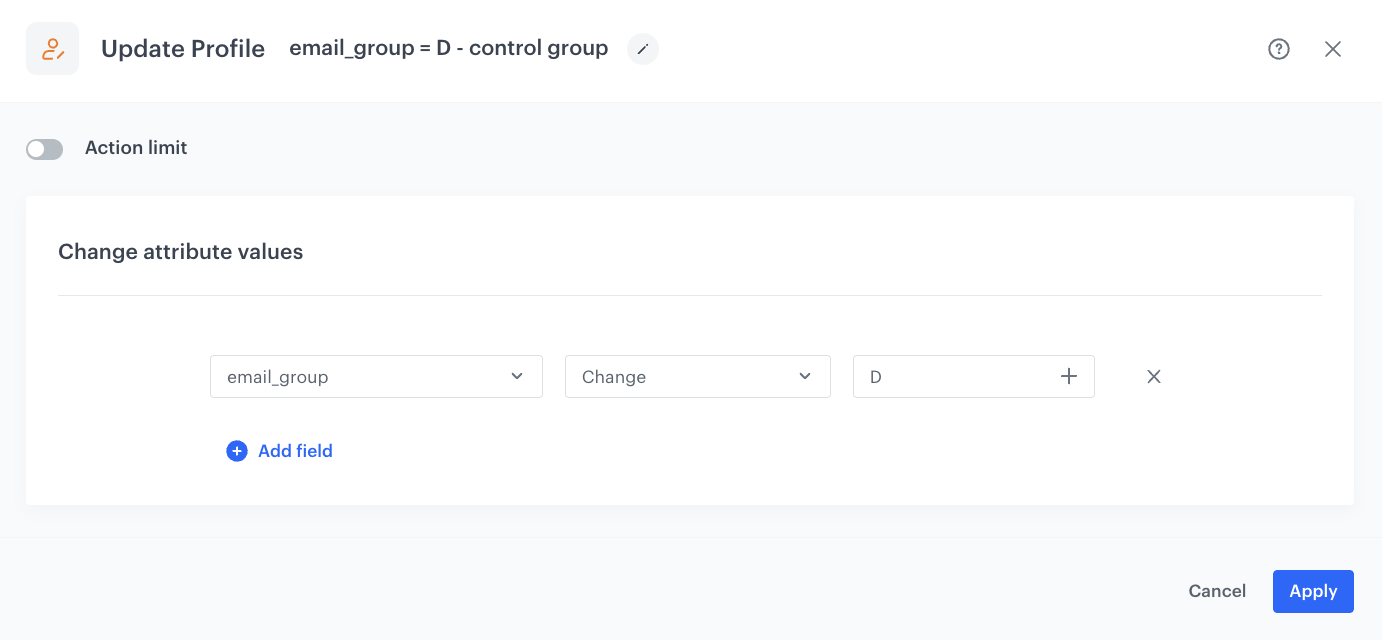
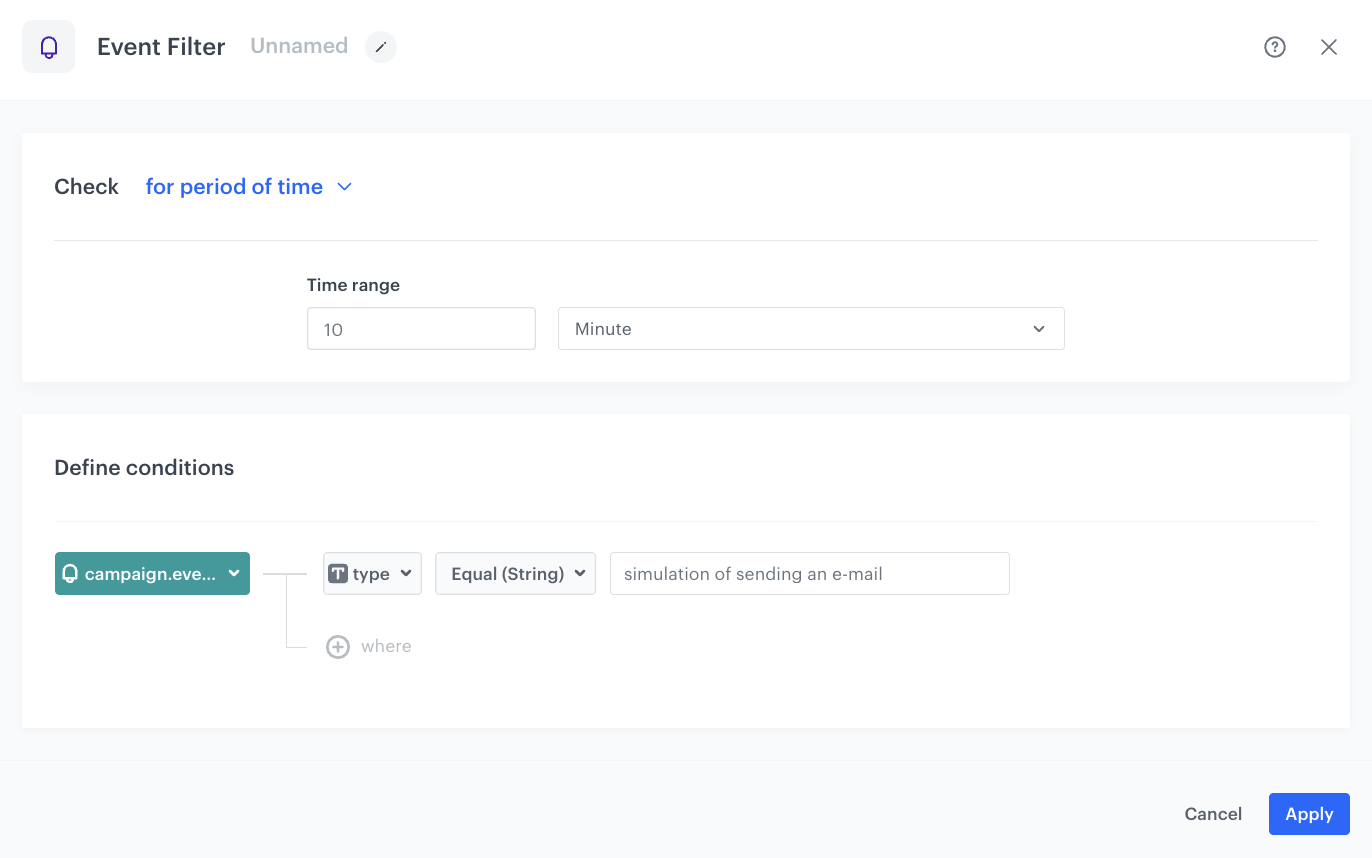
{
     "campaign": "abandoned cart - mail",
     "group": "D - Control group",
     "type": "simulation of sending an e-mail"
   }
{
     "campaign": "abandoned cart - mail",
     "group": "D - Control group",
     "type": "trigger"
   }
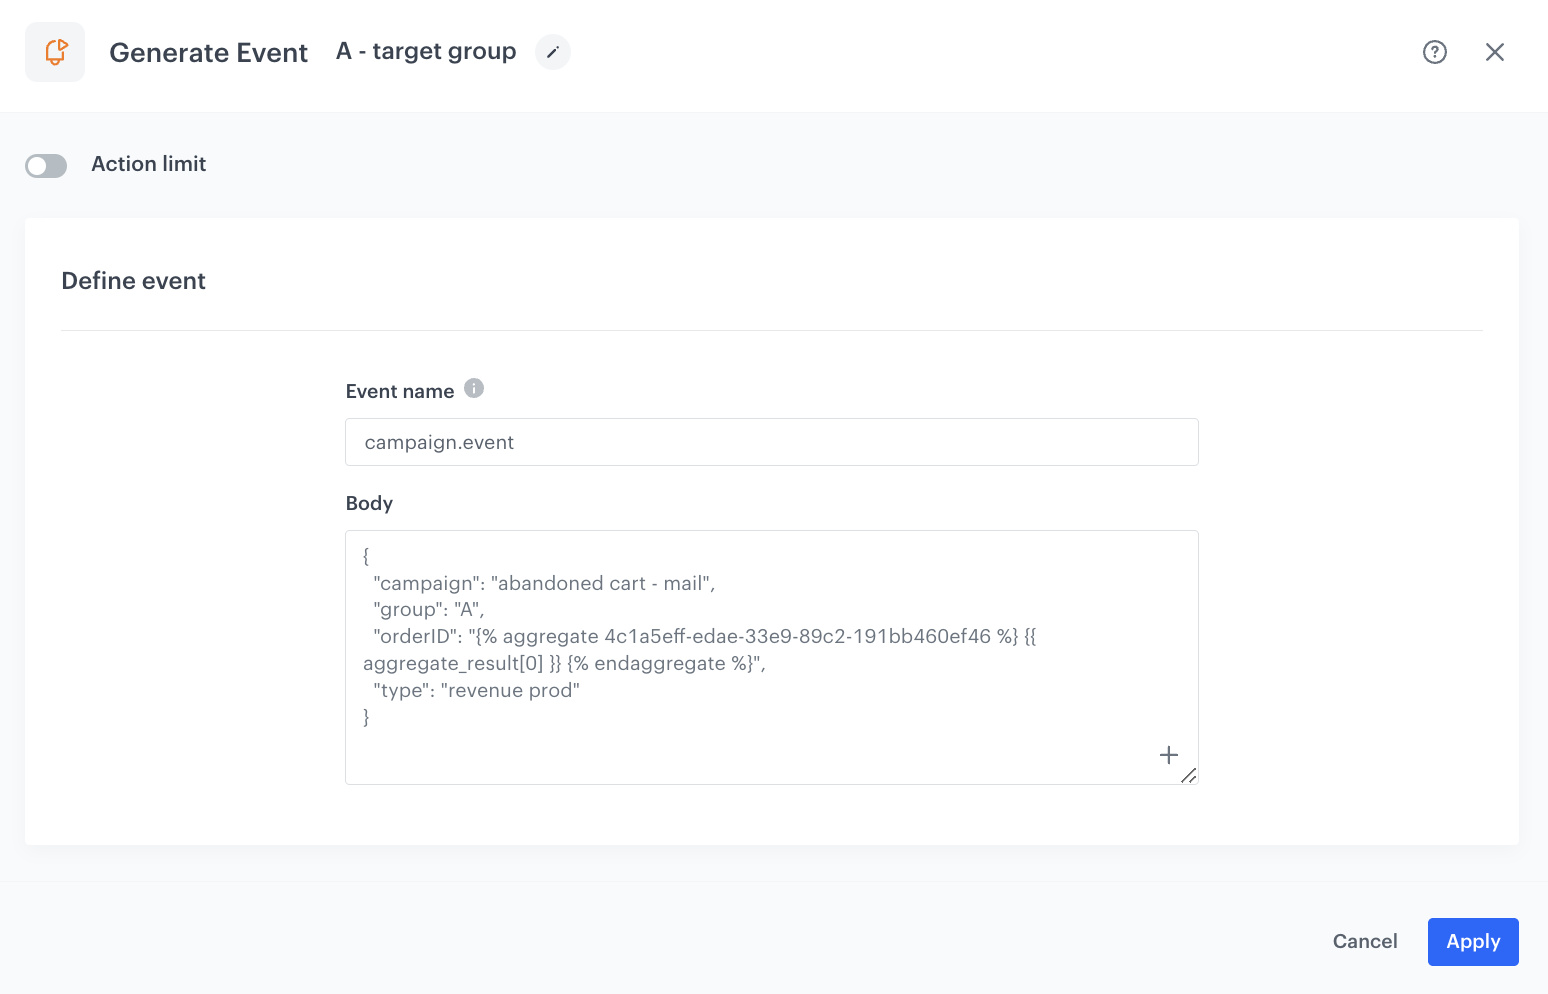
{
     "campaign": "abandoned cart - mail",
     "group": "A",
     "orderID": "{% aggregate 4c1a5eff-edae-33e9-89c2-191bb460ef46 %} {{ aggregate_result[0] }} {% endaggregate %}",
     "type": "revenue prod"
   }
{
     "campaign": "abandoned cart - mail",
     "group": "D - Control group",
     "type": "simulation of sending an e-mail follow up"
   }