
For organizations operating in multiple workspaces, transferring analytics from one workspace to another can be challenging and time-consuming, especially when the analytics involved are complex and interdependent. The Synerise's clone feature is designed to alleviate these difficulties by streamlining the transfer process and ensuring that all dependencies and mapping relationships are maintained.

In this use case, we delve into a practical implementation of cloning RFM segmentation analytics that requires the transfer of a complex, nested analysis. Using cloning, we ensure that all necessary dependencies are maintained, and mapping conflicts are resolved in a timely and efficient manner.

You will find a detailed guide on how to create a RFM analysis in [this use case](/use-cases/rfm-analysis).


<div class="admonition admonition-note"><div class="admonition-icon"><svg xmlns="http://www.w3.org/2000/svg" fill="none" viewBox="0 0 24 24" stroke="currentColor" stroke-width="2.5"><path stroke-linecap="round" stroke-linejoin="round" d="M13 16h-1v-4h-1m1-4h.01M21 12a9 9 0 11-18 0 9 9 0 0118 0z" /></svg></div><div class="admonition-body"><div class="admonition-content">

For a detailed guide on how to perform object cloning between workspaces, including all possible scenarios that can occur during the cloning, see [this article](/docs/settings/workspace/cloning-objects/cloning-analyses-to-workspaces).

</div></div></div>


## Prerequisites 
---

Follow all the prerequisites described in [this article](/docs/settings/workspace/cloning-objects/cloning-analyses-to-workspaces).

## Clone segmentation
---

1. Go to <img src="/api/docs/image/54176ad07f146575310749eba44b7c2f42c1b327/icons/decision-hub-icon.svg" alt="Decision Hub icon" class="icon" > **Decision Hub > Segmentations**.
2. On the list of segmentations, find the segmentation you want to clone.
3. To the right side of the analysis author information, click <img src="/api/docs/image/54176ad07f146575310749eba44b7c2f42c1b327/icons/threedoticon.png" alt="Three-dot icon" class="icon">.
4. From the context menu, select **Clone to workspace**.  
    **Result**: The **Choose destination** pop-up appears.
5. On the pop-up, select the workspace or workspaces to which you want to clone your analysis.  
    <figure><img src="/api/docs/image/54176ad07f146575310749eba44b7c2f42c1b327/docs/settings/_gfx/choose-workspace-to-clone.png" class="large" alt="A pop-up with selection of workspaces"><figcaption>A pop-up with selection of workspaces</figcaption></figure>
6. Confirm your choice by clicking **Next**.  
    **Result**: You are directed to the mapping wizard.
    <figure>
    <img src="/api/docs/image/54176ad07f146575310749eba44b7c2f42c1b327/use-cases/all-cases/_gfx/clone-to-workspaces-main-screen.png" alt="Mapping wizard"  class="full">
    <figcaption>Mapping wizard</figcaption>
    </figure> 

1. In the **Objects to clone** section, click **Change solutions**.
2. Next to the target workspace name, click the downward arrow icon.  
    **Result**: The list displays the analysis to be cloned. 

   <div class="admonition admonition-note"><div class="admonition-icon"><svg xmlns="http://www.w3.org/2000/svg" fill="none" viewBox="0 0 24 24" stroke="currentColor" stroke-width="2.5"><path stroke-linecap="round" stroke-linejoin="round" d="M13 16h-1v-4h-1m1-4h.01M21 12a9 9 0 11-18 0 9 9 0 0118 0z" /></svg></div><div class="admonition-body"><div class="admonition-content">

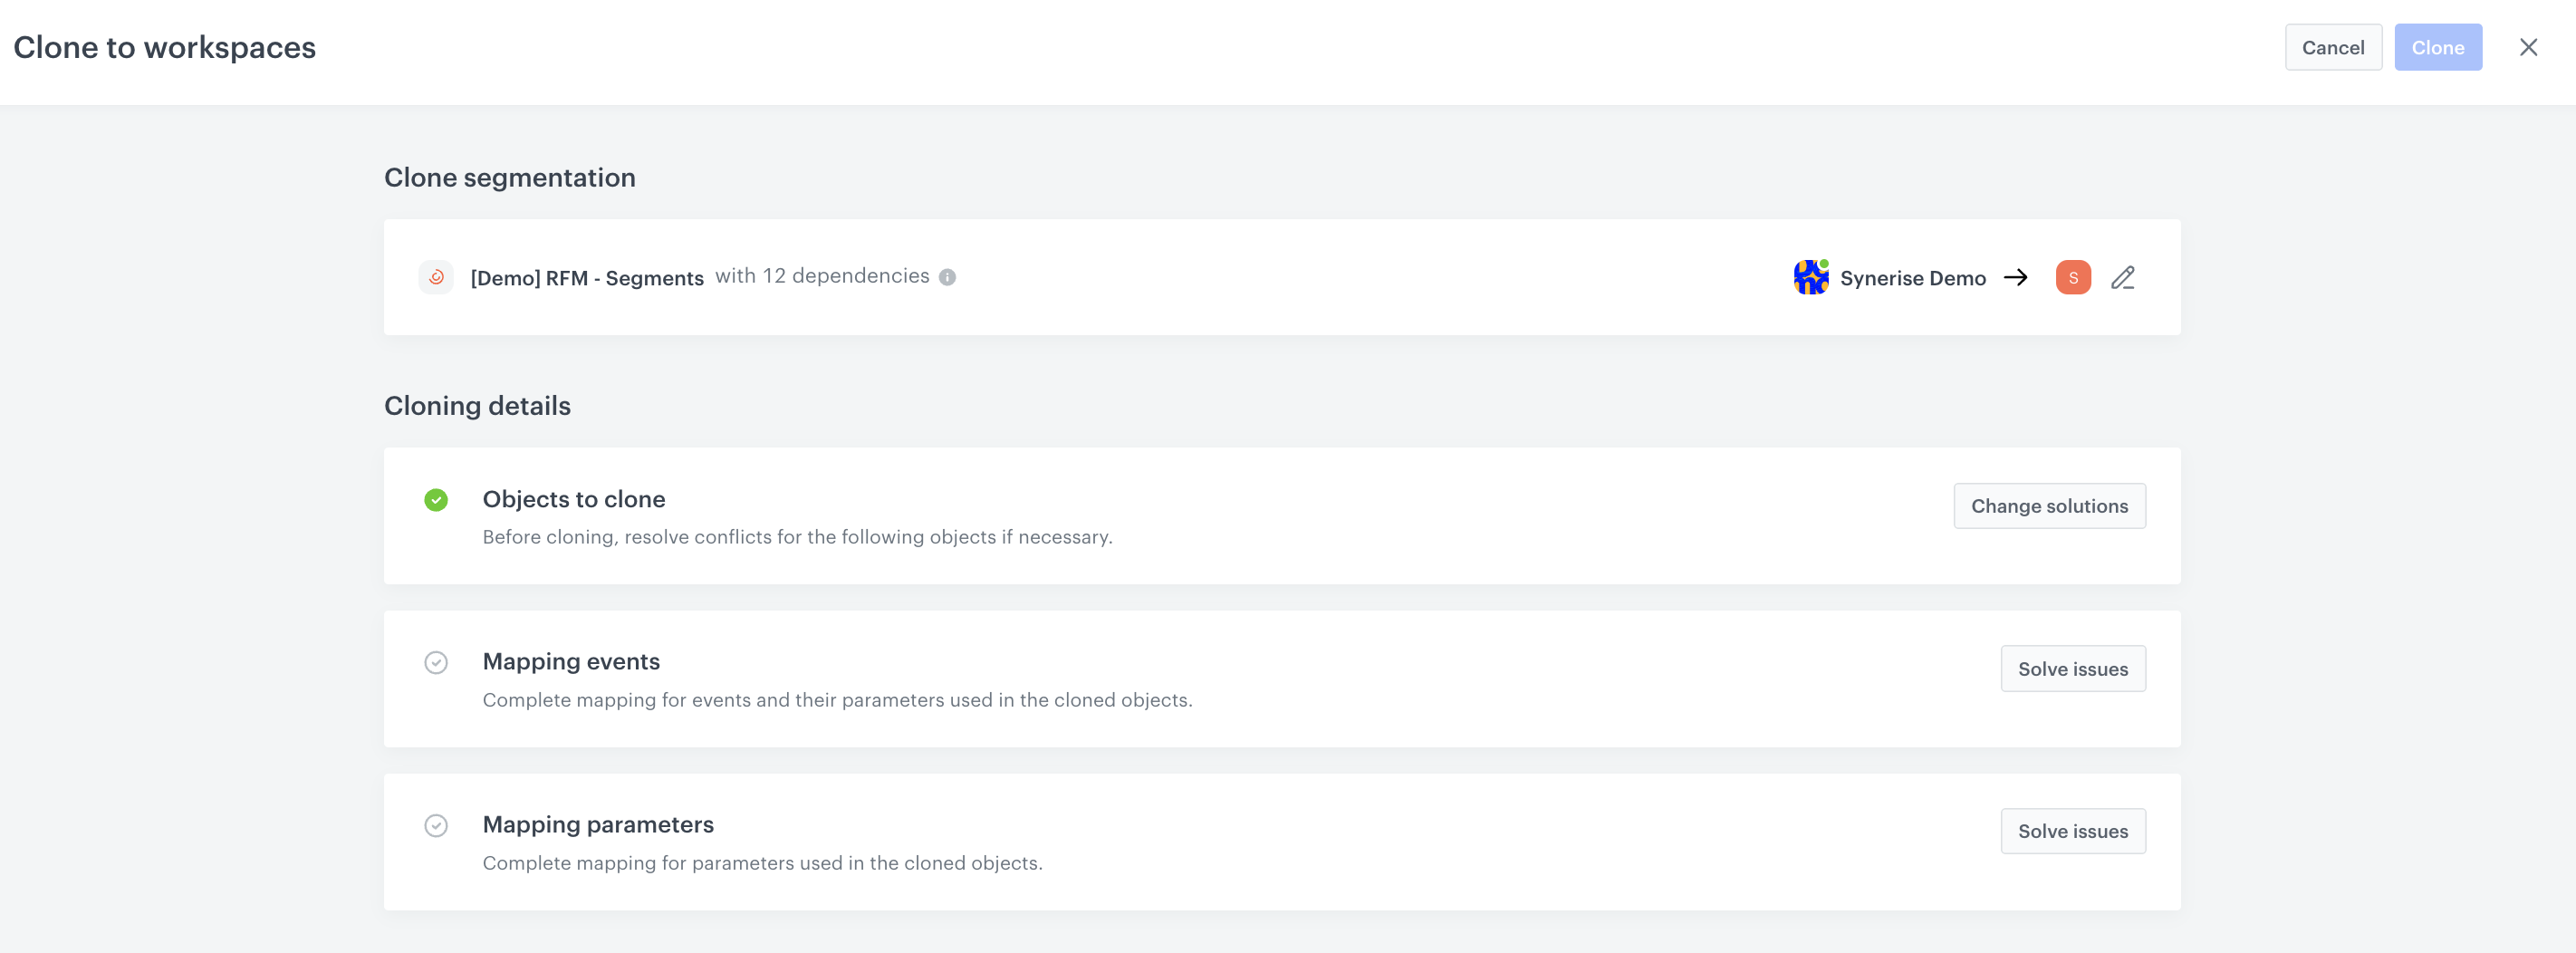
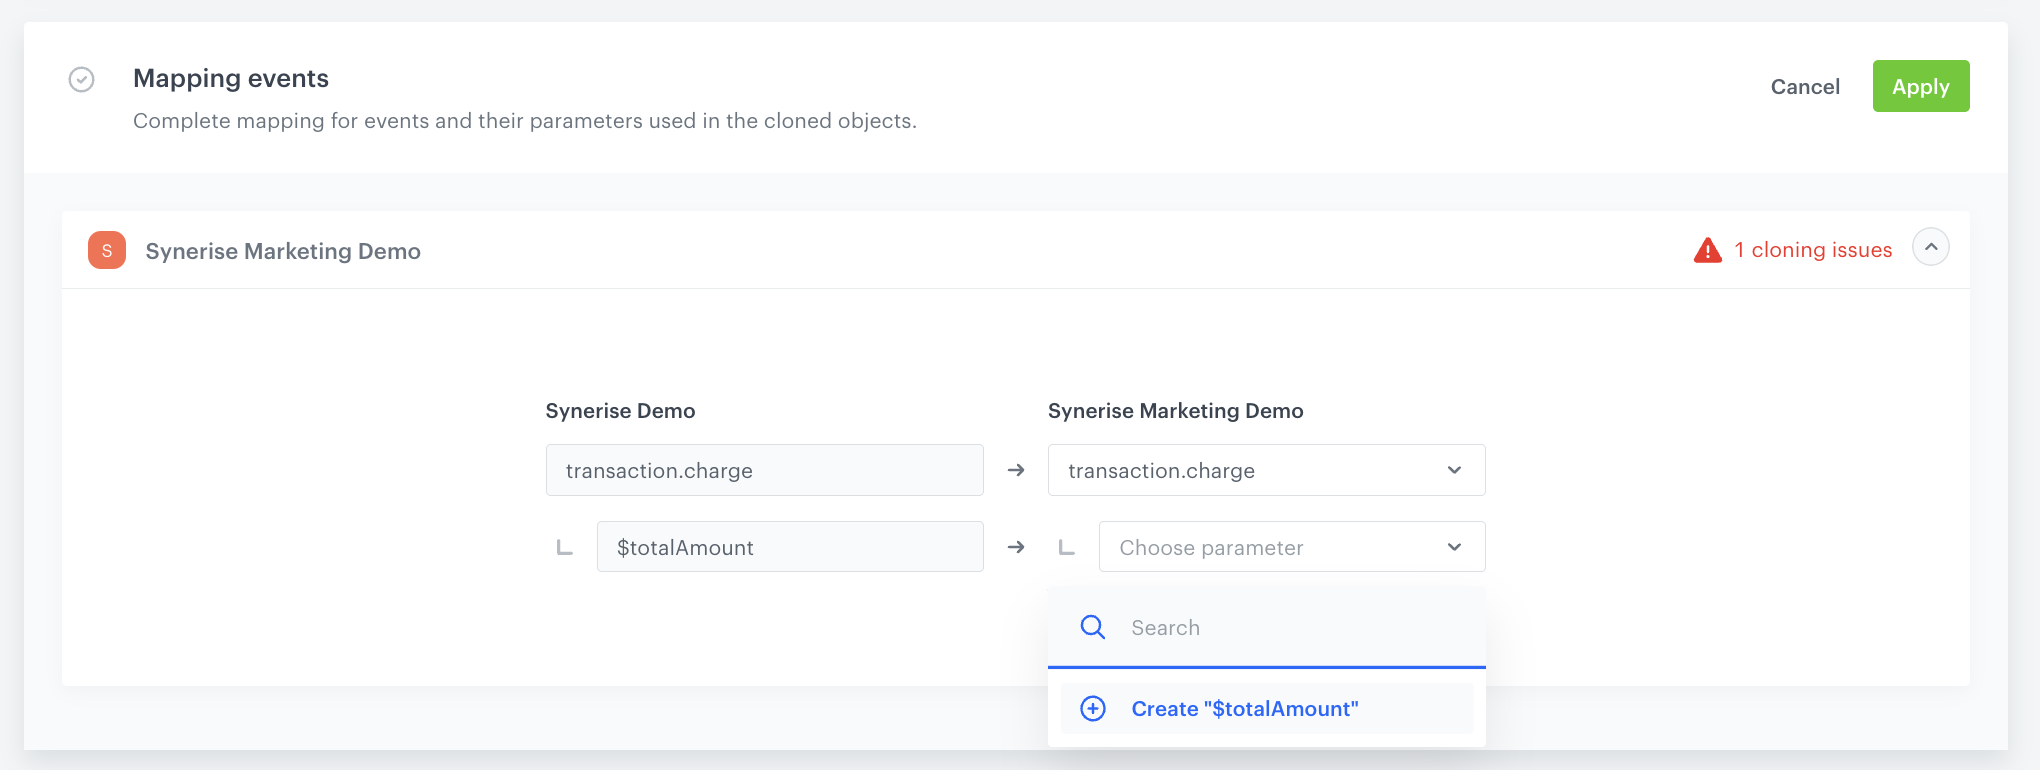
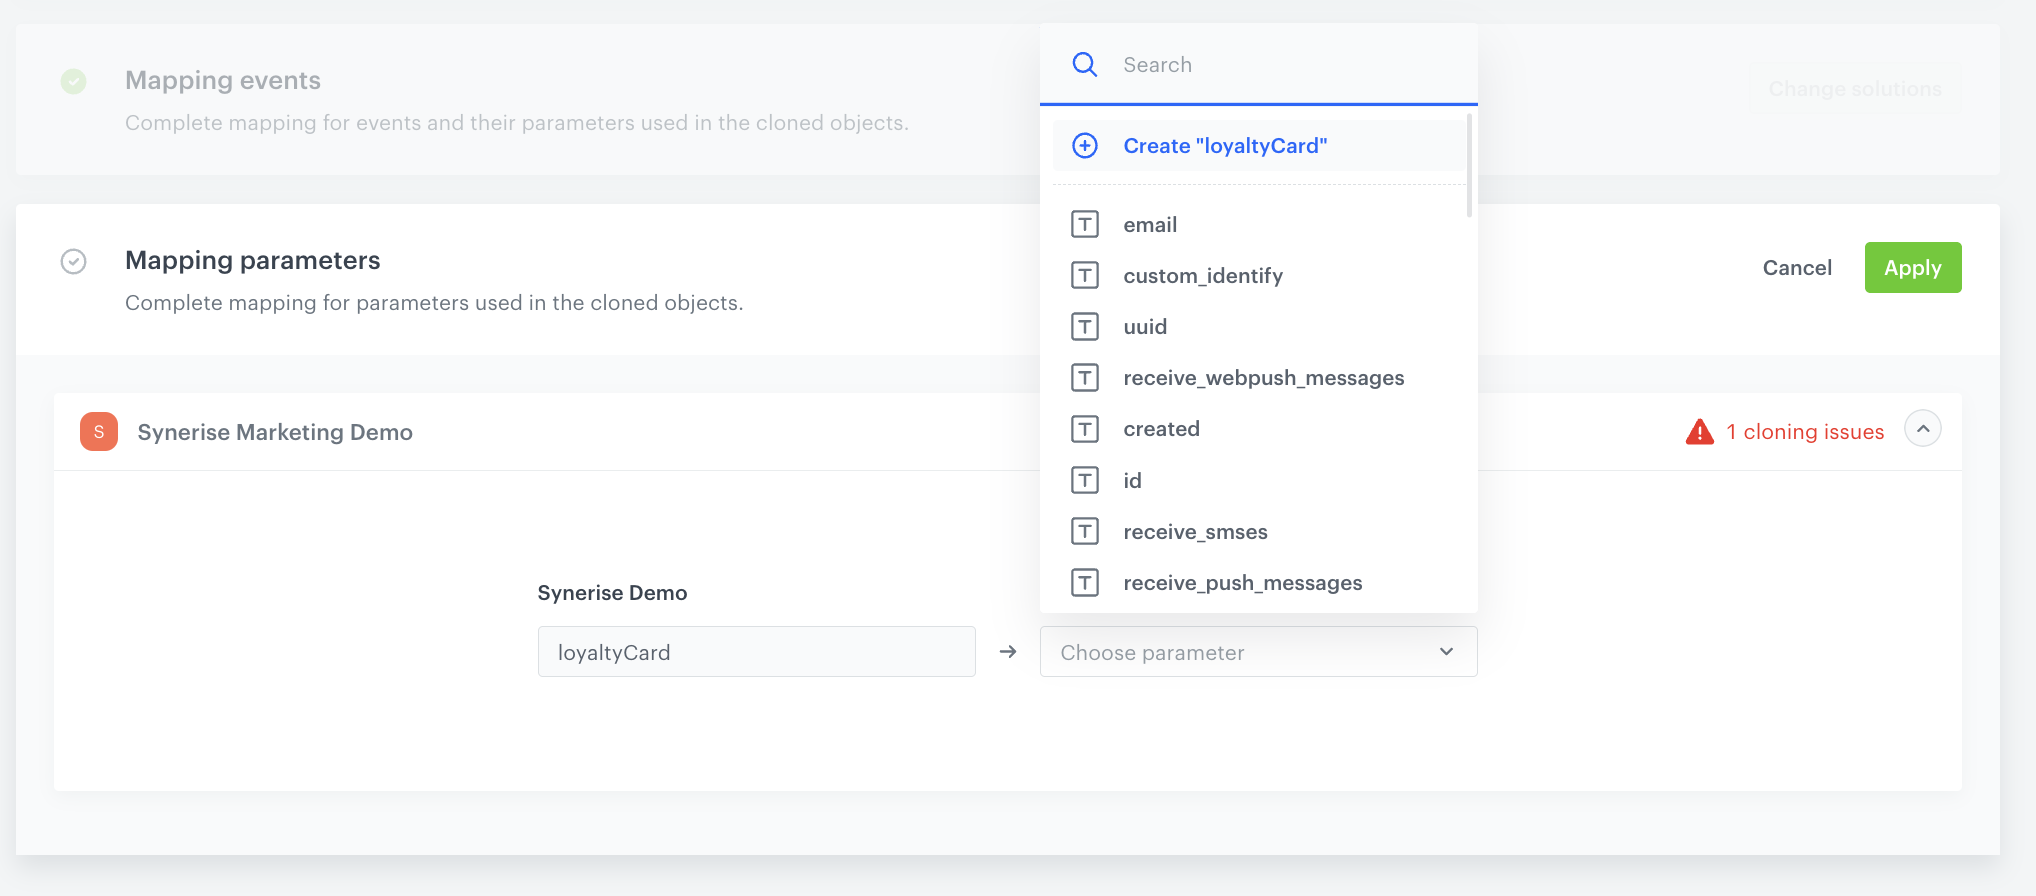
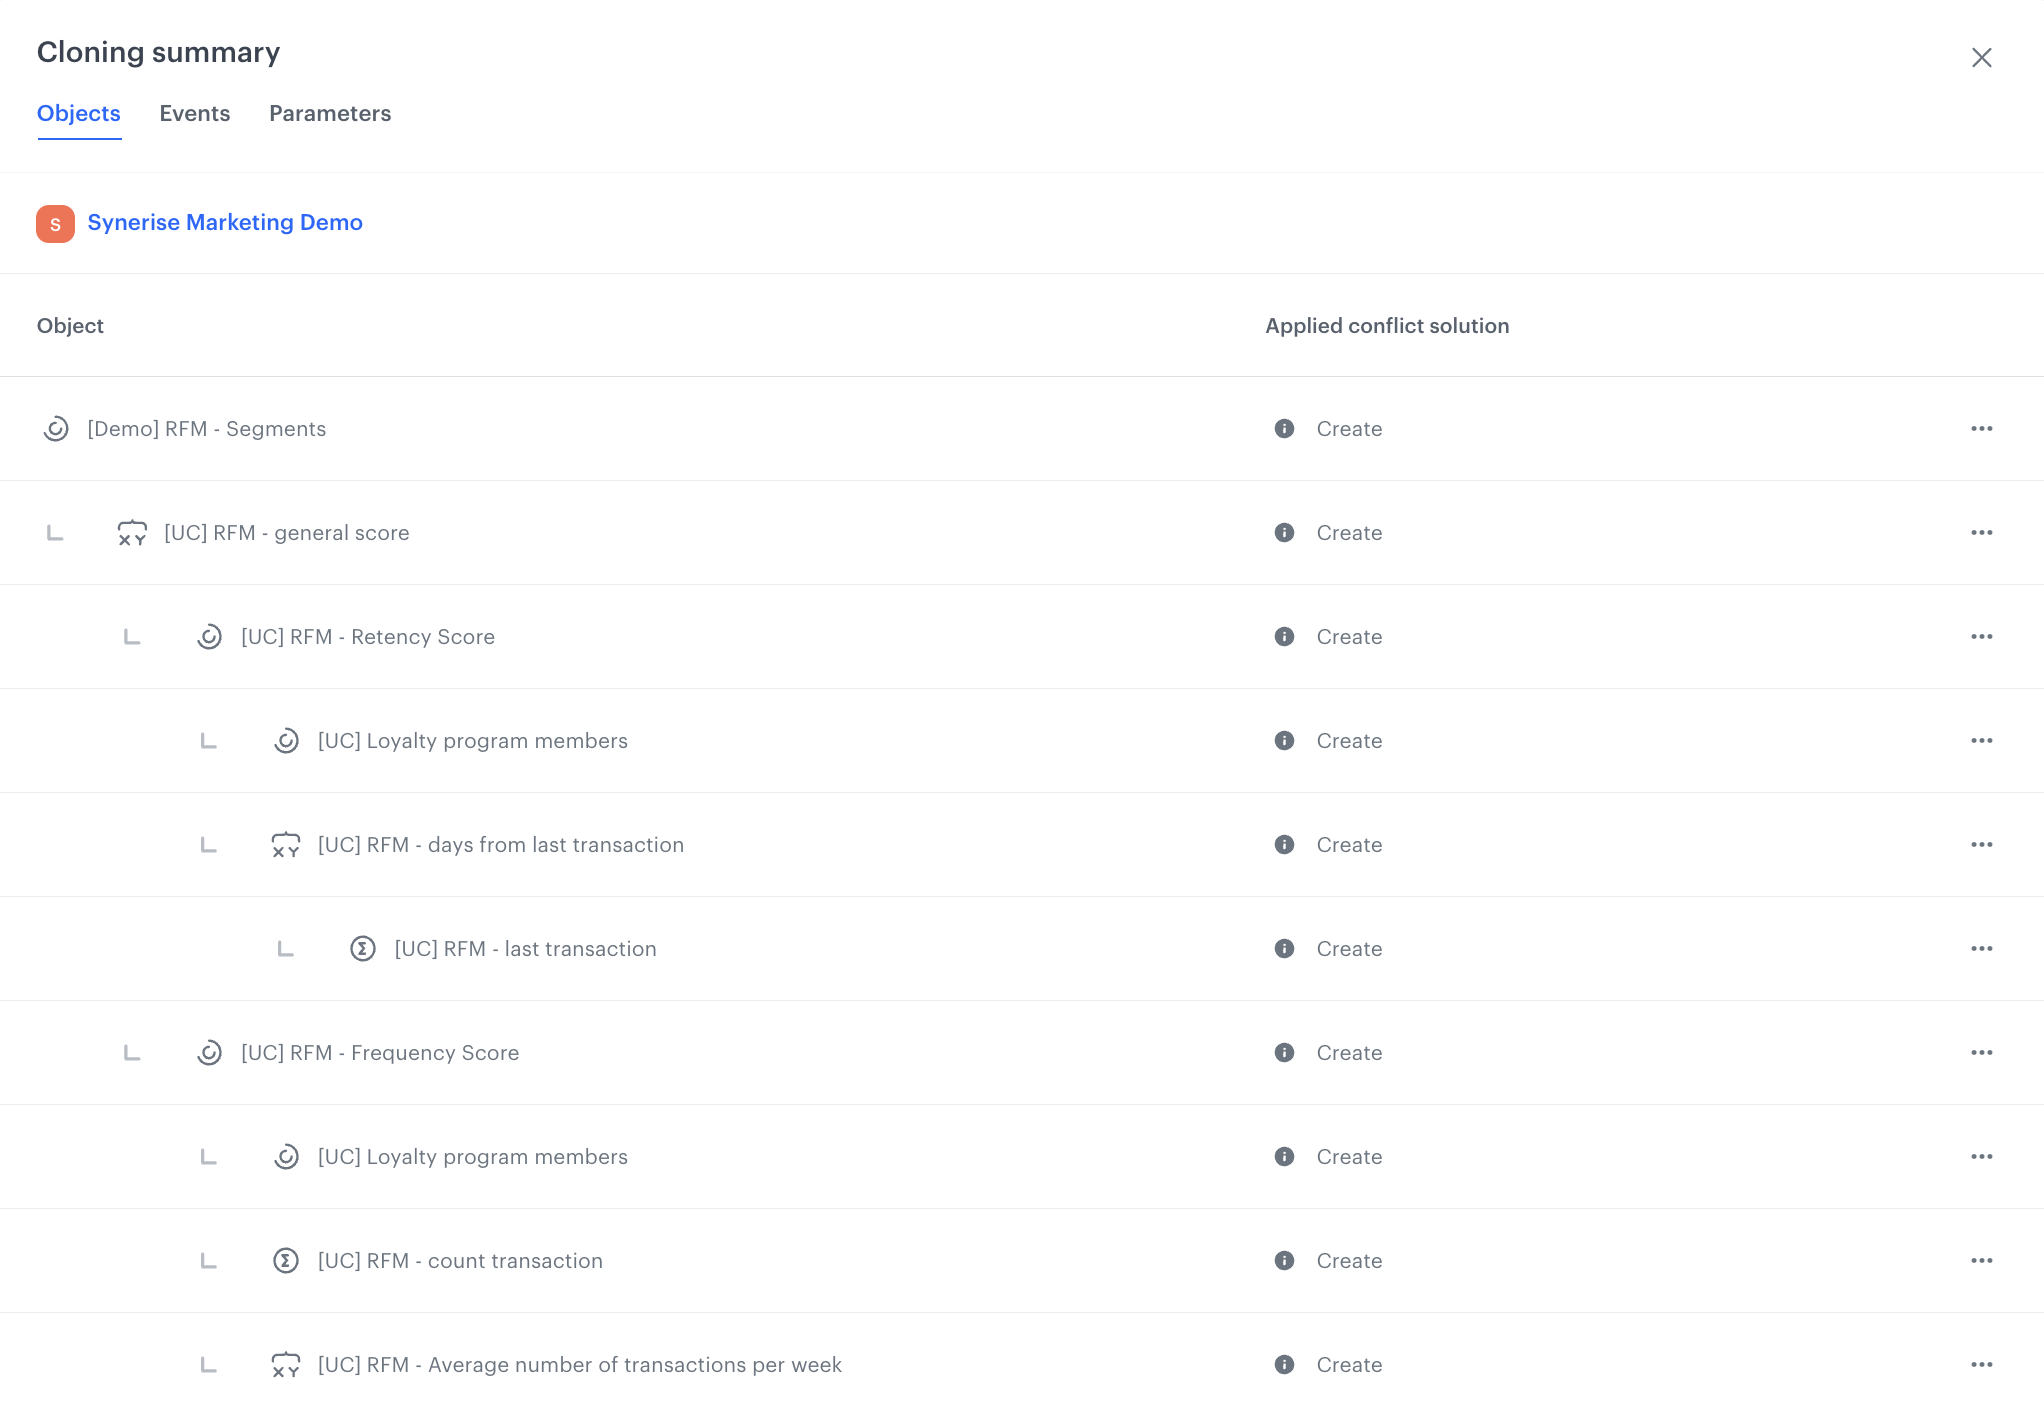
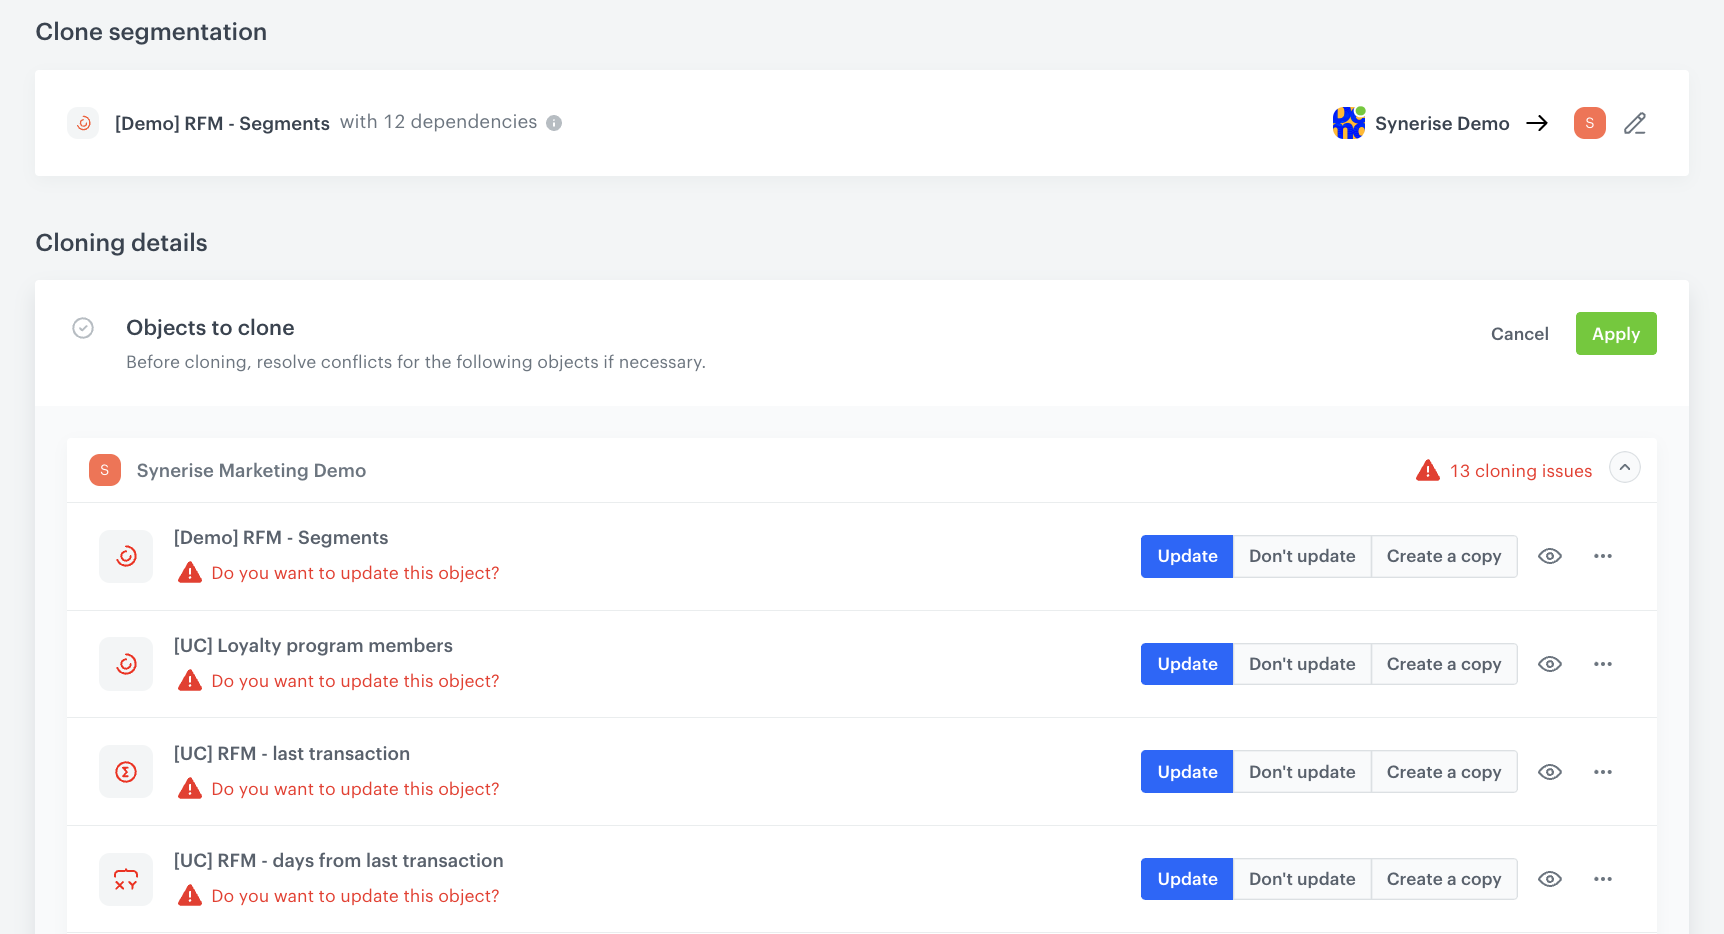
   When you clone an object and an object with the same name exists, you need to resolve the conflict. Refer to [this step](/docs/settings/workspace/cloning-objects/cloning-analyses-to-workspaces#cloning-an-object-that-exists-in-the-target-workspace), which explains how to clone an existing object in the target workspace.

   </div></div></div>

3. Click **Apply**.

### Mapping events
---

In our case, not all events and their parameters exist in the target workspace. That is why we need to create the missing event/parameter or select an existing event/parameter in the target workspace under which the values of the event/parameter from the source workspace will be saved in the cloned object.

1. In the **Mapping events** section, click **Solve issues**.
2. Next to the target workspace name, click the downward arrow icon. 
3. On the dropdown list, perform one of the following action create the missing parameter in the target workspace by clicking **Create `[$totalAmount]`**.
    <figure>
    <img src="/api/docs/image/54176ad07f146575310749eba44b7c2f42c1b327/use-cases/all-cases/_gfx/clone-and-create-event-uc.png" alt="Mapping event parameters that don't exist in the target workspace"  class="full">
    <figcaption>Mapping event parameters that don't exist in the target workspace</figcaption>
    </figure> 
4. Confirm the mapping settings by clicking **Apply**.

### Mapping parameters
---

In our case, not all attributes exist in the target workspace, which is why we need to create the missing parameter or select an existing parameter in the target workspace under which the values of the parameter from the source workspace will be saved in the cloned object.

1. In the **Mapping parameters** section, click **Solve issues**.
2. Next to the target workspace name, click the downward arrow icon. 
3. On the dropdown list, create the missing parameter in the target workspace by clicking **Create `[loyaltyCard]`**.
    <figure>
    <img src="/api/docs/image/54176ad07f146575310749eba44b7c2f42c1b327/use-cases/all-cases/_gfx/clone-and-create-parameter.png" alt="Mapping parameters that don't exist in the target workspace"  class="full">
    <figcaption>Mapping parameters that don't exist in the target workspace</figcaption>
    </figure> 
4. Confirm the mapping settings by clicking **Apply**.
5. Optionally, before cloning, you can also check the summary, where you can find detailed information about what analytics the segmentation consists of and what solution was applied to each of them, as well as what events and parameters were created.
    
   <details class="accordion"><summary>Cloning summary</summary><div class="accordion-content"><figure> <img src="/api/docs/image/54176ad07f146575310749eba44b7c2f42c1b327/use-cases/all-cases/_gfx/cloning-summary.png" alt="Cloning summary" class="large"> <figcaption>Cloning summary</figcaption> </figure></div></details>

5. In the upper right corner, click **Clone**. 

After successful cloning, you can switch to the target workspace and work with the cloned segmentation and all nested analytics.

## What's next
---

The cloning option can also be very useful in cases where you already have the same analytics created in different workspaces and want to make changes to them. In that case, all you need to do is make changes to the analytics from one workspace and then clone it to other workspaces where you want to implement that modification. When cloning, you will only need to update the cloned object in the target workspaces. This convenient solution streamlines the process and ensures that all nested objects and dependencies are taken into account. With just a few clicks, you can effortlessly update analytics across all workspaces.


<details class="accordion"><summary>Updating cloned objects</summary><div class="accordion-content"><figure> <img src="/api/docs/image/54176ad07f146575310749eba44b7c2f42c1b327/use-cases/all-cases/_gfx/update-cloned-object.png" alt="Updated cloned objects" class="large"> <figcaption>Updated cloned objects</figcaption> </figure></div></details>


## Read more
---

- [Cloning objects between workspaces](/docs/settings/workspace/cloning-objects/cloning-analyses-to-workspaces)
- [RFM analysis](/use-cases/rfm-analysis)