The better quality data you have at your disposal, the better the actions and analyses you perform on that data.
However, the data you have is not always in a state ready for analysis. The files may contain redundant or incorrect data. There may also be duplicate or missing values.
To make sure that the data you want to use in your activities and analyses is properly prepared, it is a good idea to clean data before using it. Automation Hub comes to your aid. It gives you the ability to perform a large number of operations on any data you need to modify.
This use case describes the process of transformation of a CSV file with electronic card transactions. The data transformations performed in this use case consist of:
- removing columns with missing data
- adding missing data
- removing structural errors by adding suffixes
- filtering rows
After transformation, the file will be transferred to an SFTP server.
## Prerequisites
---
- Save the file which you want to transform to your computer.
- You must have a target resource with which you transfer the data (in this use case, an SFTP server is used).
- Make a copy of the data file and remove rows from the copy until 10 are left. This copy will be used only as a sample for configuring the Data Transformation rules.
## Process
---
1. [Prepare data transformation](/use-cases/data-cleaning#create-data-transformation-rules) to modify the data to meet the requirements of the external resource data structure.
2. [Prepare a workflow](/use-cases/data-cleaning#prepare-a-workflow) that sends the data of customers from Synerise to the external resource.
## Create data transformation rules
---
In this part of the process, you define the rules of modifying data before sending it to the SFTP server, so the data is consistent. Each of the following sub-steps describes the individual changes performed on the file.
The data transformation diagram which is the output of this part of the process is used later to [automate sending the data](/use-cases/data-cleaning#prepare-a-workflow).
1. Go to **Automation Hub > Data Transformation > Create transformation**.
2. Enter the name of the transformation.
3. Click **Add input**.
### Add file with sample data
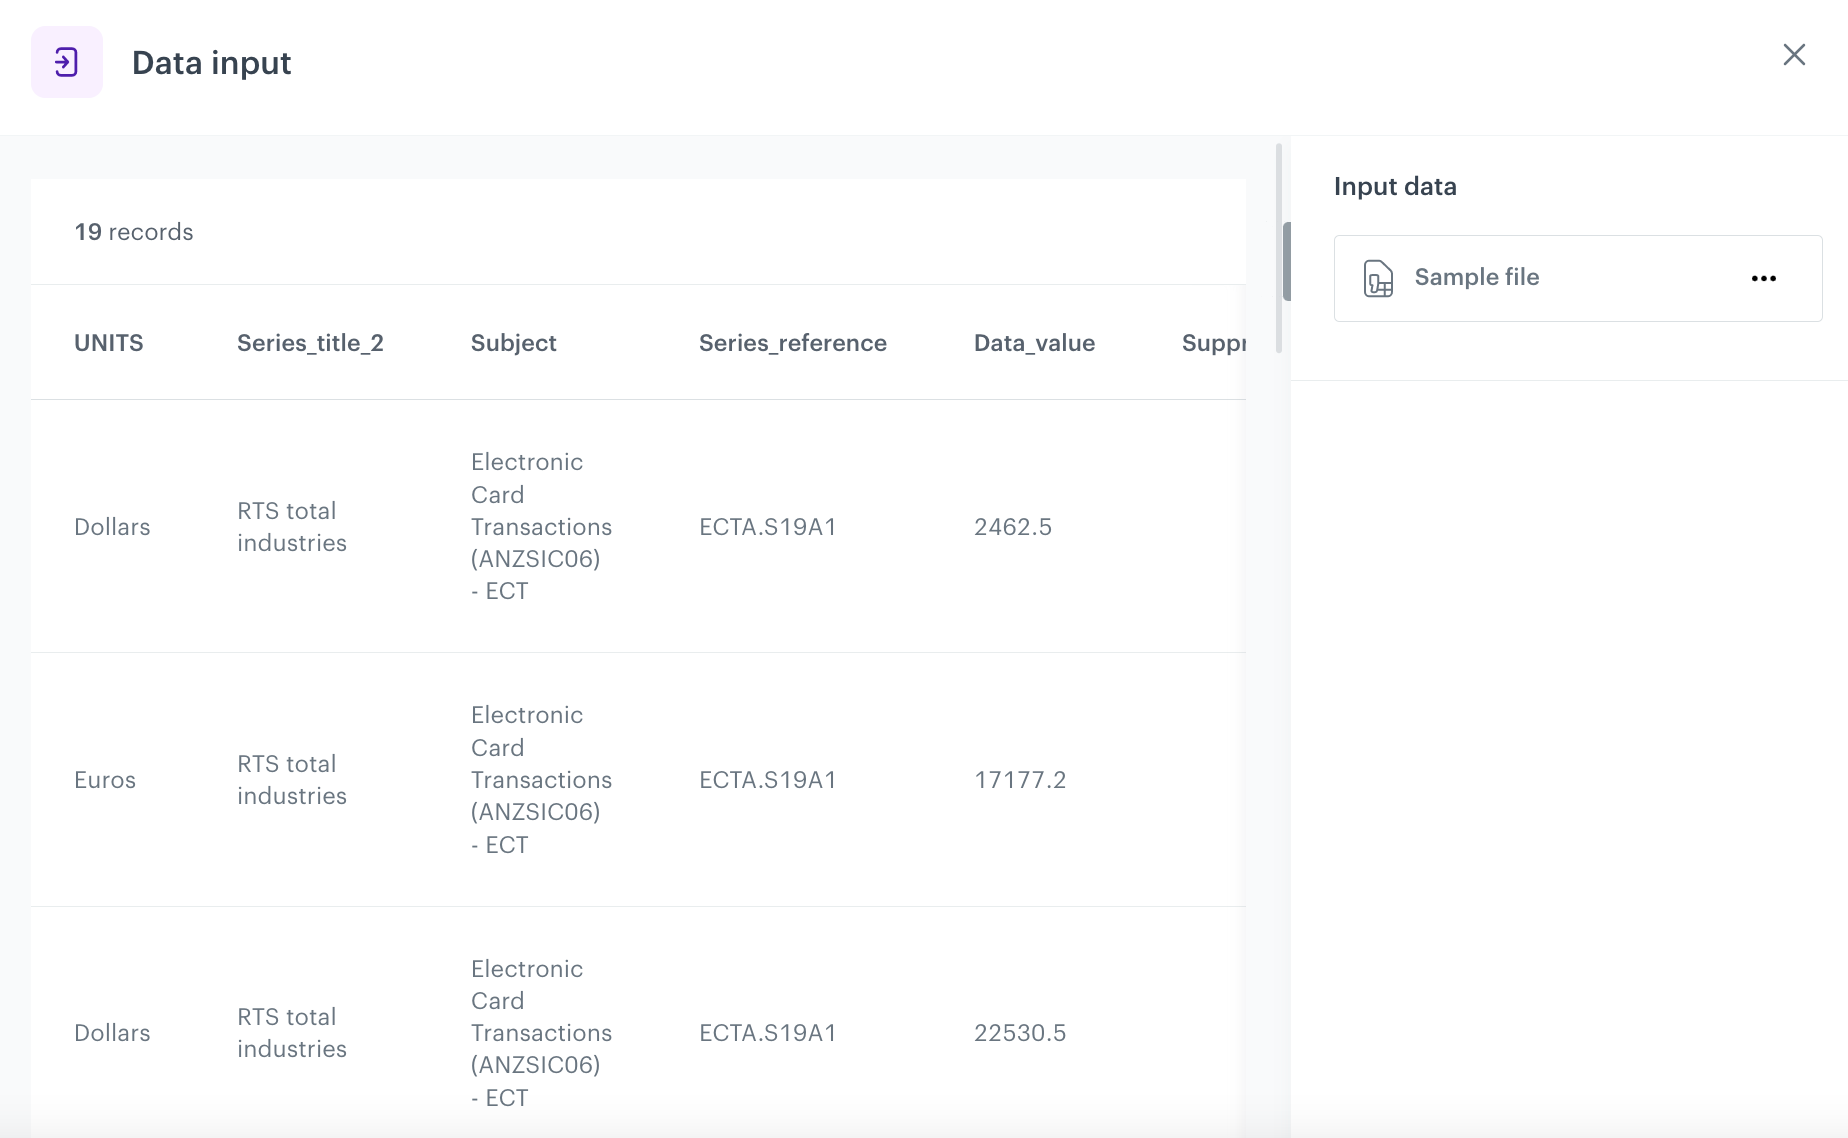
This node allows you to add a data sample. In further steps, you define how the data must be modified. Later, when this transformation is used in the workflow, the system uses the rules created with the sample data as a pattern for modifying actual data.
1. On the pop-up, click **Add example**.
2. Upload the file with the sample data.
3. Click **Generate**.
The configuration of the Data input node
### Remove irrelevant data
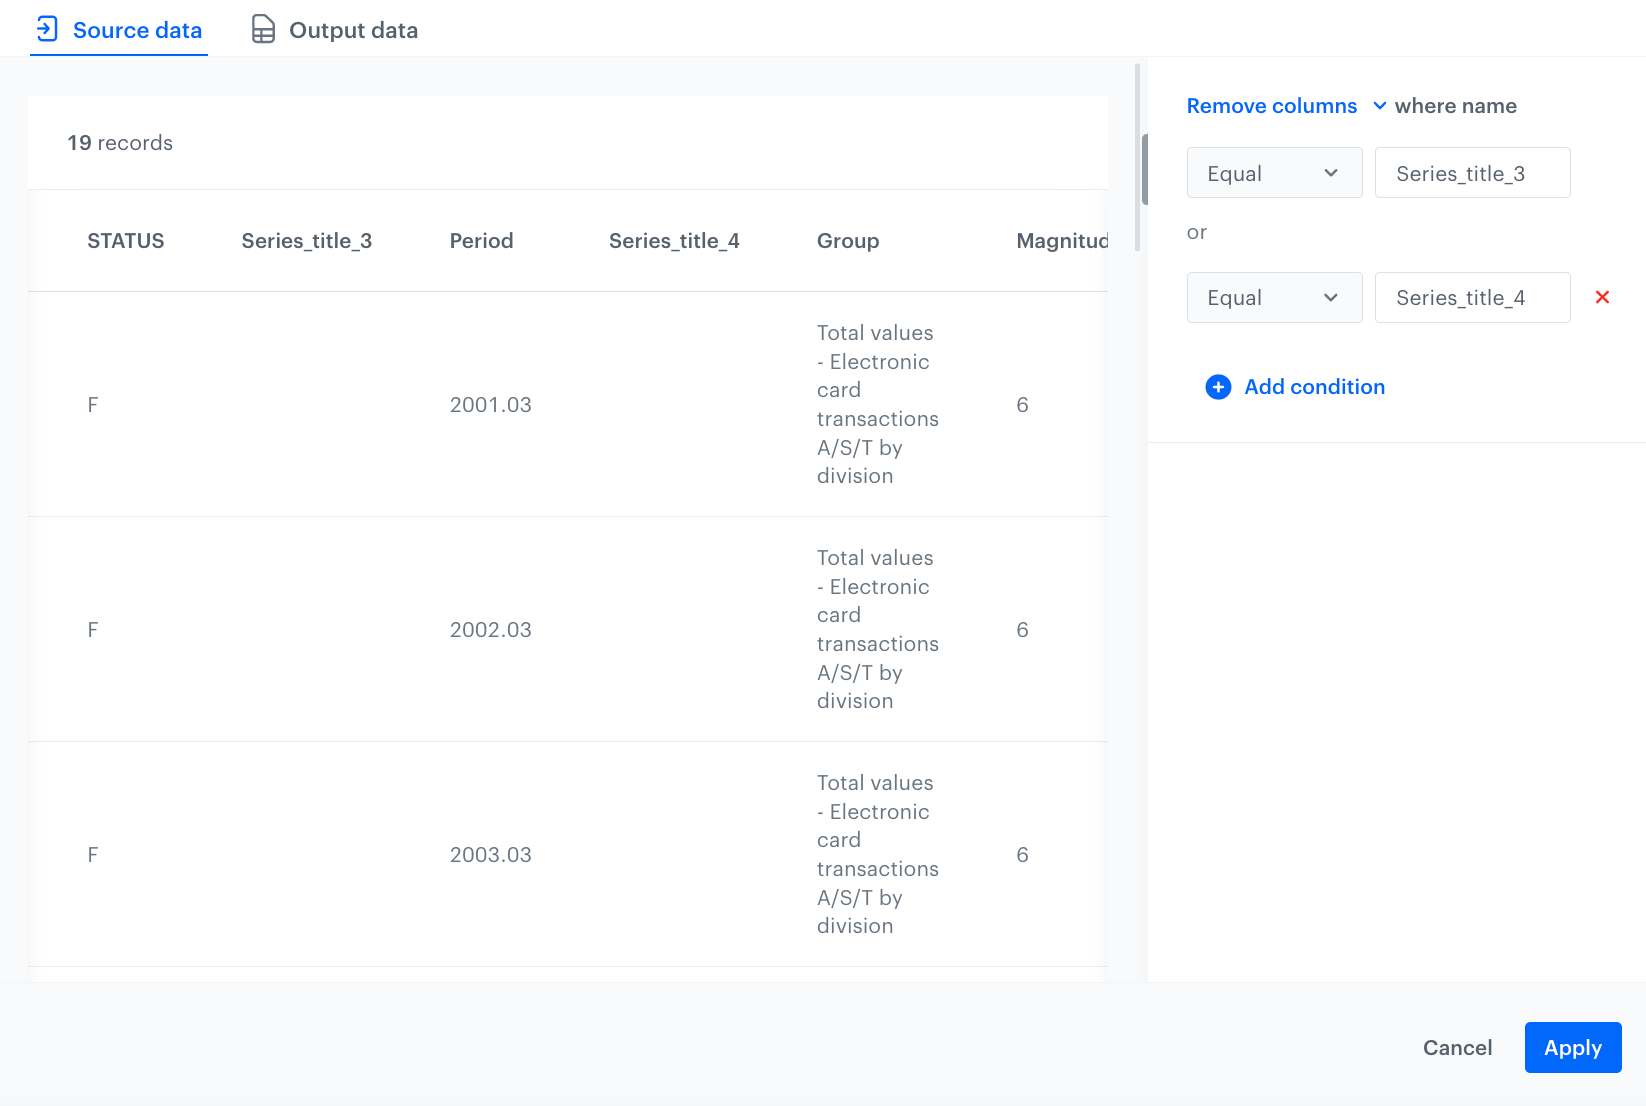
In this step, use the **Remove columns** node, to remove the columns that do not contain data, these are the columns named: **Series_title_3** and **Series_title_4**.
1. On the canvas, click the right mouse button.
2. From the dropdown list, select **Remove columns**.
3. Click the **Remove columns** node.
4. In the configuration of the node:
1. Leave the **Remove Columns** option selected in the dropdown menu.
2. Leave the default value in the dropdown as **Equal**.
3. In the text field, enter the name of the empty column you want to remove - `Series_title_3`.
4. Click **Add condition**.
5. Repeat steps **4.b-d** to define all the columns you want to delete.
The configuration of the Remove columns node
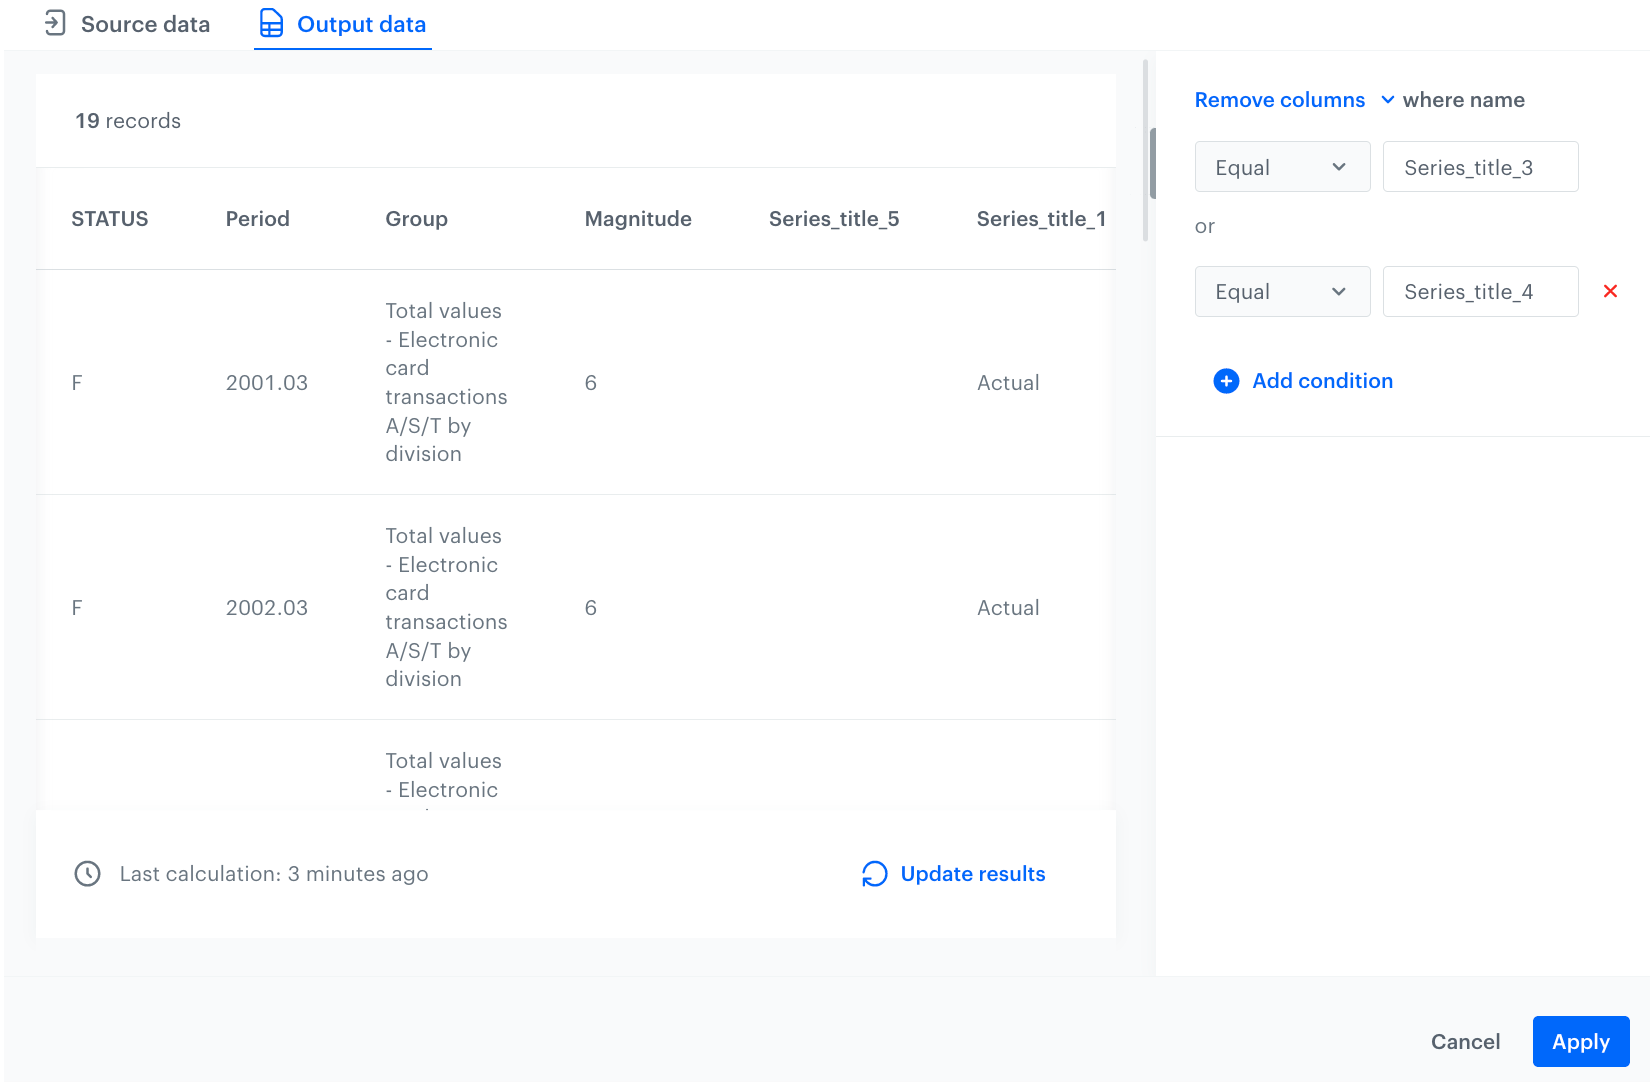
This resulted in the removal of columns **Series_title_3** and **Series_title_4**:
Output data after applying Remove columns node
6. Confirm by clicking **Apply**.
### Handle missing data
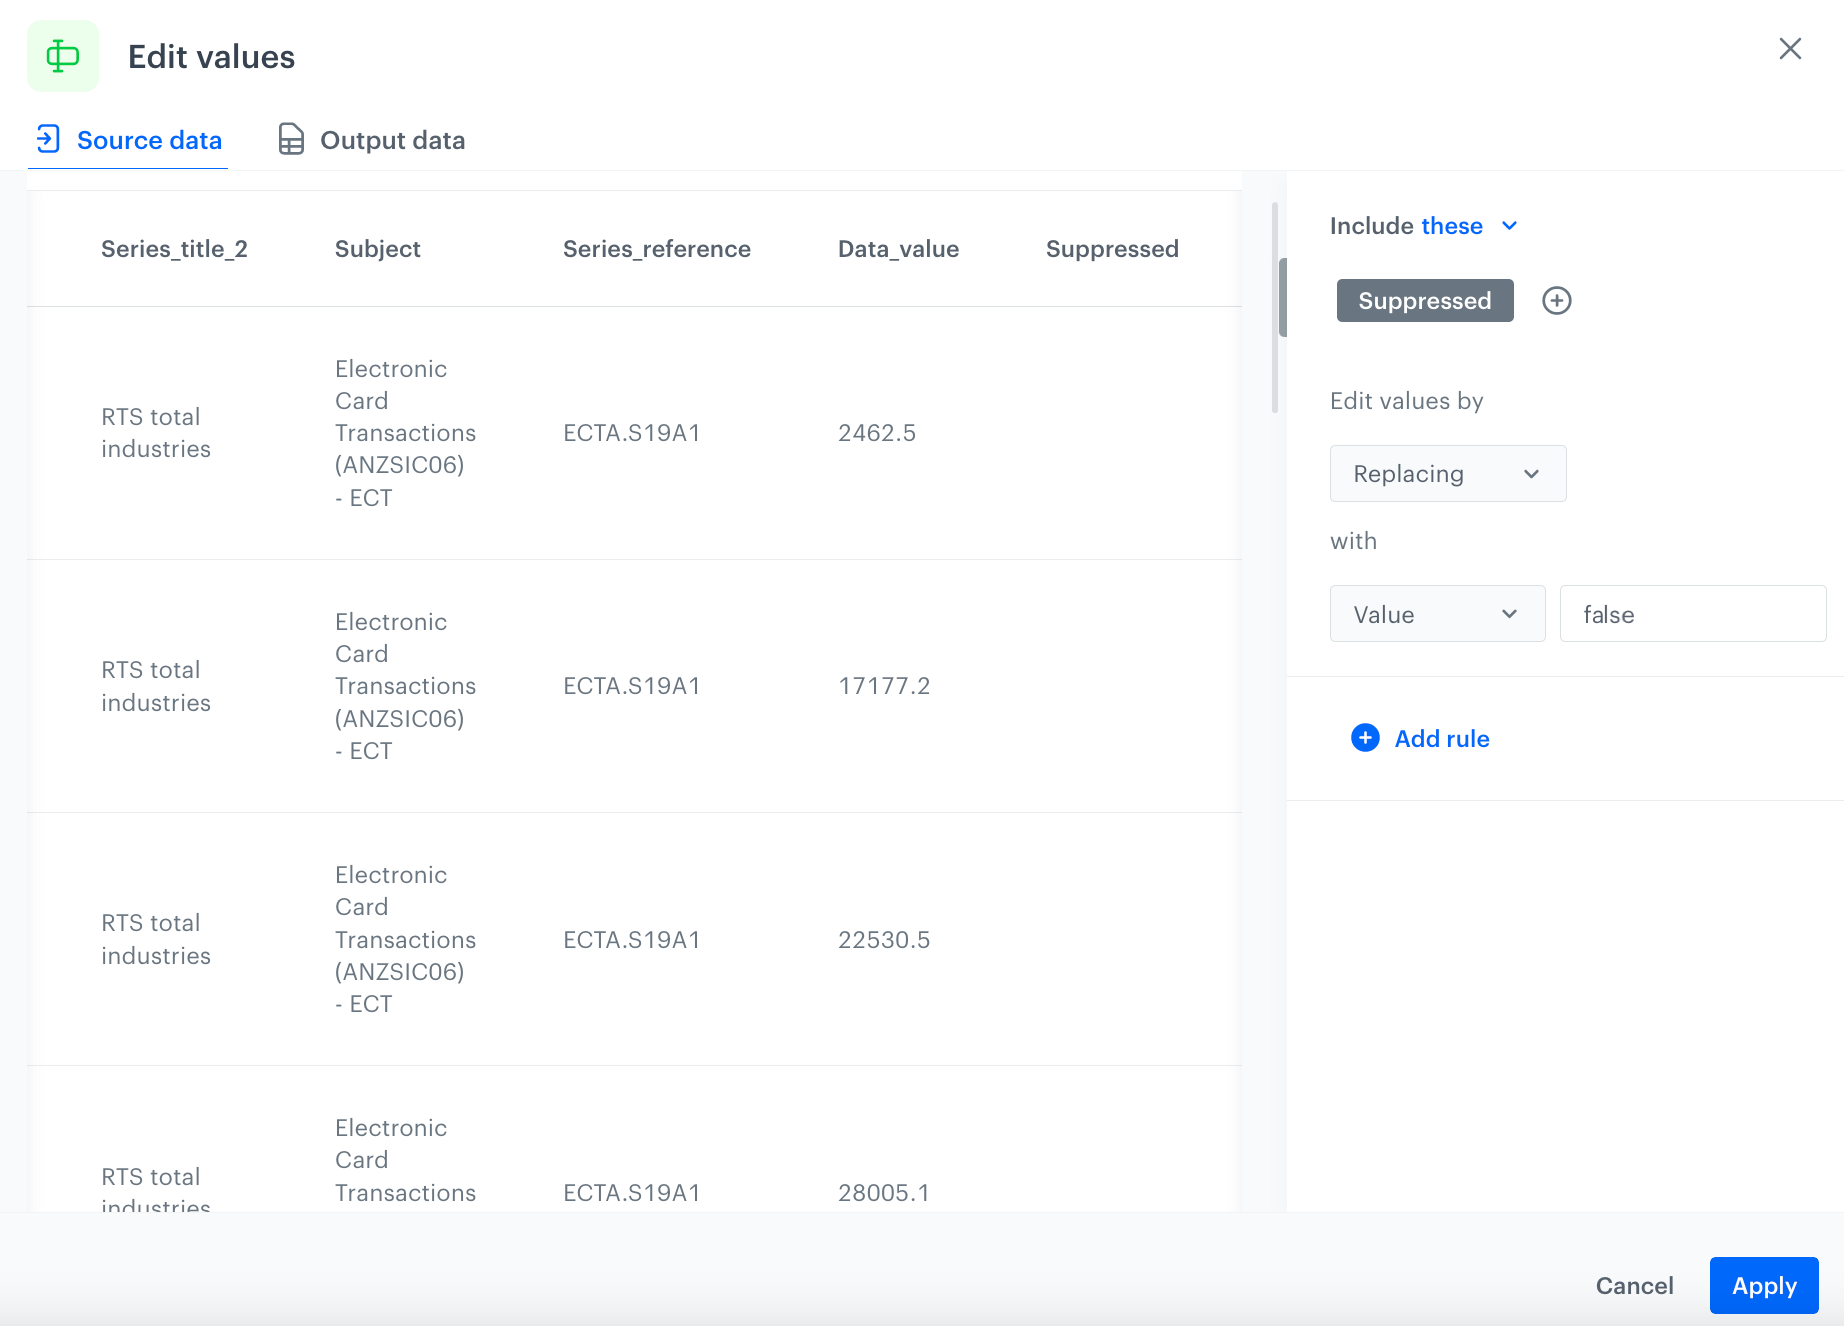
Use the **Edit values** node that allows you to perform basic actions on the dataset.
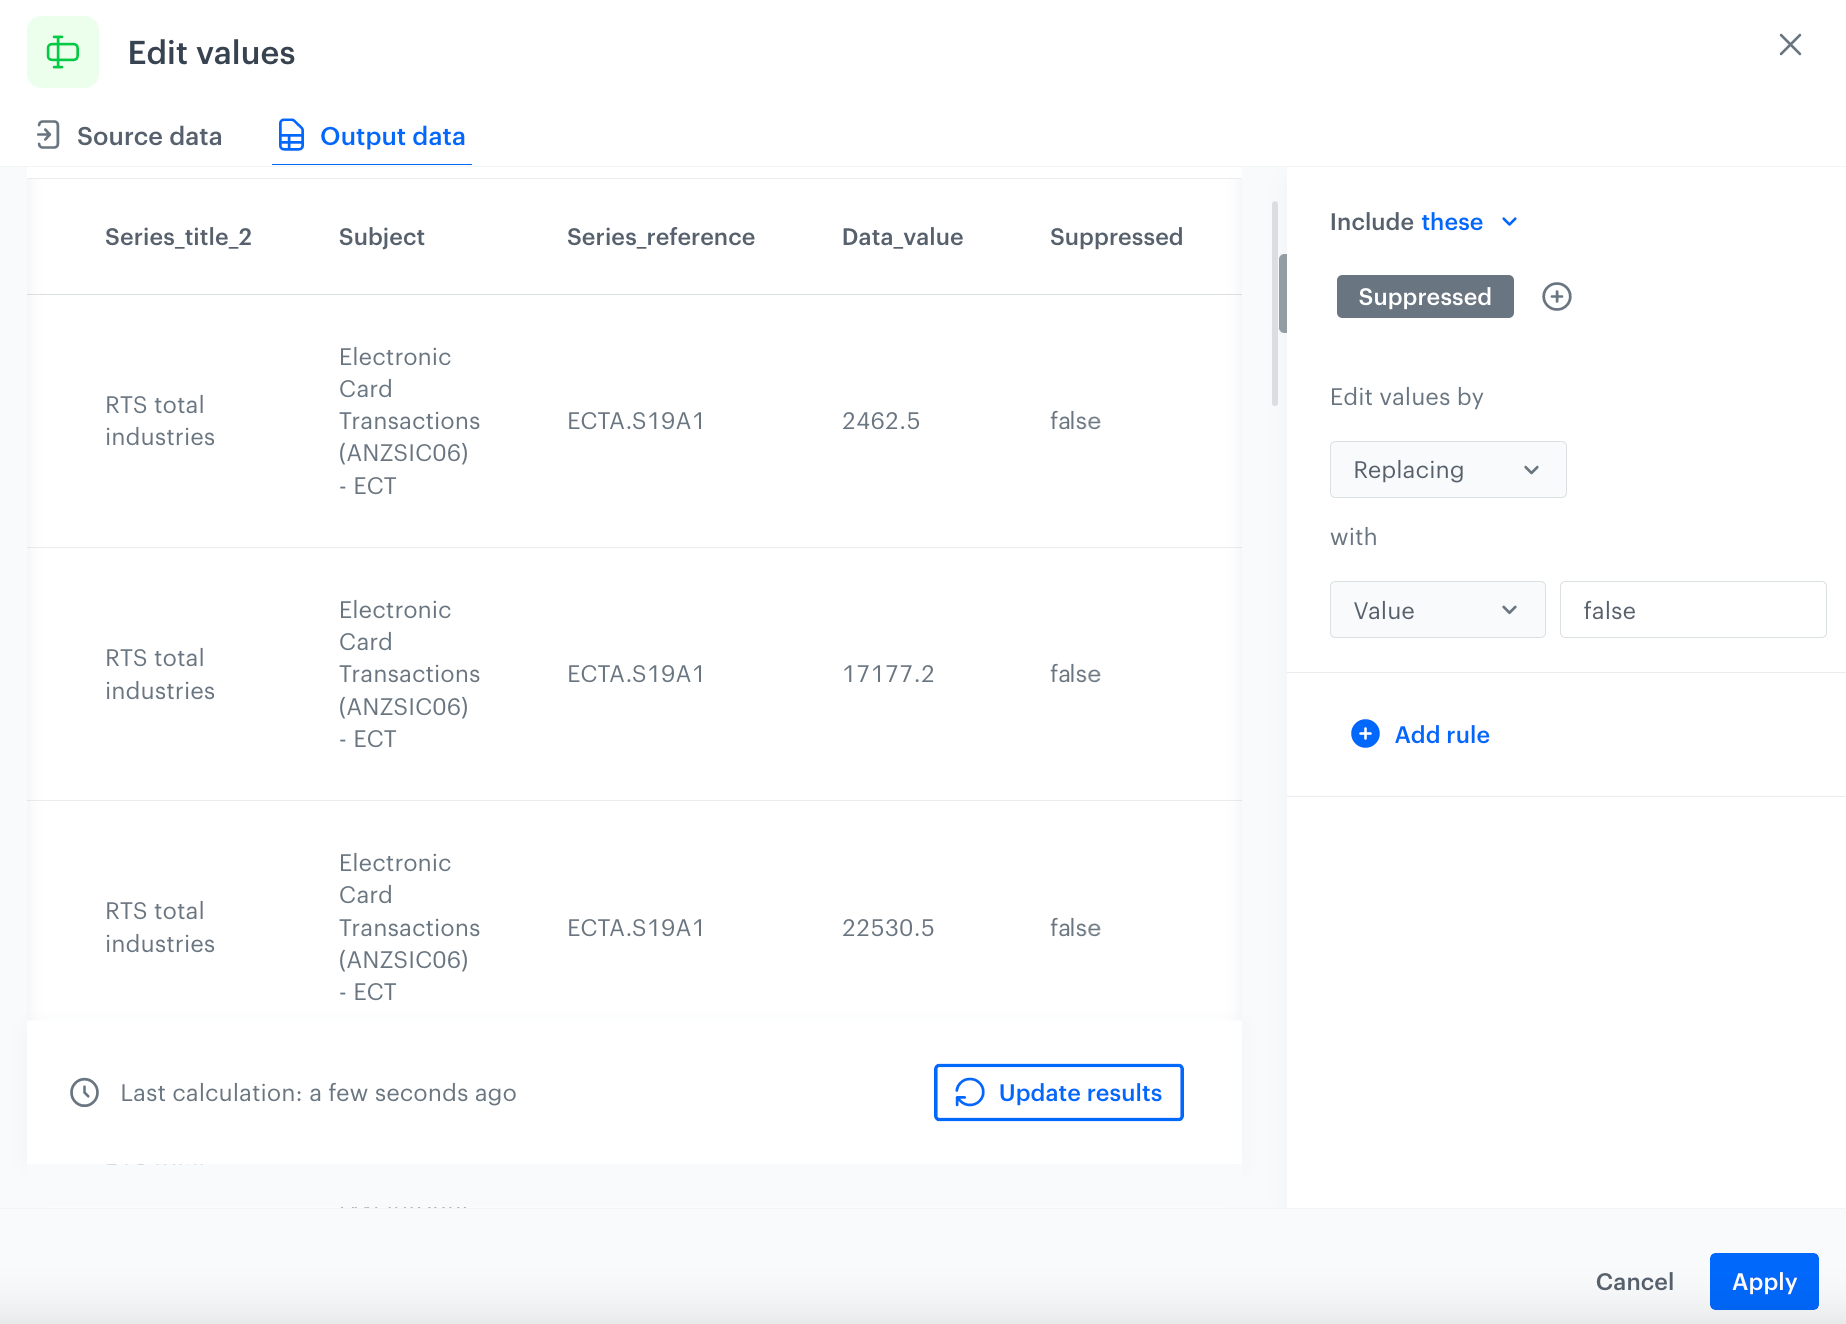
In this example, handle missing data in the **Suppressed** column by replacing its contents (in this example, the column is empty) with the value `false`.
1. On the canvas, click the right mouse button.
2. From the dropdown list, select **Edit values**.
3. Click the **Edit values** node.
4. In the configuration of the node:
1. Click **Add rule**.
2. Click **Add column**.
3. Select the **Suppressed** column.
4. Under **Edit values by**, from the dropdown list, select **Replacing**.
5. In the left dropdown, leave the **Value** option at default.
6. In the text field, enter `false`.
The configuration of the Edit values node
As a result, you will get an updated file:
The configuration of the Edit values node
7. Confirm by clicking **Apply**.
### Fix structural errors
Structural errors are when you notice strange naming conventions, typos, or incorrect capitalization when measuring or transmitting data.
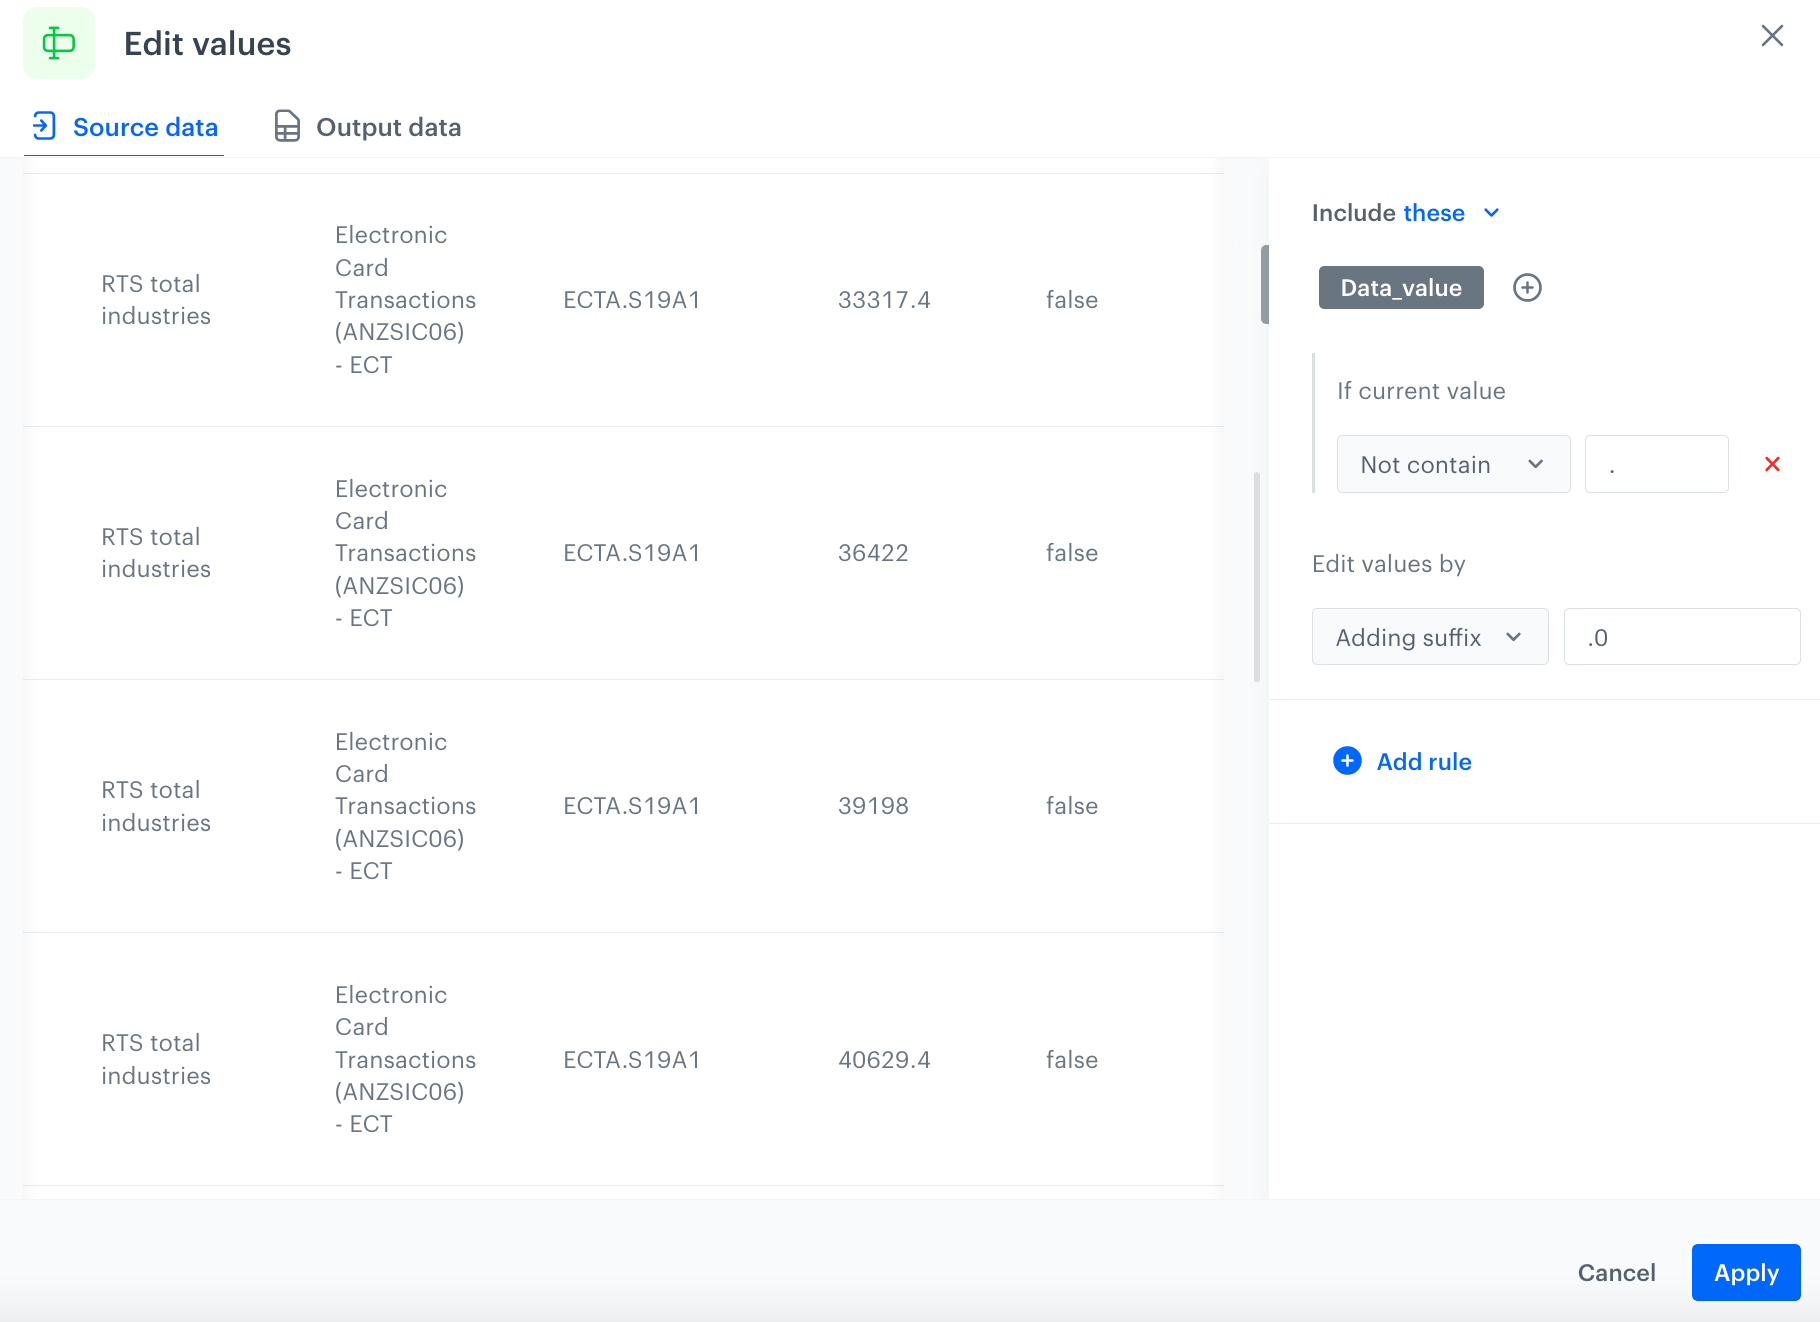
Use **Edit values** node to make the format of the data in the column **Data_value** consistent. Currently, in the **Data_value** column, the data appears both as number `36422` and float `33317.4`. To make the data consistent, unify the data to float.
1. On the canvas, click the right mouse button.
2. From the dropdown list, select **Edit values**.
3. Click the **Edit values** node.
4. In the configuration of the node:
1. Click **Add rule**.
2. Click **Add column**.
3. Select the **Data_value** column.
4. Click on the three dots on the right side of the screen view; you'll see two options: Add value filter, Remove rule.
5. Click **Add value Filter**.
6. Under **If current value**, from the dropdown list, select **Not contain**.
7. In the text field, enter `.`.
8. Under **Edit values by**, from the dropdown list, select **Adding suffix**.
9. In the text field, enter `.0`.
The configuration of the Edit values node
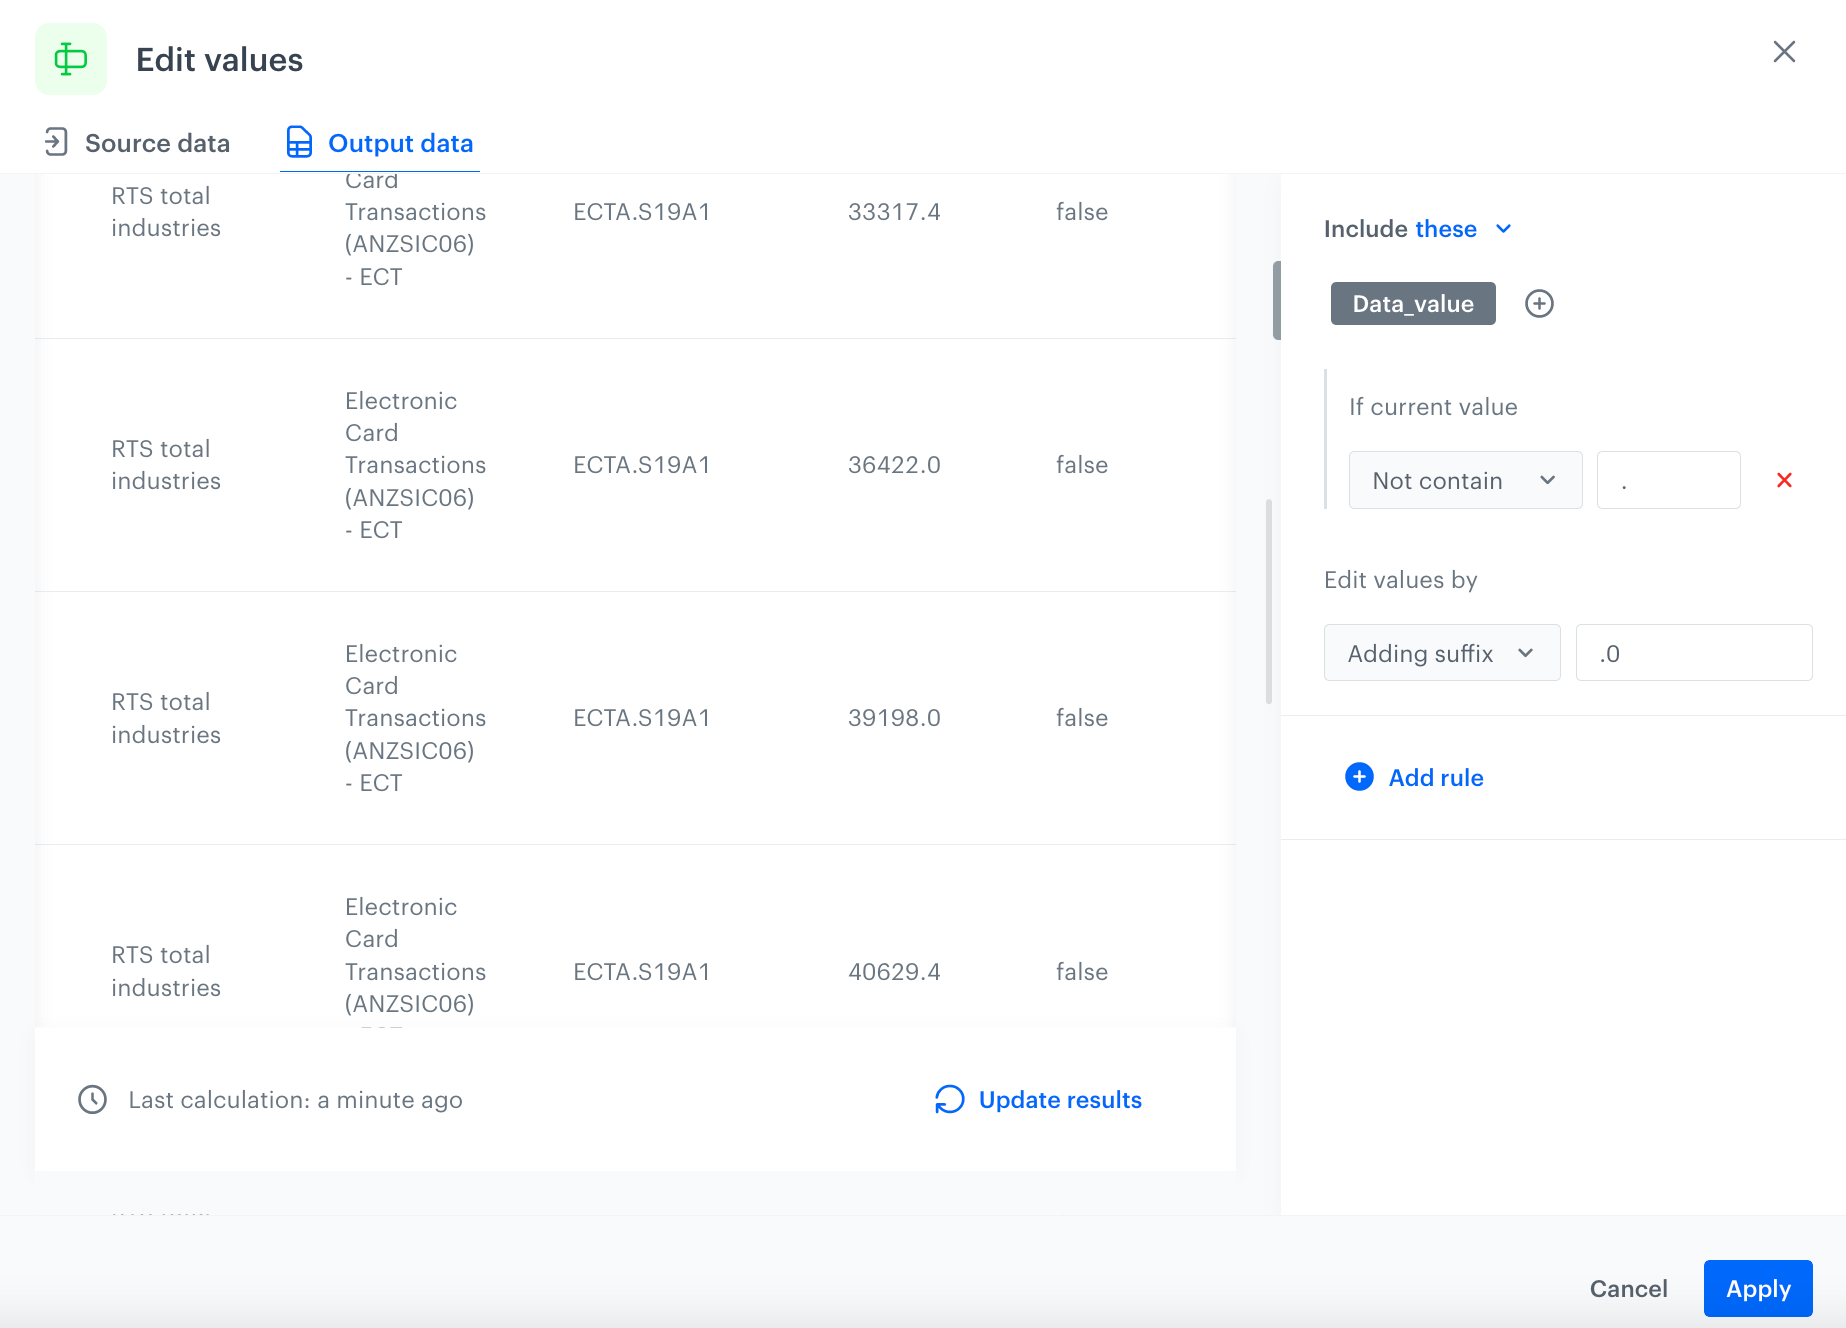
As a result, you will get an updated file:
The configuration of the Edit values node
7. Confirm by clicking **Apply**.
### Filter records
To filter records from the data, use the **Filter Rows** node.
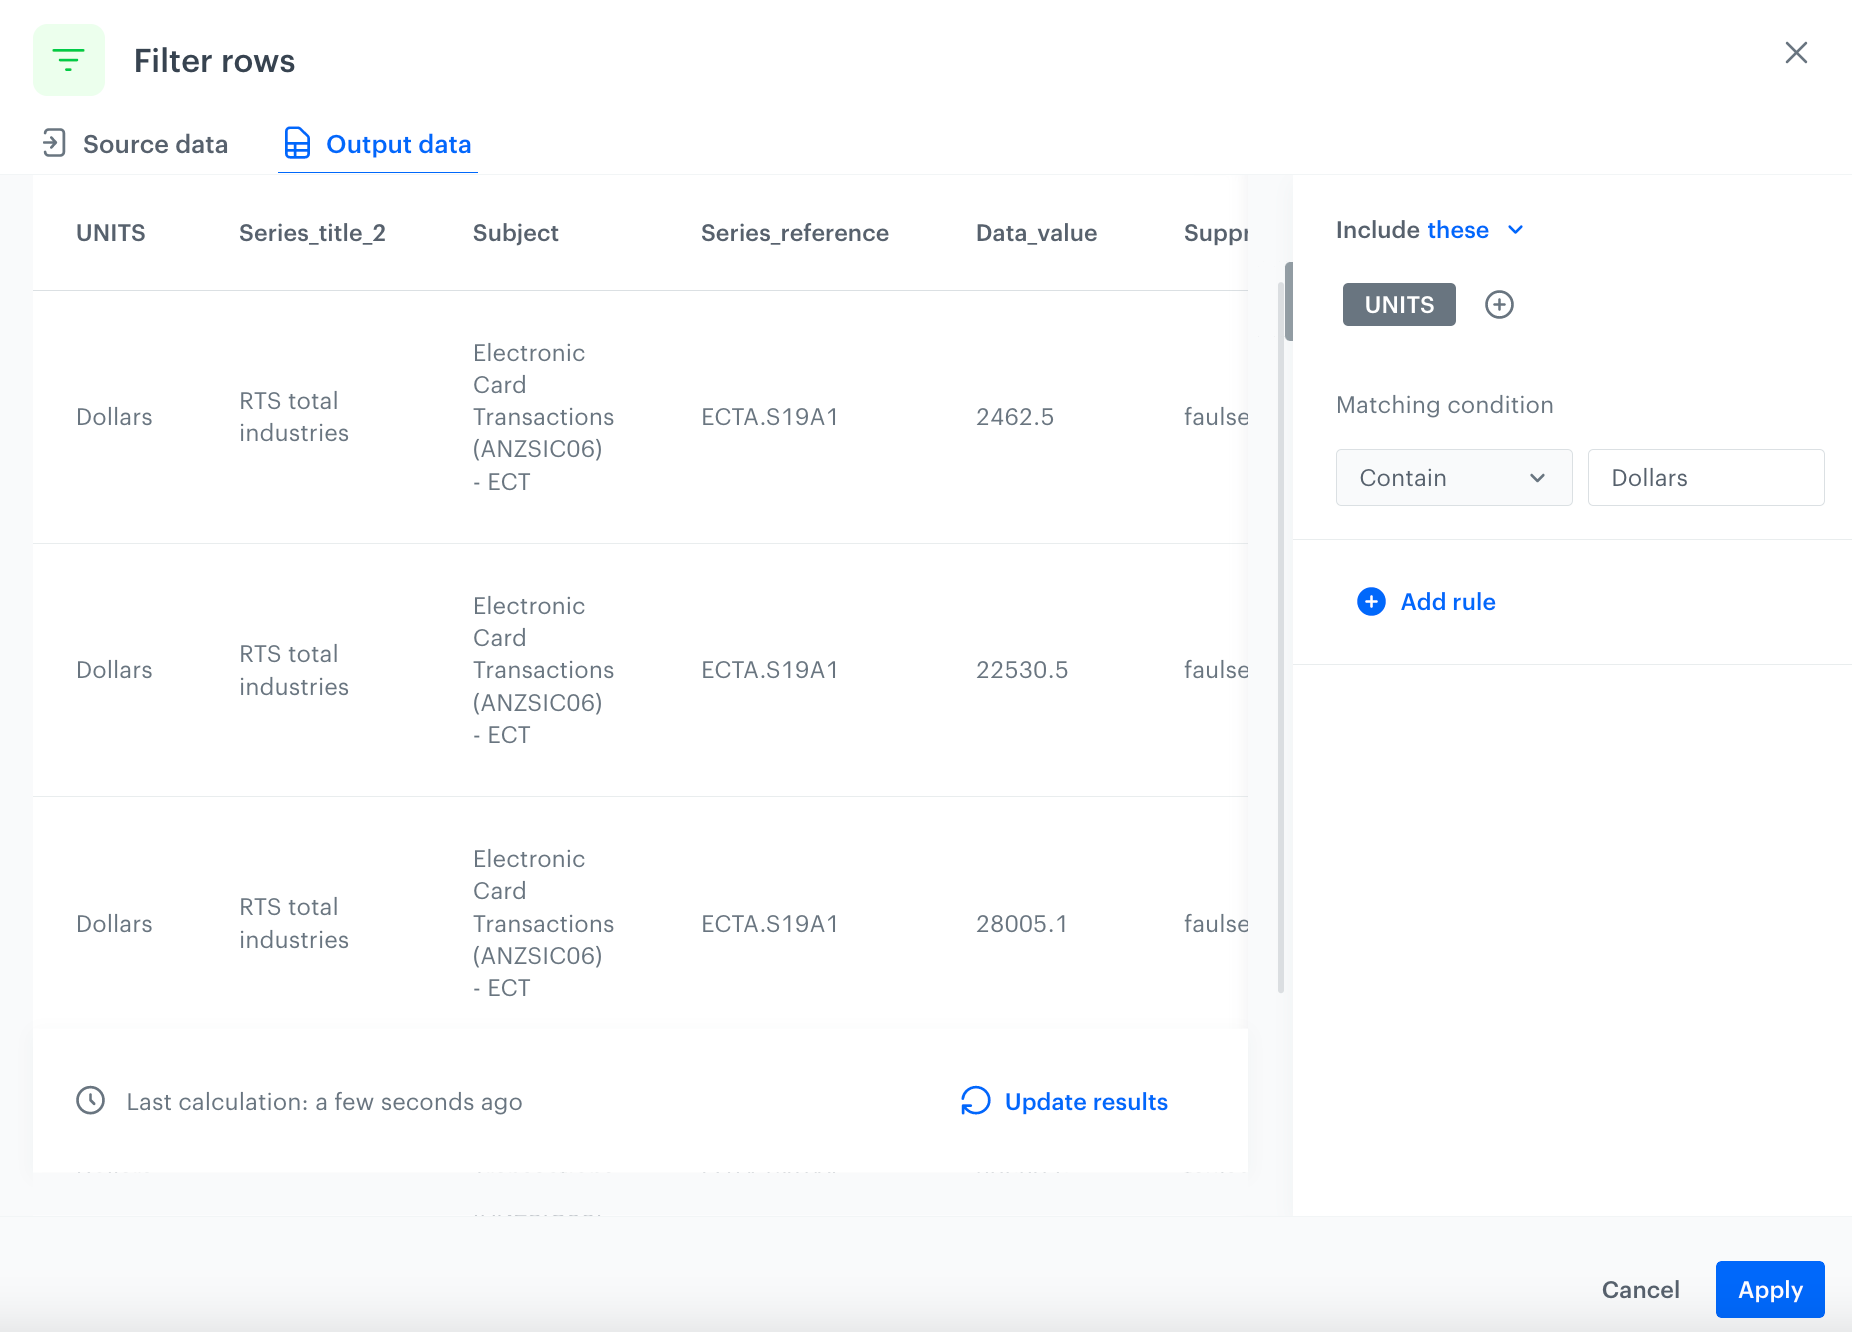
In this case, keep only records where the value of the **UNIT** column is equal to `Dollars`.
1. On the canvas, click the right mouse button.
2. From the dropdown list, select **Filter rows**.
3. Click the **Filter rows** node.
4. In the configuration of the node:
1. Click **Add rule**.
2. Click **Add column**.
3. Select the **UNITS** column.
4. Under **Matching condition**, from the dropdown list, select **Contain**.
5. In the text field, enter `Dollars`.
The configuration of the Filter rows node
As a result, you will get an updated file:
The configuration of the Filter rows node
6. Confirm by clicking **Apply**.
### Add the finishing node
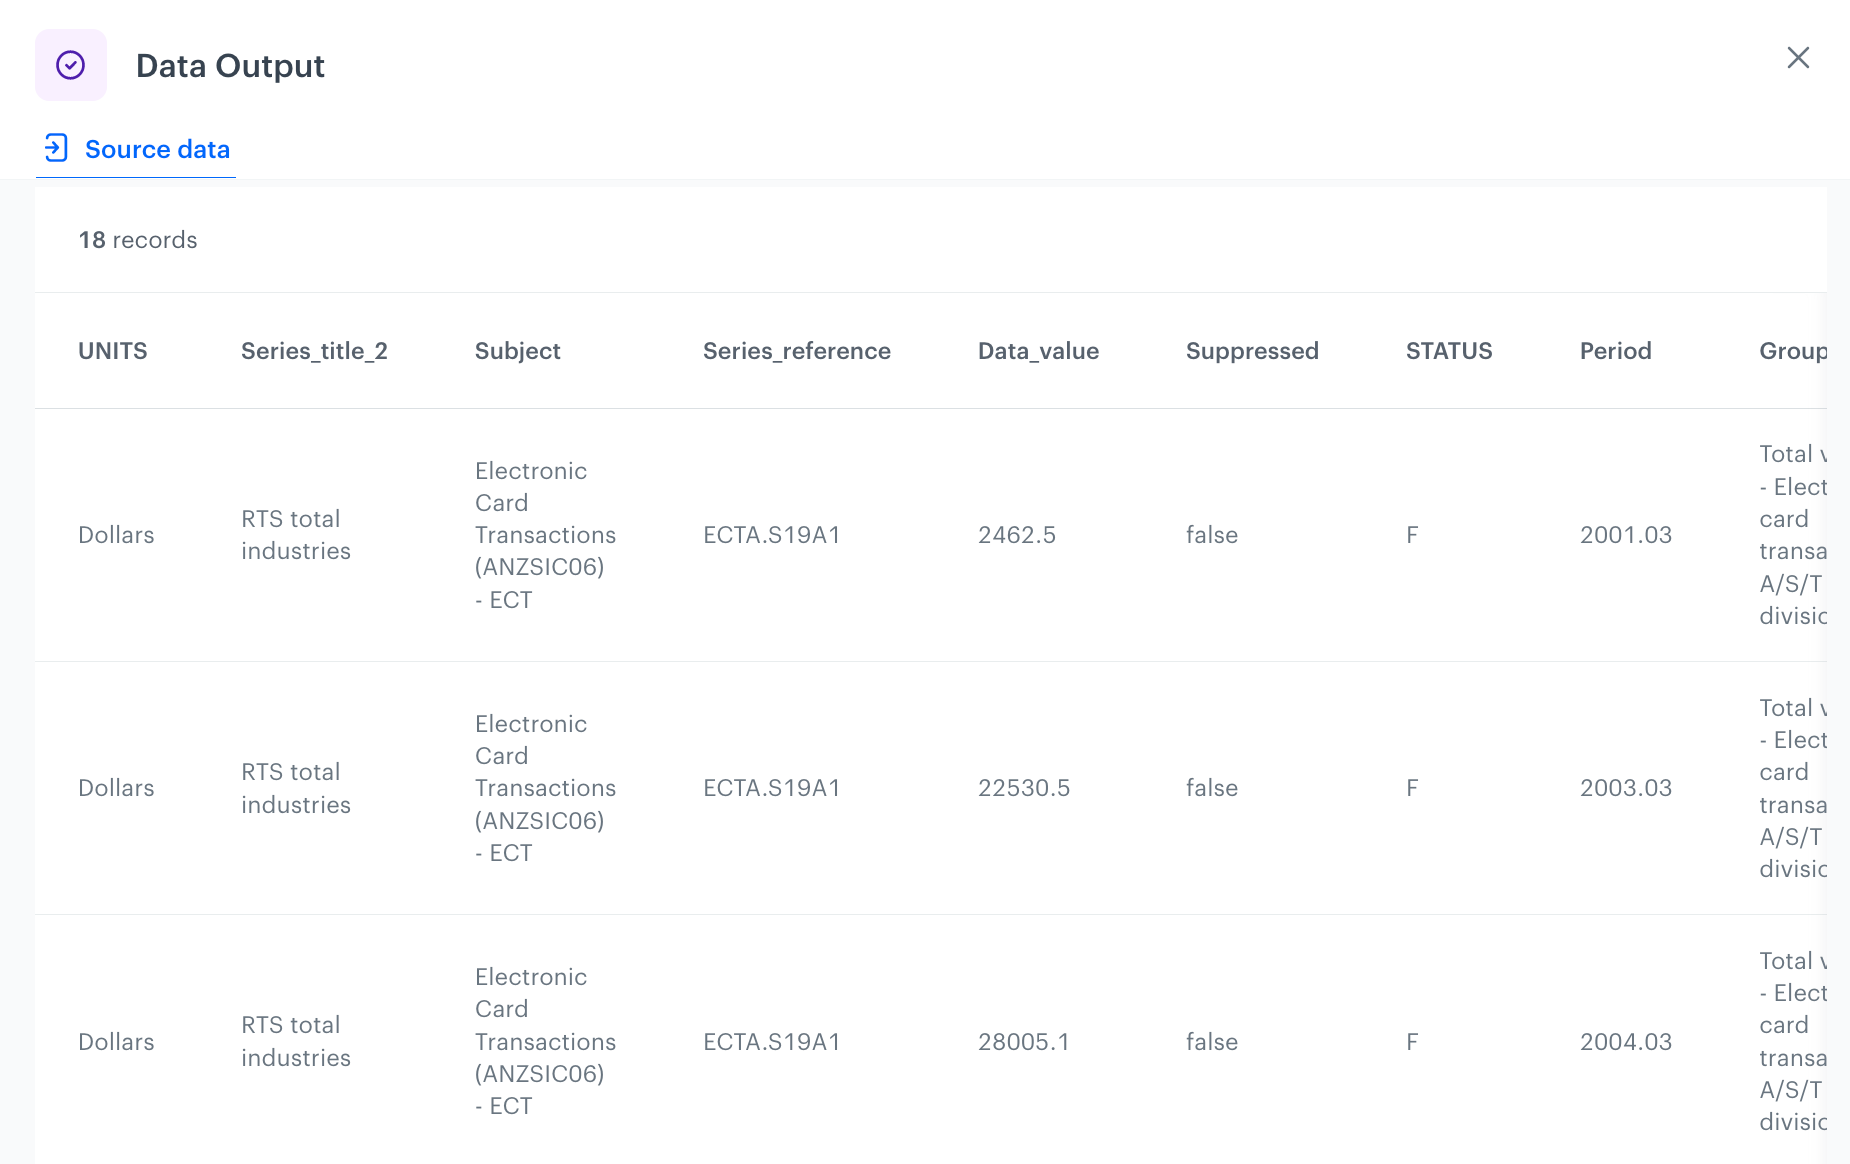
This node lets you preview the output of the modifications to the sample data.
1. On the canvas, click the right mouse button.
2. From the dropdown list, select **Data output**.
3. To preview the results, click the **Data output** node.
The preview of modifications to the file
4. Close the preview
3. In the upper right corner, click **Save and publish**.
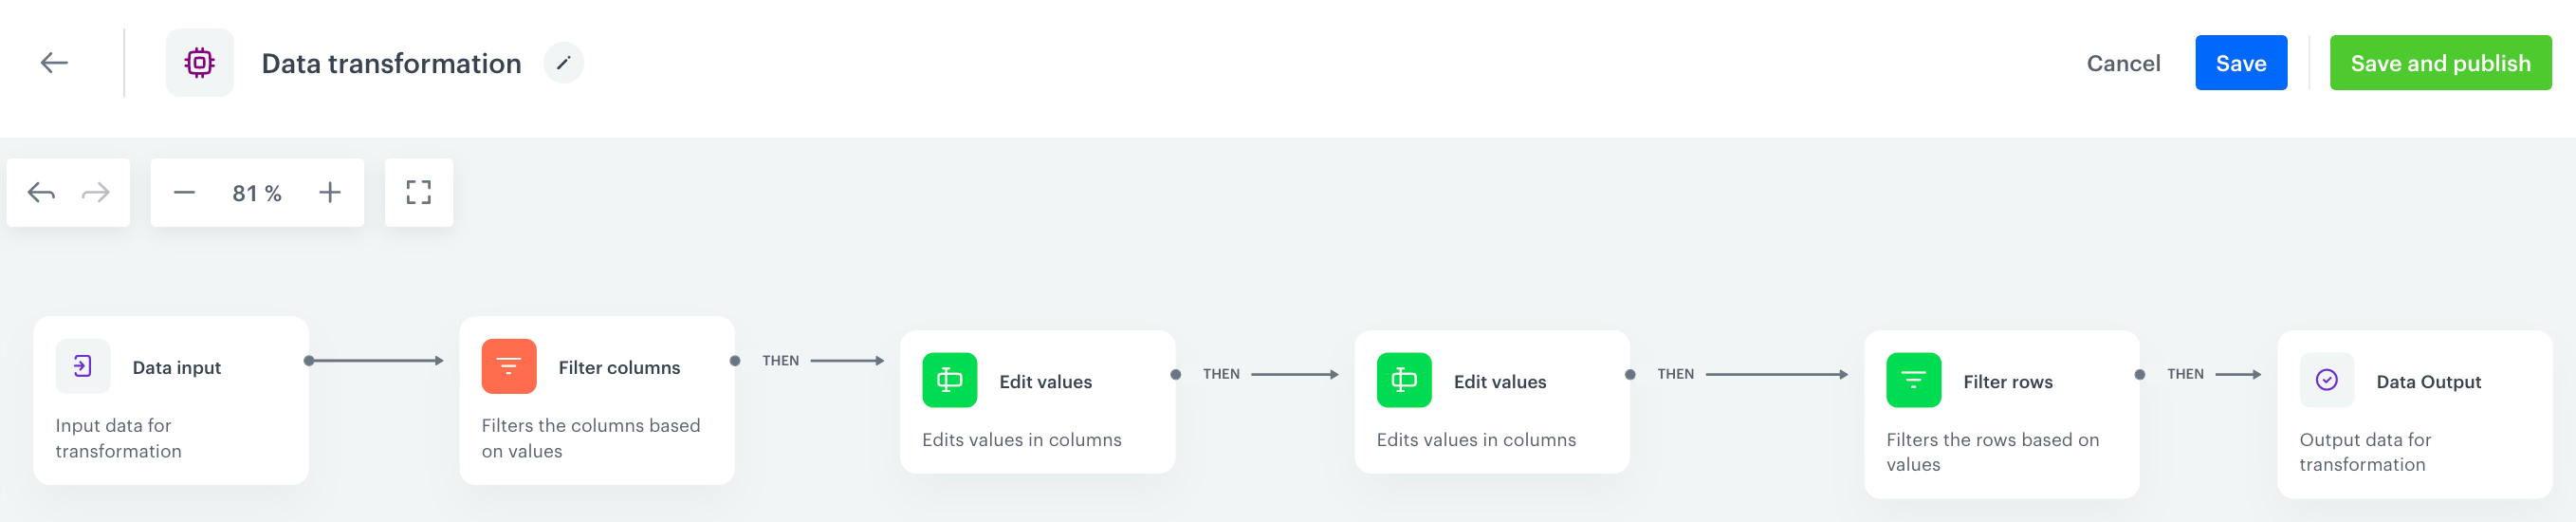
**Result**:
The diagram of data transformation
## Prepare a workflow
---
The scenario for this use case involves a one-time transformation of a file uploaded from the user's local storage. The transformed data will be exported to the external source using the SFTP protocol.
1. Go to **Automation Hub > Workflows > New workflow**.
2. Enter the name of the workflow.
### Define the launch date
3. As the trigger node, add **Scheduled Run**.
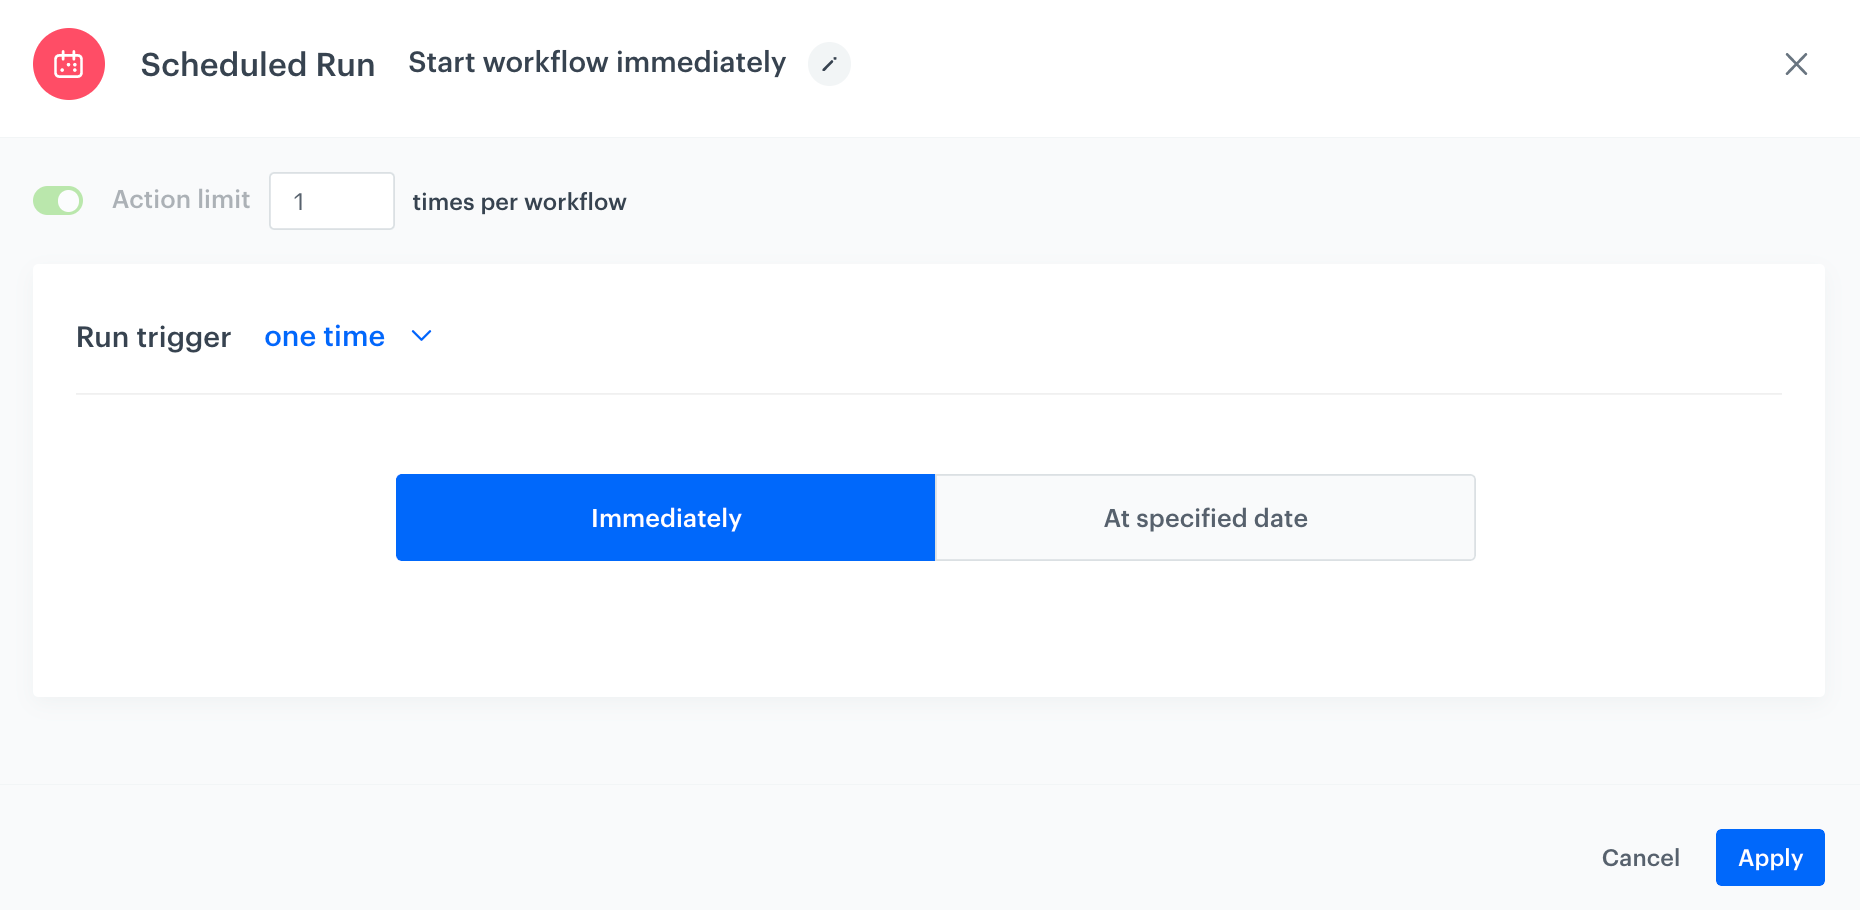
4. In the configuration of the node:
1. Change the **Run trigger** option to **one time**.
2. Select **Immediately**.
The configuration of the Scheduled Run node
3. Confirm by clicking **Apply**.
### Select file to export
1. Add a **Local File** node.
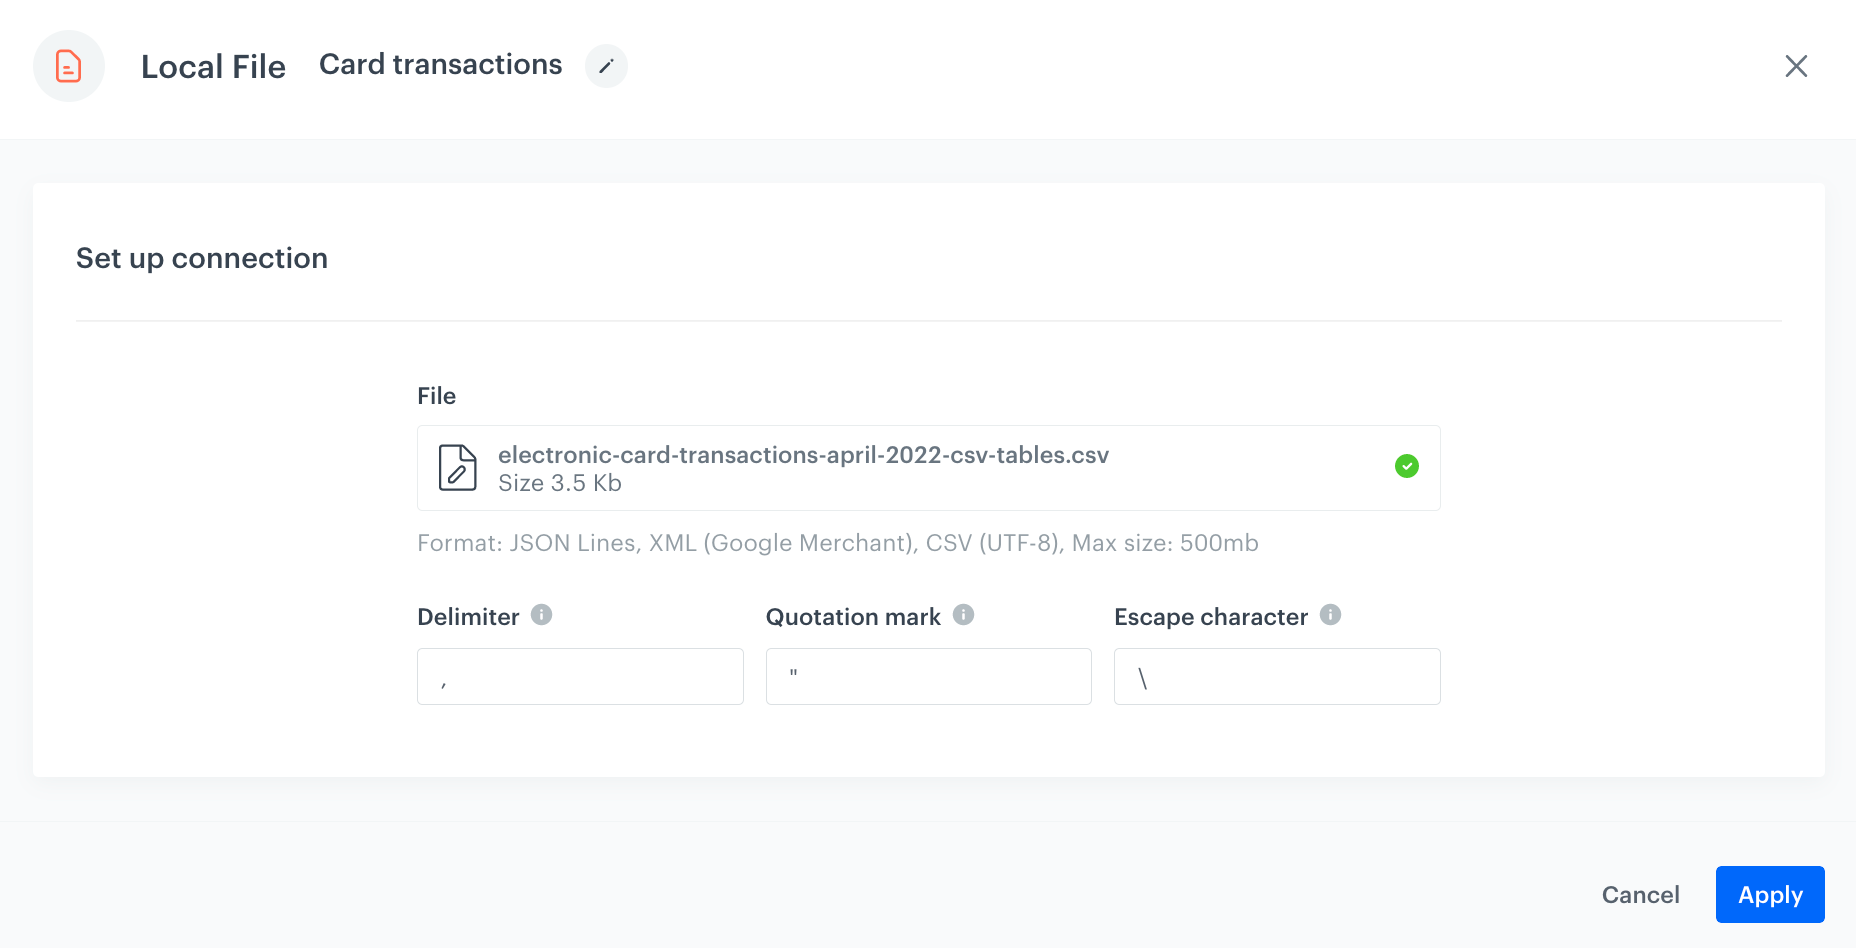
2. In the configuration of the node:
1. Upload the file in which you want to perform the transformation.
Local File transfer
2. Confirm by clicking **Apply**.
### Select the data transformation rules
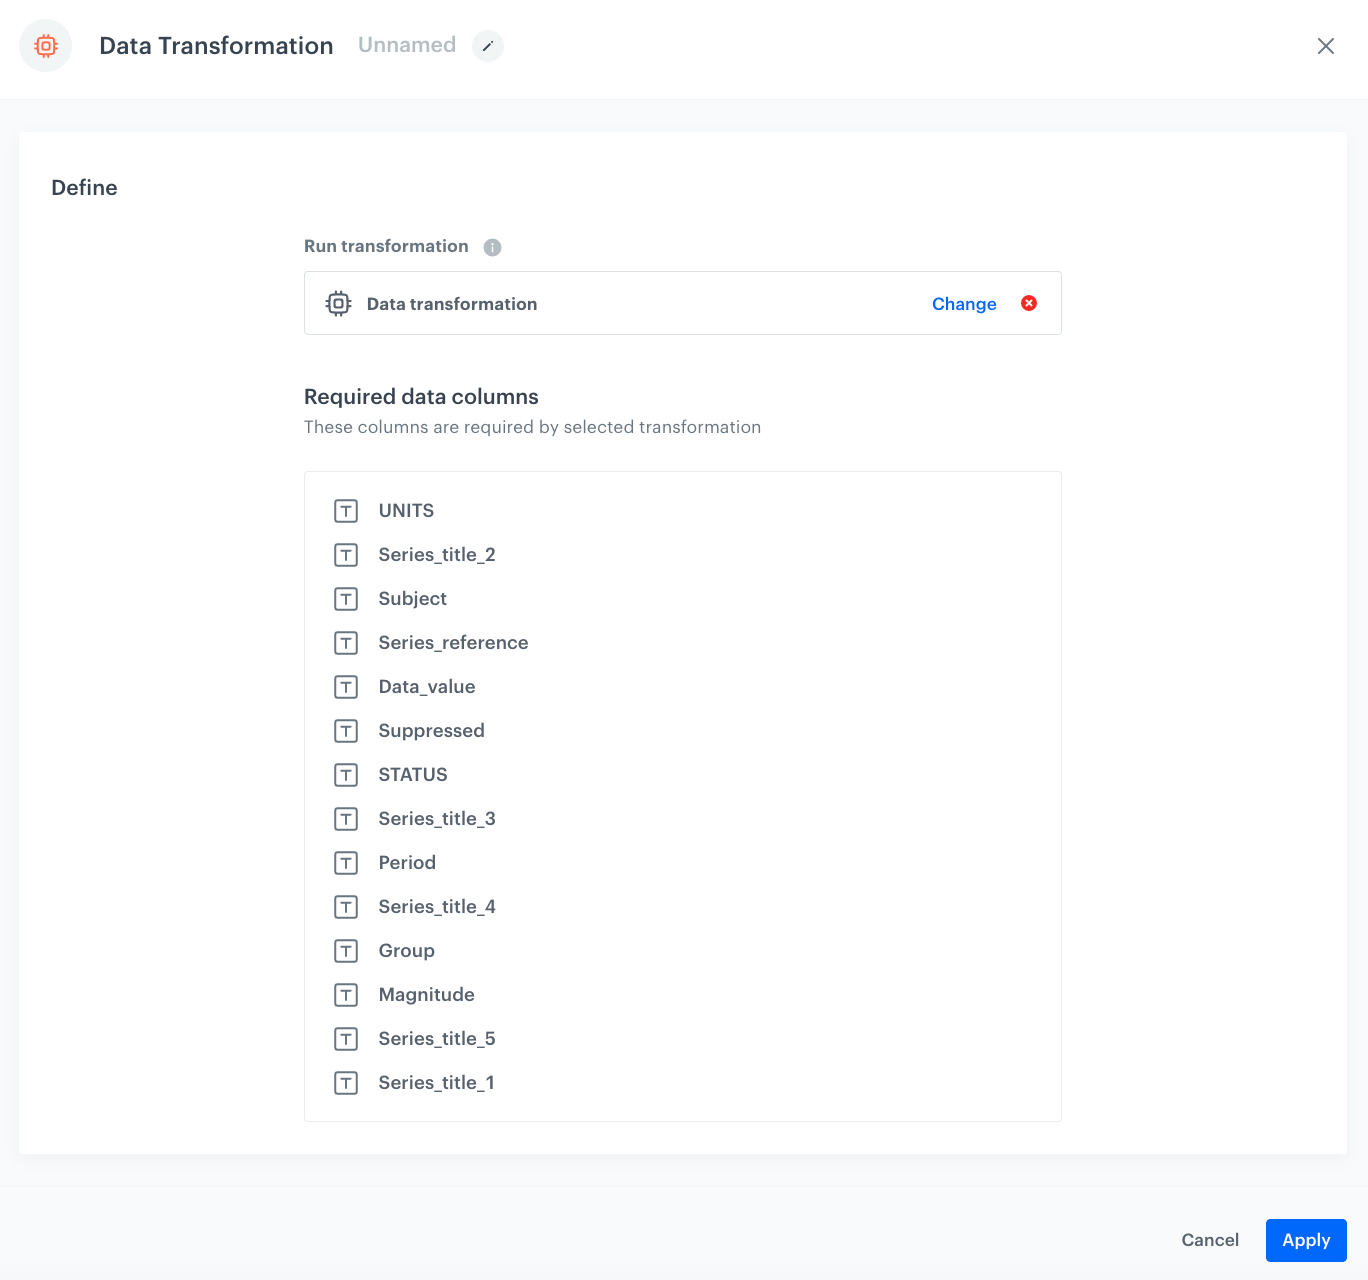
1. Add a **Data Transformation** node.
2. In the configuration of the node, select the [data transformation you have created before](/use-cases/data-cleaning#create-data-transformation-rules).
The configuration of the Data Transformation node
3. Confirm by clicking **Apply**.
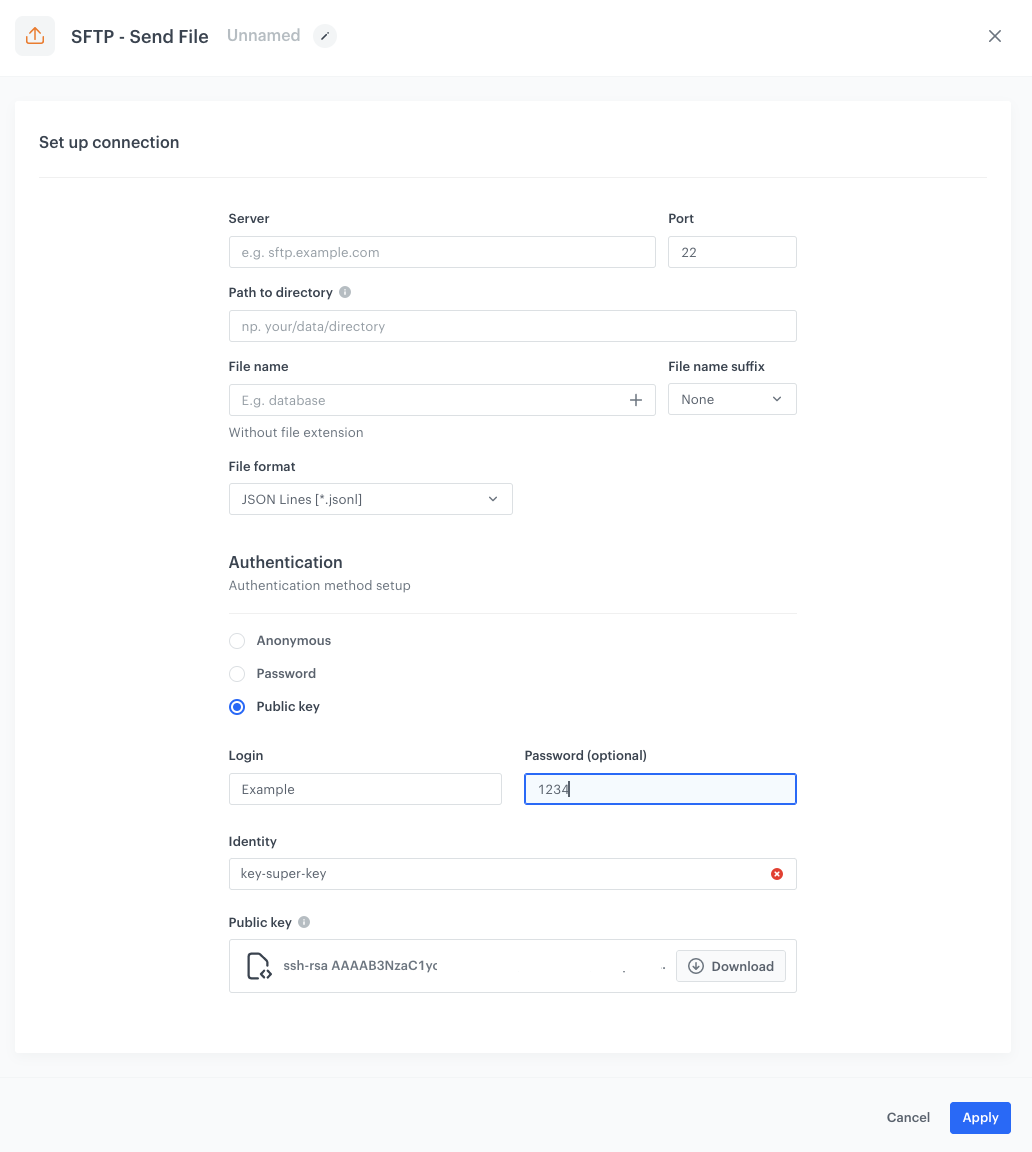
### Configure settings for SFTP protocol
1. Add the **Send File** node by clicking **THEN > SFTP**.
2. In the configuration of the node:
1. Enter the path to your server.
2. Select the port.
3. Enter the path to the directory.
4. Enter the name of the file that will be created.
5. If needed, in the **File name suffix**, select the suffix of the file name.
6. From the **File format** dropdown list, select the **CSV** format.
7. Verify and modify the delimiters if needed.
8. In the **Authentication** section, select the method of authentication.
The configuration of the SFTP node
9. Confirm by clicking **Apply**.
### Add the finishing node
1. Add the **End** node.
2. In the upper right corner, click **Save & Run**.
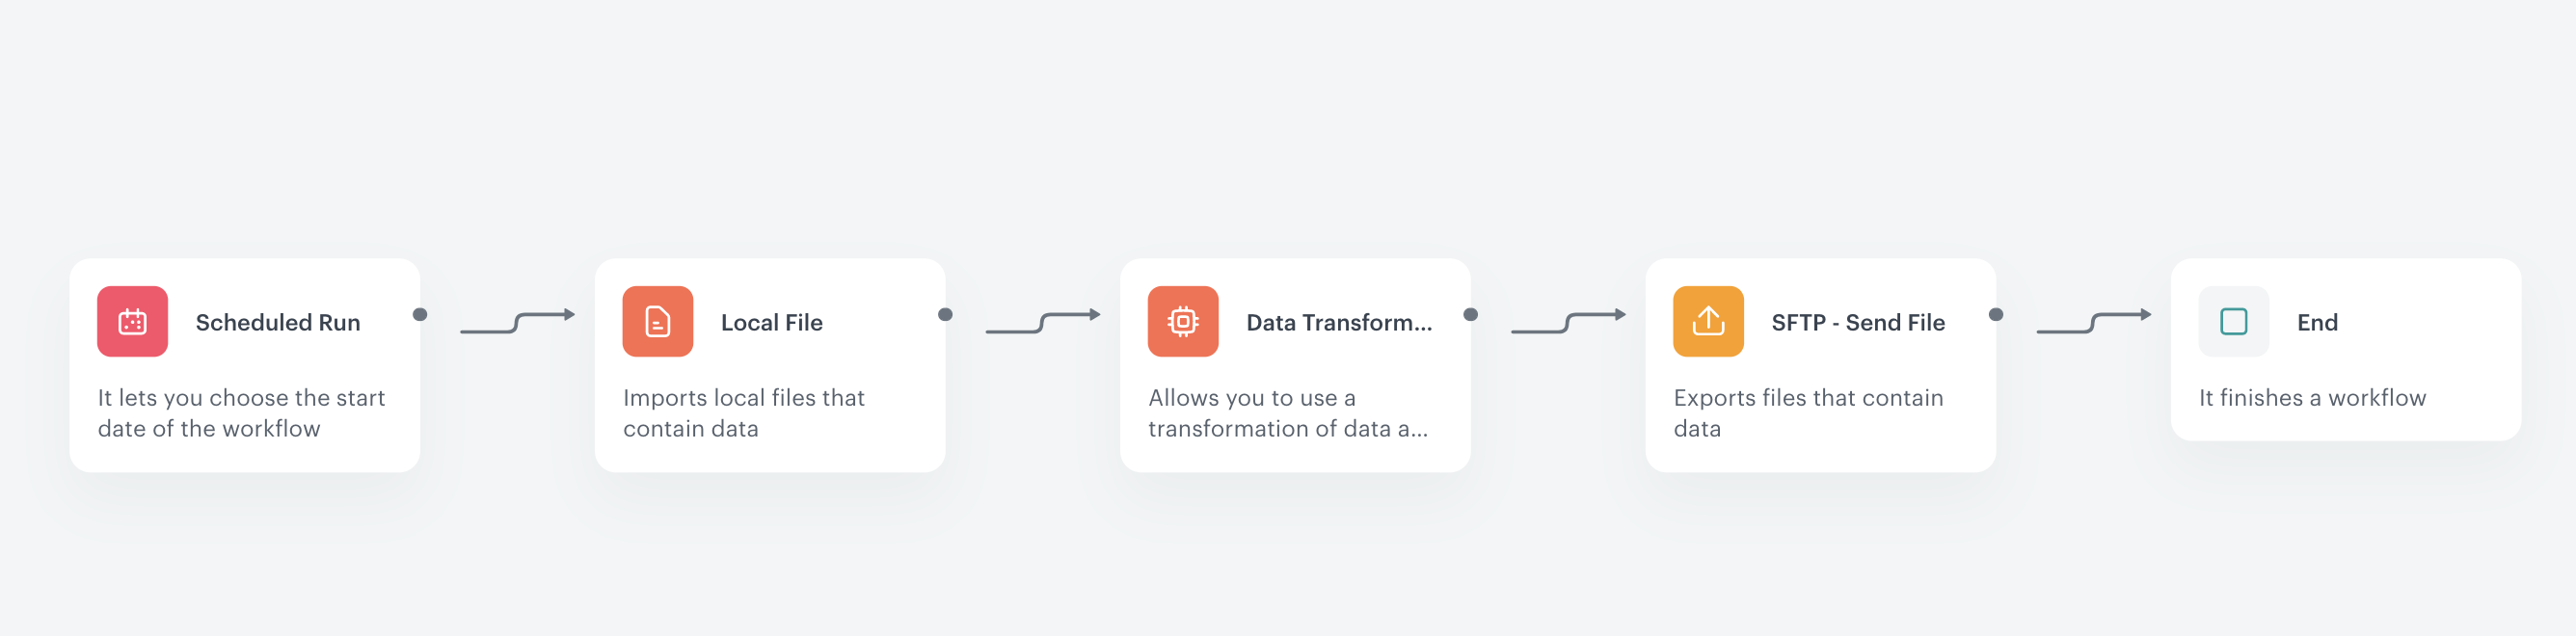
The workflow configuration
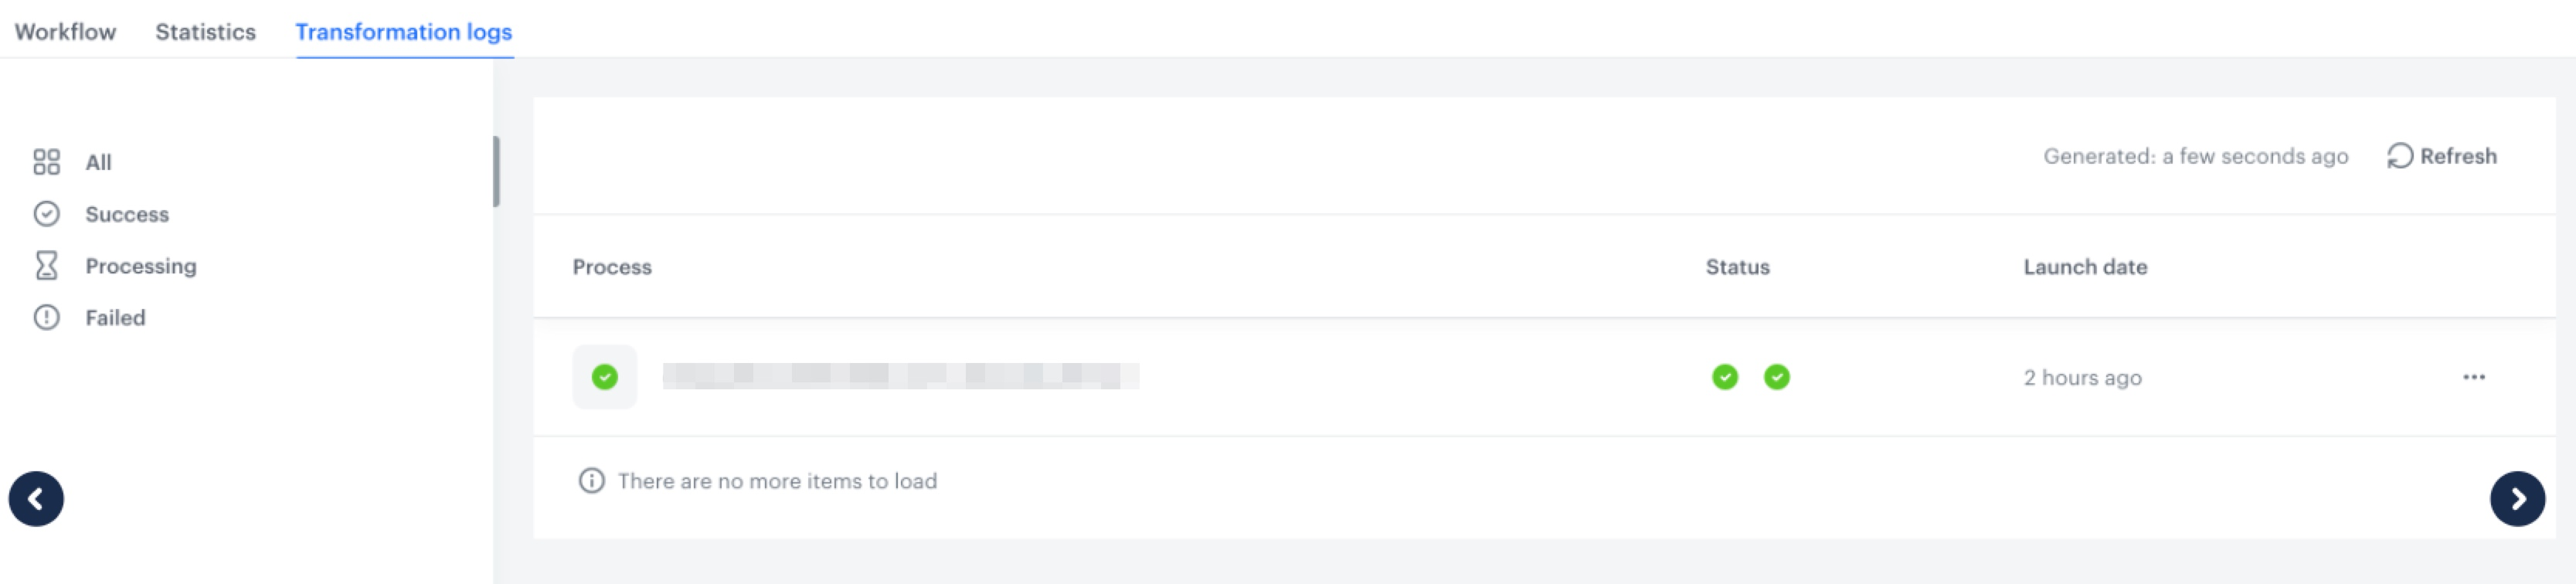
You can monitor the flow of the workflow in the **Transformation logs** tab. It contains information about each execution of the workflow.
The logs for the workflow
## Check the use case set up on the Synerise Demo workspace
---
You can check the [data transformation rules](https://app.synerise.com/automations/data-transformation/bdf77aad-e443-4630-931d-af944f814db3) and [workflow](https://app.synerise.com/automations/automation-diagram/811d3a5b-64c4-4cba-9d93-64add71a7f23) directly in Synerise Demo workspace.
If you’re our partner or client, you already have automatic access to the **Synerise Demo workspace (1590)**, where you can explore all the configured elements of this use case and copy them to your workspace.
If you’re not a partner or client yet, we encourage you to fill out the contact [form](https://demo.synerise.com/request) to schedule a meeting with our representatives. They’ll be happy to show you how our demo works and discuss how you can apply this use case in your business.
## Read more
---
- [Data Transformation](/docs/automation/data-transformation-and-imports/introduction)
- [Workflow](/docs/automation)