Synerise [documents](/docs/assets/documents) are objects that allow users to build mobile applications or create single elements to display in the applications for example a simple information about ongoing discount season. A [screen view](/docs/campaign/screen-views) lets you display the content of documents in a mobile application. This way, you can create and deliver the content dedicated to defined customer groups and also group the documents and use those group in the further communication.
In this use case, you will display an image that contains information about discounts available for all customers. The image will be included in the body of a document, and the whole document will be published by means of a screen view.
## Prerequisites
---
- [Implement Synerise SDK in your mobile app](/developers/mobile-sdk).
- Upload an image with the information about discounts, you can do it in **Data Modeling Hub > Files**
- [Meet the screen views requirements](/docs/campaign/screen-views/introduction-to-screen-views#requirements)
- [Meet the documents requirements](/docs/assets/documents/introduction-to-documents#requirements)
## Process
---
In this use case, you will go through the following steps:
1. [Create a document](/use-cases/documents-promotion#create-a-document) with basic promotion targeted to everyone.
2. [Create a screen view](/use-cases/documents-promotion#create-a-screen-view) based on the document with the general promotion and target it to everyone.
## Create a document
---
As the first part of the process, create a document with general promotion targeted to the whole database.
1. Go to **Data Modeling Hub > Documents > Add document**.
2. Enter the name for your document.
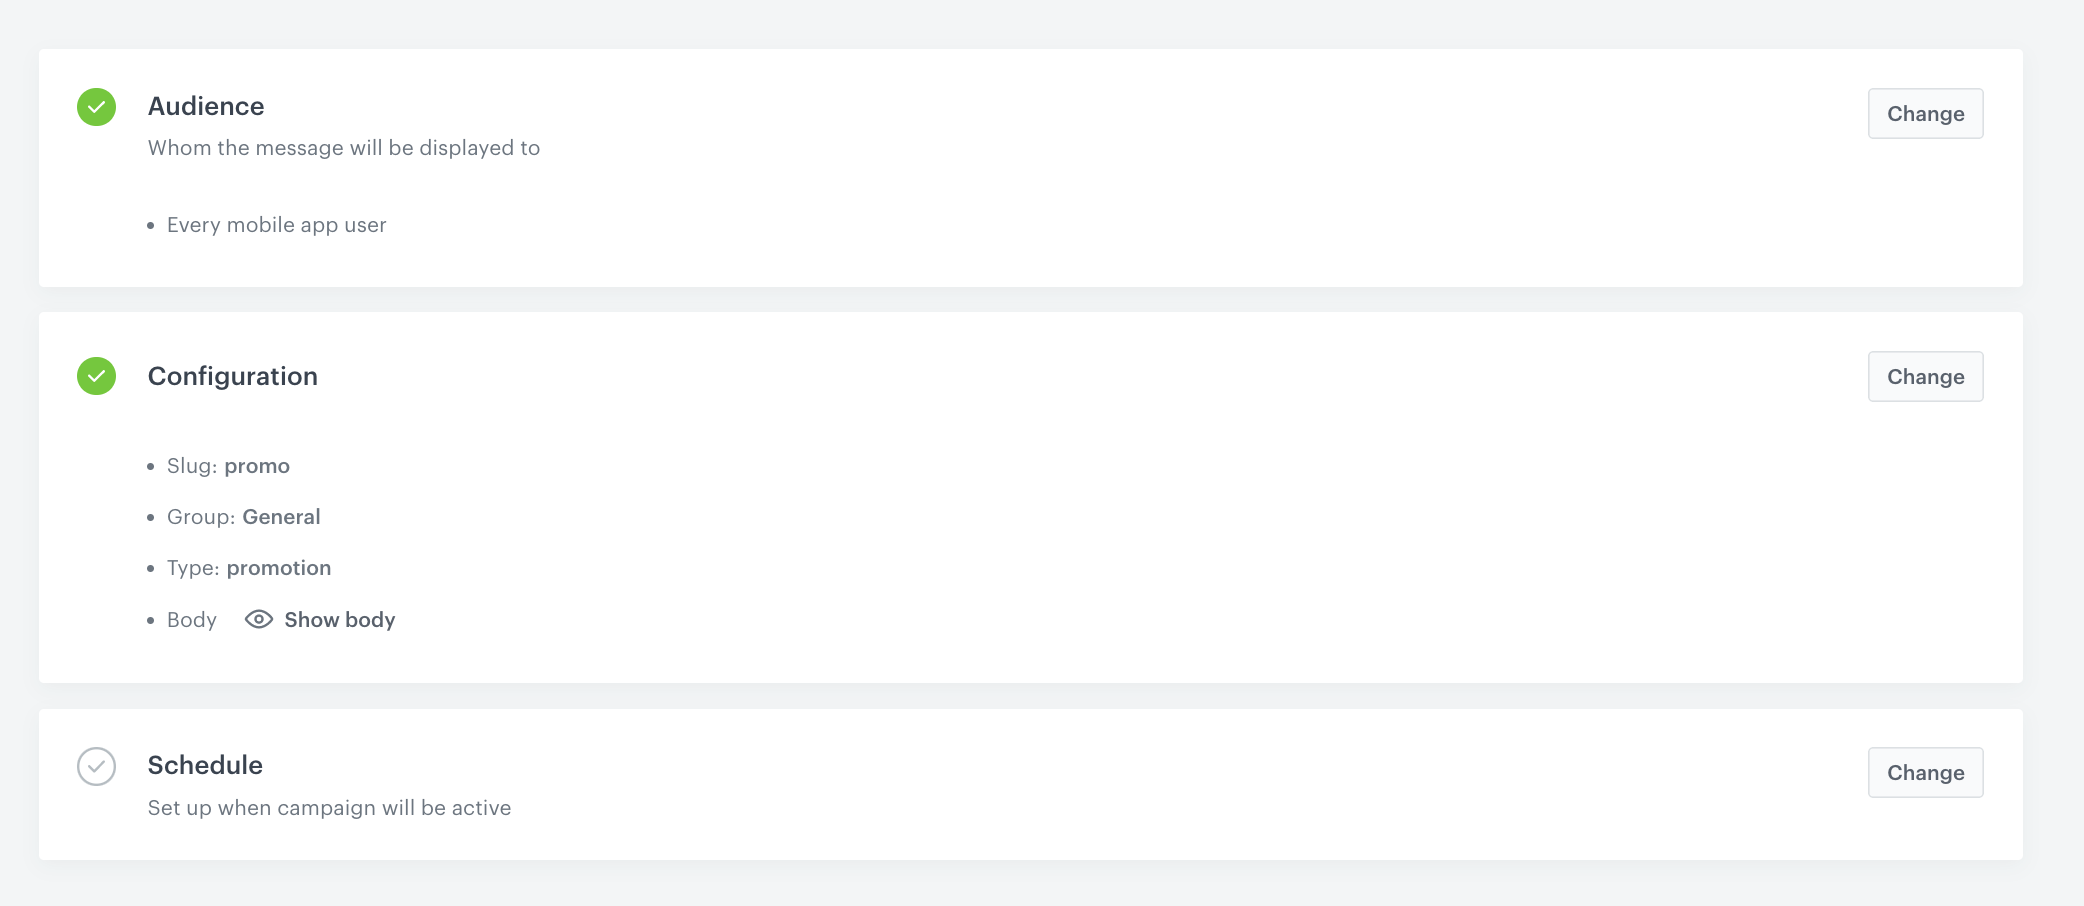
2. In the **Audience** section, choose to whom the message will be displayed. Select **Everyone**.
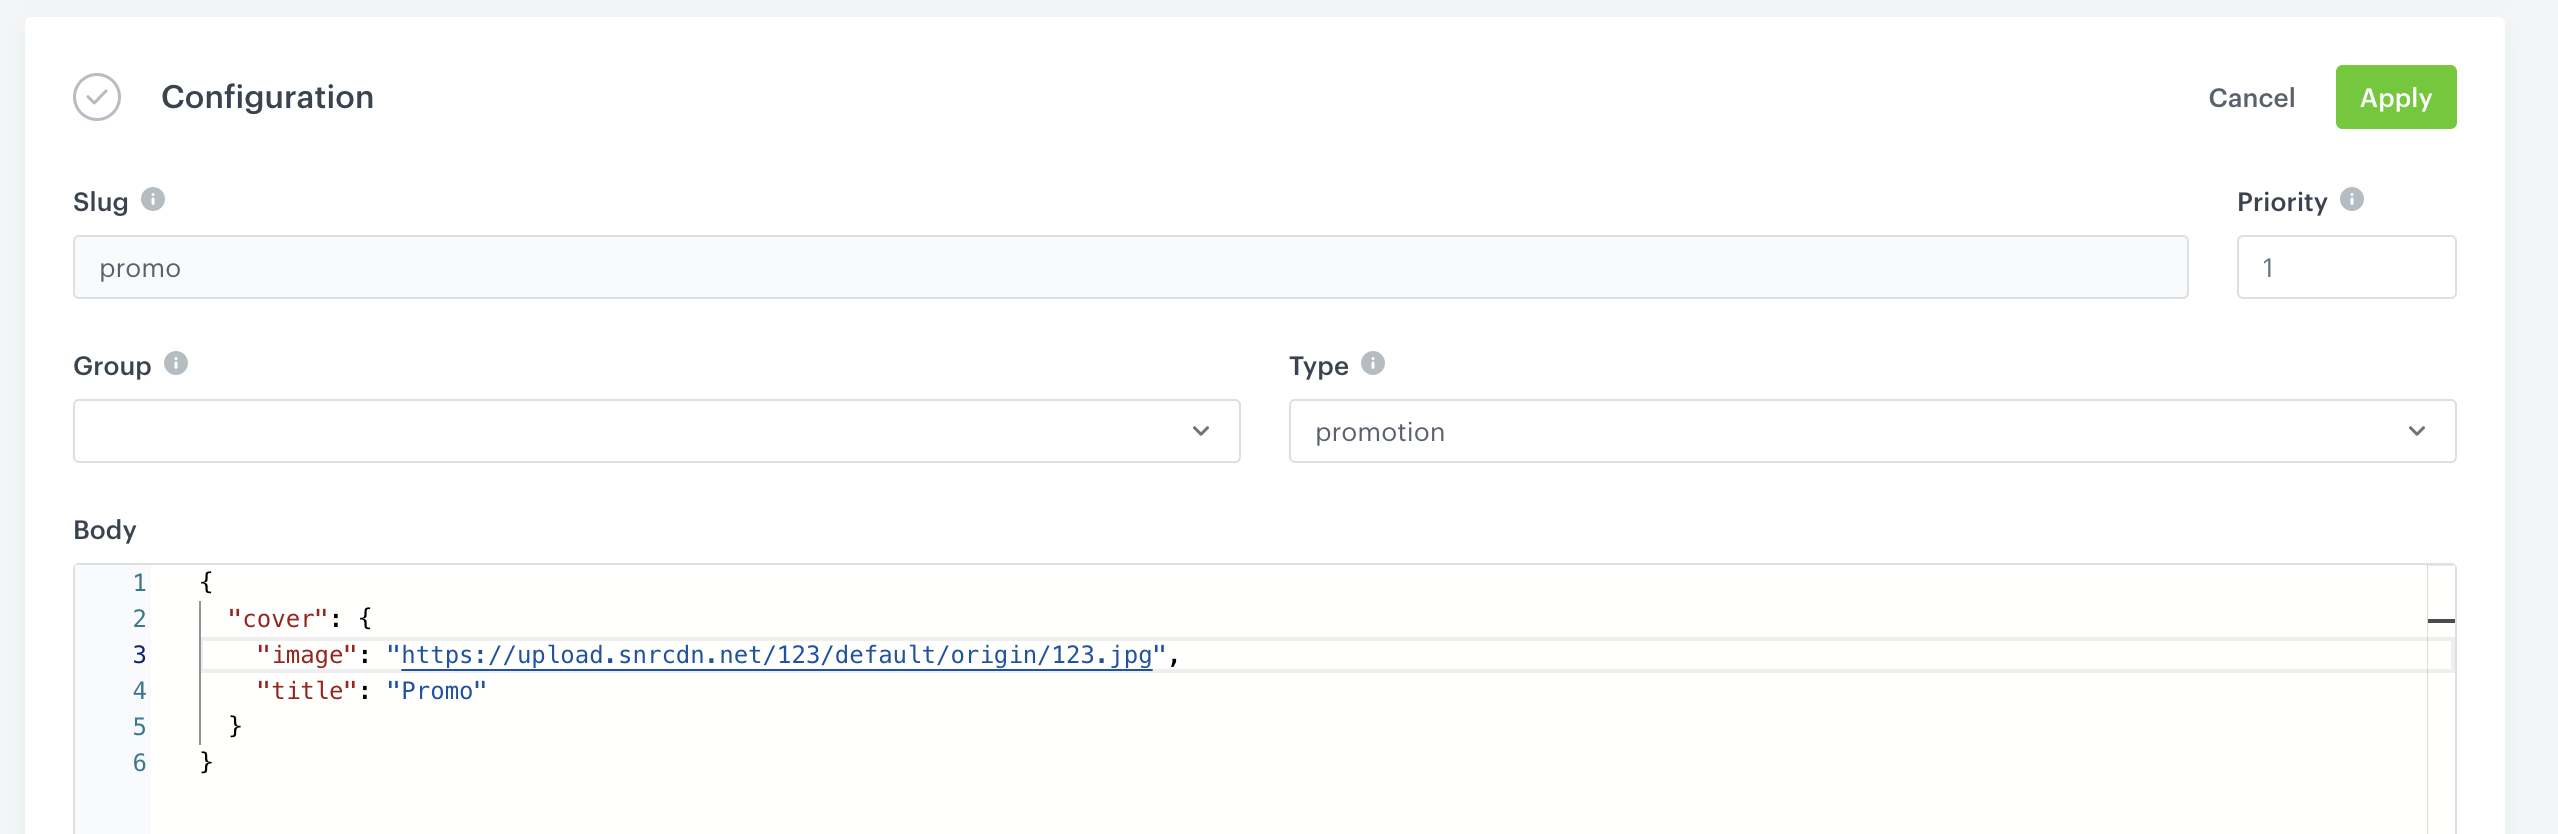
3. In the **Configuration** section:
1. In the **Slug** field, enter the slug of the document, we recommend using the following name convention: `this-is-slug-name`.
2. In the **Priority** field, use a number to define the document priority. The order of documents is defined by the priority value (1 is the highest, 100 is the lowest).
3. Optionally you can choose the **Group** to which you add your document. In this case we focus on single promotion.
4. From the **Type** dropdown list, select a document type. Document type defines how the document is validated by your mobile application. To create a new type, from the dropdown list, click **Add type**.
Full explanation of the type is available [here](/docs/assets/documents/introduction-to-documents#terminology).
5. In the **Body** field, add the content of the promotion in the JSON format. Below you will find an easy examples of the document body that contains the promotion created in Synerise:
Document configuration
7. Optionally, to check the preview of the document for the specific customer, use **Preview body**.
8. To save your changes, click **Apply**.
1. In the **Schedule** section, define the time when the document will be active.
- To activate a document immediately, choose **Run immediately** your campaign will be launched immediately after activation.
- To schedule the activation of the document at a specific date, select the **Scheduled** option and define the time range.
2. Click **Apply** to save your changes.
3. To activate immediately or at a scheduled date, click the **Activate** button.
Document configuration
## Create a screen view
---
In this part of the process, create screen views for the document created in the previous step.
1. Go to **Experience Hub > Screen views > New Screen View**.
2. Enter the name of the screen view.
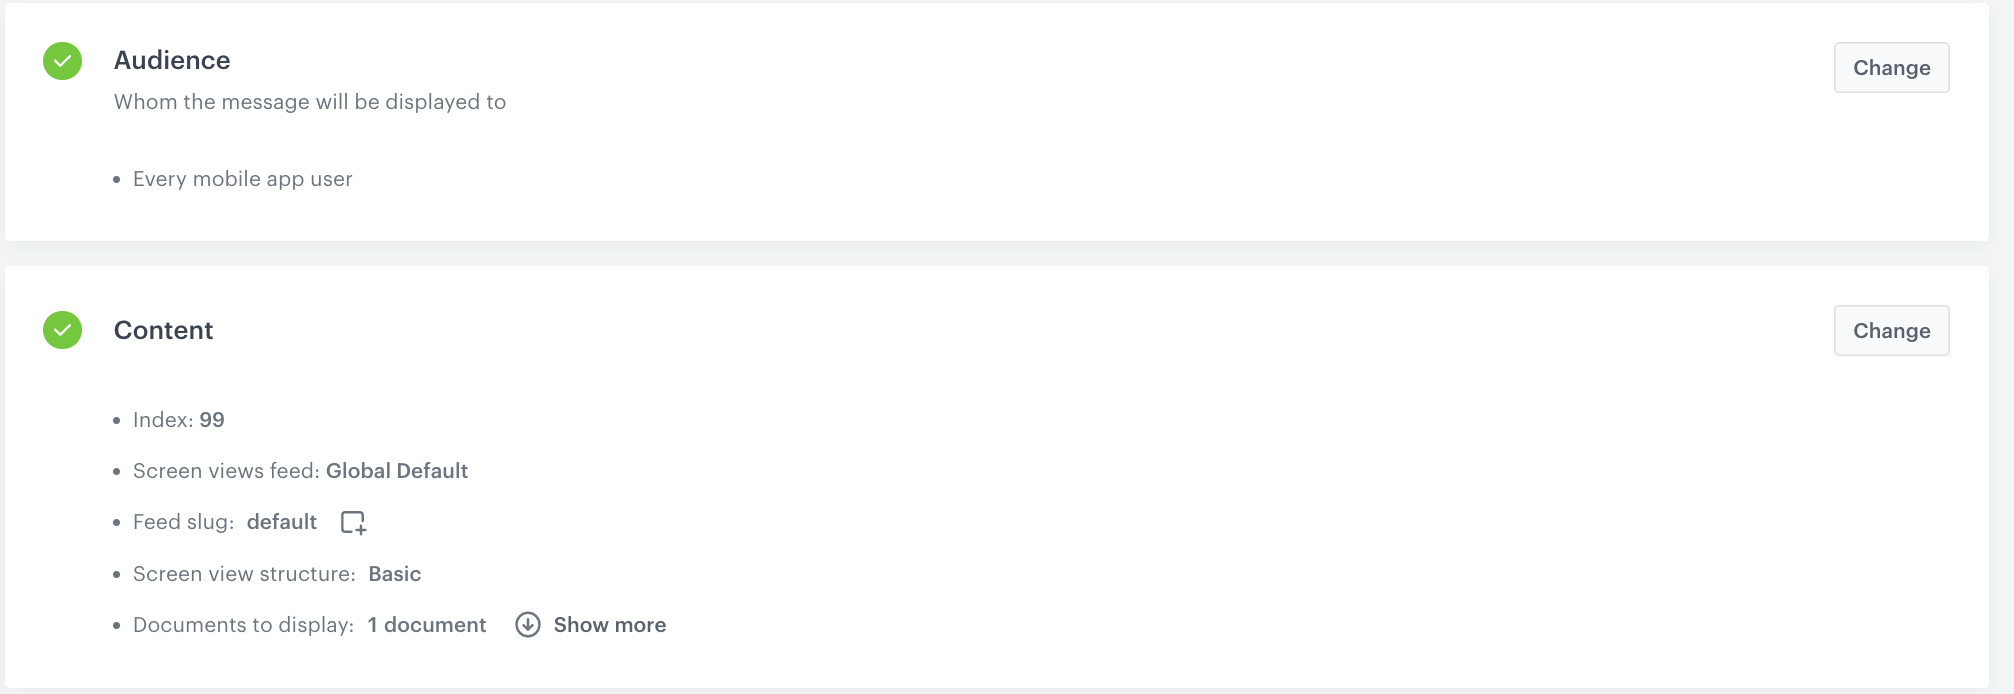
2. In the **Audience** section, choose to whom the message will be displayed. In this case, select **Everyone**.
5. Confirm your choice by clicking the **Apply** button.
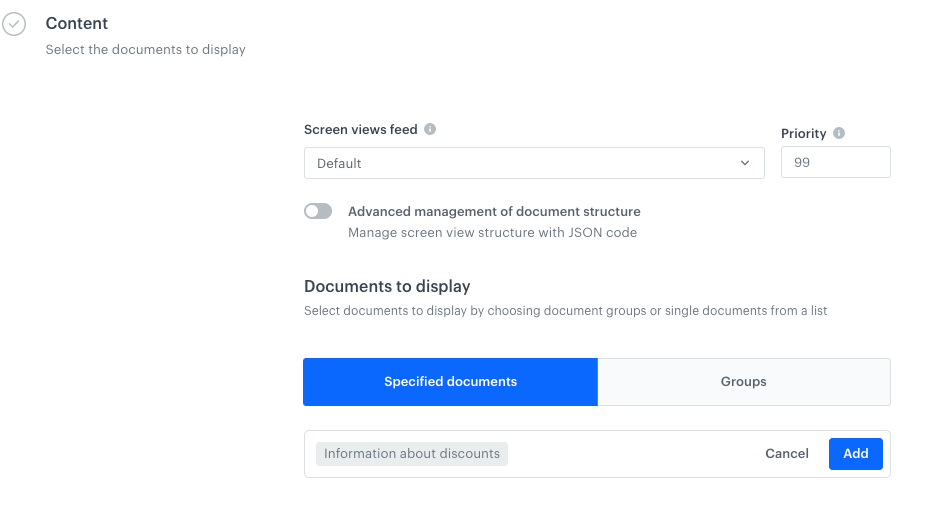
6. To create the content of your screen view, in the **Content** section click the **Change** button.
1. In the **Screen views feed**, select the general feed to display.
2. Set up the **Priority**. If multiple screen views match the conditions, the one with the higher priority is displayed (1 is the highest, 100 is the lowest).
You can learn more about the order of displaying multiple screen views [here](/docs/campaign/screen-views/creating-screen-views#conflicts).
3. Select the document you created in the [previous step](#create-a-document) by clicking the **Specified documents**.
4. From the dropdown list, select the document.
The configuration of the screen view
5. Confirm your choice by clicking **Add**.
4. Click **Apply** to save your changes.
6. Go to the **Schedule** section and click the **Change** button.
7. Set up when campaign will be active using option **Run immediately** or set up a specific time range using option **Scheduled**.
4. To save your changes, click **Apply**.
5. To run your screen views campaign, click **Activate**.
The configuration of the screen view
## What's next
---
For a screen view to be visible in a mobile application, you must fetch it using the appropriate SDK method for:
- [iOS](/developers/mobile-sdk/method-reference/ios/content#generate-screen-view),
- [Android](/developers/mobile-sdk/method-reference/android/content#generate-screen-view),
- [React Native](/developers/mobile-sdk/method-reference/react-native/content#generate-screen-view)
- [Flutter](/developers/mobile-sdk/method-reference/flutter/content#generate-screen-view)
## Check the use case set up on the Synerise Demo workspace
---
In the Synerise Demo workspace, you can check:
- [Document](https://app.synerise.com/assets/documents/3e03fc3a-5875-4273-b552-407a6d653de7)
- [Screen view](https://app.synerise.com/campaigns/screen-views/screen-view/f4283005-966e-4510-82f0-1eab94db6652)
- [Workflow](https://app.synerise.com/automations/automation-diagram/48972f25-04ff-43c3-a06f-1e34c7089e06)
If you’re our partner or client, you already have automatic access to the **Synerise Demo workspace (1590)**, where you can explore all the configured elements of this use case and copy them to your workspace.
If you’re not a partner or client yet, we encourage you to fill out the contact [form](https://demo.synerise.com/request) to schedule a meeting with our representatives. They’ll be happy to show you how our demo works and discuss how you can apply this use case in your business.
## Read more
---
- [Documents](/docs/assets/documents)
- [Screen views](/docs/campaign/screen-views)