While selecting the right audience for an annual campaign, you can use the Predictions feature to find customers in your database who are similar to those customers who converted in the same campaign a year before.
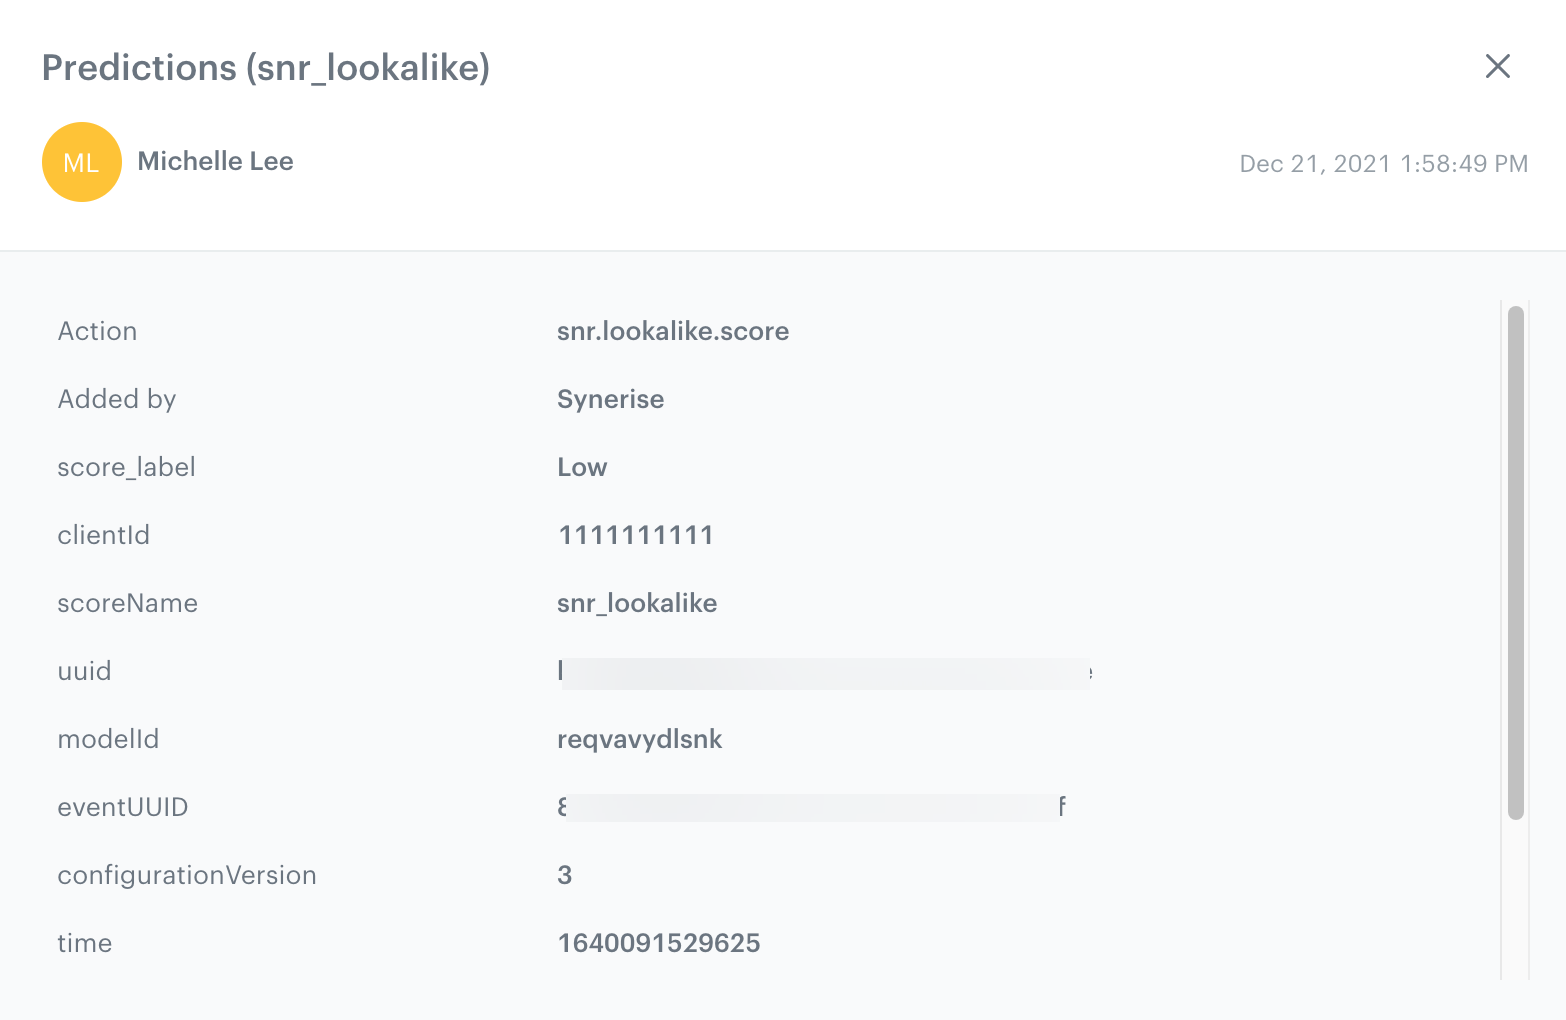
The main action in this use case is comparison of a group of customers who visited the website in the last 90 days (target group) to the group of customers who made a purchase during the Christmas season 2020 (source group). The customers from the target group are featured by the `snr.lookalike.score` event on their profiles and the `score_label` parameter contains the value of similarity scale.
Based on this event, you can create a group of customers who received the highest score and will be the recipients of the campaign during Christmas season 2021. This way, you increase the chances of reaching those who are most likely to buy and only need a small incentive to make a purchase.
## Prerequisites
---
- [Enable the Lookalike prediction type](/docs/ai-hub/predictions/enabling-predictions#enabling-lookalikes).
- Implement transaction events using [SDK](/developers/web/transactions-sdk) or [API](https://developers.synerise.com/DataManagement/DataManagement.html#operation/CreateATransaction).
## Create a lookalike prediction
---
1. Go to **AI Hub > (AI Predictions) Models > New prediction**.
2. In the **Select prediction type** window that appears, click **Lookalikes**.
3. Click **Apply**.
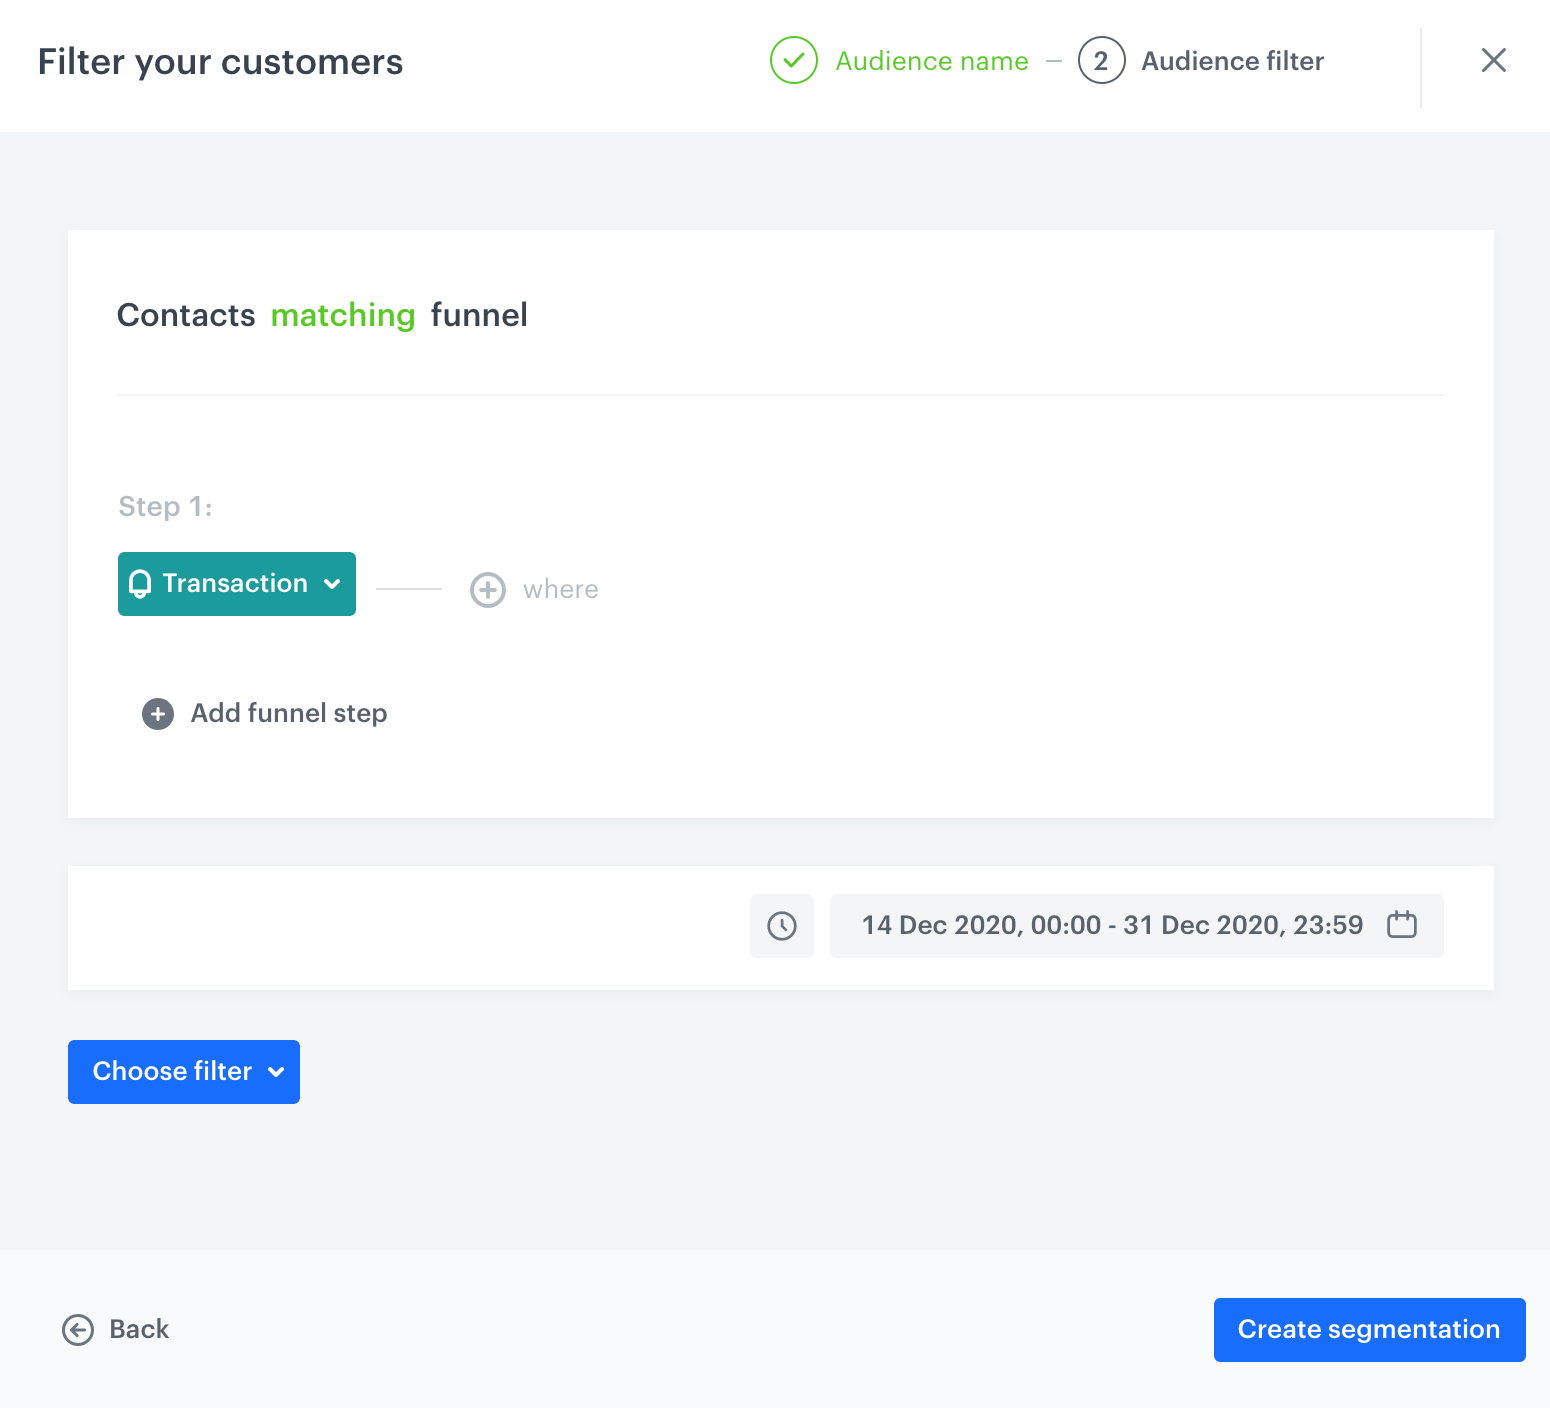
### Create a source segmentation
A source segmentation is a group of model customers to whom you compare the target group of customers in order to find similar customers in the target group.
1. In the **Audience** section, click **Define**.
2. In the **Source segmentation** subsection, click **Choose segmentation**.
3. On the dropdown list, click **Create new**.
4. In the **Segmentation name** field, enter a meaningful name of the segmentation.
5. Click **Choose filter**.
6. From the dropdown list, select the transaction event.
Events may have different labels between workspaces, but you can always find them by their action name (in this step, it’s transaction.charge).
7. Using the date picker in the lower-right corner, select the date ranges for Christmas season 2020.
Configuration of the source segmentation
9. Save the segmentation by clicking **Create segmentation**.
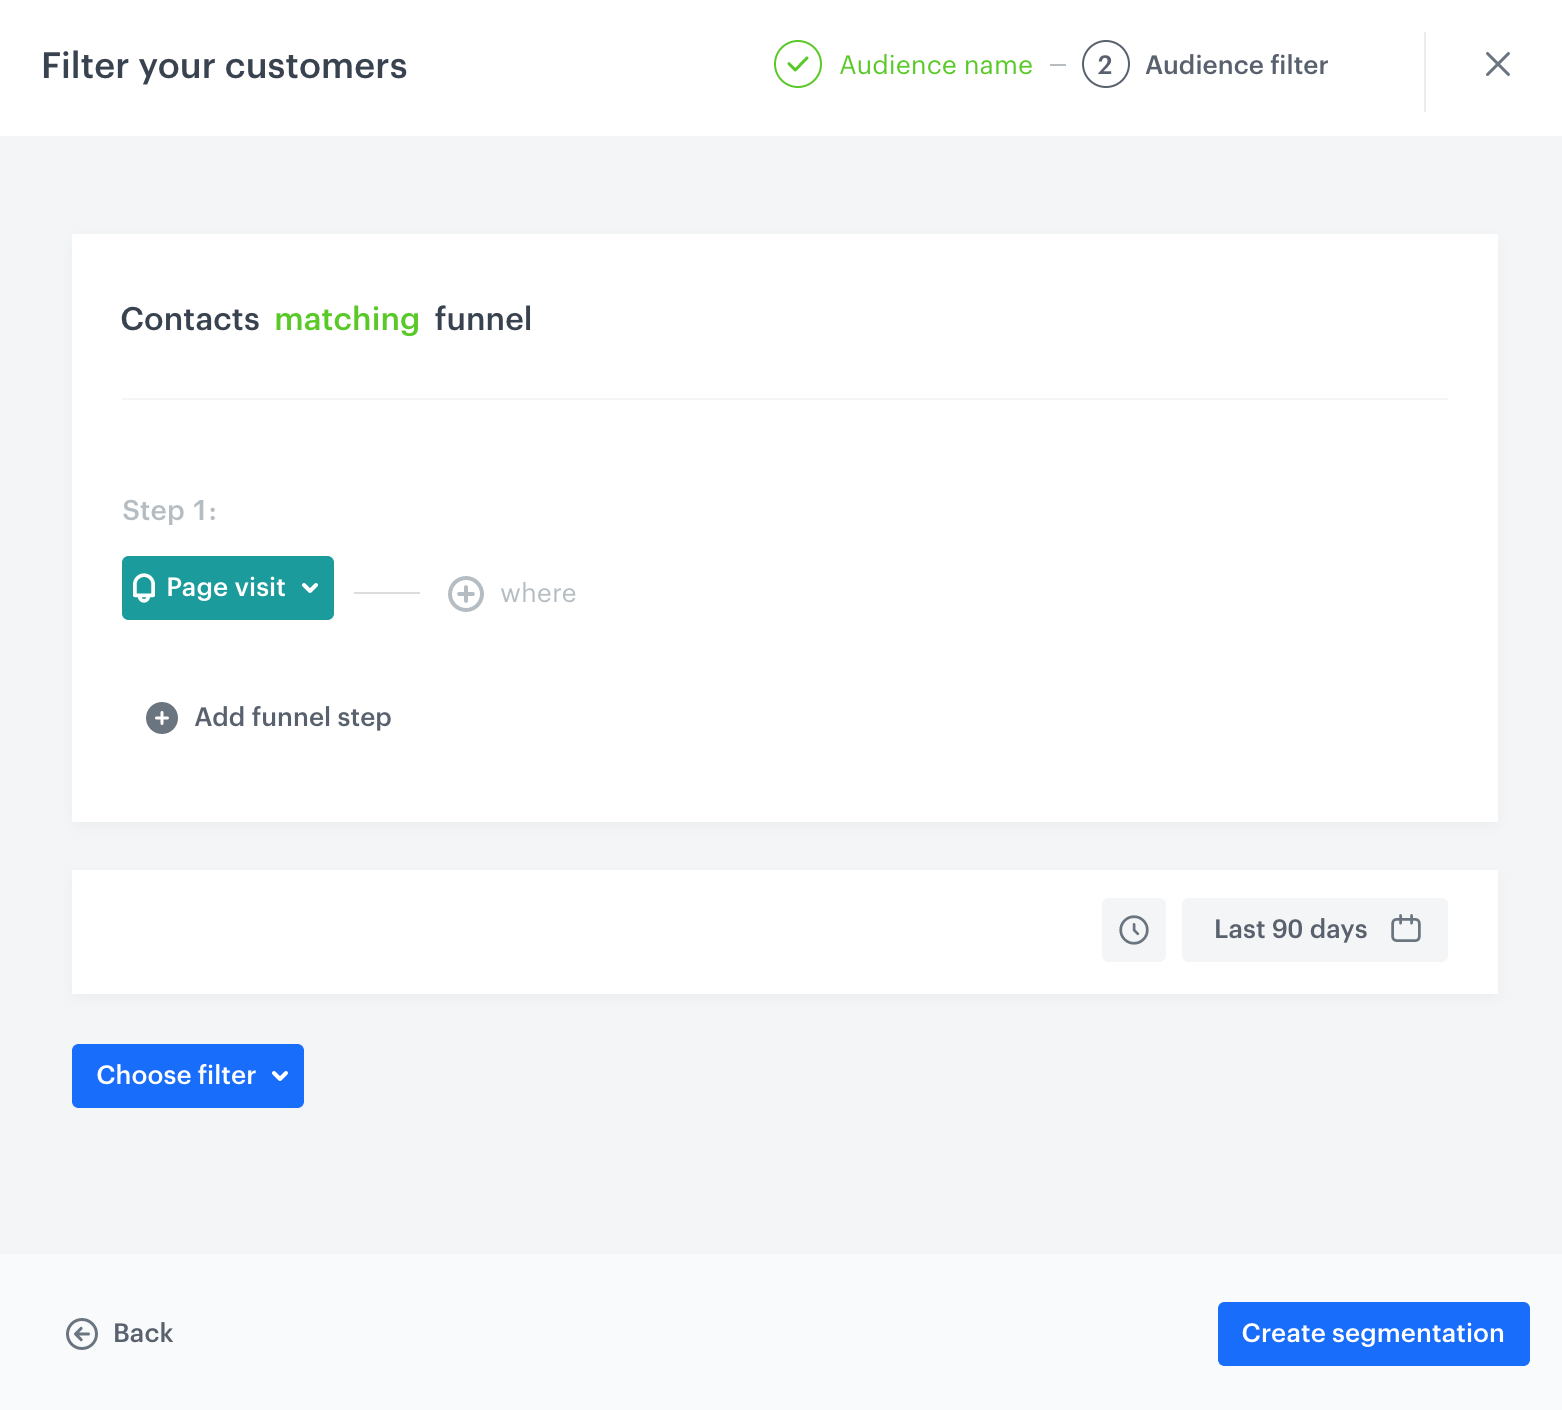
### Create a target segmentation
A target segmentation is a group of customers among which you want to find customers who are similar to those included in the source group.
1. In the **Audience** section, click **Define**.
2. In the **Target segmentation** subsection, click **Choose segmentation**.
3. On the dropdown list, click **Create new**.
4. In the **Segmentation name** field, enter a meaningful name of the segmentation.
5. Click **Choose filter**.
6. From the dropdown list, select the page visit event.
Events may have different labels between workspaces, but you can always find them by their action name (in this step, it’s page.visit).
7. Using the date picker in the lower-right corner, set the time range to **Relative time range > Custom > last 90 days**.
Configuration of the target segmentation
9. Save the segmentation by clicking **Create segmentation**.
10. Confirm the settings in the **Audience** section by clicking **Apply**.
### Configure further settings
1. In the **Settings** section, click **Change**.
2. Leave the calculation of the model at default (the prediction will be calculated only once).
3. Optionally, you can change the scale from 5 point scale to 2. The scale a customer reached will be available in the `snr.lookalike.score` event, as the `score_label` parameter.
snr.lookalike.score event
4. Confirm the changes in the **Settings** section by clicking **Apply**.
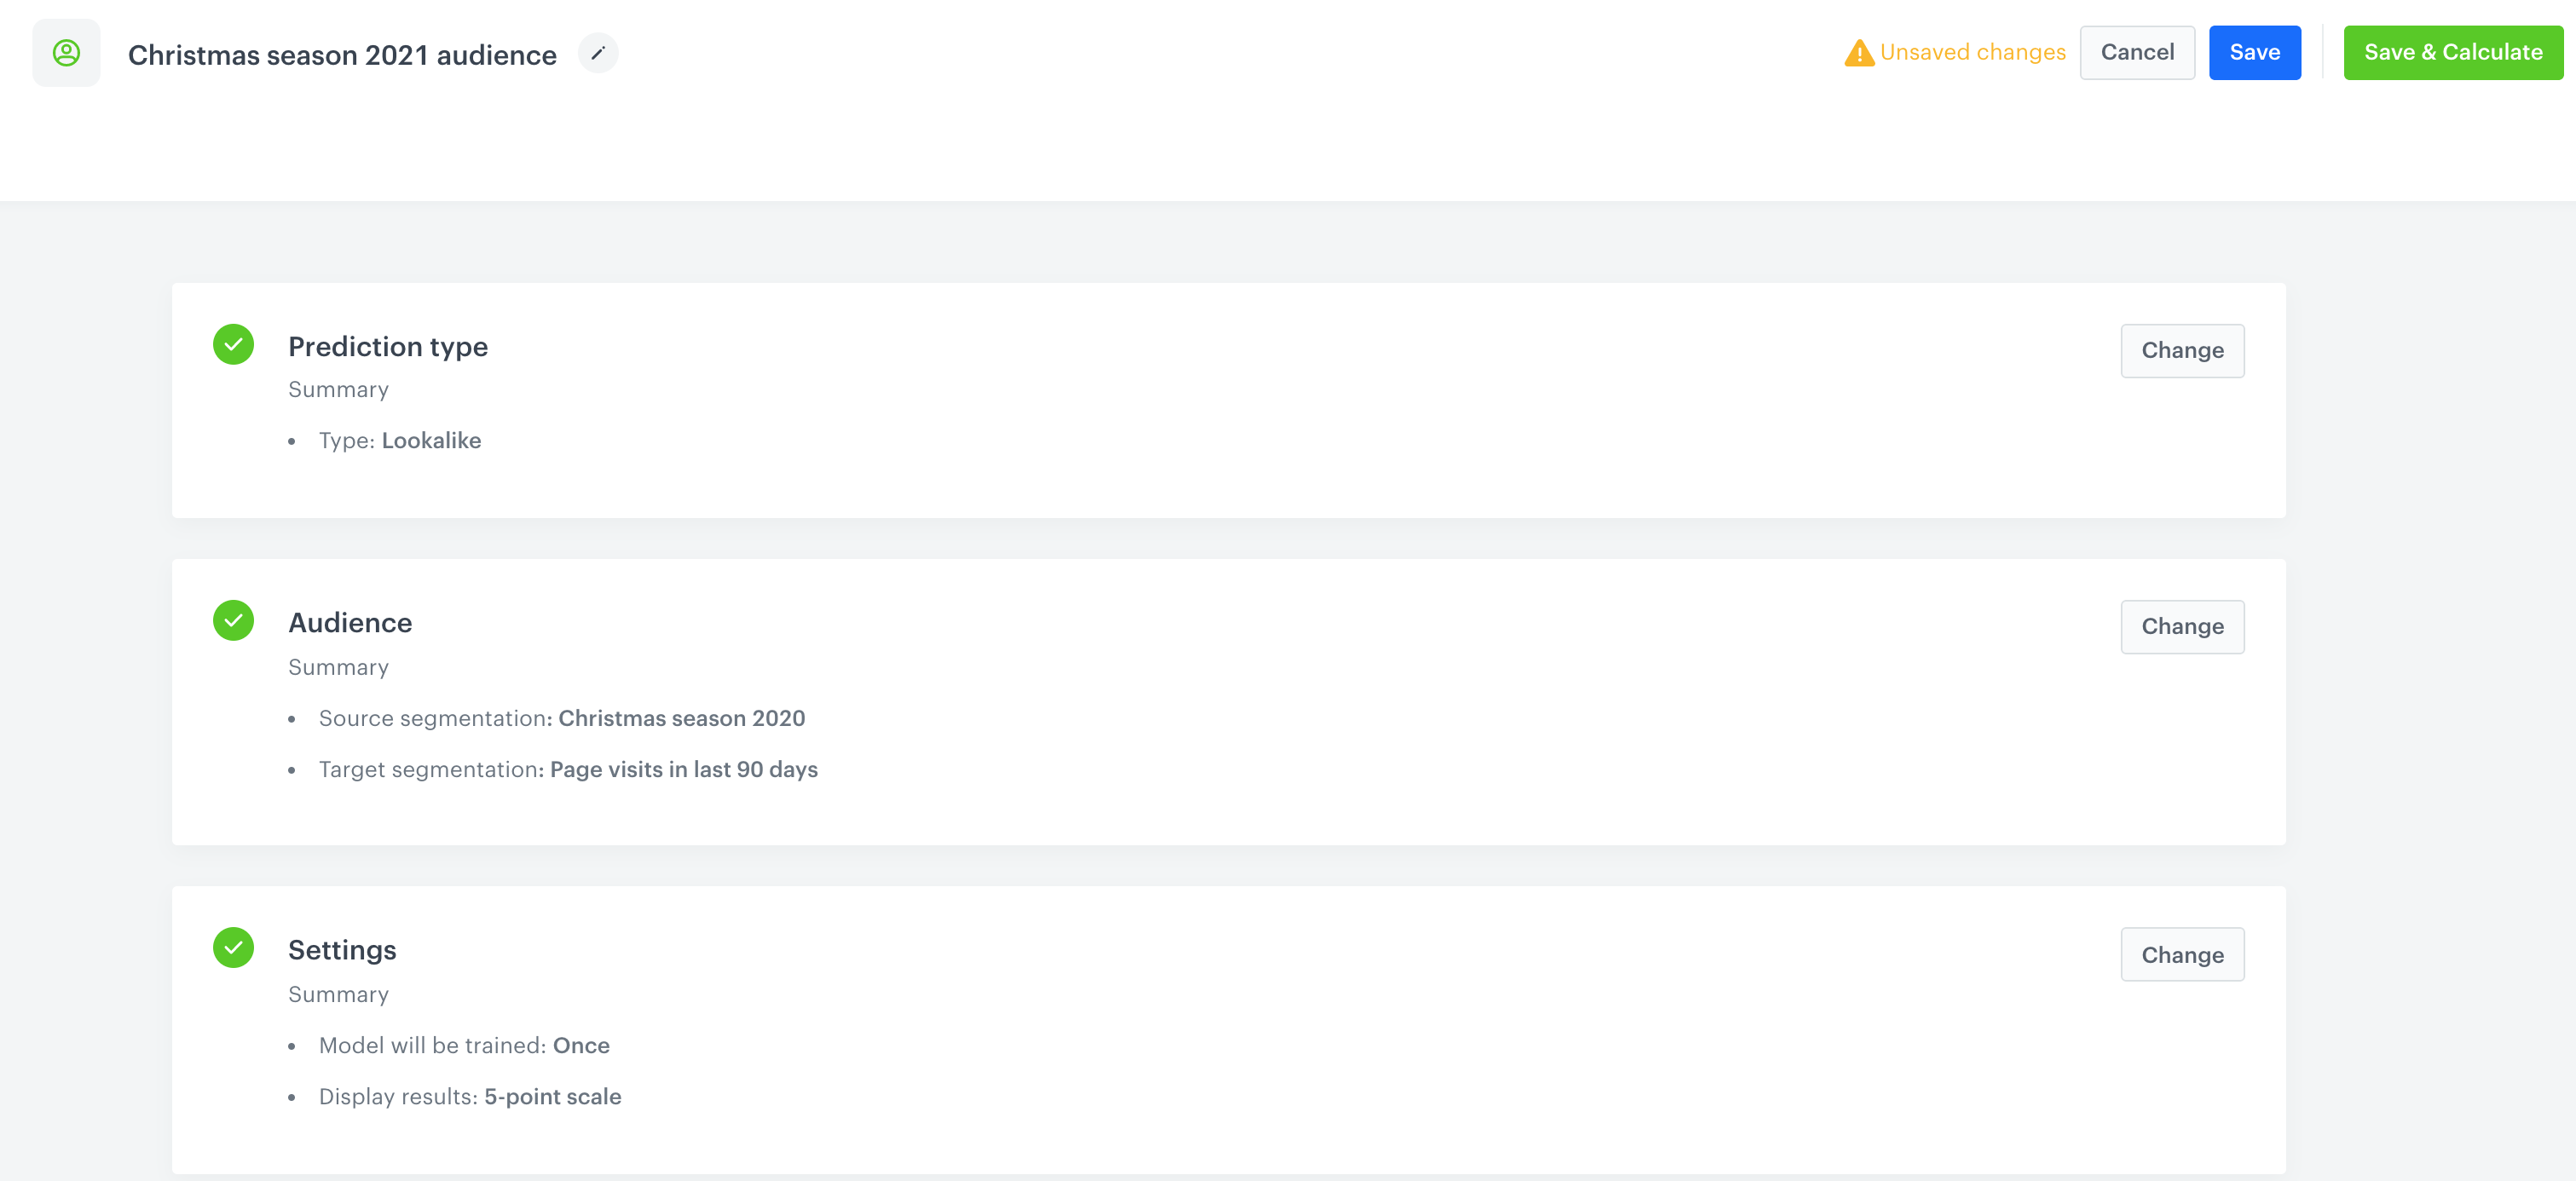
Final configuration of prediction to find matching customers for an annual campaign audience
5. Click **Save & Calculate**.
## What's next
---
Based on the `snr.lookalike.score event`, you can create a segmentation for the Christmas season 2021 campaign. To define the size of the recipient group, you can use the `score_label` parameter of the `snr.lookalike.score` with the `score` value set to high or use `percentiles` in order to address your communication to a specific percentage of target segment with the highest prediction score. Later you can use this segment in the following campaigns:
- [email](/docs/campaign/e-mail)
- [SMS](/docs/campaign/SMS)
- [web push](/docs/campaign/Webpush)
- [mobile push](/docs/campaign/Mobile)
- [dynamic content](/docs/campaign/dynamiccontent)
- [screen views](/docs/campaign/screen-views)
Email, SMS, web push and mobile push can be sent manually or you can launch them by means of [Automation Hub](/docs/automation).
## Check the use case set up on the Synerise Demo workspace
---
You can check the configuration of the [Propensity prediction](https://app.synerise.com/ai-v2/predictions/lookalike/iljrvaozvnir) directly in Synerise Demo workspace.
If you’re our partner or client, you already have automatic access to the **Synerise Demo workspace (1590)**, where you can explore all the configured elements of this use case and copy them to your workspace.
If you’re not a partner or client yet, we encourage you to fill out the contact [form](https://demo.synerise.com/request) to schedule a meeting with our representatives. They’ll be happy to show you how our demo works and discuss how you can apply this use case in your business.
## Read more
---
- [Lookalike predictions](/docs/ai-hub/predictions/lookalikes)
- [Predictions](/docs/ai-hub/predictions/predictions-introduction)