curl --location --request POST 'ENDPOINT_URL_FROM_STEP_3' \
    --header 'Content-Type: application/json' \
    --data-raw '{
        "email": "john.doe@example.com",
        "formType": "formTitle",
        "VehicleCondition": "neutral",
    }'
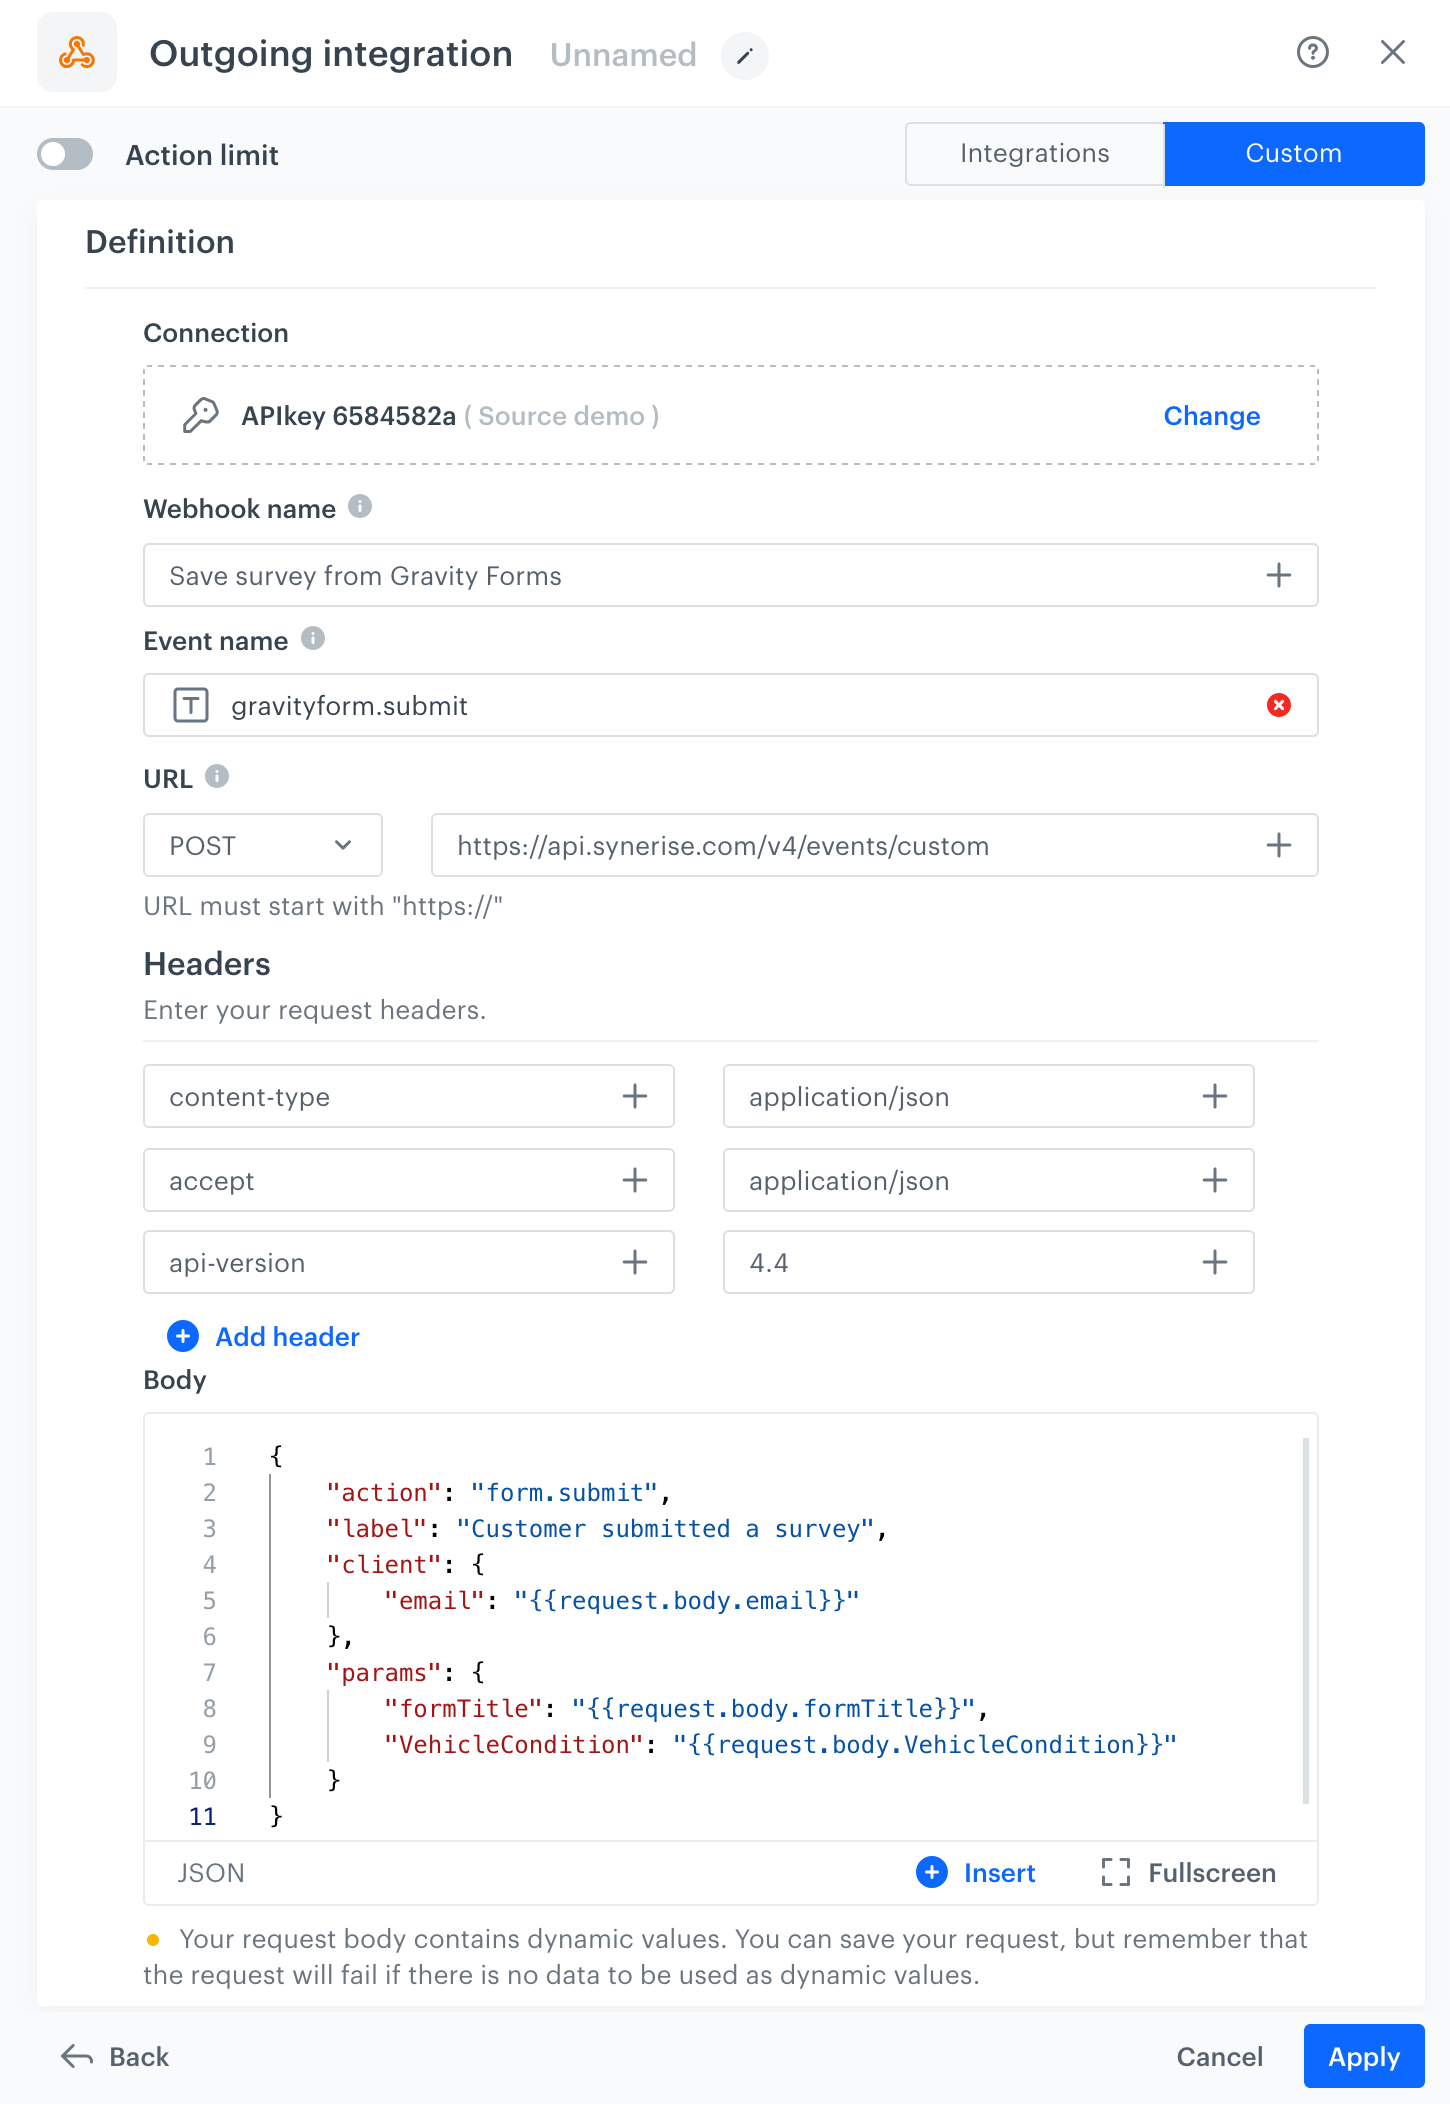
{
           "action": "form.submit",
           "label": "Customer submitted a survey",
           "client": {
               "email": "{{request.body.email}}"
           },
           "params": {
               "formTitle": "{{request.body.formTitle}}",
               "VehicleCondition": "{{request.body.VehicleCondition}}"
           }
       }