You can use the Synerise Imports feature to import custom events of your customers. You can upload any custom events to Synerise, such as cart status, adding product to wishlist or any offline events. Example of offline event can be contact with customer support call center. Import events that signify customer's contact with your call center, in order to have them historically assigned to customers and include them in your marketing efforts. Once imported, our platform empowers you to gain valuable insights from these custom events, enabling data-driven decision-making and personalized customer experiences.
In this use case, you will import custom event data (`support.contact`) of customers who contacted your customer support. You will use a `.csv` file with these data and you will import them with the Simple Import feature.
## Prerequisites
---
Add [custom event](https://developers.synerise.com/DataManagement/DataManagement.html#operation/CustomEvent) and its [parameters](/docs/assets/events/adding-event-parameters) to save data to customers' profiles when they perform an activity. In this particular use case:
- `support.contact`.
## Process
---
In this use case, you will go through the following steps:
1. [Create a `.csv` file](#create-a-csv-file) with data about custom event to import to Synerise. You can use our example file, which can be downloaded using the **Get Sample File** button while uploading the file. The sample file shows the recommended column names and the recommended formatting of the values in those columns.
2. [Import the file](#import-the-file).
## Create a .csv file
---
In this part of the process, prepare a `.csv` file that contains one of the following profile identifiers: (the list contains recommended column names, if you use different names you will be able to map data during the process):
- `email`,
- `uuid`,
- `clientID`,
- or `customID`.
This is a required column, the rest is optional, should contain the custom event's parameters.
If you choose an email as an identifier, pay attention to the correct format of emails. Otherwise, your import will fail.
`.csv` files must be UTF-8 encoded, spaces, and special characters in the column headers are not allowed. Check [tips for preparing a CSV file].
**Example CSV file might look like this:**
```
email,contactPurpose,duration,resolved
johndoe@example.com,complaint,200s,true
jnowak@example.com,ordercancellation,320s,false
jperez@example.com,complaint,150s,false
```
## Import the file
---
In this part of the process, you will upload a file from your device.
1. Go to **Data Modeling Hub > Imports> New import**.
2. As the data type for import, select **Custom events**.
### Select the file for import
---
1. As the import method, to import a single `.csv` file to Synerise, select **Import a local file**.
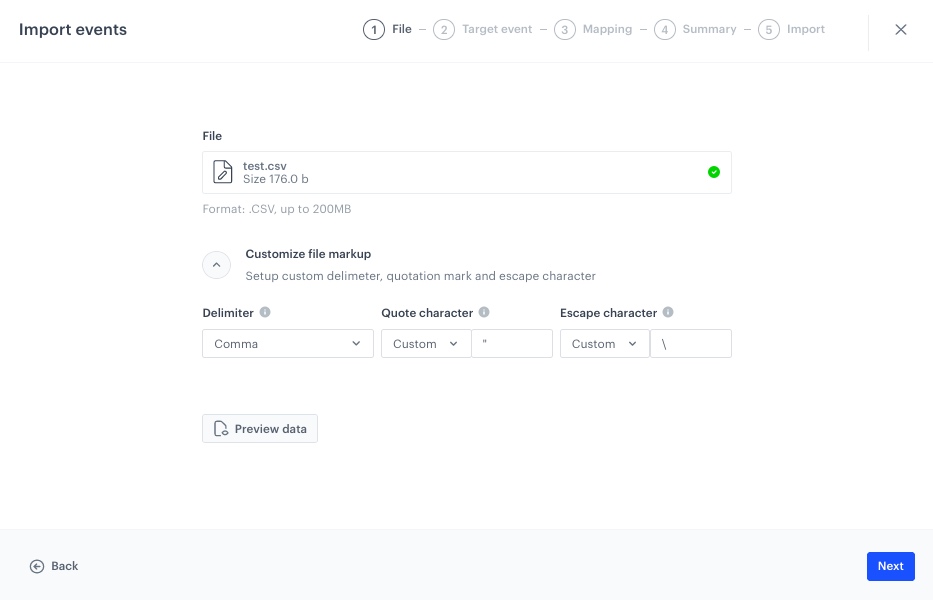
4. To upload the `.csv` file you [created in the previous step](#create-a-csv-file), click **+ Upload file or drag one here field**.
5. Optionally, you can customize the file metacharacters by clicking the arrow down icon next to **Customize file markup**.
1. From the **Delimiter** dropdown, select the character that marks the end of a column.
2. From the **Quotation mark** dropdown list, select the characters that contain the text.
3. From the **Escape character** dropdown lists, select the character which changes the default interpretation of a character or a string followed by the escape character.
6. You can preview the data output by clicking **Preview data**.
7. Click the **Next** button to upload the file.
8. When the file is uploaded click **Next** to proceed.
Import Events configuration
### Select the target event
---
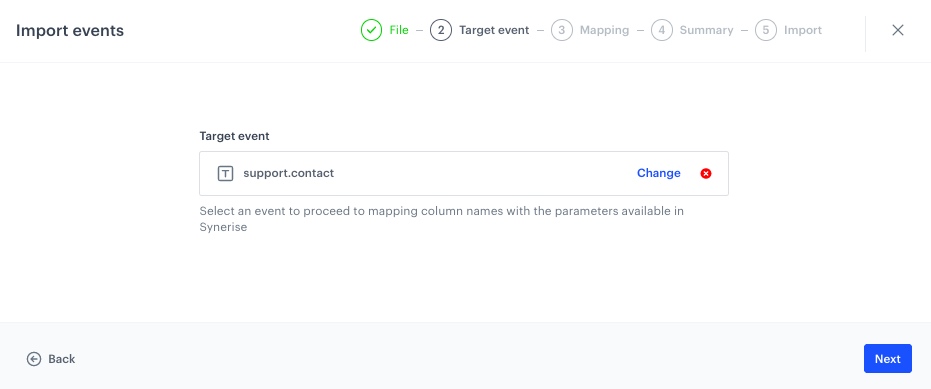
In this part of the process, you will select the event which you want to import. Thanks to that, during the mapping process the system will prompt the parameters for mapping based on the event type.
You can import one type of event at a time.
1. Click **Select target event** and from the dropdown list, select `support.contact`.
2. Click **Next**.
Target event configuration
### Mapping the columns with parameters in Synerise
---
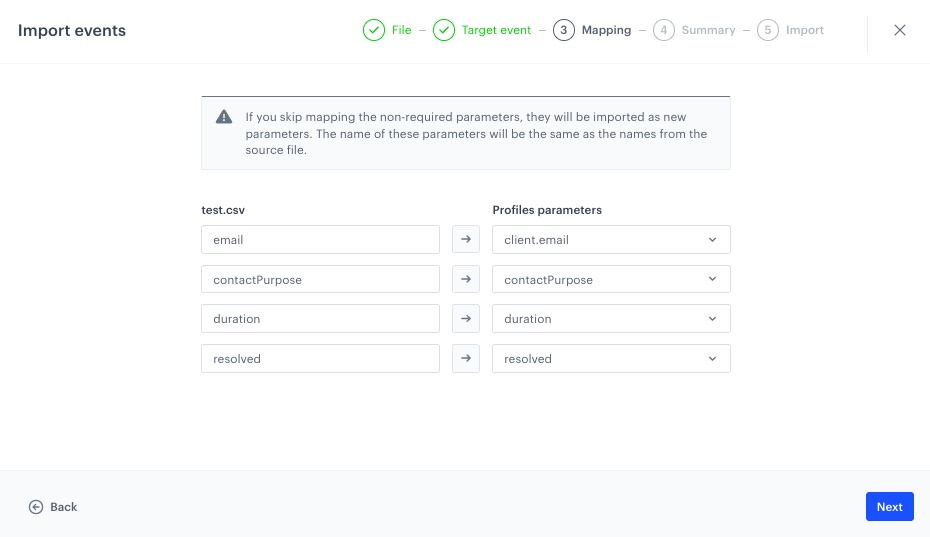
In this part, you will map parameters based on the event type [selected in the previous step](#select-the-target-event).
You can exclude parameters from the import.
On the user interface, you will be presented with two columns - the left column displays the names of the columns from the imported file, the other contains dropdown lists with the parameters available in Synerise. The dropdown lists indicate the required parameters for a an import.
If you skip mapping the non-required parameters, the name of these parameters will be the same as the names from the imported file. If parameters don't exist in Synerise, they will be imported as new parameters.
1. Next to the file column name, from the dropdown list, select the corresponding parameter in Synerise. Perform this step for all columns in your file.
2. To exclude a parameter from import, next to the column name, click this icon: Mapping
3. To proceed to the summary of the import, click **Next**.
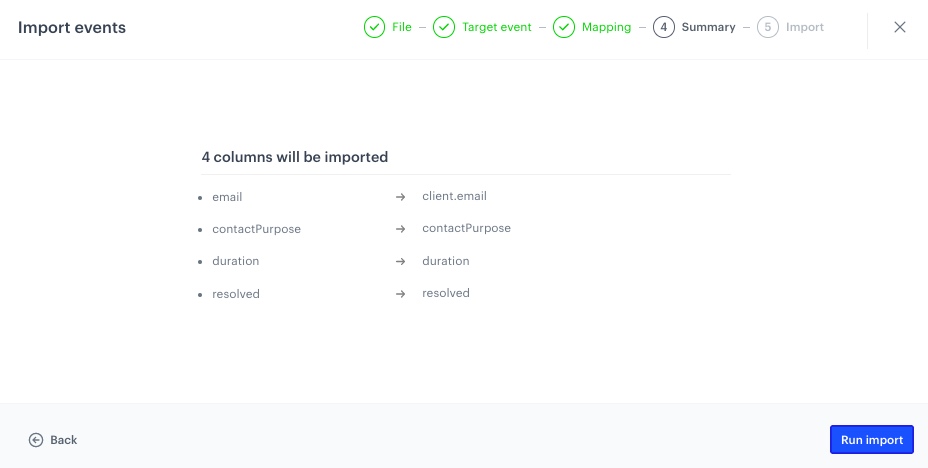
**Result:** The summary of the import is displayed.
Import summary/figcaption>
4. After checking the import summary, to start the import, click **Run import**.
5. You can monitor the status of your import and potential errors due to incorrect data in the **Imports List**.
## Read more
---
- [Custom events](https://developers.synerise.com/DataManagement/DataManagement.html#operation/CustomEvent)
- [Imports](/docs/assets/imports/introduction-to-imports)