Data quality and timeliness are key to executing effective business operations. It is important that the data you are handling is always up-to-date, otherwise your communications won't meet the current needs of your customers. A useful solution, in this case, can be the cyclical transfer of data stored on servers to Synerise catalogs. It gives you the possibility to use up-to-date product data in customer communications such as e-mail campaigns, dynamic content, text messages, web pushes, and other customized messaging.
This use case describes the process of creating an automated, recurring workflow that transfers data from your server over HTTPS to a catalog in Synerise.
## Prerequisites
---
- [Create a catalog](/docs/assets/catalogs/creating-catalogs). The catalog can be empty.
- Product data in the form of an XML file under the HTTPS link. Check [XML feed requirements](/developers/product-feed).
The maximum allowed size of the data file is 5 GB (5 000 000 000 bytes).
## Create the workflow
---
Create the workflow that imports the product data from the HTTPS link into the Synerise catalog every hour.
1. Go to **Automation Hub > Workflows > New workflow**.
3. Enter the name of the workflow.
4. As the trigger node, add **Scheduled Run**.
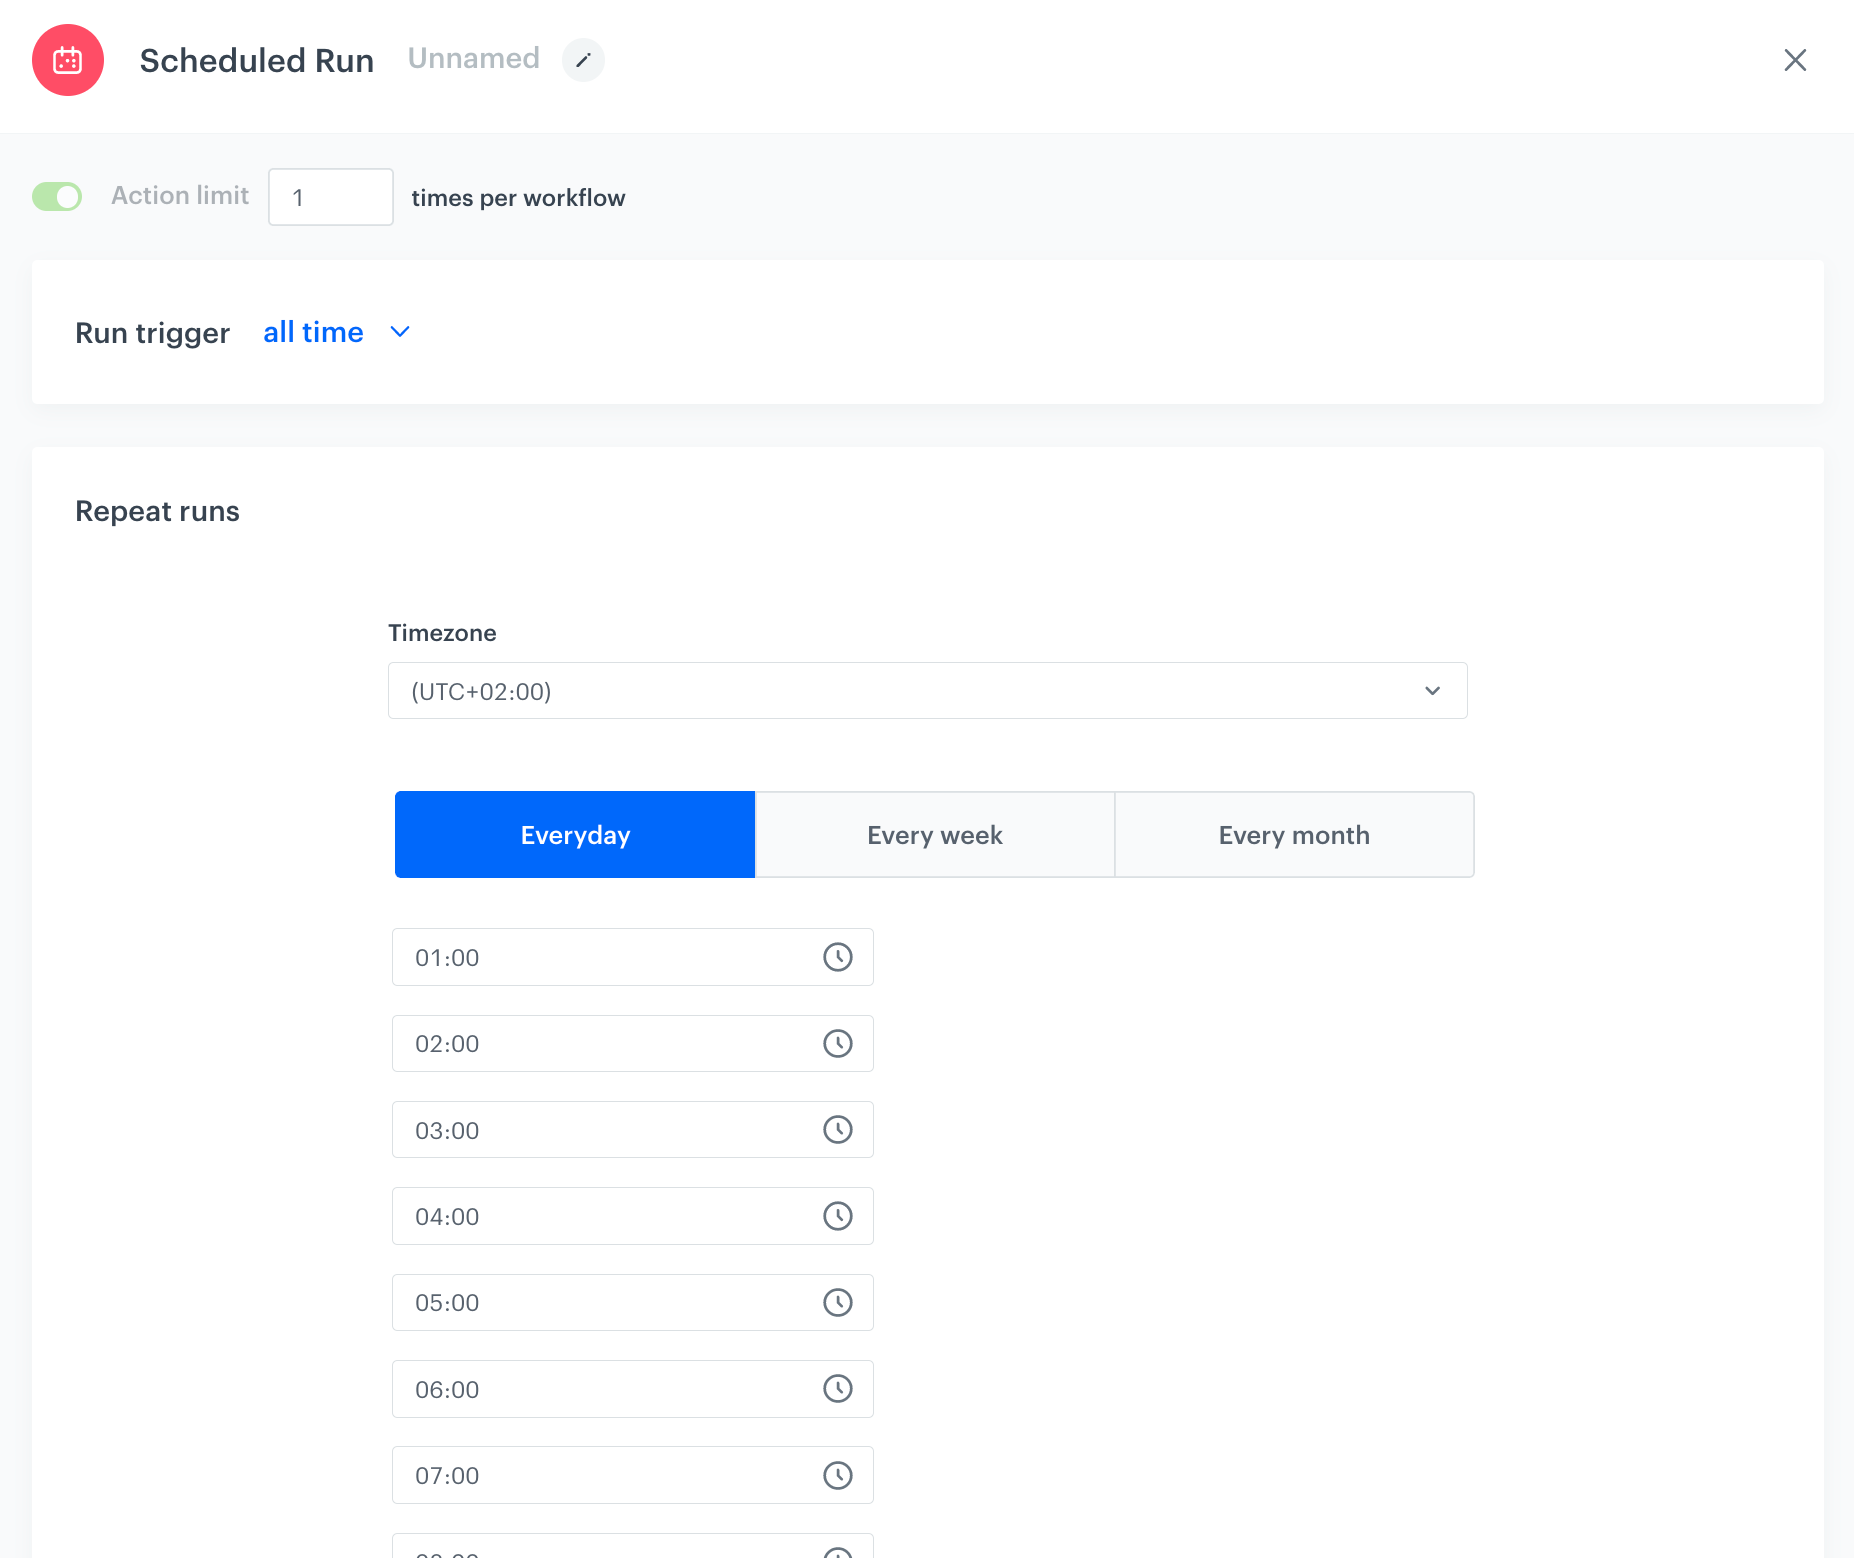
5. In the configuration of the node:
1. In the **Run trigger** dropdown, leave the defauld option **All time**.
2. From the **Timezone** list, select the time zone.
3. Select **Everyday** tab to launch the workflow every day at the defined time.
4. Add the hours when the workflow should be activated.
5. Confirm by clicking **Apply**.
The configuration of the Scheduled Run node
6. Add the **HTTPS Get File** node.
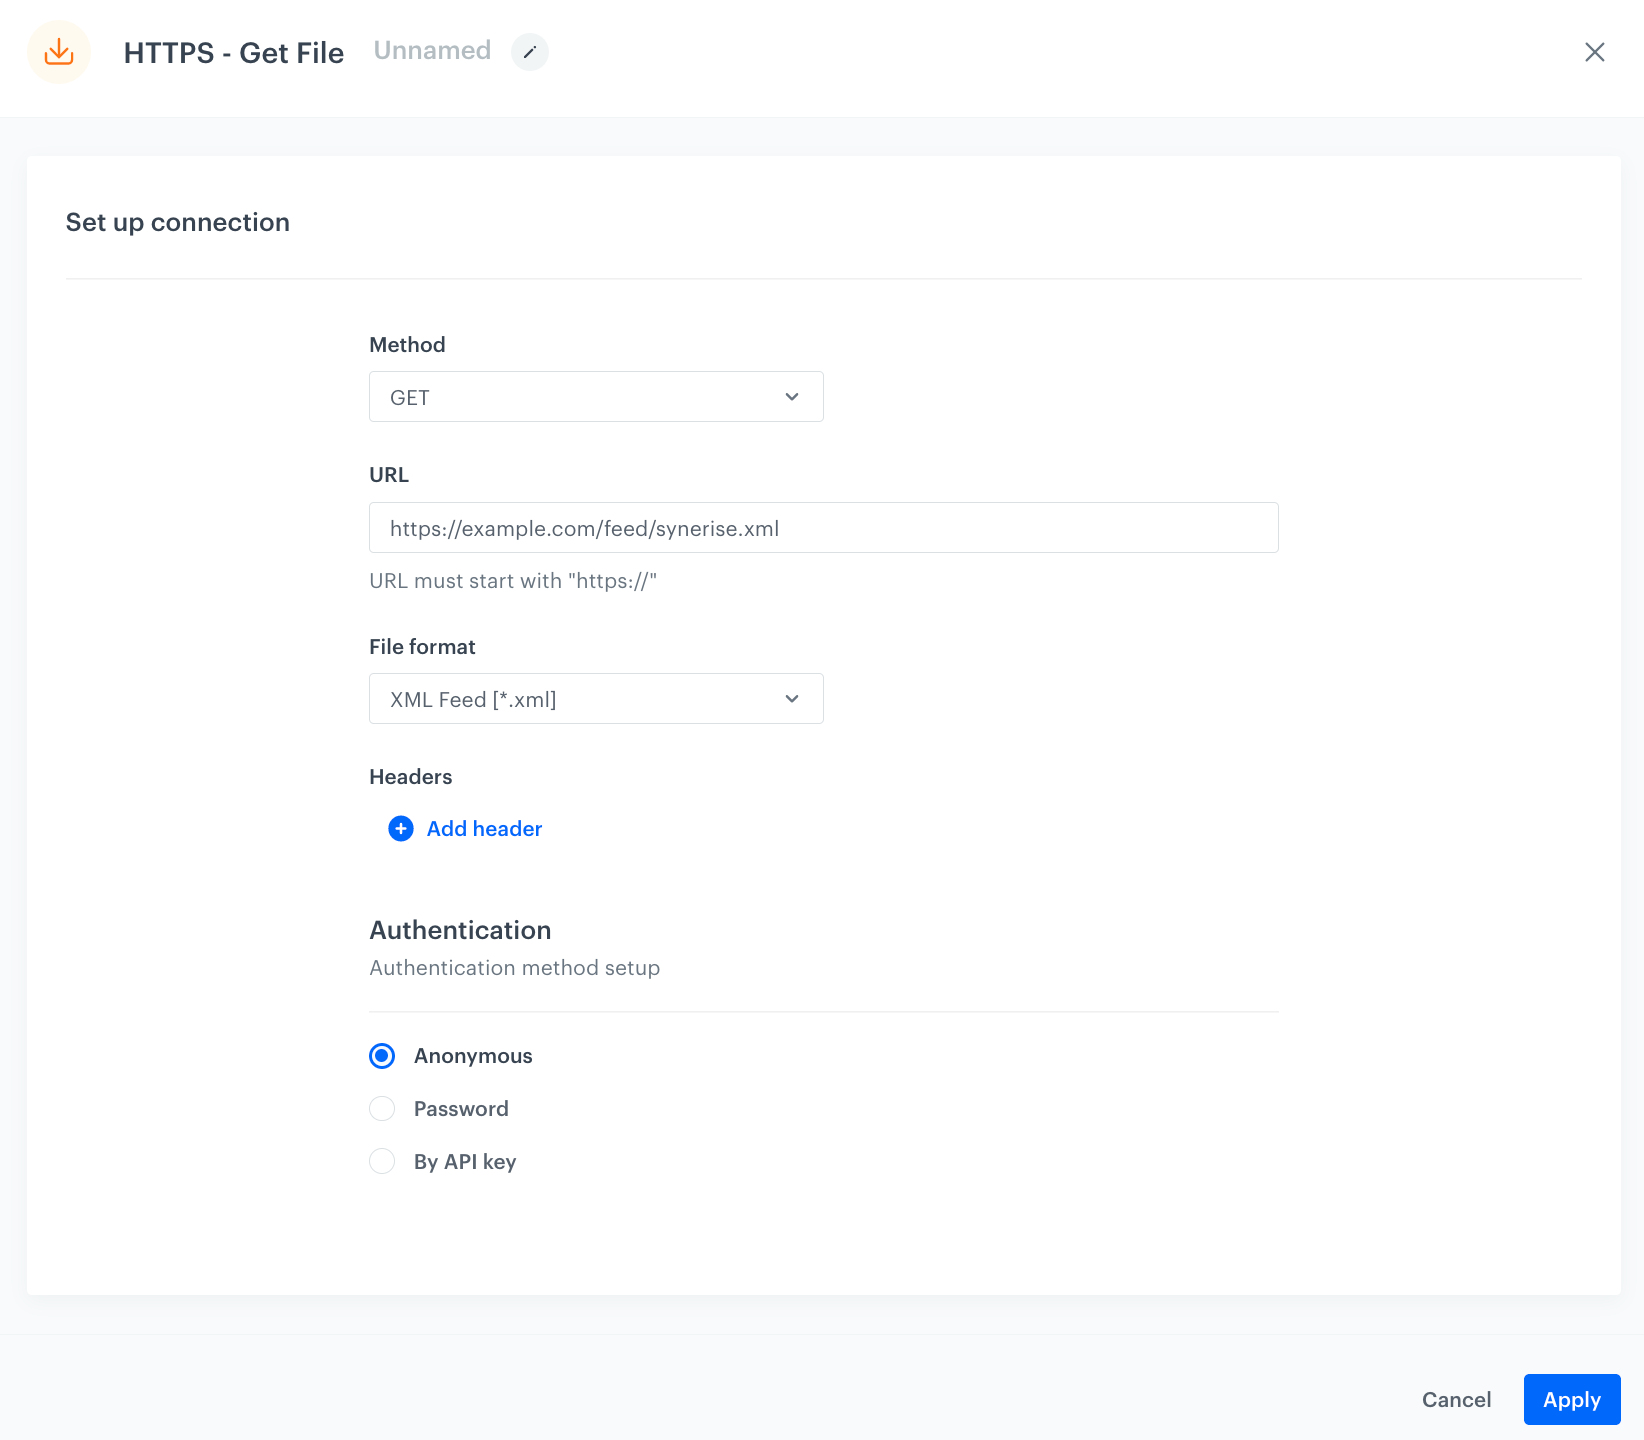
7. In the configuration of the node:
1. Leave the method at default (**GET**).
2. In the URL, enter the address of the resource.
3. As a file format, from the dropdown list, select **XML feed**.
4. In the Authentication section, select the required authentication method.
6. Confirm by clicking **Apply**.
The configuration of the HTTPS get file node
8. Add the **Import to Catalog** node.
9. In the configuration of the node:
1. Select the catalog to which the data will be imported.
2. As the primary key, enter the name of the XML element which contains the unique identifiers of the items.
3. Confirm by clicking **Apply**.
The configuration of the Import to Catalog node
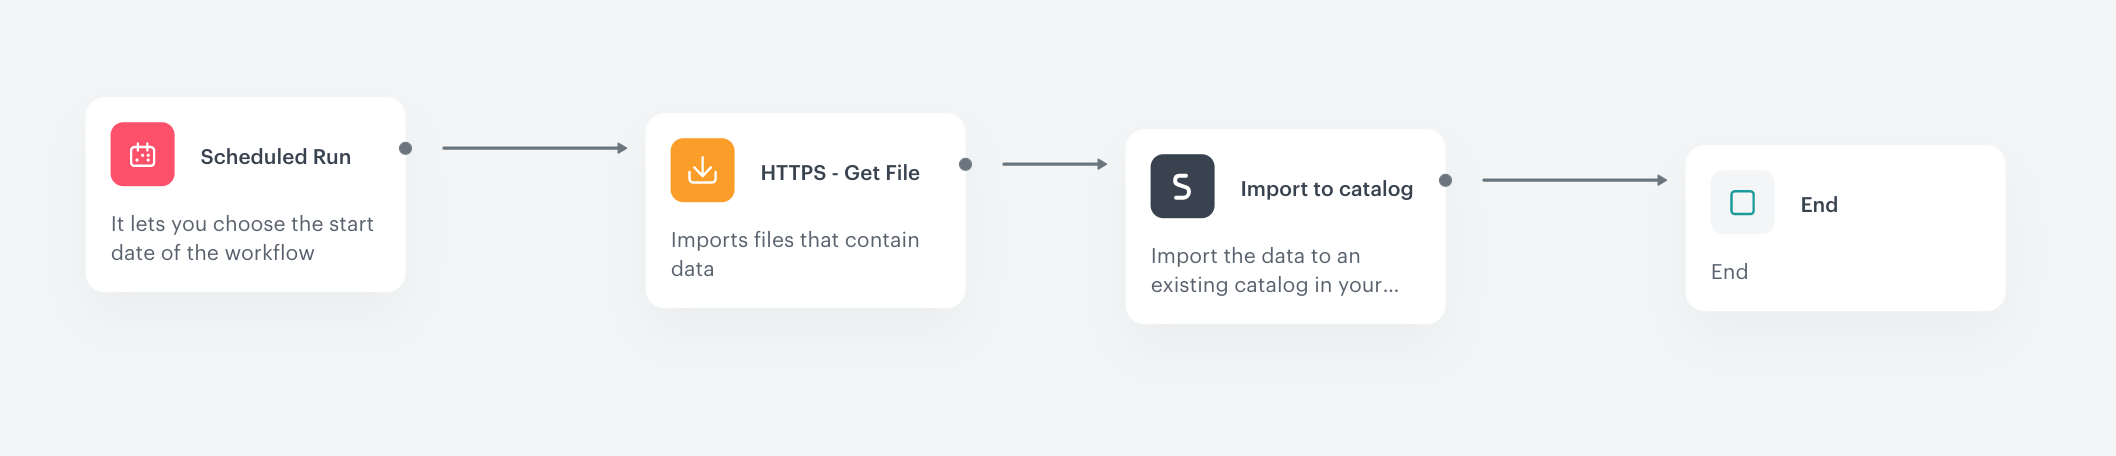
10. Add the **End** node.
The workflow configuration
Information about products from the catalog can be referenced in customer communications such as e-mails, dynamic content, text messages, etc. using [inserts](/developers/inserts/insert-usage#catalogs).
Example of a catalog with imported data:
Example of a catalog with imported items
## Check the use case set up on the Synerise Demo workspace
---
You can check the workflow configuration directly in Synerise demo workspace, at this [link](https://app.synerise.com/automations/automation-diagram/b9496621-b24f-4866-8fe1-8a5da67931df).
If you’re our partner or client, you already have automatic access to the **Synerise Demo workspace (1590)**, where you can explore all the configured elements of this use case and copy them to your workspace.
If you’re not a partner or client yet, we encourage you to fill out the contact [form](https://demo.synerise.com/request) to schedule a meeting with our representatives. They’ll be happy to show you how our demo works and discuss how you can apply this use case in your business.
## Read more
- [Catalogs](/docs/assets/catalogs/introduction-to-catalogs)
- [Product feed](/developers/product-feed)