There are various methods available to import transactional data into Synerise. One of them is to send live data via API, collect it directly from the website, or set up cyclic data exchange processes between Synerise and external solutions. Another possible method is a simple import, which can be done through an intuitive wizard to guide you in importing data that meets all Synerise requirements.
In this use case, we will walk you through the process of importing transactions to Synerise using a local `.csv` file. This straightforward method ensures a smooth and efficient import of your transactional data, allowing you to leverage it for robust analytics and impactful business decisions.
## Prerequisites
---
Make sure you meet all [prerequisites](/docs/assets/imports/importing-transactional-data#requirements) for starting to work with Imports. You will also find valuable [tips](/docs/assets/imports/importing-transactional-data#tips-for-preparing-a-csv-file) for preparing the CSV file.
In this case, we will use data from a sample file, which can be downloaded during the [Select the file for import](/use-cases/import-transactional-data#select-the-file-for-import) step, using the **Get Sample File** button.
## Select the file for import
---
In this part of the process, you will upload a file from your device.
1. Go to **Data Modeling Hub > Imports > New import**.
2. As the data type for import, select **Transactions**.
3. As the import method, to import a single `.csv` file to Synerise, select **Import a local file**.
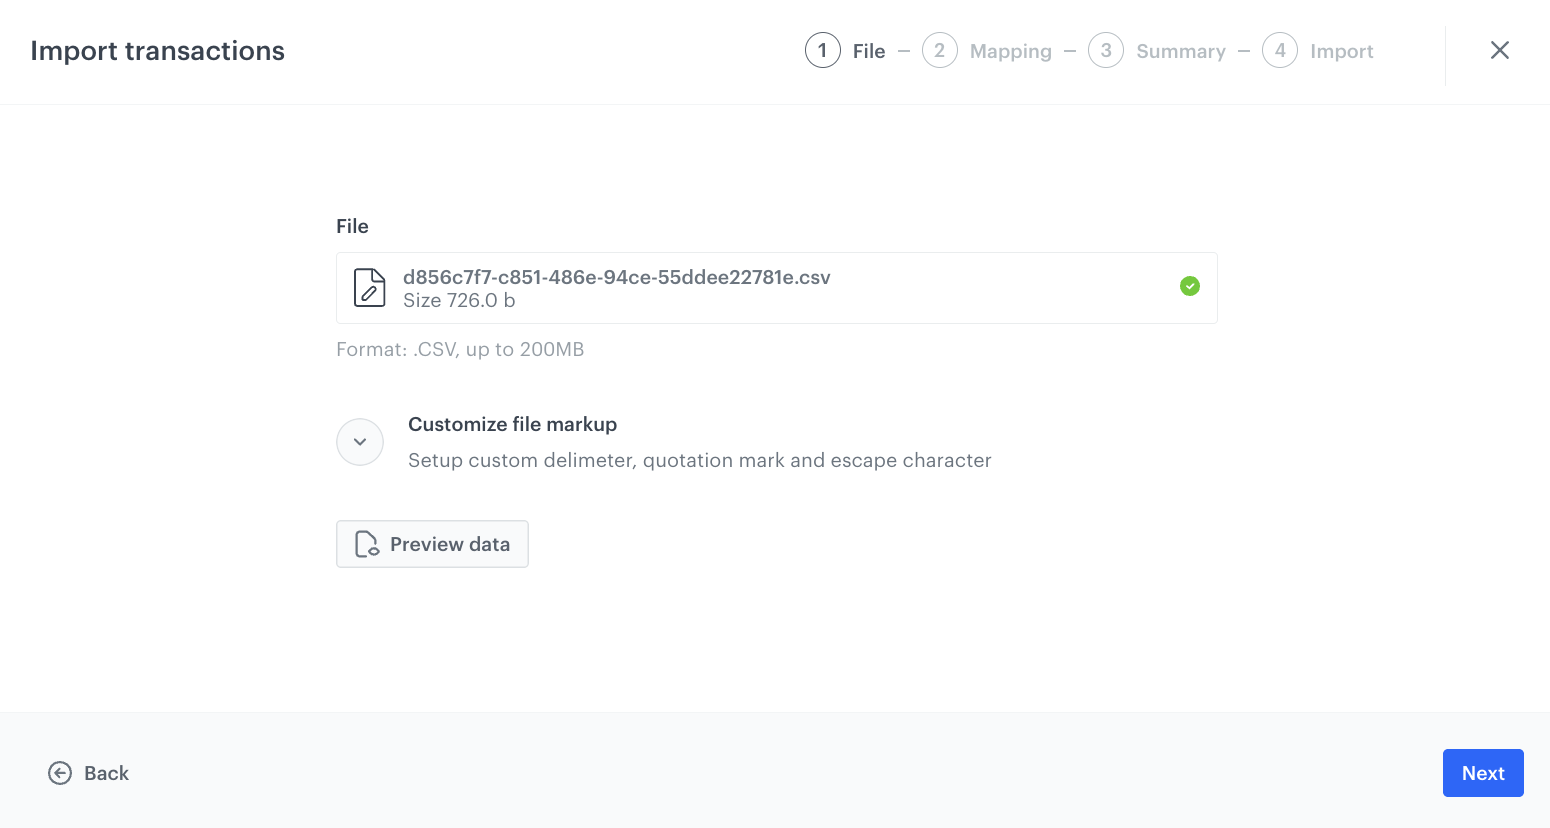
4. Upload the `.csv` file by using the **+ Upload file or drag one here** field.
5. Optionally, you can customize the file metacharacters by clicking the arrow down icon next to **Customize file markup**.
1. From the **Delimiter** dropdown, select the character that marks the end of a column.
2. From the **Quotation mark** dropdown list, select the characters that contain the text.
3. From the **Escape character** dropdown lists, select the character which changes the default interpretation of a character or a string followed by the escape character.
6. You can preview the data output by clicking **Preview data**.
File download view
7. Click the **Next** button to upload the file.
8. When the file is uploaded click **Next** to proceed.
## Mapping the columns with parameters in Synerise
---
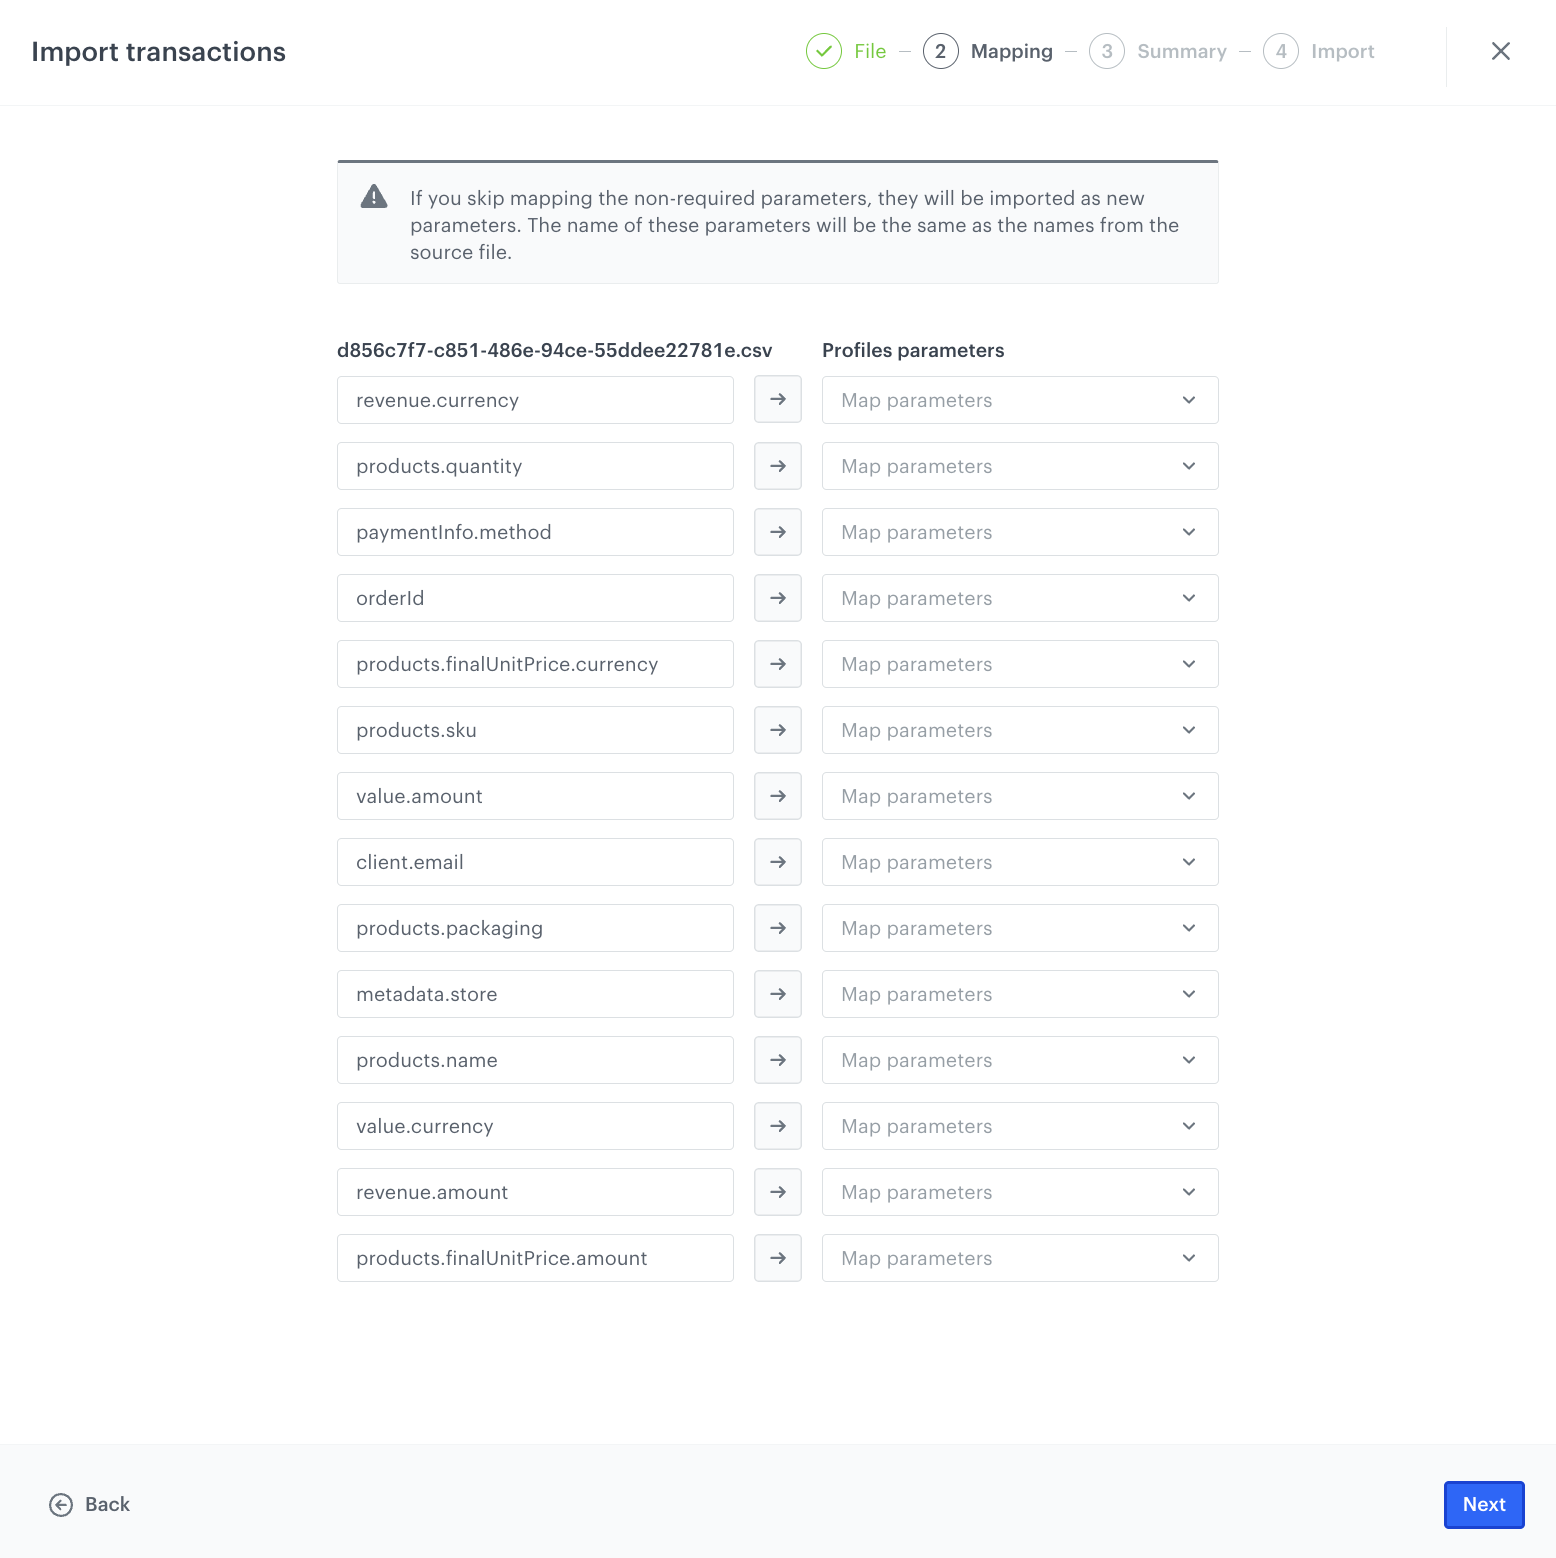
In this part of the process, you will connect the columns from the file with their counterparts (the existing parameters) in Synerise. This way, you will point which parameters in Synerise will contain the event information from the imported file.
Note that the revenue information is mandatory. If you have not previously included this information in the file, you can enable automatic calculation of the revenue (which is the multiplication of the item quantity by its price) in this part of the process by enabling the **Calculate revenue** option. In the **Product unit price** field, from the dropdown list select the name of the column that contains the price of a single piece of an item. The revenue will be calculated by multiplying price by item quantity.
You can also exclude parameters from the import. During the mapping process, you can’t add new columns to the imported file.
1. Next to the file column name, from the dropdown list, select the corresponding parameter in Synerise. Perform this step for all columns in your file if needed.
In our case, we do not need to map the parameters, because the uploaded file meets all the requirements from the prerequisites.
Mapping the columns with parameters
2. To proceed to the summary of the import, click **Next** and **Continue**.
**Result:** The summary of the import is displayed.
3. After checking the import summary, to start the import, click **Run import**.
**Result:** The import results in `transaction.charge` and `product.buy` events generated on the profile cards of customers indicated in the imported file.
Once you initiate the import process, you can conveniently monitor its progress. If data was added in the wrong format, all relevant details of these irregularities are available in the job list. Each stage of the import process is accompanied by its status and information on the level of success achieved. This allows you to easily identify any issues and take appropriate actions to fix them.
## Read more
---
- [Imports](/docs/assets/imports/introduction-to-imports)
- [Transactional data structure](https://developers.synerise.com/ProfileManagement/ProfileManagement.html#operation/ClientCompletedTransaction)