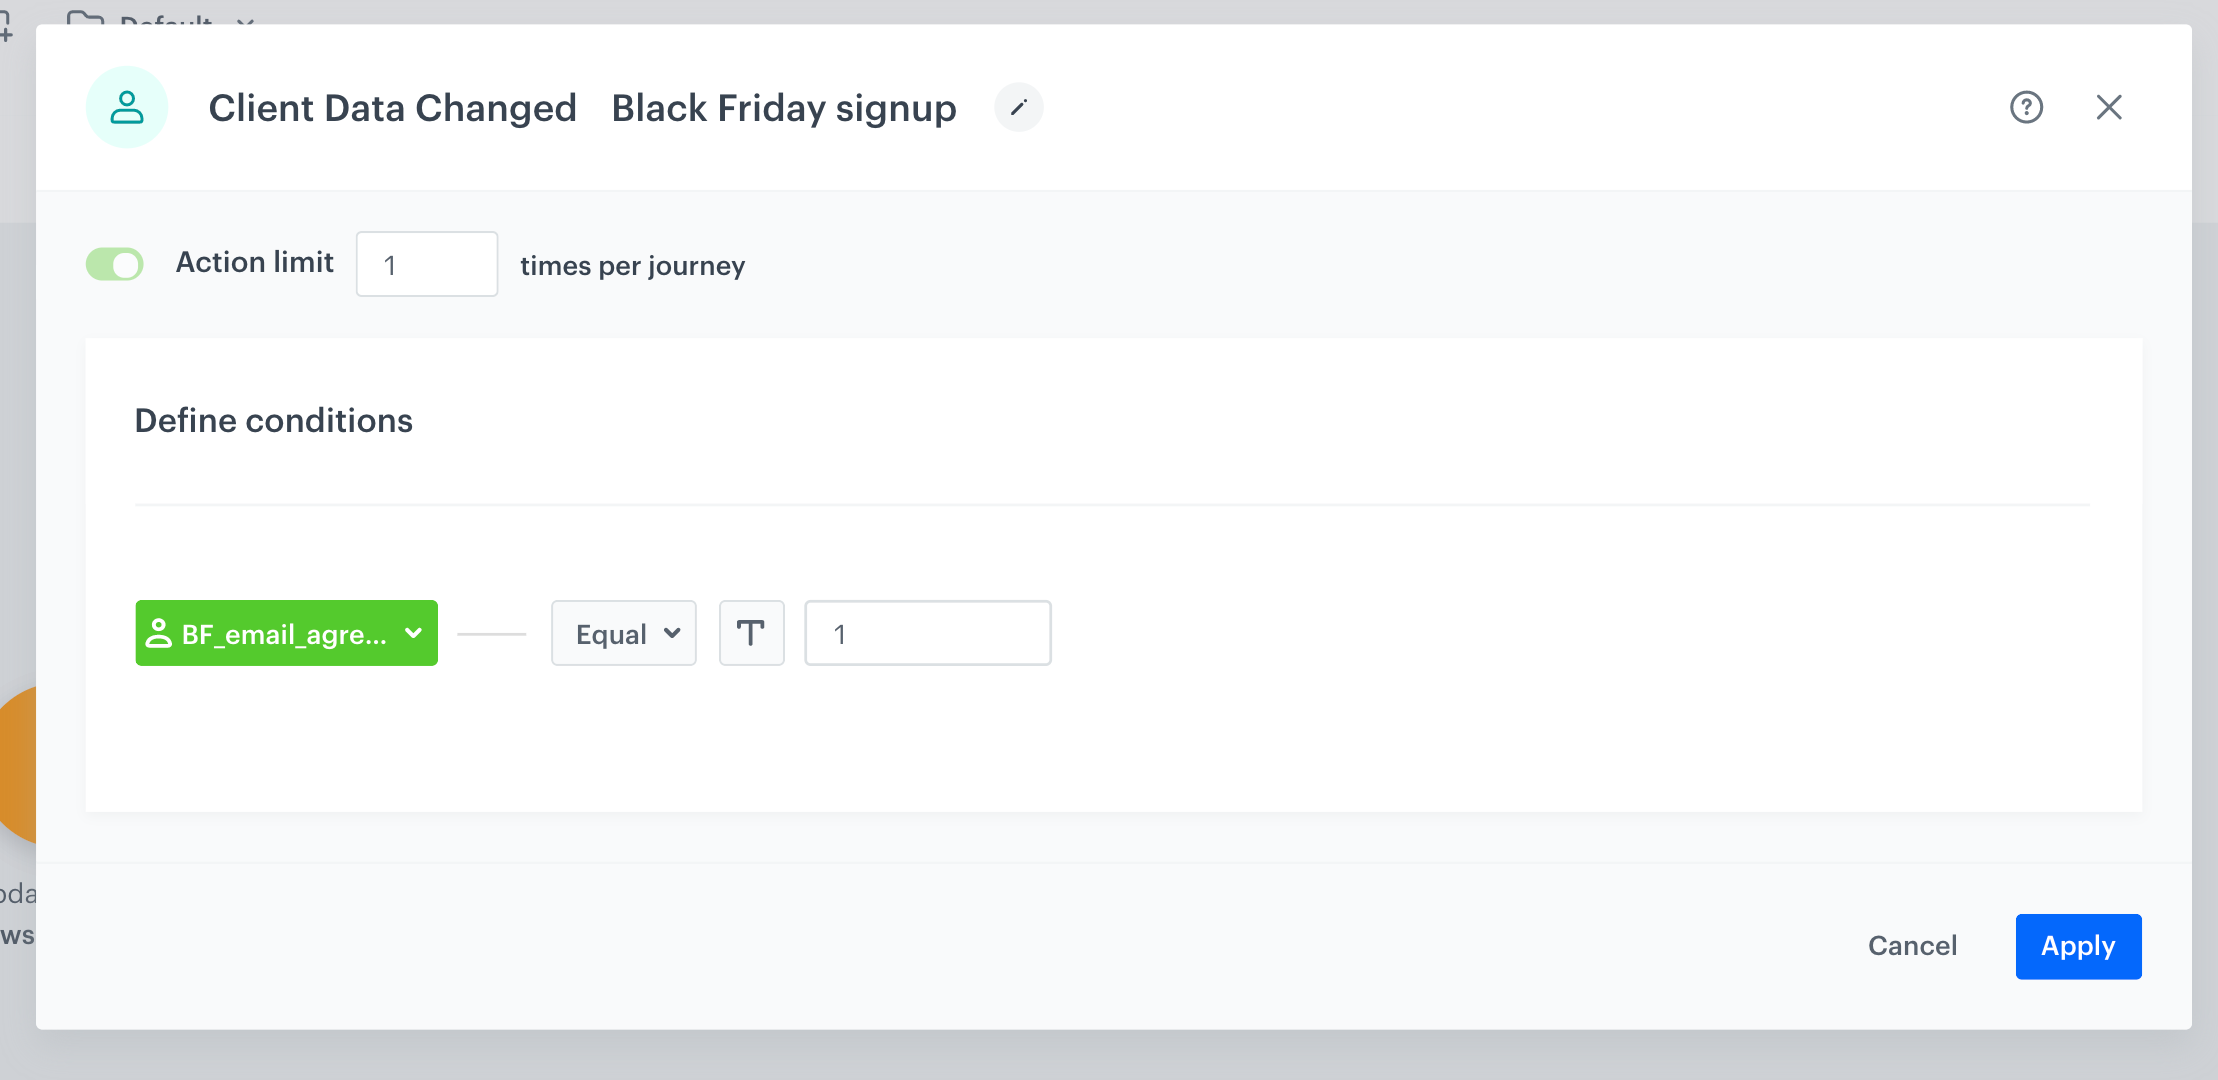
With landing pages you can enrich information about customers' preferences you already have (for example their favorite categories, products and so on). Then, based on their answers you can personalize products and offers that you send to them later. Thanks to this solution you can get to know them better and be able to match the content of your messages to their preferences.
 
## Example of use - Retail industry 

Our client wanted to be prepared for Black Friday and be sure that their customers receive only offers that interest them. For this purpose, they prepared a landing page which made it possible for their customers to choose their favorite product categories:

- **Technology**: Smartphones, TVs, Gaming software, PC monitors, Desktops, Printers, Portable speakers, Peripherals, Laptops, Gaming consoles, Tablets, Smartphone accessories, E-scooters, Wearable gadgets, Cameras 
- **Entertainment**: Toys, Books, Comics, Movies, Music 
- **Marketplace**: Infant, Home, Fitness, Personal care, Fashion, Clothing  

Each customer received special Black Friday offers connected with those categories via email or web push. Before it could happen, the customers had to first select the categories available in a form on the landing page, provide an email address and submit the form. Later, these customers could be grouped into a segmentation to which the messages could be sent. This way, the landing page became a great place to get new leads.

<figure>
<img src="/api/docs/image/54176ad07f146575310749eba44b7c2f42c1b327/use-cases/all-cases/_gfx/landing-page-preference.png" alt="Screenshot presenting personalized landing page" class="full no-frame">
<figcaption> A form about customers' preferences on a landing page </figcaption>
</figure>

## Prerequisites 
---
To be able to implement this use case, you must:
- [Implement a tracking code](/docs/settings/tool/tracking_codes) 
- [Track forms](/developers/web/tracking-form-data)
- [Configure newsletter sign-up process](/docs/settings/configuration/newsletter-sign-up)
- [Create a sender account](/docs/campaign/e-mail/configuring-email-account)

In case you want to send web push notifications:
- [Configure web push notifications](/docs/campaign/Webpush/configuring-web-push)
- [Implement an agreement form](/docs/campaign/Webpush/one-step-agreement-form)

## Process
---
Create a landing page with customer preference perform the steps in the following order:

1. [Track landing page data](/use-cases/landing-page-customer-preference#track-landing-page-data).
2. [Prepare an automation](/use-cases/landing-page-customer-preference#prepare-an-automation).
3. [Prepare segment of customers](/use-cases/landing-page-customer-preference#prepare-segments-of-customers).
4. [Run your landing page](/use-cases/landing-page-customer-preference#run-your-landing-page). 
 
## Track landing page data  
---
To collect information gathered through a form implemented on a landing page (instead of a landing page, you can also use pop-ups) and save it on a customer's profile in, [track this form](/developers/web/tracking-form-data). In this use case, a customer can select up to 26 categories. Below, you can find an example code for 3 categories.


<details class="accordion"><summary>Check the Jinjava code</summary><div class="accordion-content"><pre><code class="language-jinja">&lt;form action="" method="post" data-synerise="BF_Preferences"&gt; &lt;input type="email" placeholder="E-mail" data-synerise="email" &gt; &lt;label&gt; &lt;input type="checkbox" data-synerise="BF_email_agreement" data-synerise-value="1"&gt; I consent to the processing of my email address by xxxx in order to send me a newsletter with xxxx offers. &lt;/label&gt; &lt;label&gt; &lt;input type="checkbox" data-synerise="tvs" data-synerise-value="interested"&gt; tvs &lt;/label&gt; &lt;label&gt; &lt;input type="checkbox" data-synerise="music" data-synerise-value="interested"&gt; music &lt;/label&gt; &lt;label&gt; &lt;input type="checkbox" data-synerise="clothes" data-synerise-value="interested"&gt; clothes &lt;/label&gt; &lt;input type="submit" value="Save" /&gt; &lt;/form&gt;</code></pre></div></details>


With this code you will collect 4 types of information 

- Customer’s email.
- Custom attribute with agreement for email communication **BF_email_agreement = 1**.
- Tag **BF_preferences**.
- Attributes collected when a customer selects a checkbox on the form, for example **music = interested**.


  <div class="admonition admonition-tip"><div class="admonition-icon"><svg xmlns="http://www.w3.org/2000/svg" fill="none" viewBox="0 0 24 24" stroke="currentColor" stroke-width="2.5"><path stroke-linecap="round" stroke-linejoin="round" d="M9.663 17h4.673M12 3v1m6.364 1.636l-.707.707M21 12h-1M4 12H3m3.343-5.657l-.707-.707m2.828 9.9a5 5 0 117.072 0l-.548.547A3.374 3.374 0 0014 18.469V19a2 2 0 11-4 0v-.531c0-.895-.356-1.754-.988-2.386l-.548-.547z" /></svg></div><div class="admonition-body"><div class="admonition-content">

  If your form is not in the source code, but you’re adding it dynamically (using Java Script or Dynamic Content) you have to call the method which will catch the form `SyneriseTC.initFormCatch()`[Documentation](/developers/web/tracking-form-data)

  </div></div></div>
 
 
## Prepare an automation
---
If you want to add newsletter agreement to users who submit this preferences form, you have to prepare an automation which will enable the newsletter consent on the customer card.

<figure>
 <img src="/api/docs/image/54176ad07f146575310749eba44b7c2f42c1b327/use-cases/all-cases/_gfx/landingpage_preference5.png" alt="Screenshot with prepare an automation" class="large">
 <figcaption> Enabling newsletter agreement on a customer's profile </figcaption>
 </figure>


<div class="admonition admonition-important"><div class="admonition-icon"><svg xmlns="http://www.w3.org/2000/svg" fill="none" viewBox="0 0 24 24" stroke="currentColor" stroke-width="2.5"><path stroke-linecap="round" stroke-linejoin="round" d="M12 8v4m0 4h.01M21 12a9 9 0 11-18 0 9 9 0 0118 0z" /></svg></div><div class="admonition-body"><div class="admonition-content">

This example contains the instruction on enabling an agreement for receiving emails in a customer's profile. However, you can also create such automation for other types of agreements: [web push](/docs/campaign/Webpush) and [SMS](/docs/campaign/SMS).

</div></div></div>
 

### Detect enabling the agreement

Create a workflow for every customer who selected the newsletter agreement checkbox on the form.

1. Go to **Automation Hub > workflow > New workflow**. 
2. Click the plus button and select **Profile Data Changed** trigger.    
3. Double-click the node.    
4. From the **Choose value** dropdown list, select a newsletter agreement related attribute (in our example it’s **BF_email_agreement**).    
5. From the **Choose operator** dropdown list, select **Equal**.    
6. In the text field, enter the value of the attribute (in our example, it's `1`.)

<figure>
 <img src="/api/docs/image/54176ad07f146575310749eba44b7c2f42c1b327/use-cases/all-cases/_gfx/landingpage_preference2.1.png" alt="Screenshot with create agreement" class="large">
 <figcaption> The configuration of the Profile Change Data node </figcaption>
 </figure>

### Update agreement on a customer's profile 

1. As action choose **Update Profile node**, 
2. Set that **newsletter_agreement** attrribute has to change for enabled. 

 <figure>
   <img src="/api/docs/image/54176ad07f146575310749eba44b7c2f42c1b327/use-cases/all-cases/_gfx/landingpage_preference7.png" alt="Screenshot presenting Update Profile node" class="large">
   <figcaption> The configuration of the Update Profile node </figcaption>
   </figure>

### Prepare the final settings  

1. Add the **End** node where the workflow finishes for customers.
2. Optionally, add titles to each node so the workflow will be more understandable to your colleagues.
3. Name the workflow.
4. To save it as a draft, click **Save** it or activate by clicking **Save & Run**.

## Prepare segments of customers
---

Based on the collected attributes, you can prepare segments of users, interested in a category or more categories.

1. Go to **Decision Hub > Segmentation > New segmentation**.  
2. From the **Choose filter** dropdown list, select **Clients** tab.  
3. In the **Clients** tab, select **Attributes**.  
4. Select the attribute which is an equivalent of a category on the form.  
5. In the **Choose operator** dropdown list, click the <img src="/api/docs/image/54176ad07f146575310749eba44b7c2f42c1b327/icons/boolean-icon.png" alt="Boolean icon" class="icon" > icon.   
6. Select **Is true**.

<figure>
  <img src="/api/docs/image/54176ad07f146575310749eba44b7c2f42c1b327/use-cases/all-cases/_gfx/landingpage_preference6.png" alt="Screenshot with prepare segments of users" class="large">
  <figcaption> A segmentation of customers who are interested in the TV category </figcaption>
  </figure>

## Run your landing page
---

At the end of creating landing page with customer preferences, set up your landing page. Plan your communication - decide when you want to reach your customers, prepare the content of the message and select the communication type. For example, you can send [email](/docs/campaign/e-mail/creating-email-campaigns) or [web push](/docs/campaign/Webpush) communication. Remember to choose appropriate segment of customers.

<figure>
  <img src="/api/docs/image/54176ad07f146575310749eba44b7c2f42c1b327/use-cases/all-cases/_gfx/landingpage_preference3.png" alt="Screenshot with run landing page" class="medium">
  <figcaption> List of landing page </figcaption>
  </figure>

## Check the use case set up on the Synerise Demo workspace
---
You can check the configuration of use case in Synerise Demo workspace:
- [Workflow configuration](https://app.synerise.com/automations/workflows/automation-diagram/08e5f60e-6fbc-4d5e-8296-352b329fdd0f)
- [Segmentation](https://app.synerise.com/analytics-v2/segmentations/fe3a1af4-a64c-4085-b336-02e88a55c725)

If you’re our partner or client, you already have automatic access to the **Synerise Demo workspace (1590)**, where you can explore all the configured elements of this use case and copy them to your workspace.  

If you’re not a partner or client yet, we encourage you to fill out the contact [form](https://demo.synerise.com/request) to schedule a meeting with our representatives. They’ll be happy to show you how our demo works and discuss how you can apply this use case in your business. 

## Read more 
---
- [Email communication](/docs/campaign/e-mail/creating-email-campaigns)
- [Forms data](/developers/web/tracking-form-data)
- [Segmentation](/docs/analytics/segmentations/introduction-to-segmentations)
- [Web push](/docs/campaign/Webpush)


