In today's retail landscape, engaging customers through smart technology is essential. This use case demonstrates how a customer service system, integrated with automation and messaging tools, can boost customer interaction. By using Synerise's API, retailers can send timely SMS notifications, promoting app downloads and driving personalized marketing campaigns.
The workflow is triggered when a customer contacts a consultant, sending an SMS with an app download link. This enhances the customer experience by providing immediate app access, improving efficiency, and encouraging deeper engagement with the platform.
This strategy fosters customer loyalty, ensures relevant, well-timed communications, and respects preferences with a weekly message cap. The integration is simple, scalable, and adaptable to future needs.
## Prerequisites
---
- [Implement a dedicated custom event](/developers/api/events/sending-events#send-custom-event-endpoint), triggered when a customer contacts a consultant, sending an SMS with an app download link. In this use case, we use `customer.call` event.
- [Integrate with the SMS provider](/docs/campaign/SMS/configuring-sms-gateway).
## Create a workflow
---
You will create a workflow which will be triggered by a custom.call event and send an SMS to a customer with a link to the application.
### Select the trigger
1. Go to **Automations > Workflow > New workflow**.
2. Enter a name of the workflow.
2. Define the trigger by choosing **Profile Event**.
3. To open the settings of the node, click the node.
4. In the settings of the node, from the **Choose event** dropdown list, select **customer.call**.
5. Confirm the settings by clicking **Apply**.
### Select the action node
1. To add a node, click **THEN**.
2. From the dropdown list, select **Send SMS**.
3. To open the settings of the node, click the node.
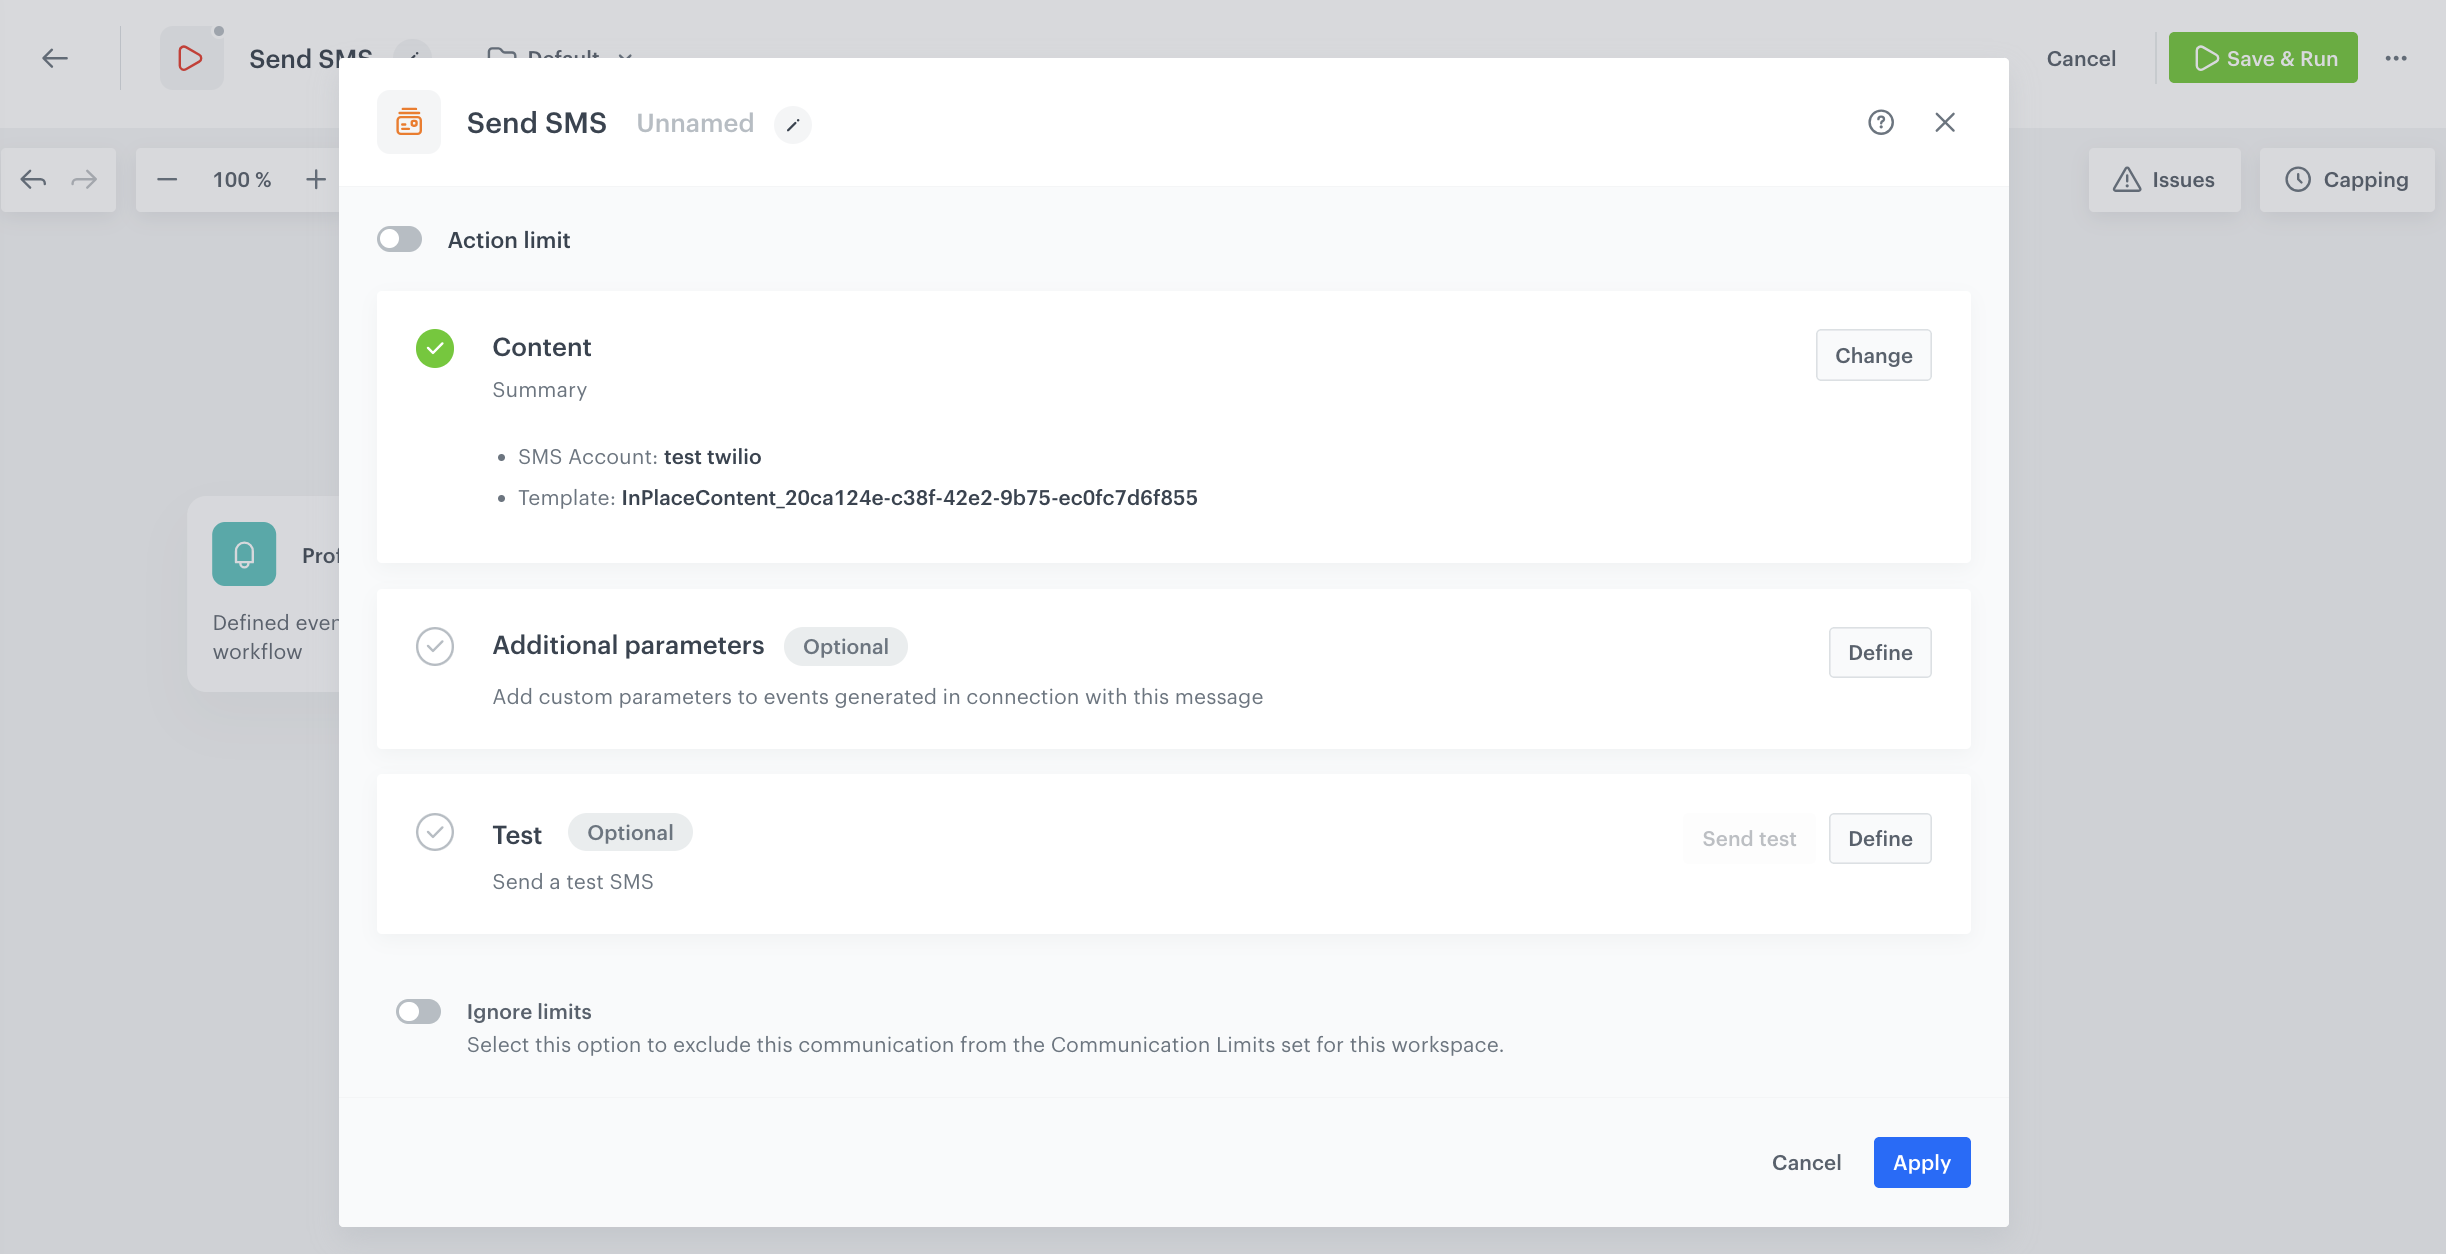
4. In the settings of the node, in the **Content** section, click **Define**.
5. From the **From phone number** dropdown list, select the SMS account from which the message will be sent.
6. Click **Create message**.
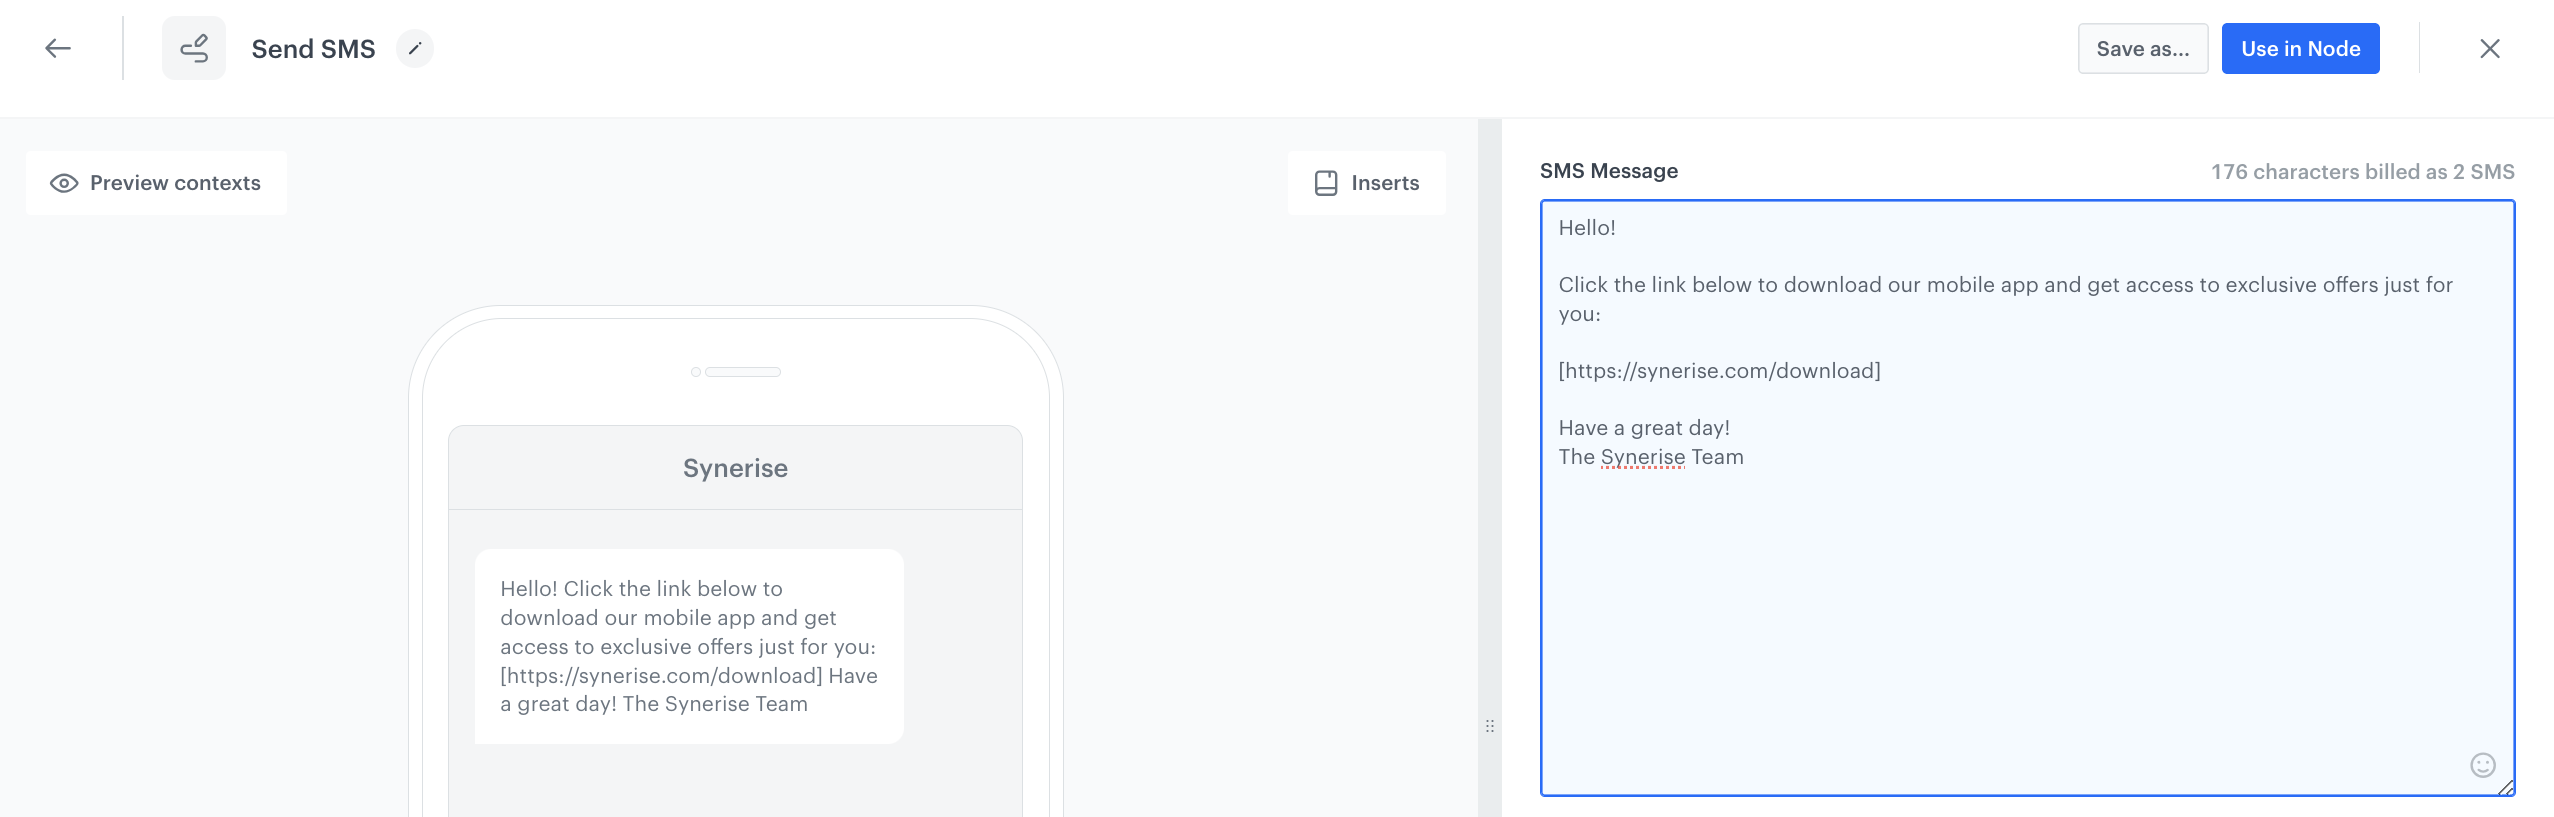
7. In the upper right corner, click **New template**.
8. In the **SMS Message** field, enter the contents of your message. You can [use inserts to personalize](/docs/campaign/SMS/creating-SMS-template#personalization) the message, you can use emoji to make the message look breezy or use [short links](/docs/campaign/SMS/creating-SMS-template#short-links).
Profile Event trigger configuration
9. After the content is ready, click **Use in Node**.
10. In the **Content** section, click **Apply**.
24. If you want to add custom parameters to the events generated automatically by this workflow (for example, sms.send), in the **Additional parameters** section, click **Define** and add a pair or more of parameter and value. Confirm the settings by clicking **Apply**.
25. If you want to send a test SMS, perform the instructions in the [Sending a test message](/docs/automation/actions/send-sms-node#sending-a-test-message) section.
26. You can define additional node setting such as enabling ignoring limits or global control group. You can find more information about it in [Defining additional node settings](/docs/automation/actions/send-sms-node#defining-additional-node-settings) section.
Profile Event trigger configuration
27. To confirm the node settings, click **Apply**.
**Result**:
Profile Event trigger configuration
### Add finishing node
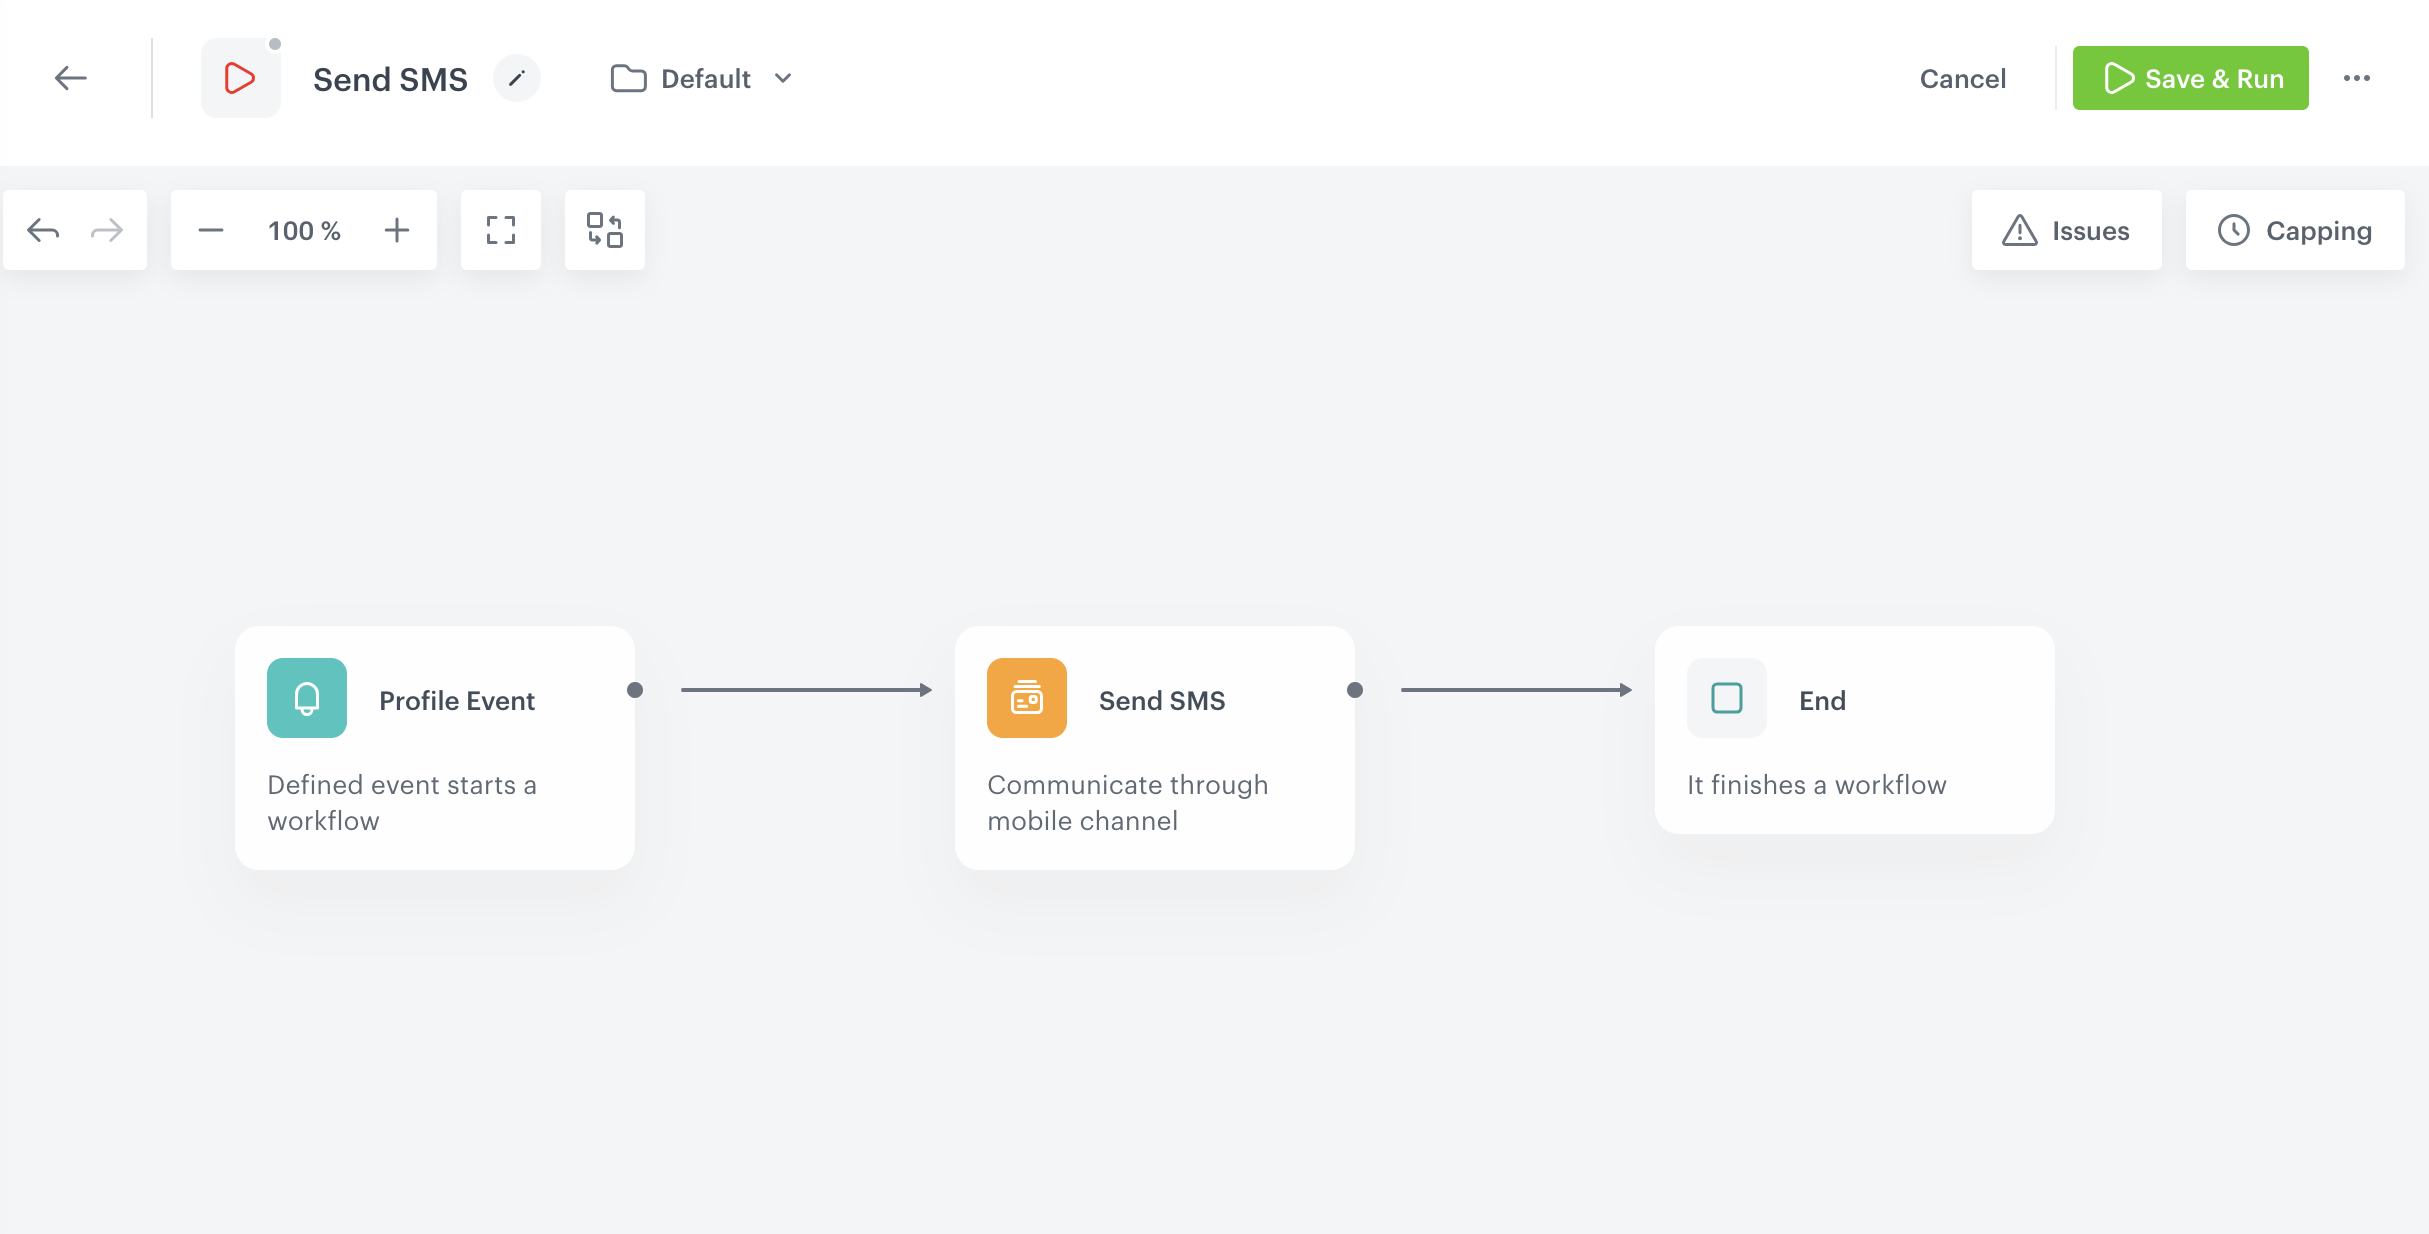
1. To add a node, click **THEN**.
2. From the dropdown list, select **End**. This node doesn't require configuration.
Remember to define additional settings for the workflow, in this case: capping, for example 1x per week.
3. In the upper-right corner, click **Save & Run**.
## Check the use case set up on the Synerise Demo workspace
---
You can check the [workflow](https://app.synerise.com/automations/workflows/automation-diagram/5201cfbf-e695-406a-858c-949ff34e367f) configuration directly in Synerise demo workspace.
If you’re our partner or client, you already have automatic access to the **Synerise Demo workspace (1590)**, where you can explore all the configured elements of this use case and copy them to your workspace.
If you’re not a partner or client yet, we encourage you to fill out the contact [form](https://demo.synerise.com/request) to schedule a meeting with our representatives. They’ll be happy to show you how our demo works and discuss how you can apply this use case in your business.
## Read more
---
[Send SMS node](/docs/automation/actions/send-sms-node)