Loyalty programs have emerged as a crucial factor in determining the success and performance of companies across various industries. These programs provide a means for businesses to establish and nurture stronger connections and relationships with customers. By offering incentives and rewards to loyal customers, companies can effectively encourage repeat purchases and foster a sense of loyalty and affinity towards their brand.
This use case demonstrates a specific loyalty activity in which customers receive 100 loyalty points for each product bought from specific brand within a certain time period. This strategy effectively stimulates sales of the brand's products while fostering customer loyalty by encouraging additional purchases and the accumulation of loyalty points.
## Prerequisites
---
- Implement transaction events using [SDK](/developers/web/transactions-sdk) or [API](https://developers.synerise.com/DataManagement/DataManagement.html#operation/CreateATransaction).
- Implement basic [loyalty program](/use-cases/loyalty-programs-basics) based on which you granted customers with 1 point for every 1 PLN spent.
## Security configuration
---
Before you start working with this hub, if you are a Synerise customer or partner, consider reading [the section about denylisting events](/docs/settings/tool/api#denylist). This natively accessible configuration will allow you to manage the restrictions in points management that may help you prevent fraud.
## Create a workflow
---
Create a workflow that awards 100 loyalty points for each product bought from a specific brand.
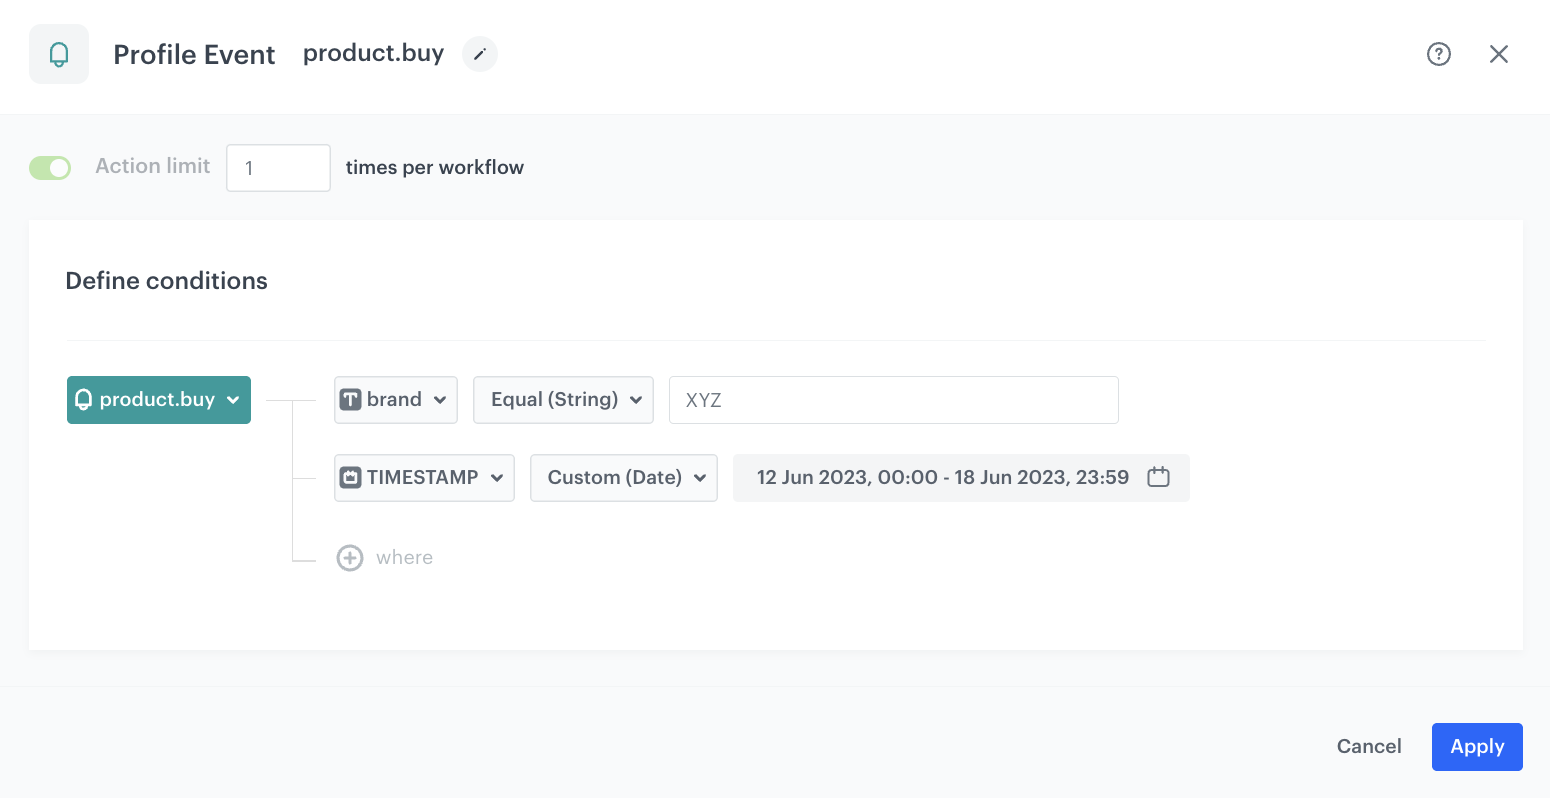
### Define the Profile Event trigger node
Configure the conditions that launch the workflow. As a trigger, we will use the `product.buy` event.
1. As the first node of the workflow, add **Profile Event**.
2. From **Choose event** dropdown menu, choose the `product.buy` event.
3. Click the **+ where** button and from the dropdown list, choose **brand**.
4. From the **Choose operator** dropdown, select **Equal**.
5. In the text field, type the name of the brand. In our case it will be `XYZ`.
6. Click the **+ where** button and from the dropdown list, choose **TIMESTAMP**.
7. From the **Choose operator** dropdown, choose **Custom (Date)**.
8. Click **Select date range**.
9. Set the time range in which your promotion is active. In this use case, it will be one week.
6. Confirm by clicking **Apply**.
Profile Event trigger node
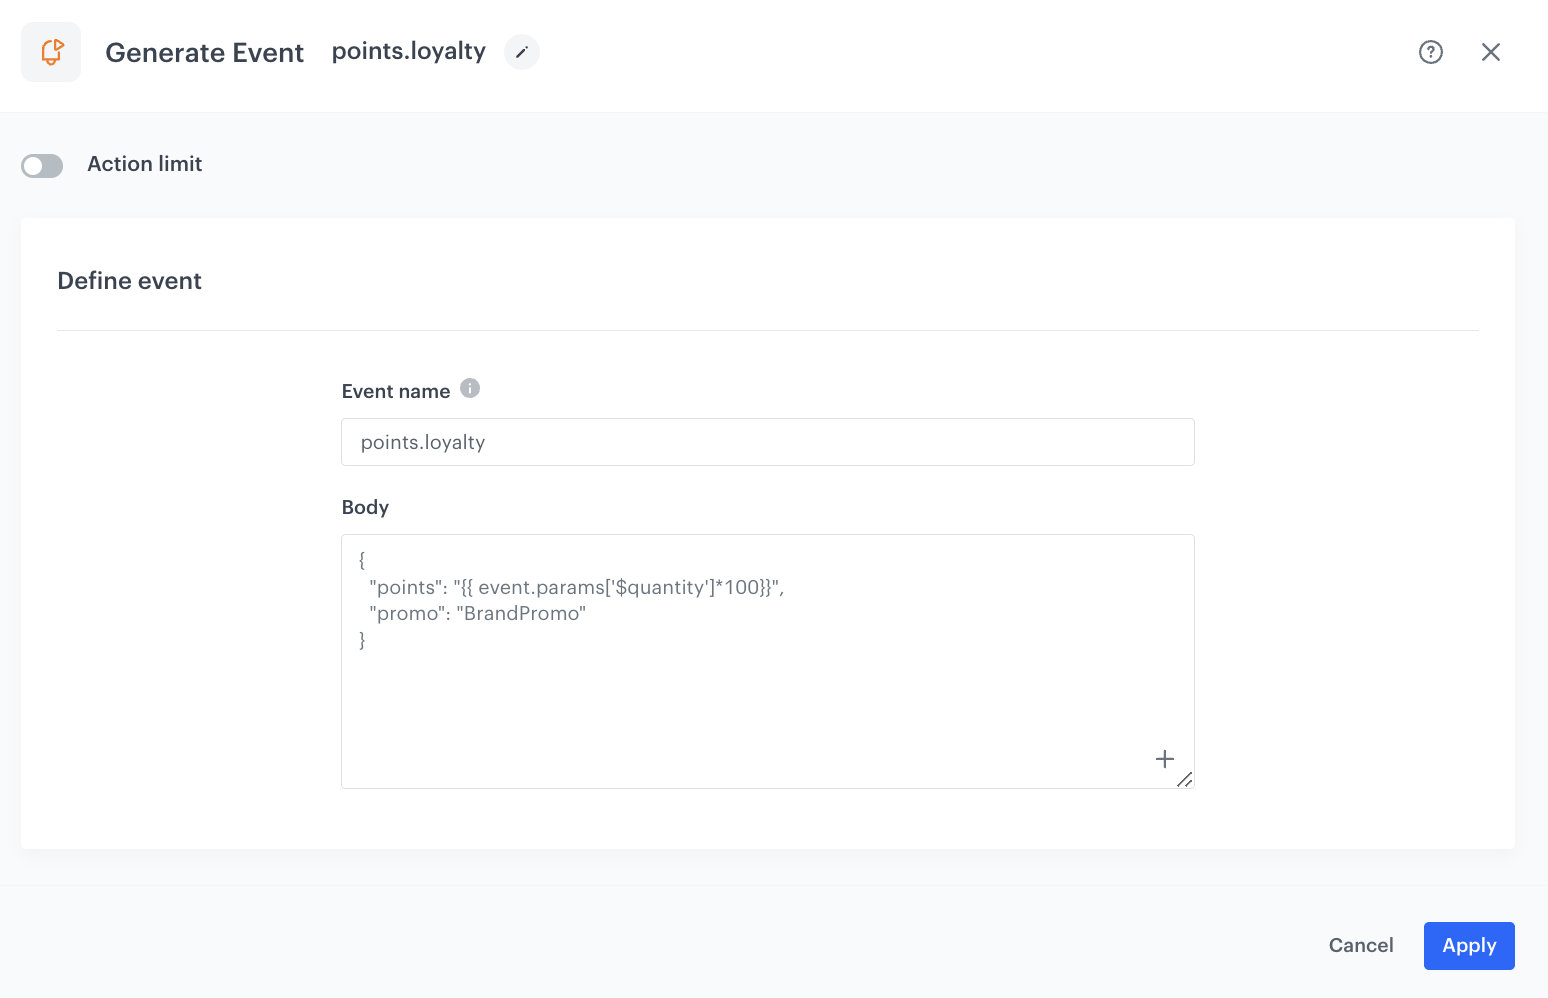
### Configure the Generate Event node
In this part of the process, you will create a node which generates a `points.loyalty` event which adds extra loyalty points. This event is created in addition to the regular `points.loyalty` event. In result, the customer receives points for a purchase from specified brand twice:
- Points based on the [loyalty points schema](/use-cases/loyalty-programs-basics#prepare-the-points-schema) described as a part of prerequisites.
- Extra points through this workflow.
The body of the additional event will contain the `points` parameter calculated by multiplying the `$quantity` parameter from the `product.buy` event by the constant value of `100`.
1. As the second node of the workflow, add **Generate Event**.
2. In the **Event name** field, enter `points.loyalty`.
4. In the **Body** section, define the parameters of this event, and click **Apply**.
**Example content of **Body** section:**
The event body is an example. You can add more parameters or change the point calculation, perform any mathematical formula according to your business needs.
Generate Event node configuration
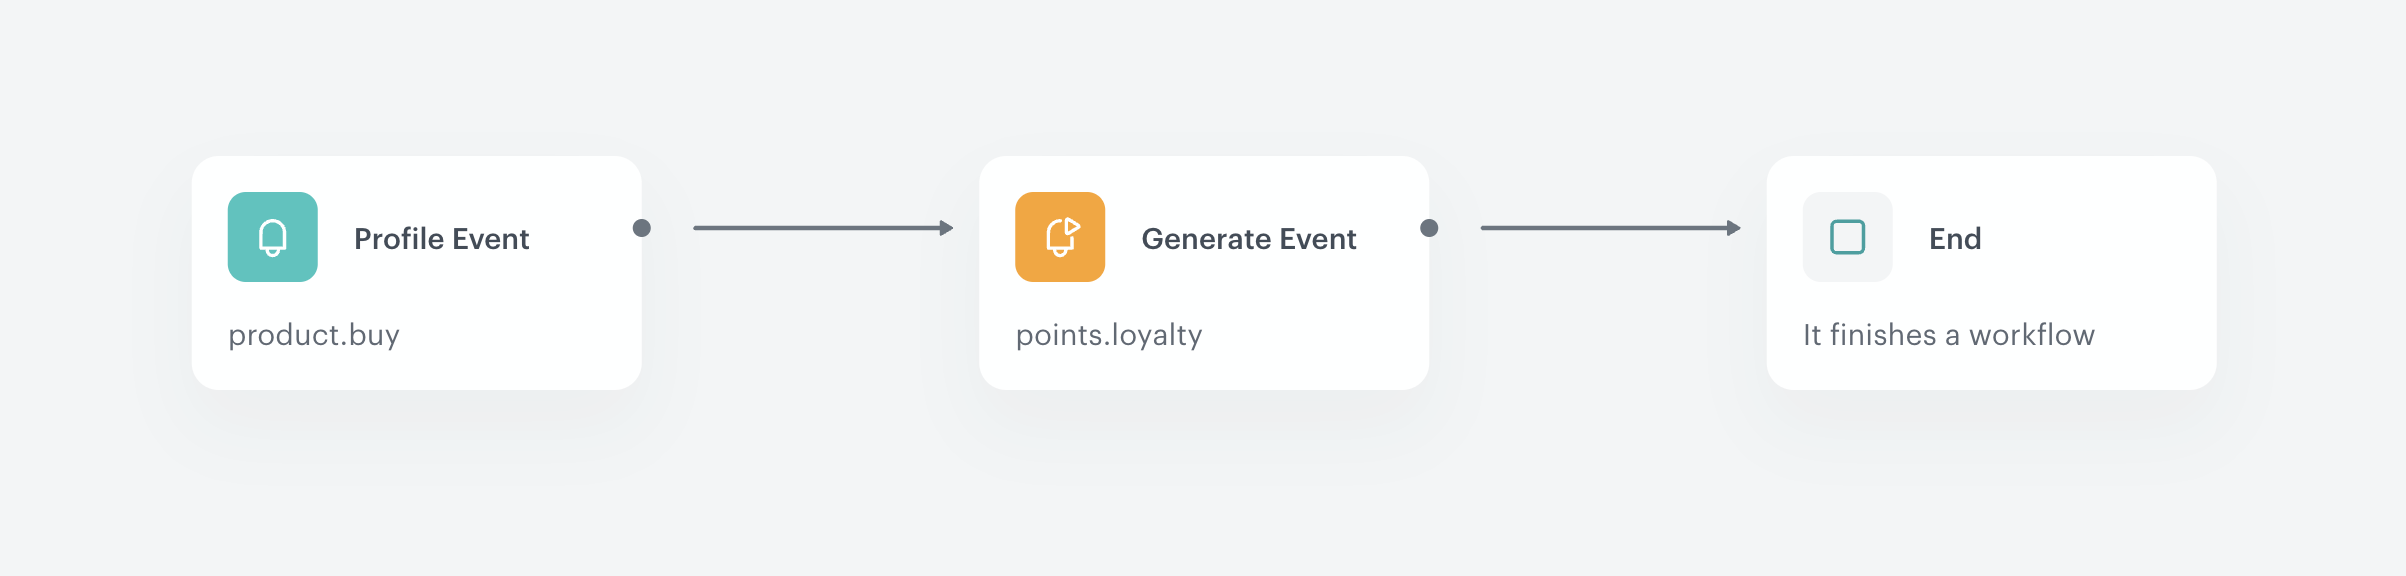
### Add the End node
1. On the **Generate Event** node, click the plus icon.
2. From the dropdown list, select **End**.
3. In the upper right corner, click **Save & Run**.
The final configuration of the workflow
## Check the use case set up on the Synerise Demo workspace
---
You can check the configuration of the [workflow](https://app.synerise.com/automations/automation-diagram/edbdd32f-34d7-4b1d-a7ba-8c0890ce687f) directly in Synerise Demo workspace.
If you’re our partner or client, you already have automatic access to the **Synerise Demo workspace (1590)**, where you can explore all the configured elements of this use case and copy them to your workspace.
If you’re not a partner or client yet, we encourage you to fill out the contact [form](https://demo.synerise.com/request) to schedule a meeting with our representatives. They’ll be happy to show you how our demo works and discuss how you can apply this use case in your business.
## Read more
---
- [Automation Hub](/docs/automation)
- [Jinjava inserts](/developers/inserts)
- [Loyalty programs basics](/use-cases/loyalty-programs-basics)