In-store pickup creates a valuable and strategic touchpoint that can drive additional sales and boost loyalty program engagement.
By rewarding customers who pick up their orders quickly with extra loyalty points redeemable for discounts or gifts, you unlock additional operational and business benefits:
- accelerating the pickup process, which frees up backroom space and improves store operations;
- reducing the number of unclaimed orders, which helps lower return-related costs;
- increasing participation in your loyalty program.
This use case presents a workflow that grants 40 loyalty points to customers who collect their order within 24 hours from the moment it becomes ready for pickup.
Prerequisites
- Integrate mechanism for awarding loyalty points.
Implement custom events:
orderPickup.readywhen the order is ready for pickup in-storeorder.pickedUpwhen the order is collected’ You can use the API.
These events will be saved to the customers' profiles.
- Integrate Synerise mobile SDK in your mobile application.
Find more in the Loyalty programs basics use case.
Security configuration
Before you start working with this hub, if you are a Synerise customer or partner, consider reading the section about denylisting events. This natively accessible configuration will allow you to manage the restrictions in points management that may help you prevent fraud.
Create a workflow
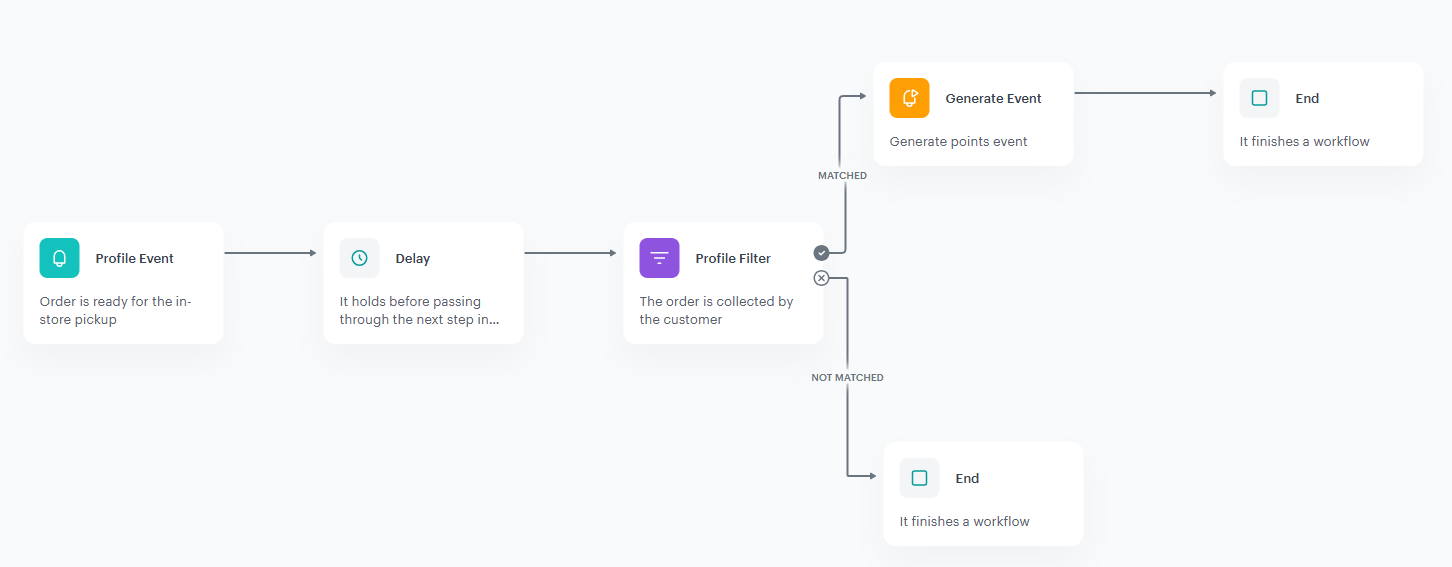
Create a workflow that grants 40 loyalty points for fast order pickup.
- Go to
 Automation Hub > Workflows > New workflow.
 - Enter the name of the workflow.
Define the Profile Event trigger node
At this stage, we will configure the conditions that launch the workflow. As a trigger, we will use the orderPickup.ready event.
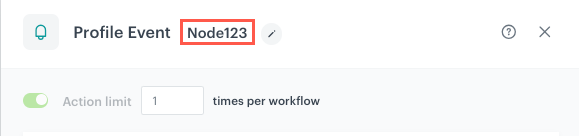
- As the first node of the workflow, add Profile Event. In the configuration of the node:
- From Choose event dropdown menu, choose the
orderPickup.readyevent. - Confirm by clicking Apply.
- From Choose event dropdown menu, choose the

Configure the Delay node
- Add the Delay node. In the node settings:
- In the Delay field, type
1. - From the dropdown list, choose Day.
- In the Delay field, type
- Click Apply.
Define the Profile Filter node
In this step, you will verify whether the customer has collected the order within 24 hours from the moment it becomes ready for pickup. If not, the workflow ends for a user.
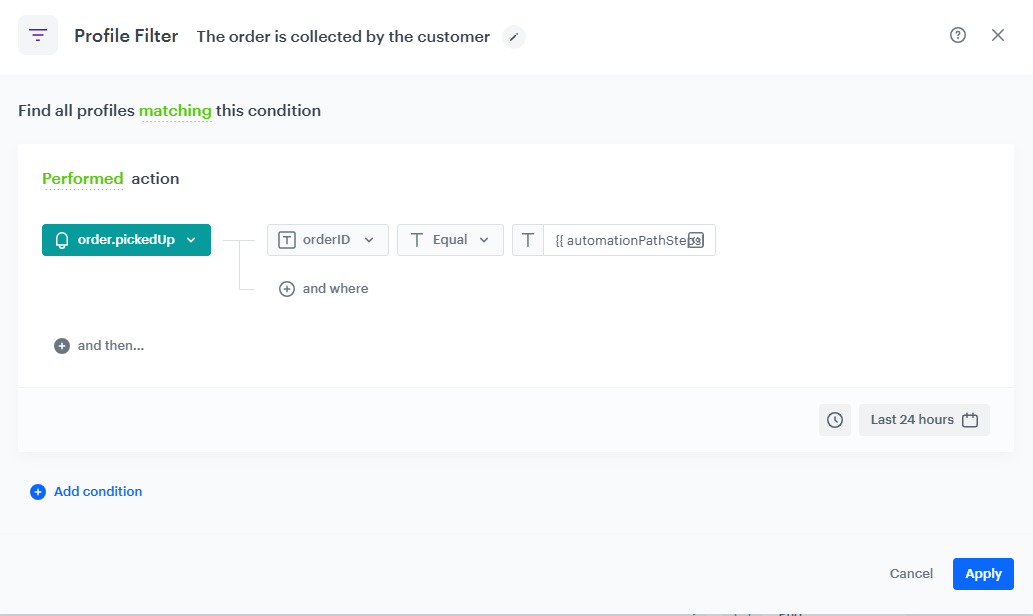
- Add the Profile Filter node.
- From the Choose filter dropdown list, select the
order.pickedUpevent. - From the Choose parameter dropdown list, select the
orderIDparameter. - From the Choose operator dropdown list, choose Equal (String).
One customer can have several orders to collect, so to make sure that the
orderIDparameter fororder.pickedUpevent matches theorderIDparameter fororderPickup.readyevent, use the following syntax in the field{{ automationPathSteps['nodeName'].event.params.paramName }}, where:nodeNameis the title of the node whose data you want to refer to (in this case the title introduced was 'Order is ready for the in-store pickup’)paramNameis the name of the parameter (in this caseorderID)
The node title to be used as `nodeName` - Click Apply.
- To the unmatched path from the Profile Filter node, add the End node.
Congifure the Generate Event node
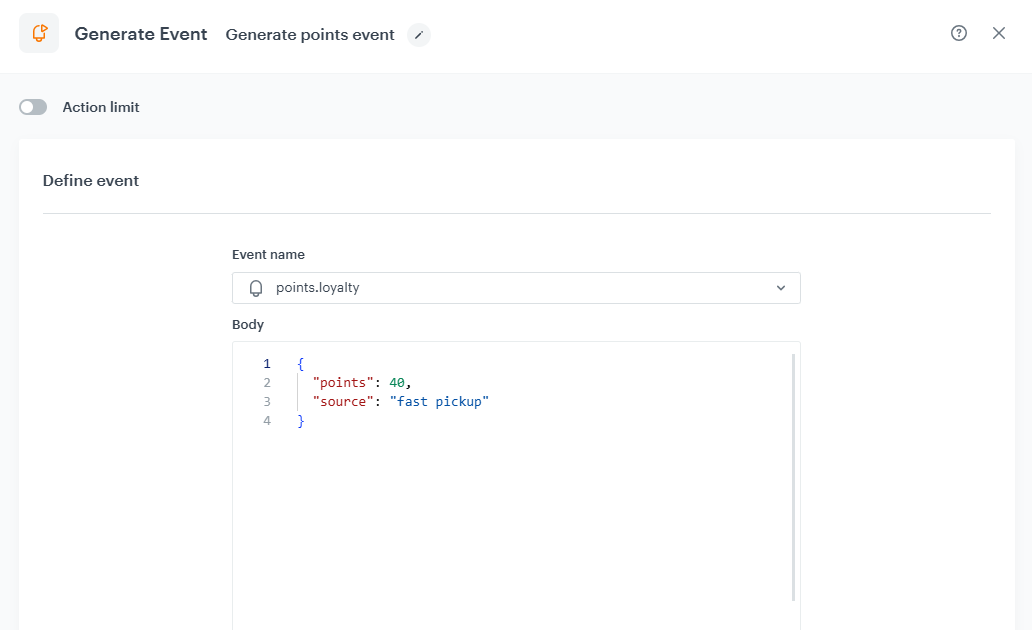
- Add the Generate Event node.
In the settings of the node:
In the Event name field, from the dropdown list, select the
points.loyaltyevent.- In the Body section, use the following code and modify it to your needs:
{
        "points": "40",
        "source": "fast pickup"
        }
- Click Apply.
Add final setting to your workflow
- Add the End node to both paths.
- Launch the workflow by clicking Save&Run.
Check the use case set up on the Synerise Demo workspace
In Synerise Demo workspace, you can check the configuration of the workflow.
If you’re our partner or client, you already have automatic access to the Synerise Demo workspace (1590), where you can explore all the configured elements of this use case and copy them to your workspace.
If you’re not a partner or client yet, we encourage you to fill out the contact form to schedule a meeting with our representatives. They’ll be happy to show you how our demo works and discuss how you can apply this use case in your business.