In today's highly competitive business environment, establishing and nurturing customer loyalty holds immense significance for companies aiming to maintain their customer base and drive revenue growth. To accomplish this, deploying a well-designed loyalty program emerges as a powerful tool, incentivizing customers for their purchases and fostering continuous engagement and brand advocacy.
This specific use case delves into the implementation of a targeted loyalty program, wherein customers earn reward points for transactions conducted exclusively at a designated point of sale (POS). The program's strategic focus aligns with the grand opening of a new store, offering a limited-time promotion that is exclusively available during the opening weekend.
Following a purchase, it is possible to send customers an email informing them of their existing points balance. Although the specifics of this communication process are not addressed in this particular scenario, if you are interested in acquiring knowledge on generating analytics to calculate point balances for customers, we suggest referring to this [use case](/use-cases/loyalty-points-for-category), which offers a comprehensive, step-by-step tutorial on creating such analytics.
## Prerequisites
---
- Implement transaction events using [SDK](/developers/web/transactions-sdk) or [API](https://developers.synerise.com/DataManagement/DataManagement.html#operation/CreateATransaction). Make sure that you implement shopID parameter that contains the ID of the point of sales where the purchase has been made.
- Implement basic [loyalty program](/use-cases/loyalty-programs-basics) based on which you granted customers with 1 point for every 1 PLN spent.
## Security configuration
Before you start working with this module, if you are a Synerise customer or partner, consider reading [the section about denylisting events](/docs/settings/tool/api#denylist). This natively accessible configuration will allow you to manage the restrictions in points management that may help you prevent fraud.
## Create a workflow
---
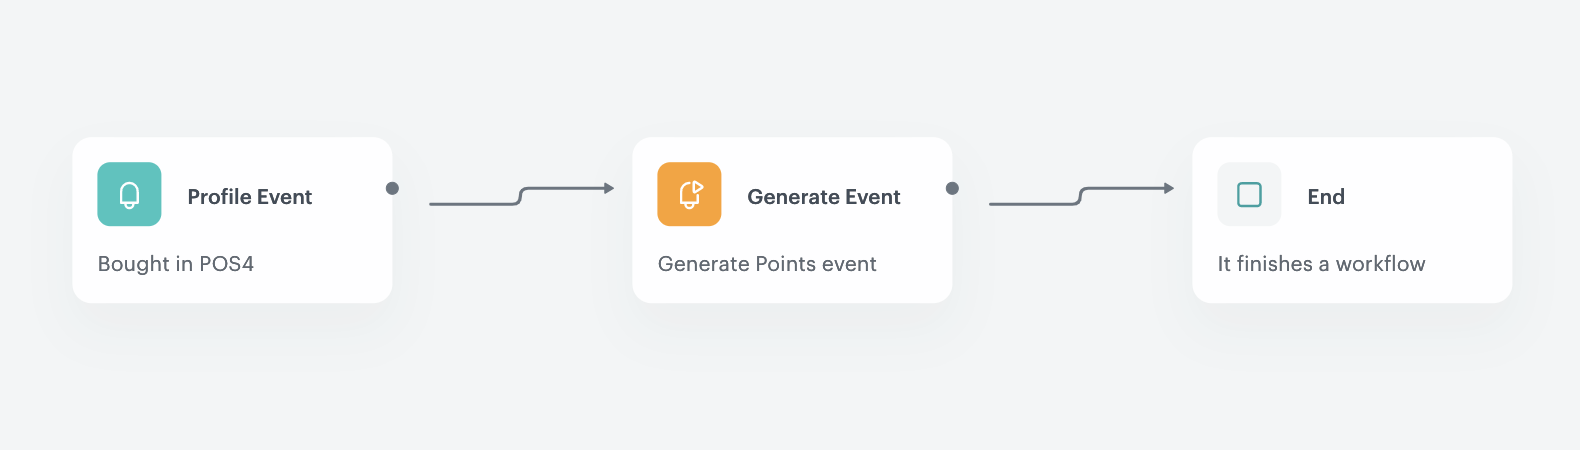
Design a workflow that awards 150 points for completing 10 transactions within a specified timeframe and location. In our particular use case, this will apply during the weekend when the grand opening of the stationary shop will take place. For the purposes of this use case, we will use the `ShopID` of the stationary shop, which is **POS4**.
1. Go to **Automation Hub > Workflows > New workflow**.
2. Enter the name of the workflow.
### Define the Profile Event trigger node
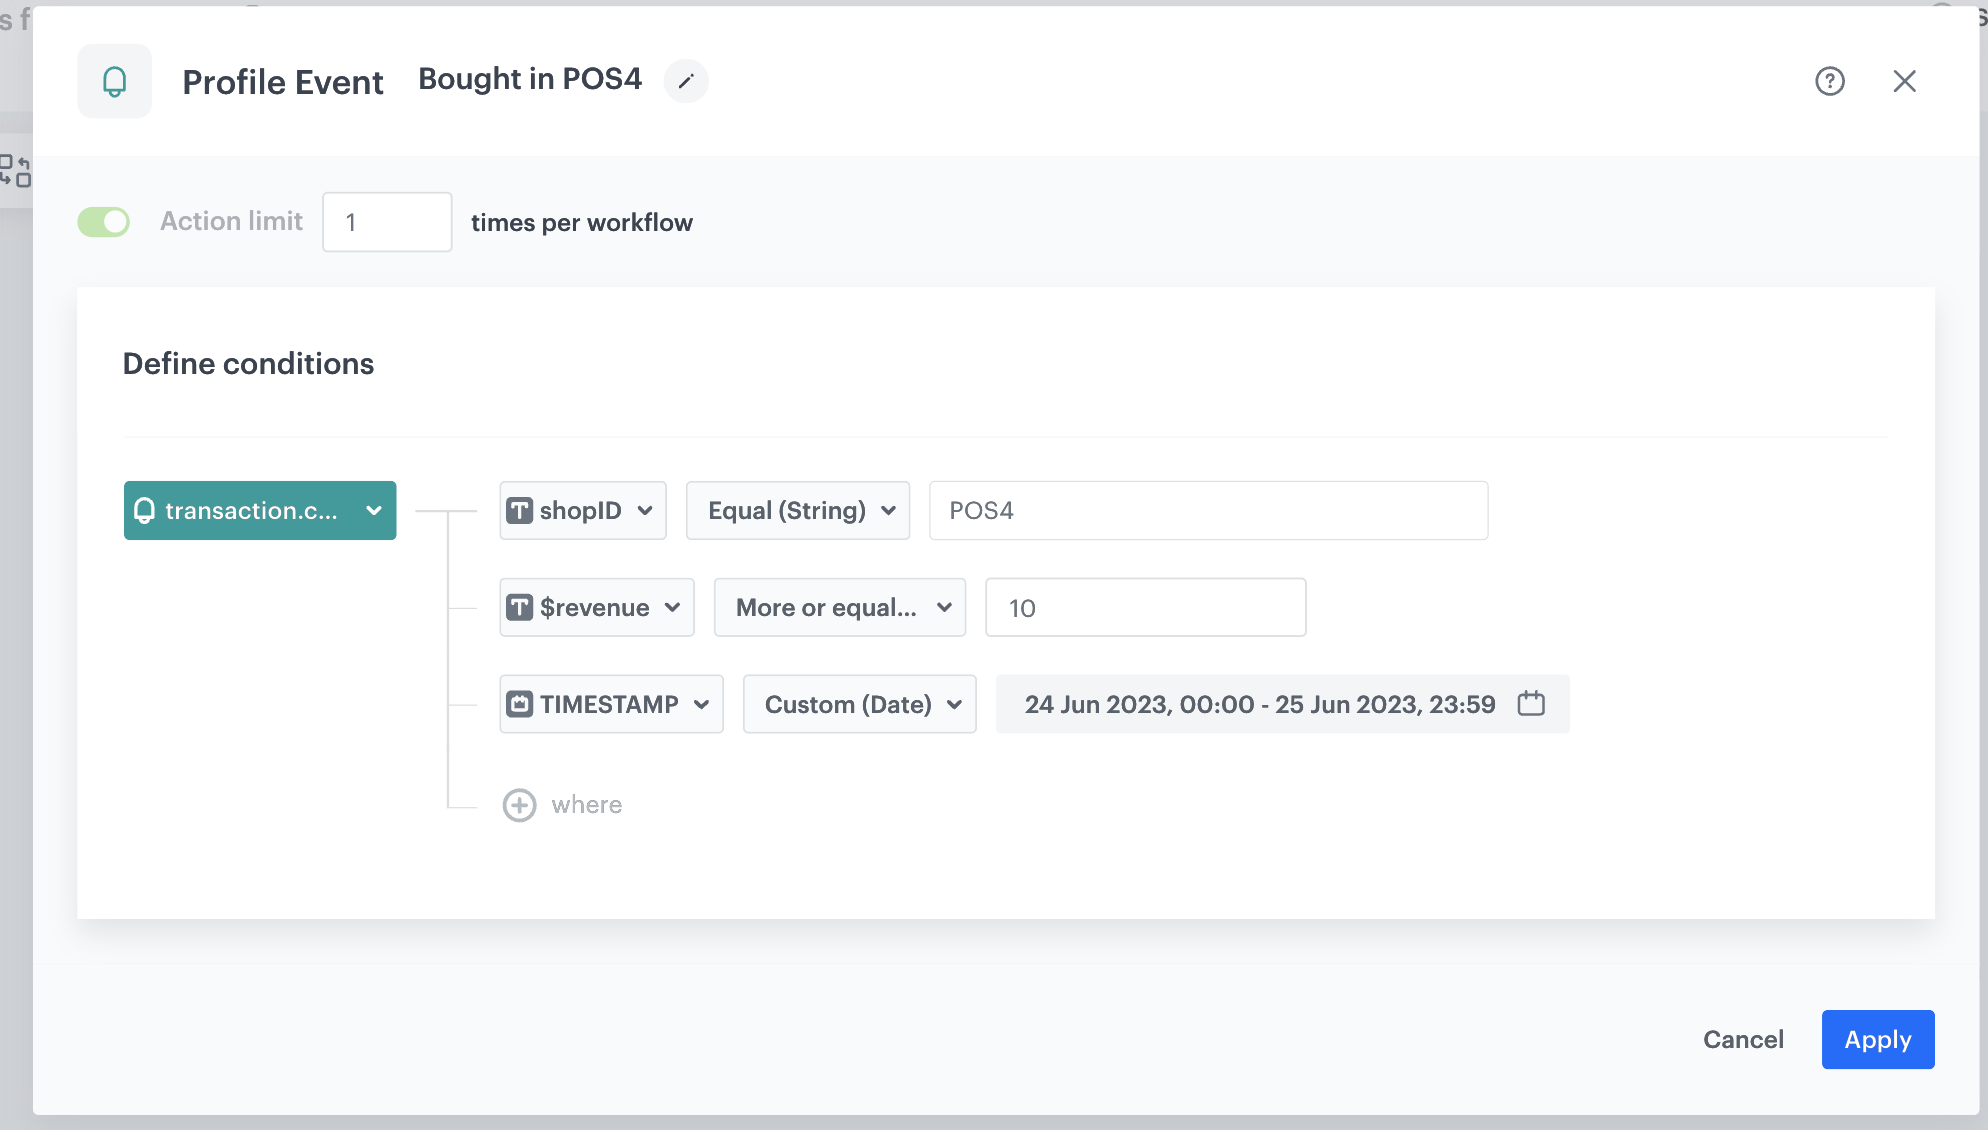
At this stage, we will configure the conditions that launch the workflow. As a trigger, we will use the `transaction.charge` event.
1. As the first node of the workflow, add **Profile Event**. In the configuration of the node:
1. From **Choose event** dropdown menu, choose the `transaction.charge` event.
2. Click the **+ where** button and from the dropdown list, choose **shopID**.
3. From the **Choose operator** dropdown, select **Equal**.
4. In the text field, type the name of the **shopID**, as `POS4`.
5. Click the **+ where** button and from the dropdown list, choose **revenue**.
6. From the **Choose operator** dropdown, choose **More or equal to**.
7. In the text field enter `10`.
8. Click the **+ where button** and from the dropdown list, choose **TIMESTAMP**.
9. From the **Choose operator** dropdown, choose **Custom (Date)**.
10. Click **Select date range**.
11. Set the time range in which your promotion is active. In this use case, it will be one week.
2. Confirm by clicking **Apply**.
Profile Event trigger node
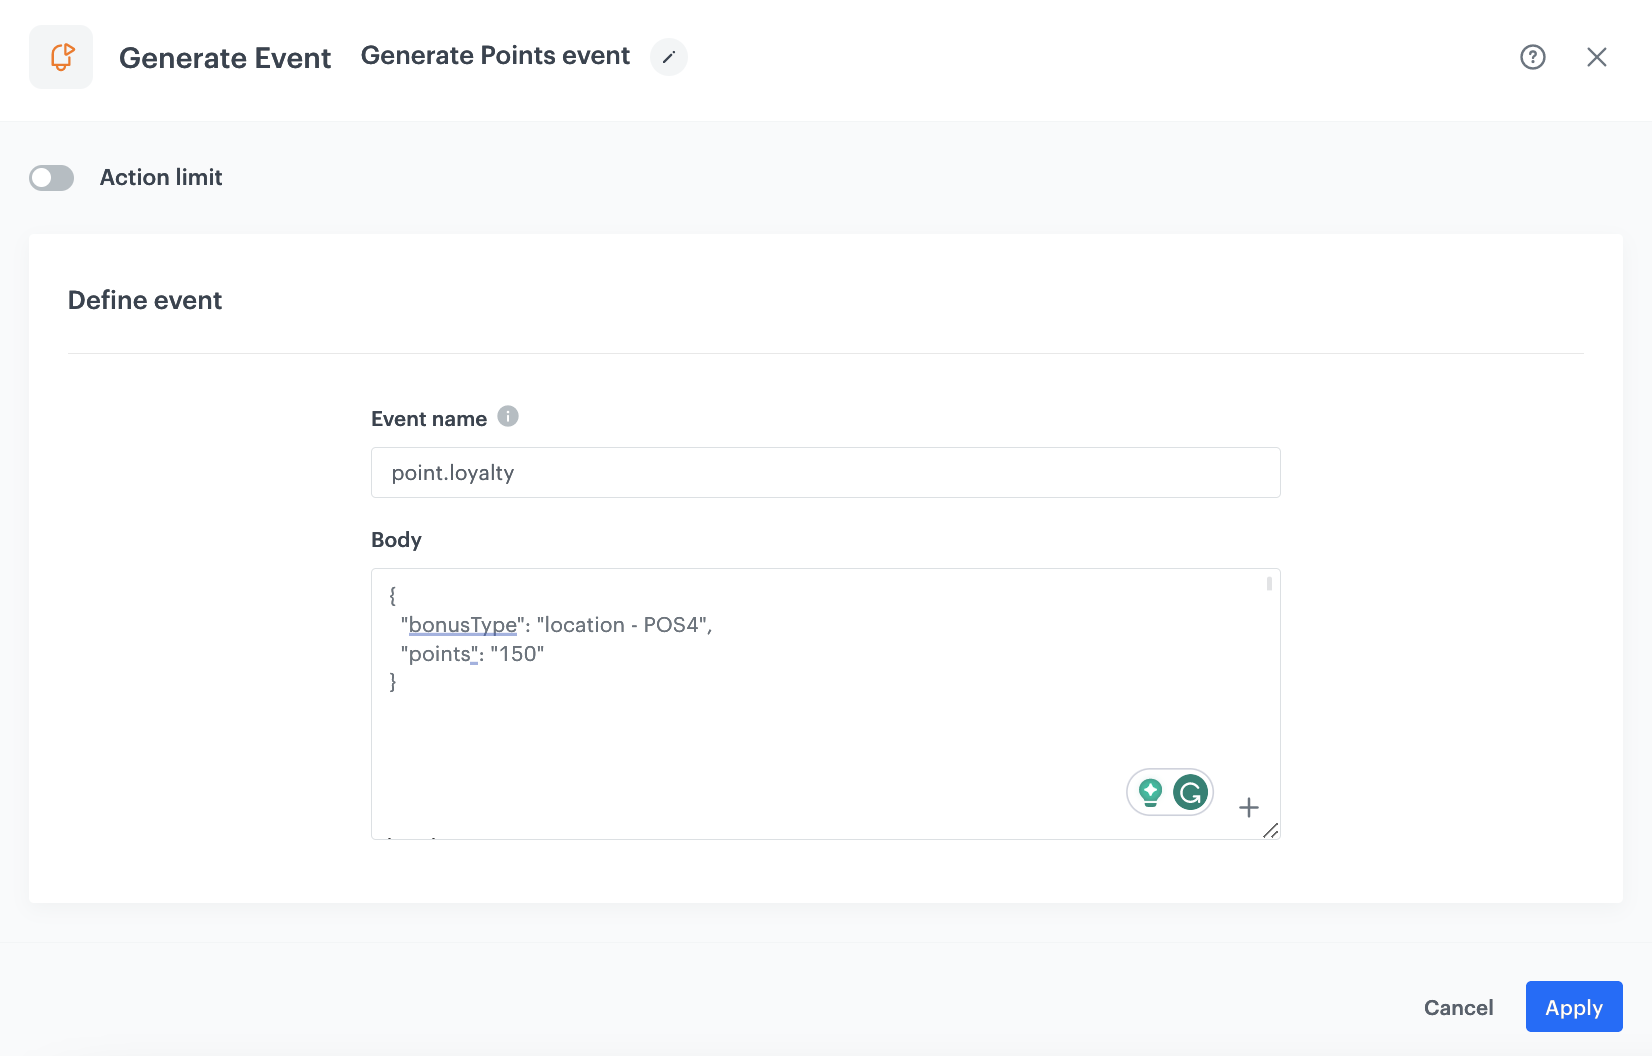
### Configure the Generate Event node
In this part of the process, you will create a node that generates a `points.loyalty` event which adds extra loyalty points. This event is created in addition to the regular `points.loyalty` event. In result, the customer receives points for a purchase in the specific point of sales twice:
- Points based on the loyalty points schema described as a part of prerequisites.
- Extra points through this workflow. The body of the additional event will contain 150 bonus points for purchases in location - POS4.
1. As the second node of the workflow, add **Generate Event**.
2. In the **Event name** field, enter `points.loyalty`.
4. In the **Body** section, define the parameters of this event, and click **Apply**.
**Example content of **Body** section:**
The event body is an example. You can add more parameters or change the point calculation, perform any mathematical formula according to your business needs.
Generate Event node configuration
### Add the end node
---
1. On the **Generate Event** node, click the plus icon.
2. From the dropdown list, select **End**.
3. Optionally, define **capping**.
4. Optionally, add titles to each node so the workflow will be more understandable to your colleagues.
5. In the upper right corner, click **Save & Run**.
The workflow configuration
## Check the use case set up on the Synerise Demo workspace
---
You can check the configuration of the [workflow](https://app.synerise.com/automations/automation-diagram/db6e214d-59ee-49e1-ac73-62341017f825) directly in Synerise Demo workspace:
If you’re our partner or client, you already have automatic access to the **Synerise Demo workspace (1590)**, where you can explore all the configured elements of this use case and copy them to your workspace.
If you’re not a partner or client yet, we encourage you to fill out the contact [form](https://demo.synerise.com/request) to schedule a meeting with our representatives. They’ll be happy to show you how our demo works and discuss how you can apply this use case in your business.
## Read more
---
- [Automation Hub](/docs/automation)
- [Expressions](/docs/analytics/expressions)
- [Loyalty programs basics](/use-cases/loyalty-programs-basics)