There are various strategies to motivate new customers to join your loyalty program, boost revenue, and encourage repeat purchases, ultimately fostering long-term loyalty. One effective approach is to provide customers with rewarding loyalty points immediately upon registration, coupled with a minimum transaction requirement. By offering these points, you incentivize customers to increase their spending while providing them with a valuable currency that can be used to unlock a range of rewards, discounts, and exclusive benefits.
In this use case, we will create a workflow that grants 100 loyalty points for new loyalty program members. This offer will be available for transactions equal to or higher than 10$.
## Prerequisites
---
- Implement transaction events using [SDK](/developers/web/transactions-sdk) or [API](https://developers.synerise.com/DataManagement/DataManagement.html#operation/CreateATransaction).
- Add a [custom event](https://developers.synerise.com/DataManagement/DataManagement.html#operation/CustomEvent) to save data to customers' profiles when they perform an activity. In this particular use case: `points.register`
- Integrate Synerise [mobile SDK](/developers/) in your mobile application.
- Integrate mechanism for awarding loyalty points.
Find more in the [Loyalty programs basics](/use-cases/loyalty-programs-basics) use case.
## Security configuration
---
Before you start working with this hub, if you are a Synerise customer or partner, consider reading [the section about denylisting events](/docs/settings/tool/api#denylist). This natively accessible configuration will allow you to manage the restrictions in points management that may help you prevent fraud.
## Process
---
In this use case, you will go through the following steps:
1. [Create a segmentation](#create-a-segmentation) that groups customers that already have loyalty points for registration.
2. [Create a workflow](#create-a-workflow) which grants 100 loyalty points for the first purchase worth a minimum $10 after registration.
## Create a segmentation
---
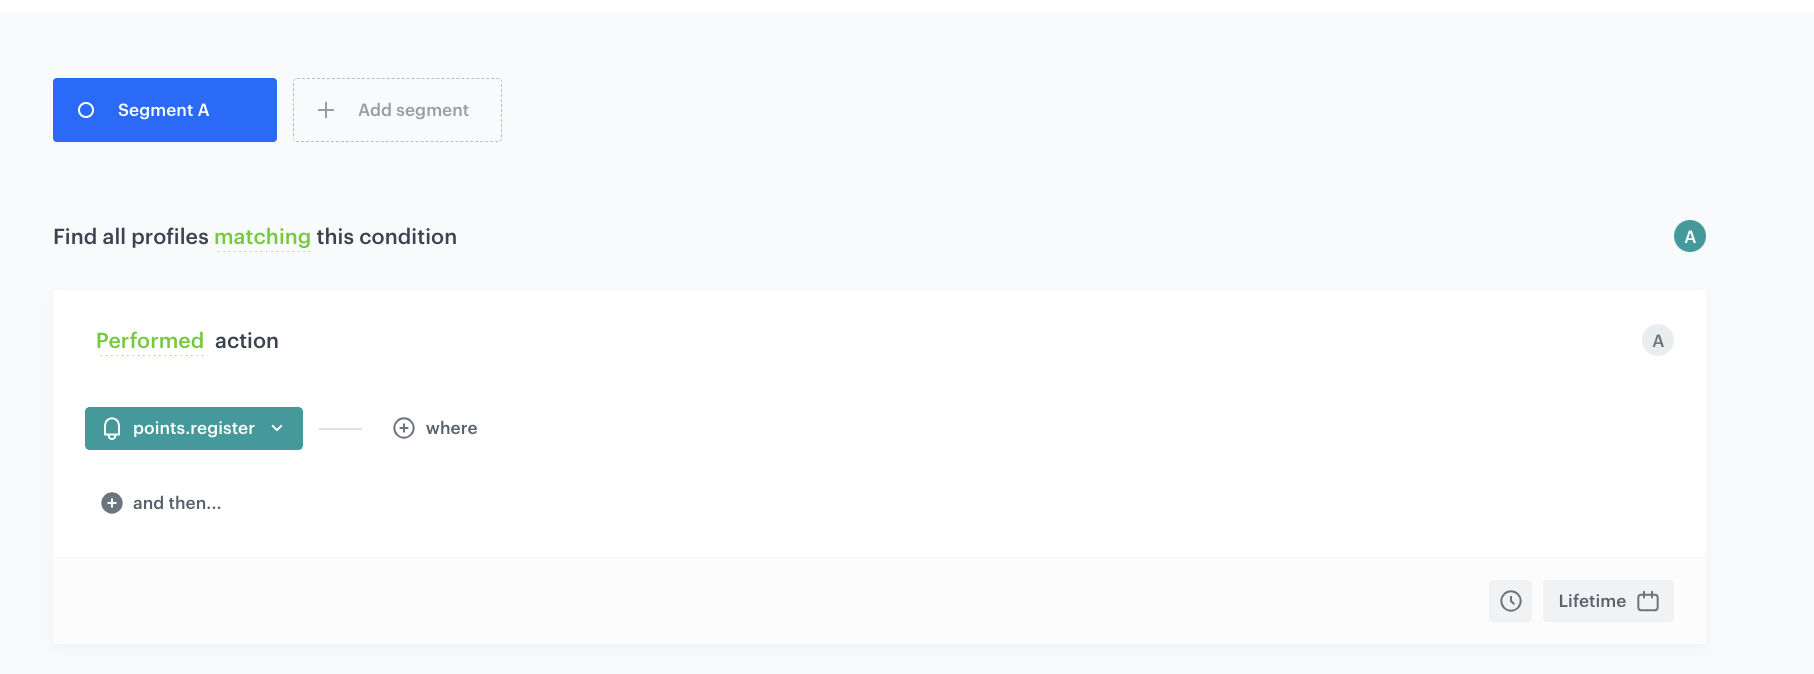
In this part of the process, you create a segmentation based on the `points.register` event.
1. Go to **Decision Hub > Segmentations > New segmentation**.
2. Enter a meaningful name for the segmentation.
3. Click the **Add condition** and from the dropdown list, select the `points.register` event.
4. In the calendar in the right bottom of the page:
1. In the **Relative date range** section, click **More** and from the dropdown list, select **Lifetime**.
2. Click **Apply**.
Segmentation configuration
5. Click **Save**.
The segment is saved and can be viewed in **Preview**.
## Create a workflow
---
Create a workflow that grants 100 loyalty points for the first purchase for a minimum value to customers who register for the first time.
1. Go to **Automation Hub > Workflows > New workflow**.
2. Enter the name of the workflow.
### Define the Profile Event trigger node
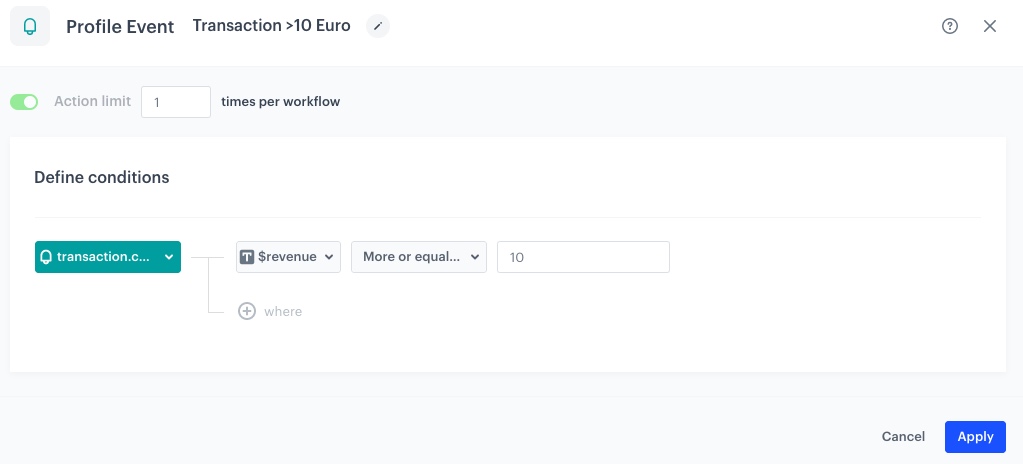
At this stage, we will configure the conditions that launch the workflow. As a trigger, we will use the `transaction.charge` event with value equal to or higher than $10.
1. As the first node of the workflow, add **Profile Event**. In the configuration of the node:
1. From **Choose event** dropdown menu, choose the `transaction.charge` event.
2. Click the **+ where** button and from the dropdown list, choose **$revenue**.
3. From the **Choose operator** dropdown, select **More or equal to (Number)**.
4. In the text field, type the minimal value of the transaction. In our case it will be `10`.
5. Confirm by clicking **Apply**.
Profile Event node configuration
### Define the Profile Filter node
As the next step, add the Profile Filter node, which checks if the customer already has points for the registration. If the customer has not yet received loyalty points for registration, then in the next step we will generate an event with those points for them, and if they have already received points, then the workflow ends.
1. Add **Profile Filter** node.
2. Click **Choose filter > Profiles > Segmentations** and from the dropdown list, select [the segmentation you created in the previous step](#create-a-segmentation).
3. From the **Choose operator** dropdown, choose **Is true (Boolean)**.
4. Click **Apply**.
Profile Filter node configuration
### Congifure the Generate Event node
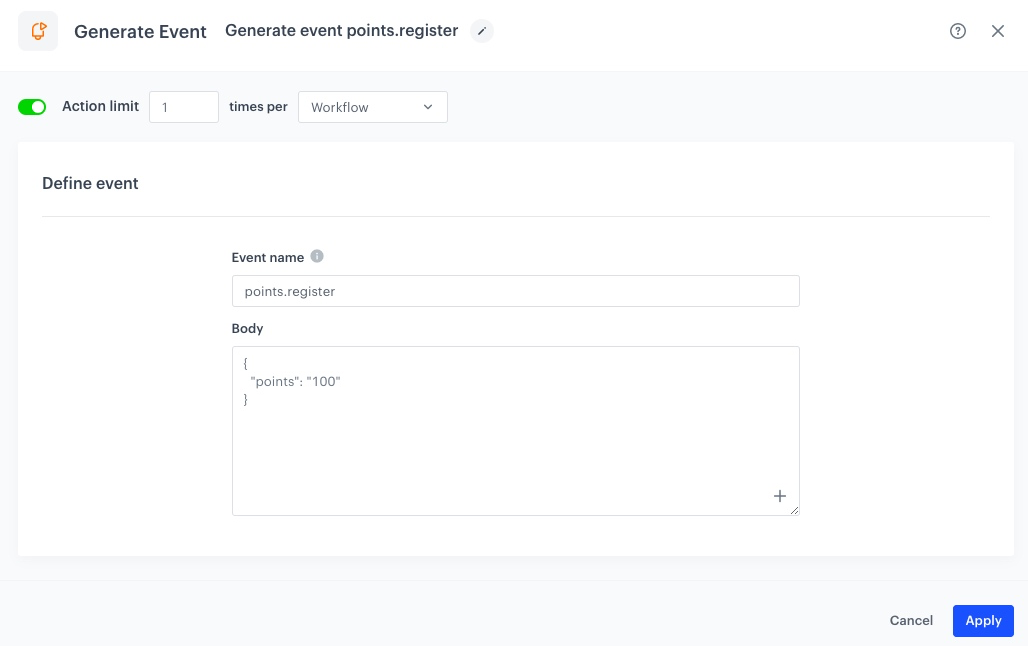
1. To the **Not matched** path, add a **Generate Event** node.
2. In the settings of the node:
1. Enable the **Action limit** toggle.
2. In the **Event name** field, enter the name of the event. In our case, we are using `points.register` event.
4. In the **Body** section, use the following code and modify it to your needs:
{
               "points": "100"
               }
3. Click **Apply**.
Generate Event node configuration
### Add final setting to your workflow
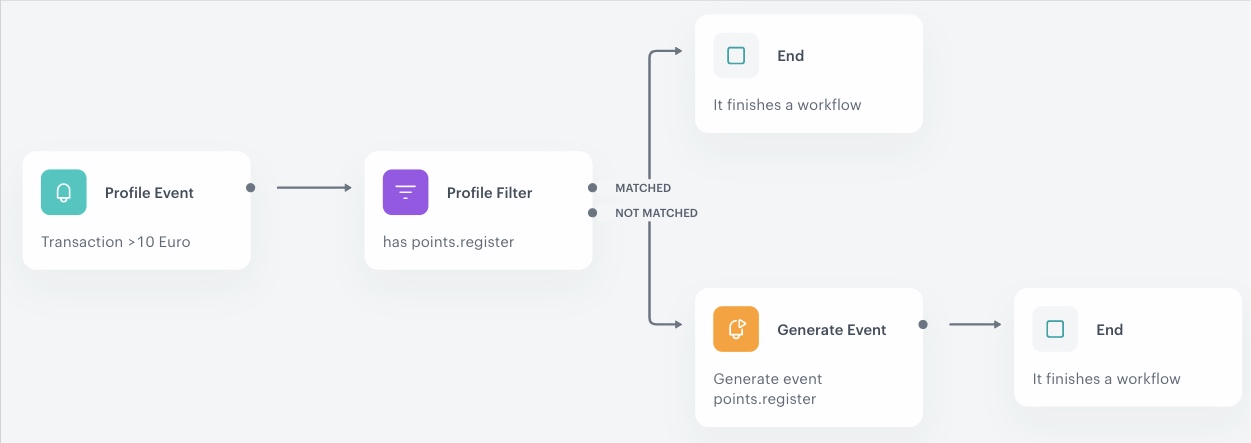
1. Add the **End** node to both paths.
2. Launch the workflow by clicking **Save&Run**.
Configuration of the workflow
## Check the use case set up on the Synerise Demo workspace
---
In Synerise Demo workspace, you can check the configuration of:
- [Segmentation](https://app.synerise.com/analytics-v2/segmentations/5b6f8c9a-5bef-4902-acd7-46bad11e976f)
- [Workflow](https://app.synerise.com/automations/automation-diagram/637d8052-4bff-4040-81db-afd3f1db59c7)
If you’re our partner or client, you already have automatic access to the **Synerise Demo workspace (1590)**, where you can explore all the configured elements of this use case and copy them to your workspace.
If you’re not a partner or client yet, we encourage you to fill out the contact [form](https://demo.synerise.com/request) to schedule a meeting with our representatives. They’ll be happy to show you how our demo works and discuss how you can apply this use case in your business.
## Read more
---
- [Automation Hub](/docs/automation)
- [Jinjava inserts](/developers/inserts)
- [Snippets](/docs/assets/snippets)
- [Segmentation](/docs/analytics/segmentations)