
In this use case, you can easily set up a list of available promotions inside your mobile app, shown to the user after selecting the My Promotions section. All you need is an in-app campaign targeted to all users, with the display of the promotions list triggered by tapping that section. 

You can adjust the copy and other elements directly in the template, since the entire setup is based on predefined in-app templates that are simple to adapt.

## Prerequisites 
---
- Create an [item catalog](/docs/assets/catalogs).
- Integrate Synerise [mobile SDK](/developers/mobile-sdk) in your mobile application. 
- Implement the [transaction events](/developers/web/transactions-sdk) using [SDK](/developers/web/transactions-sdk) or [API](https://developers.synerise.com/DataManagement/DataManagement.html#operation/CreateATransaction).
 - Implement [basic loyalty program with points](/use-cases/loyalty-programs-basics). 
 - [Integrate Synerise promotions](/docs/ai-hub/promotions/introduction-to-promotions).


## Implement a promotions catalog template
---
This template provides an in-app catalog of coupons that can be redeemed with points. You can:
- Display the list of coupons available
- Show possibility to copy the code

### Create an in-app message
---
In this part of the process, you create an in-app campaign triggered by your custom event.
The trigger should come from a dedicated event generated by your mobile application — for example, an action such as tapping the ‘My promotions’ button. This ensures that the in-app is displayed only when the user intentionally requests it.

1. Go to <img src="/api/docs/image/54176ad07f146575310749eba44b7c2f42c1b327/icons/experience-hub-icon.svg" alt="Experience Hub icon" class="icon" > **Experience Hub > In-app messages> Create in-app**.
2. Enter the name of the in-app.

### Define the audience
---
As the first step, define the target group of customers for the in-app message. 

1. In the **Audience** section, click **Define**.
4. Click **Everyone**.
8. To save the audience, click **Apply**.

### Define content
---
In this part of the process, you will create the content of the in-app message that will appear in the mobile application with the help of ready-made template.


<div class="admonition admonition-note"><div class="admonition-icon"><svg xmlns="http://www.w3.org/2000/svg" fill="none" viewBox="0 0 24 24" stroke="currentColor" stroke-width="2.5"><path stroke-linecap="round" stroke-linejoin="round" d="M13 16h-1v-4h-1m1-4h.01M21 12a9 9 0 11-18 0 9 9 0 0118 0z" /></svg></div><div class="admonition-body"><div class="admonition-content">

The template is designed so that the user can copy a specific coupon to the clipboard and paste it later in the checkout in the appropriate field.

</div></div></div>


1. In the **Content** section, click **Define**.
2. Click **Create message** and from the list of template folders, select **Predefined templates**.
3. Select the **Promotions catalog** template.

**Result:** You are redirected to the code editor.

<div class="admonition admonition-note"><div class="admonition-icon"><svg xmlns="http://www.w3.org/2000/svg" fill="none" viewBox="0 0 24 24" stroke="currentColor" stroke-width="2.5"><path stroke-linecap="round" stroke-linejoin="round" d="M13 16h-1v-4h-1m1-4h.01M21 12a9 9 0 11-18 0 9 9 0 0118 0z" /></svg></div><div class="admonition-body"><div class="admonition-content">

You can edit the template in two ways, by editing the code of the template ([add snippets](/docs/campaign/in-app-messages/creating-inapp-templates/creating-inapp-template#adding-a-snippet-to-the-template-code), [add variables](/docs/campaign/in-app-messages/creating-inapp-templates/creating-inapp-template#adding-a-variable) and/or by filling out the form in the Config tab. In this use case, we will use the capabilities of the predefined Config tab.

</div></div></div>


<figure>
<img src="/api/docs/image/54176ad07f146575310749eba44b7c2f42c1b327/use-cases/all-cases/_gfx/inapp-loyal2.png" alt="The view of in-app configuration"  class="large">
<figcaption>In-app configuration</figcaption>
</figure> 

#### Edit form in the Config tab 
---
The form in the **Config** tab is already filled in with default values. You can change them to fit your business needs.


<div class="admonition admonition-important"><div class="admonition-icon"><svg xmlns="http://www.w3.org/2000/svg" fill="none" viewBox="0 0 24 24" stroke="currentColor" stroke-width="2.5"><path stroke-linecap="round" stroke-linejoin="round" d="M12 8v4m0 4h.01M21 12a9 9 0 11-18 0 9 9 0 0118 0z" /></svg></div><div class="admonition-body"><div class="admonition-content">

This template automatically pulls all active promotions from your promotion list in which the customer fits the defined audience. To make sure the more important promotions appear first for the user, adjust their priority. Here’s how to do it:
<p> In the Type and limits section of specific promotion - in the Priority field, enter a number that defines the promotion’s priority.
<p> 
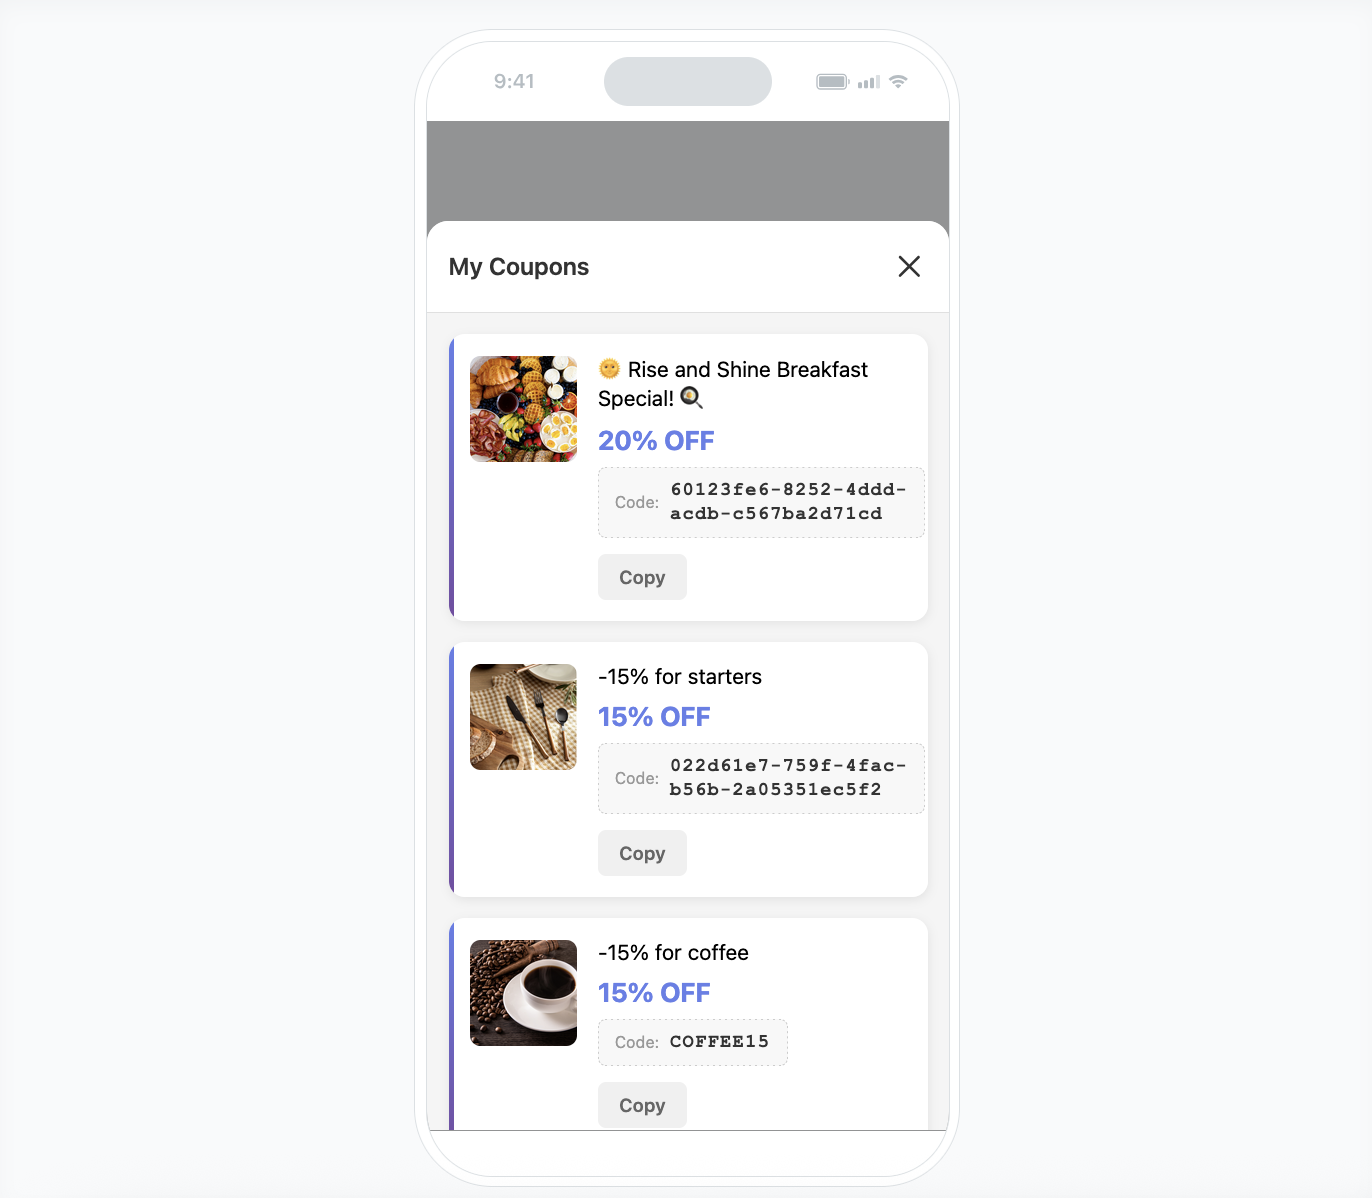
Priority controls the display order in the customer’s view. 1 is the highest. If multiple applicable promotions share the same priority, the one created earlier will be shown first.

</div></div></div>


2. Edit the copy using Title, and all the fileds connected with the Headers of the loyalty card.
9. Define the colors and style for the following fields: Borders, Backgrounds,and Text colors.
10. Set up the maximum number of promotion displayed for the user.
10. After you make changes to the template, you can check the preview.
    1. Click the **Preview** button on the upper left side.
    2. Enter the ID of a customer.
    3. Click **Apply**.
  
    <div class="admonition admonition-important"><div class="admonition-icon"><svg xmlns="http://www.w3.org/2000/svg" fill="none" viewBox="0 0 24 24" stroke="currentColor" stroke-width="2.5"><path stroke-linecap="round" stroke-linejoin="round" d="M12 8v4m0 4h.01M21 12a9 9 0 11-18 0 9 9 0 0118 0z" /></svg></div><div class="admonition-body"><div class="admonition-content">

    Considering that the in-app is very interactive, the preview in the platform may not be enough to test the in-app performance. That’s why we suggest checking the preview directly in the mobile app.

    </div></div></div>


    <figure></figure>
11. If the template is ready, in the upper right corner click **Save this template > Save as**.
12. On the pop-up:
    1. In the **Template name field**, enter the name of the template.
    2. From the **Template folder** dropdown list, select the folder where the template will be saved.
    3. Confirm by clicking **Apply**.
13. To continue the process of configuring the in-app campaign, click **Next**.
14. To save your content changes, click **Apply**.


### Select events that trigger the in-app message display
---
In this part of the process, you will define the custom event triggering the display of the in-app message. 

1. In the **Trigger events** section, click **Define**.
2. Select **Add event** and from the dropdown list, choose your custom event.
4. As the logical operator, select **Exists**.
5. Click **Apply**.

### Schedule the message and configure display settings
---
As the final part of the process, you will set the display settings of the in-app message such as schedule, capping, priority of the message among other in-app messages.

1. In the **Schedule** section, click **Define** and set the time when the message will be active. 
2. In the **Display Settings** section, click **Change**.
3. Define the **Delay display**, **Priority index** and enable the **Frequency limit** toggle to manage the frequency of in-app message display in the application.  

    
   <div class="admonition admonition-note"><div class="admonition-icon"><svg xmlns="http://www.w3.org/2000/svg" fill="none" viewBox="0 0 24 24" stroke="currentColor" stroke-width="2.5"><path stroke-linecap="round" stroke-linejoin="round" d="M13 16h-1v-4h-1m1-4h.01M21 12a9 9 0 11-18 0 9 9 0 0118 0z" /></svg></div><div class="admonition-body"><div class="admonition-content">

   You can additionally enable the **Capping limit** toggle to limit the amount of time the in-app message can be displayed to a user in general.

   </div></div></div>
  

16. Click **Apply**. 

17. Optionally, you can define the UTM parameters and additional parameters for your in-app campaign.
18. Click **Activate**.


## Check the use case set up on the Synerise Demo workspace
---
You can check the configuration of [promotion catalog in-app campaign](https://app.synerise.com/communications/in-app/a12e8289-4b81-4b10-a631-4c100a597858) in Synerise Demo workspace.

If you’re our partner or client, you already have automatic access to the **Synerise Demo workspace (1590)**, where you can explore all the configured elements of this use case and copy them to your workspace.  

If you’re not a partner or client yet, we encourage you to fill out the contact [form](https://demo.synerise.com/request) to schedule a meeting with our representatives. They’ll be happy to show you how our demo works and discuss how you can apply this use case in your business. 

## Read more
---

- [In-app messages](/docs/campaign/in-app-messages)
- [Using in-app template builder](/docs/campaign/in-app-messages/creating-inapp-templates/creating-inapp-template)
- [Promotions](/docs/ai-hub/promotions)