In this use case, mobile push campaign in the application is sent to customers located in a specific city (in our case Warsaw) to inform them about the opening of a new offline store. The message includes details about an exclusive, limited-time promotion: an extra 20% off for the first 50 customers who visit the store. This targeted approach not only builds excitement around the new location but also encourages immediate foot traffic by rewarding early visitors with a special discount.
## Prerequisites
---
- [Implement Synerise SDK in your mobile application](/developers/mobile-sdk).
- Implement mobile push notifications in your mobile application:
- [iOS](/developers/mobile-sdk/configuring-push-notifications/ios),
- [Android](/developers/mobile-sdk/configuring-push-notifications/android).
- [Create a mobile push template](/docs/campaign/Mobile/simple_push).
## Process
---
1. [Create geoanalysis](/use-cases/mobile-push-offline-store#create-geoanalysis) that groups customers based on the specific location (in our case - Warsaw).
2. [Create a mobile push campaign](/use-cases/mobile-push-offline-store#create-a-mobile-push-campaign).
## Create geoanalysis
---
As the first part of the process, create a geoanalysis that returns a list of customers who generated a [`session.start` event](/docs/assets/events/event-reference/web-and-app#sessionstart) (opened a mobile application) in a specific location (Warsaw).
1. Go to **Decision Hub > Geoanalytics**.
2. In the upper right corner of the map, click the **Add selection** button.
**Result**: A box appears on the map.
3. To select the location for analysis, drag the box to a place on the map.
4. Adjust the size of the selected area by clicking, holding, and moving the borders of the selection.
4. To proceed to the settings, click **Go to analytics**.
4. To proceed to the settings, click **Go to analytics**.
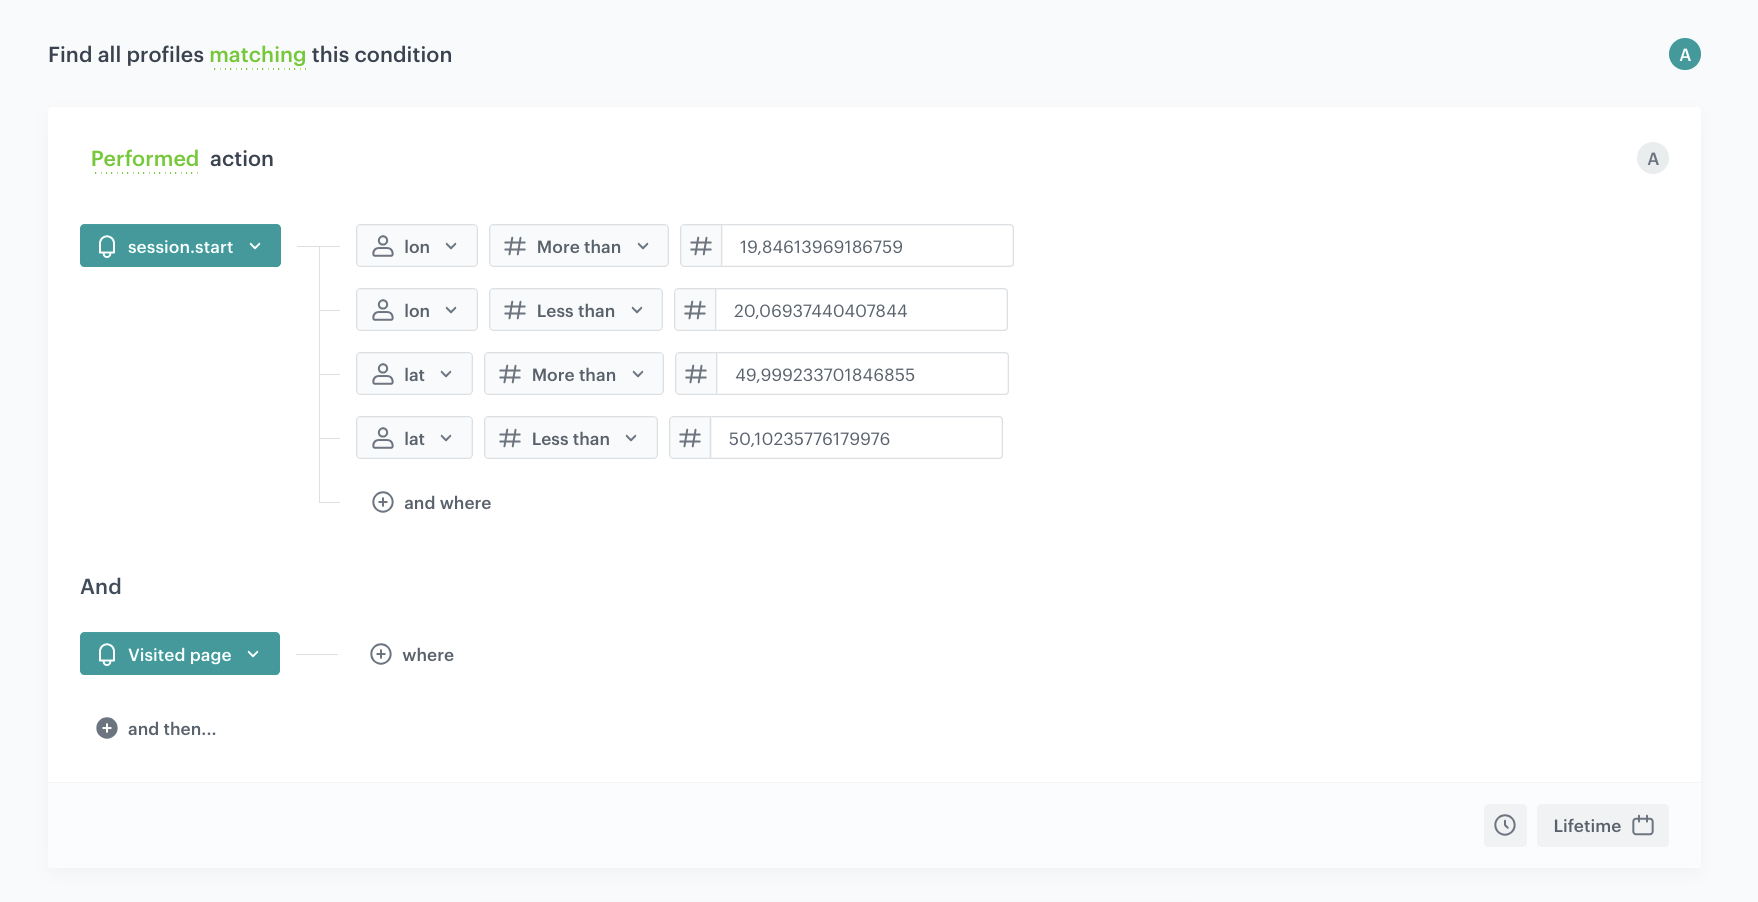
**Result**: You are redirected to the segmentation configuration form. The first step is already done for you - a `session.start` event with the geographical coordinates are already selected. The system selects the group of customers which performed this event in the location you selected. Out of the group selected this way, you can select customers who meet your conditions specified in the further steps.
5. Enter the name of the segmentation.
8. To create the next step in the segmentation, click the **and then...** button.
9. From the dropdown list, choose `page.visit`.
6. To determine the time range from which the data will be analyzed, click the [calendar](/docs/analytics/i_date-filters) icon, and choose **Lifetime**.
7. To complete the process, click the **Save** button.
**Result**: When you save the segmentation based on geoanalytics, you can find it on the list of segmentations under the given name.
Example of geoanalytics
## Create a mobile push campaign
---
Prepare a mobile push with information about the promotion.
1. Go to **Experience Hub > Mobile > Create new**.
2. Add a name and optionally the description for your campaign.
2. Choose **Simple Push**.
3. In **Device type**, choose **All**.
4. In **Audience** section, click the **Segments** and choose the segmentation created in the [previous step](#create-geoanalysis) based on the geoanalysis.
5. Click **Apply**.
6. In the **Content** section, click **Create message**. From the list of templates, select the one you prepared as a part of prerequisites. If you haven't done that, you can use the a predefined template from the folder or create your own one using the mobile push code editor, in such case, click **New template**.
For more information on creating a mobile push templates, read [Creating mobile push templates](/docs/campaign/Mobile/creating-mobile-push-templates).
8. To use the template in the campaign, click **Use in communication**.
9. Set up your schedule in **Schedule** section.
10. Optionally send a test mobile push and add [additional parameters](/docs/campaign/Mobile/creating-mobile-push#define-additional-parameters) to the events generated by this mobile campaign.
11. To send your campaign, click **Send** .
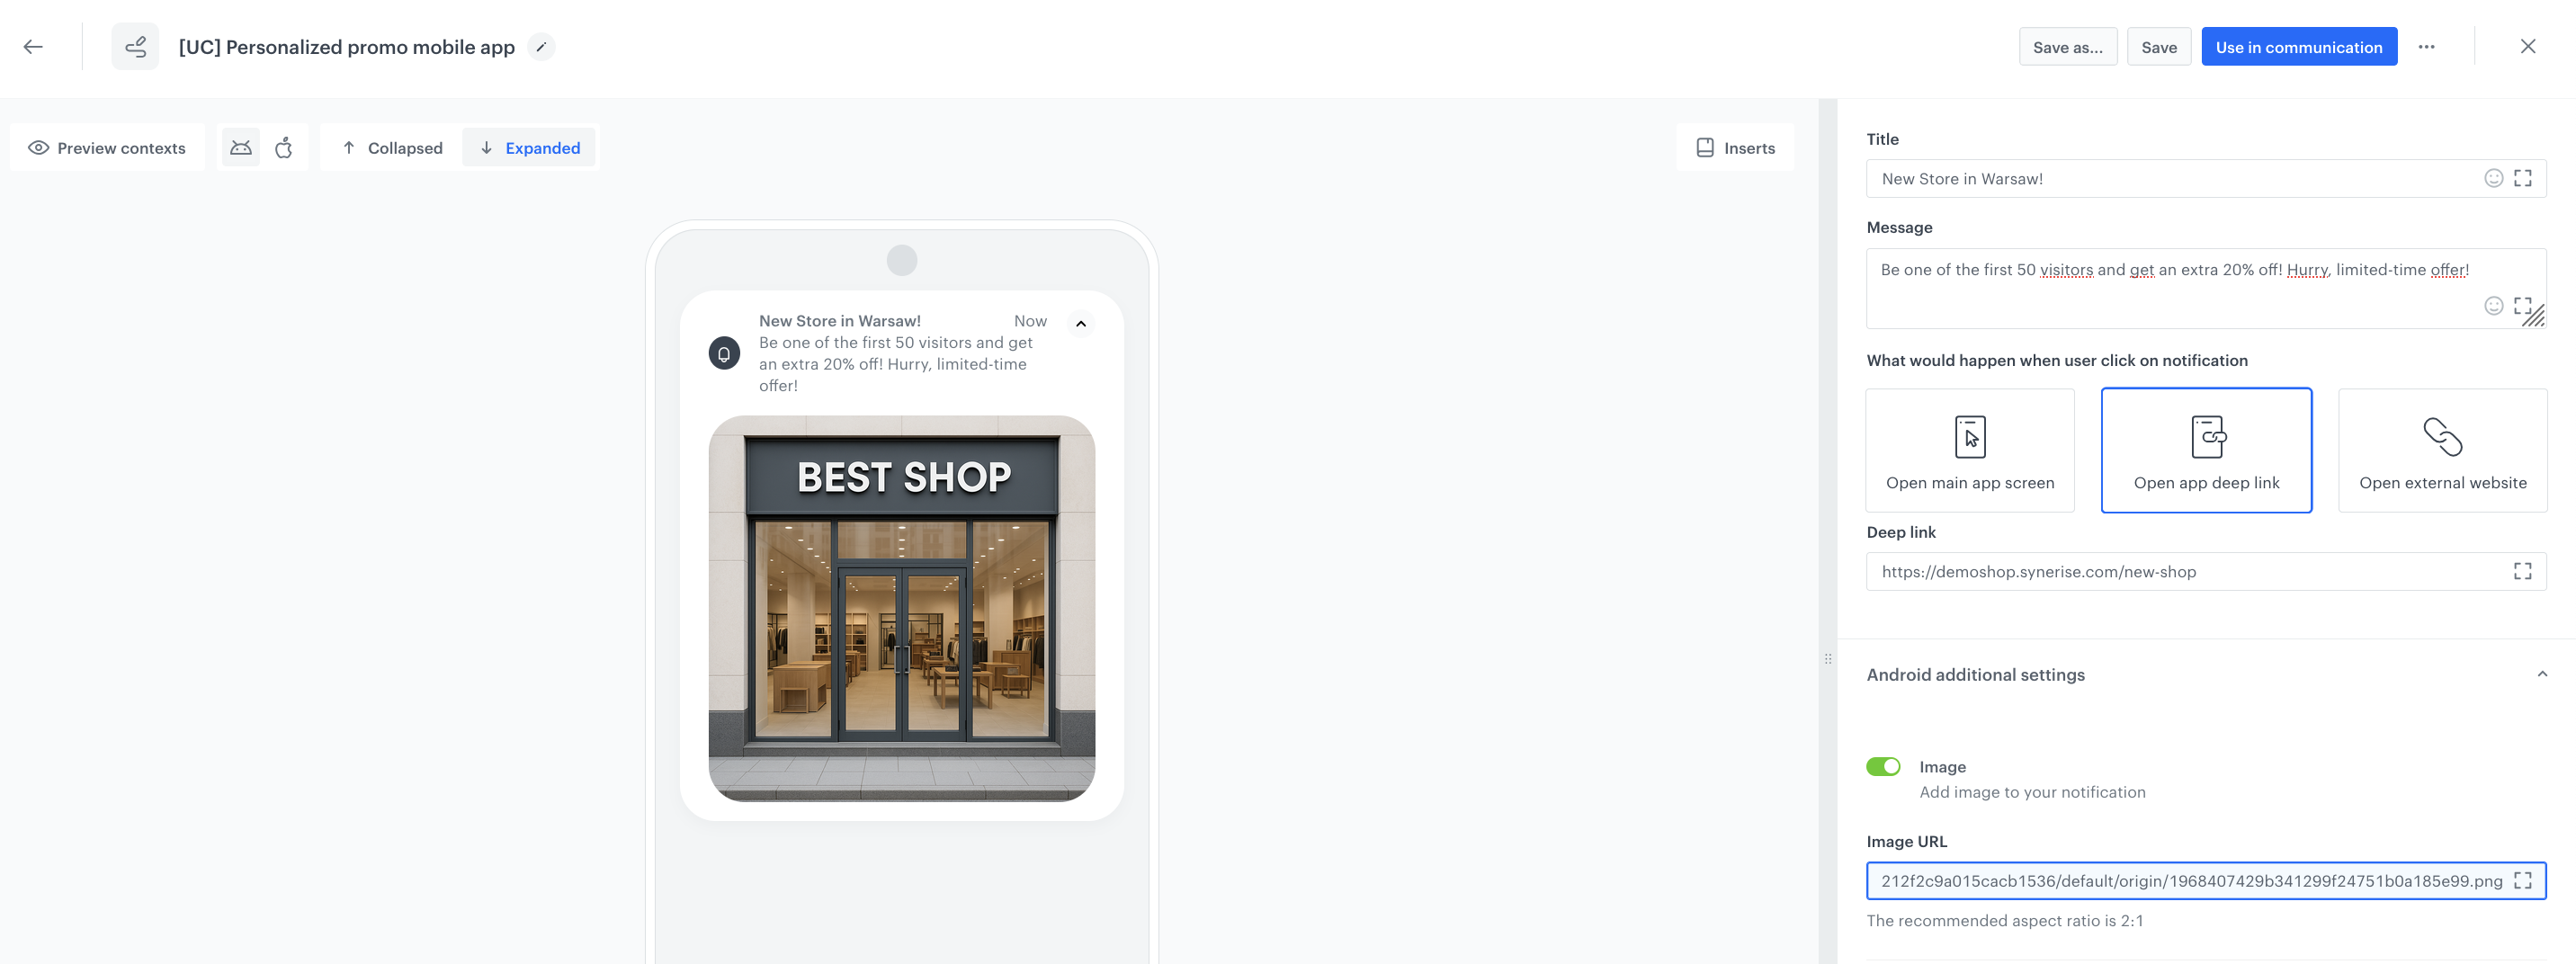
Example of mobile push
## Check the use case set up on the Synerise Demo workspace
---
You can check the [segmentation configuration](https://app.synerise.com/analytics-v2/segmentations/d3e88fb4-2cb0-48b4-a489-abb7d0b3efdc) and [mobile push campaign](https://app.synerise.com/campaigns/mobile-push/create/26129088-3b81-4f04-a15b-3499f3a4fcac) directly in Synerise Demo workspace.
If you’re our partner or client, you already have automatic access to the **Synerise Demo workspace (1590)**, where you can explore all the configured elements of this use case and copy them to your workspace.
If you’re not a partner or client yet, we encourage you to fill out the contact [form](https://demo.synerise.com/request) to schedule a meeting with our representatives. They’ll be happy to show you how our demo works and discuss how you can apply this use case in your business.
## Read more
---
- [Configuring mobile notifications](/docs/campaign/Mobile/mobile_campaign)
- [Creating geoanalytics](/docs/analytics/geoanalytics/creating-geoanalytics)