In this use case, you will learn how to create a segmentation that allows you to divide your customers into segments based on the time of week on which they bought a product. You may use that information further for targeted communication.
## Prerequisites
---
- Implement transaction events using [SDK](/developers/web/transactions-sdk) or [API](https://developers.synerise.com/DataManagement/DataManagement.html#operation/CreateATransaction).
## Create a segmentation
---
Create a segmentation that organizes customers into two groups:
- Weekend - It gathers the customers who bought products on weekends,
- Week days - It gathers the customers who bought products on week days.
1. Go to **Decision Hub > Segmentations > New Segmentation**.
2. Enter the name of the segmentation.
3. Name the first segment, in our case `Weekend`
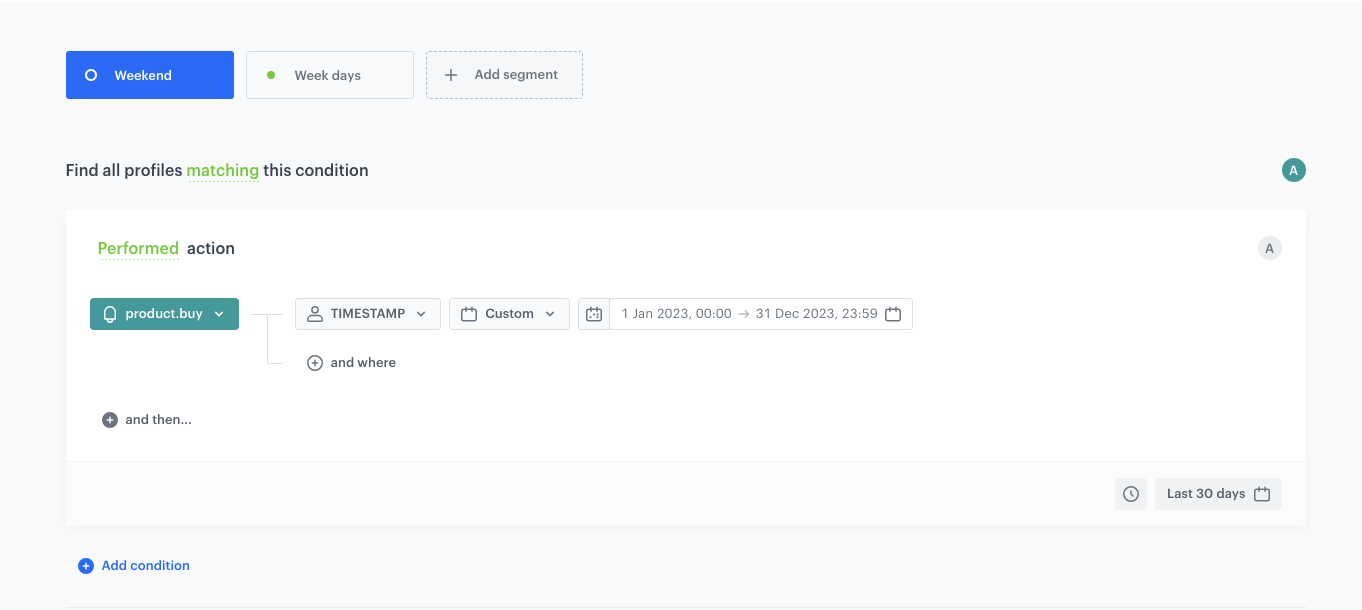
4. To add the first step to the segment, click the **Performed event...** button.
5. From the dropdown list, select the `product.buy` event.
6. For the event parameter, click the **+ where** button and select `TIMESTAMP`.
7. As the logical operator, select **Custom** date.
8. Click **Start date -> End date**:
1. In the **Relative date range** section, click **Custom**, type 365 and from the the dropdown list, select **Days**.
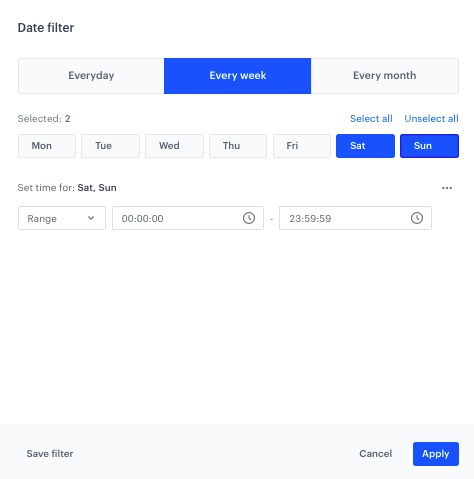
2. In the **Filter** section, click **Add filter** and then **Every week**.
3. Select **Sat** and **Sun**.
4. Click **Add time**.
4. Click **Apply**.
Conditions of the date range
9. Click **Apply**.
10. In the calendar in the right bottom of the page:
1. In the **Relative date range** section, click **Custom**, type 365 and from the the dropdown list, select **Days**.
2. Click **Apply**.
Conditions of the segment
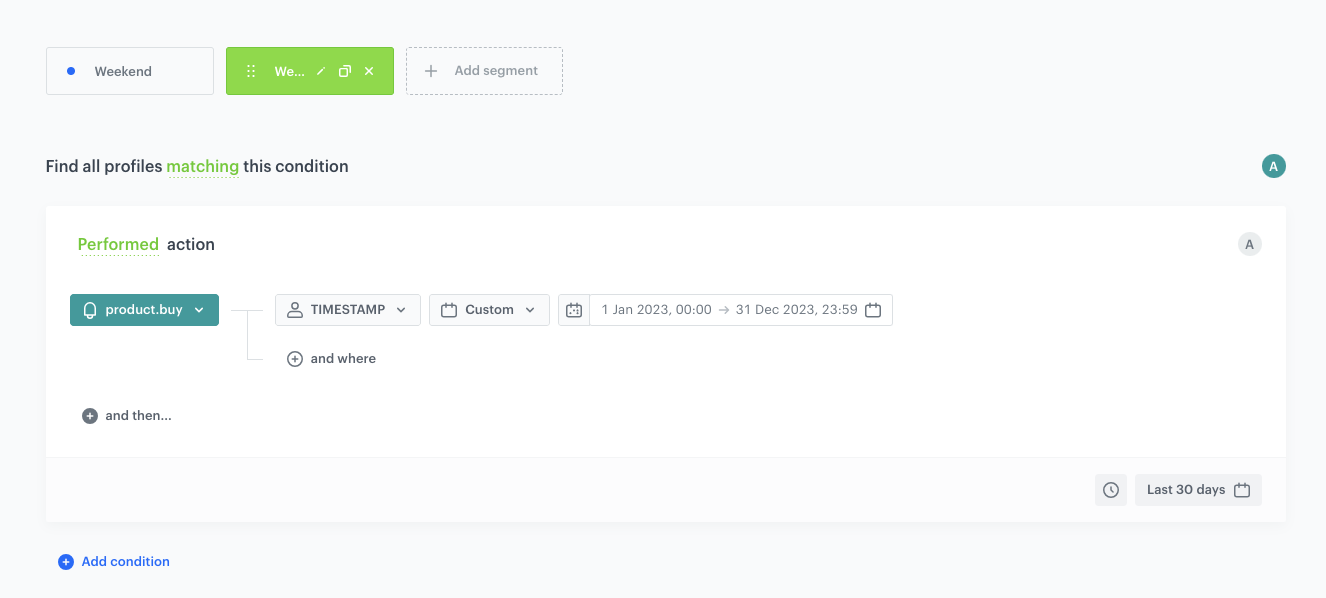
11. Create the second segment by duplicating the one you have just created.
12. Name this segment `Week days`.
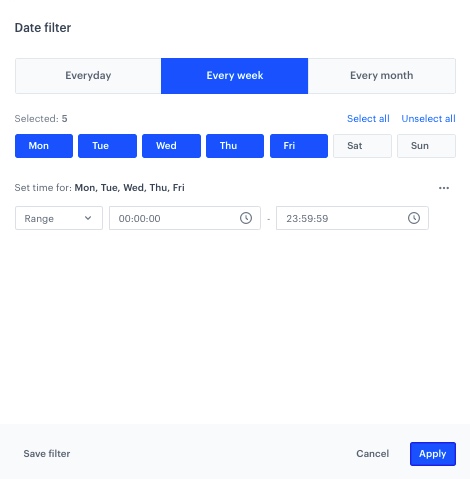
13. Change the date range:
1. In the **Filter** section, click **Change** .
2. Click on **Select all** and clear selection of **Sat** and **Sun**.
4. Click **Add time**.
3. Click **Apply**.
Conditions of the date range
14. Click **Apply**.
Conditions of the segment
15. In the calendar in the right bottom of the page:
1. In the **Relative date range** section, click **Custom**, type 365 and from the the dropdown list, select **Days**.
2. Click **Apply**.
16. Click **Save**. The segments are saved and can be viewed in **Preview** where you can preview how your customer base splits according to the defined conditions.
## What's next
---
To use this segments in **Experience Hub**:
1. Click **Define** in the **Audience** section.
2. Click **New Audience**.
3. Click **Define conditions**.
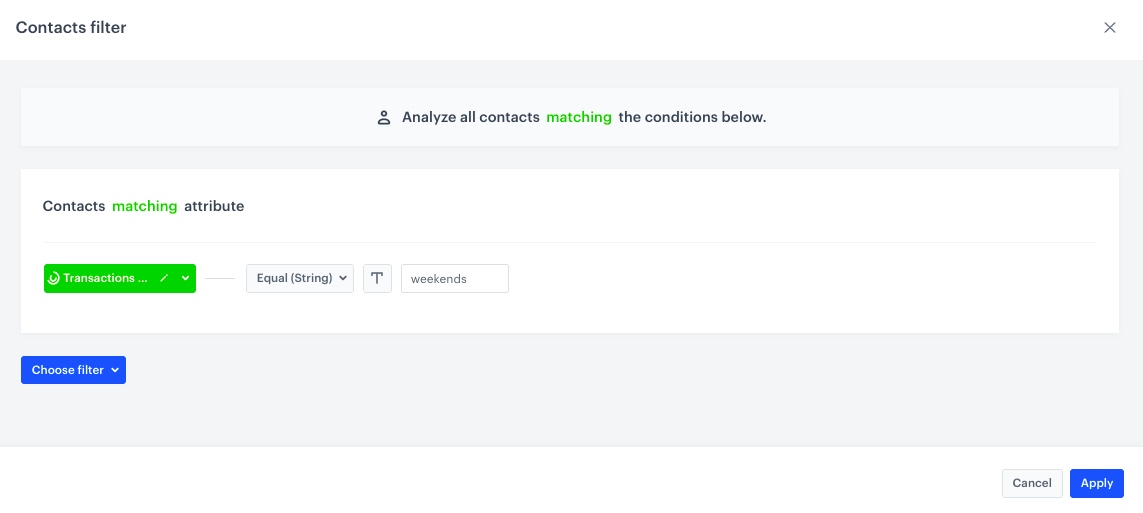
1. Click **Choose filter** and from the dropdown list choose the segmentation you have created in [this step](/use-cases/number-of-transactions-weekend-vs-workdays#create-a-segmentation).
2. Choose operator **Equal**.
3. Type the name of the segment.
Depending on whether you want to send the communication to customers who buy on the weekend, enter the name of the segment `Weekend`, and if to those who buy during week days - `Week days`.
4. Click **Apply**.
4. Click **Apply**.
Example of audience
## Check the use case set up on the Synerise Demo workspace
---
You can also check the [segmentation configuration](https://app.synerise.com/analytics-v2/segmentations/0d06b767-6168-4e8f-8c08-9bfb2ad6544c) directly in Synerise Demo workspace.
If you’re our partner or client, you already have automatic access to the **Synerise Demo workspace (1590)**, where you can explore all the configured elements of this use case and copy them to your workspace.
If you’re not a partner or client yet, we encourage you to fill out the contact [form](https://demo.synerise.com/request) to schedule a meeting with our representatives. They’ll be happy to show you how our demo works and discuss how you can apply this use case in your business.
## Read more
---
- [Segmentations](/docs/analytics/segmentations)