The ability to take a flexible approach to loyalty program management is undoubtedly an advantage, which allows you to both better meet the needs of your customers and execute a range of customized campaigns that enable the execution of individual business scenarios. Synerise offers a number of features to help you achieve your specific goals.
Based on the basic loyalty program settings described in detail in this [use case](/use-cases/loyalty-programs-basics), a number of additional scenarios can be created to meet your current business needs. An example of such a scenario might be the need to exclude certain product categories from loyalty point accrual for a particular campaign.
This use case describes the process of creating a workflow that helps exclude certain product categories from loyalty point accrual. This workflow describes a scenario in which we will give loyalty points for every category except Beverages and cancelled products. Such a workflow can be created for a specific campaign that takes place within a certain timeframe.
This use case presents one of the ways to exclude product categories from accruing loyalty points. You can find an alternative solution in [this use case](/use-cases/product-category-exclusion-in-points-scheme). Your choice of one of the scenarios will depend on the implementation of your loyalty program. You can always customize any solution to meet your specific business needs.
## Prerequisites
---
Implement transaction events using [SDK](/developers/web/transactions-sdk) or [API](https://developers.synerise.com/DataManagement/DataManagement.html#operation/CreateATransaction).
## Security configuration
---
Before you start working with this hub, if you are a Synerise customer or partner, consider reading [the section about denylisting events](/docs/settings/tool/api#denylist). This natively accessible configuration will allow you to manage the restrictions in points management that may help you prevent fraud.
## Create a workflow that excludes specific product categories from rewarding loyalty points
---
Create a workflow that excludes certain product categories from accruing loyalty points during the customer purchase process.
1. Go to **Automation Hub > Workflows > New workflow**.
2. Enter the name of the workflow.
### Define the Profile Event trigger node
---
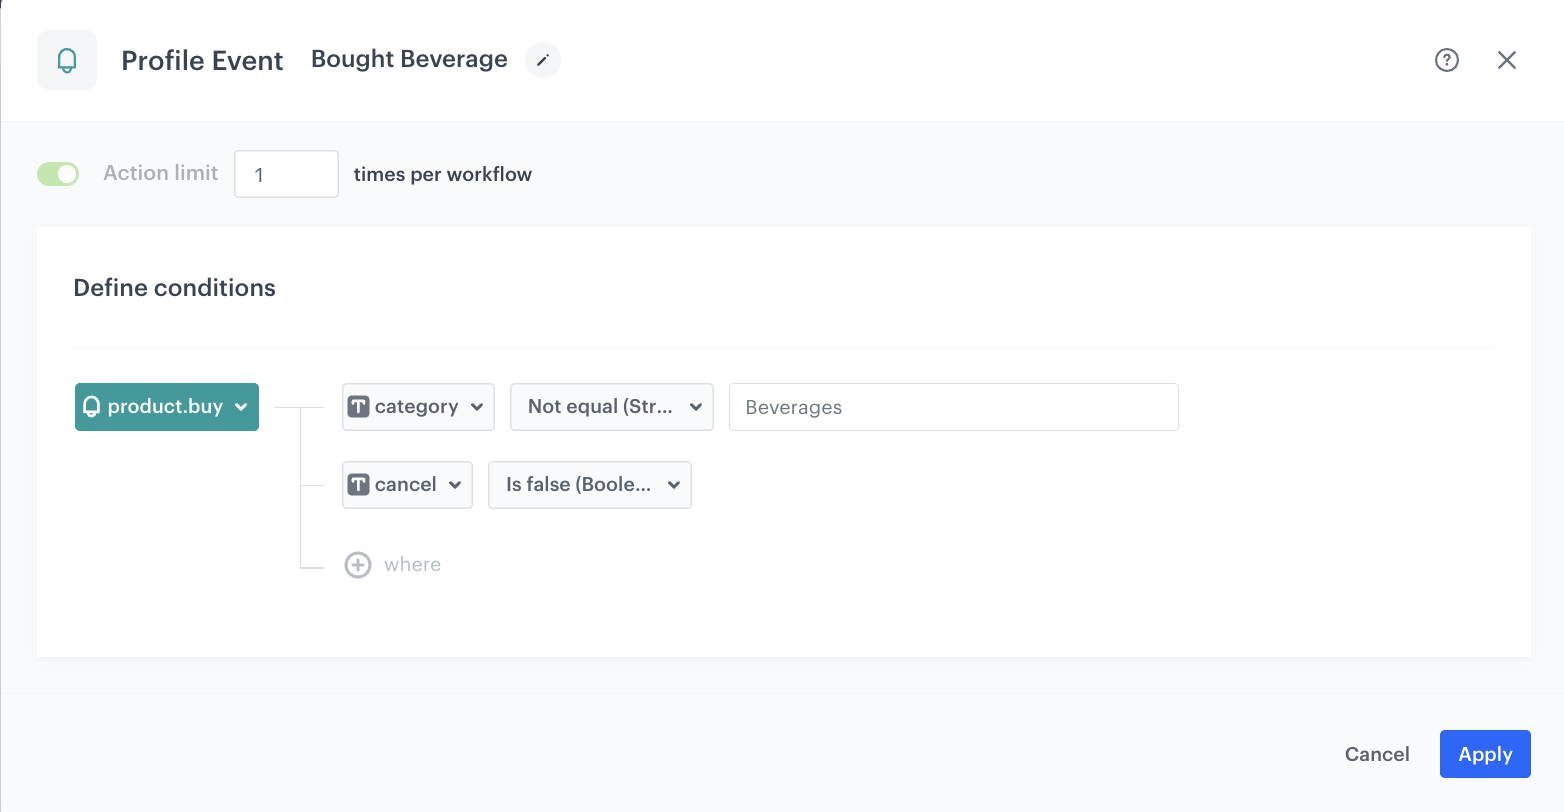
The workflow will be triggered by a purchase. In the settings of the trigger, define the product categories that you want to exclude from rewarding loyalty points.
1. As a trigger, choose **Profile Event**.
2. Choose the `product.buy` event.
3. Click **+ where** and as the parameter, select `category`.
4. From the **Choose operator** dropdown list, select **Not equal (String)**.
5. Enter the names of the categories you want to exclude from loyalty point accrual.
6. Click **+ where** and as the parameter, select `cancel`.
7. From the **Choose operator** dropdown list, select **Is false (Boolean)**.
The `cancel` parameter used in this use case refers to products that were previously selected by the customer, but were canceled for some reason during the purchase process. You can use any other nomenclature for this type of action while implementing transaction events.
8. Click **Apply**.
Configuration of the Profile Event node
### Define the Generate Event node
---
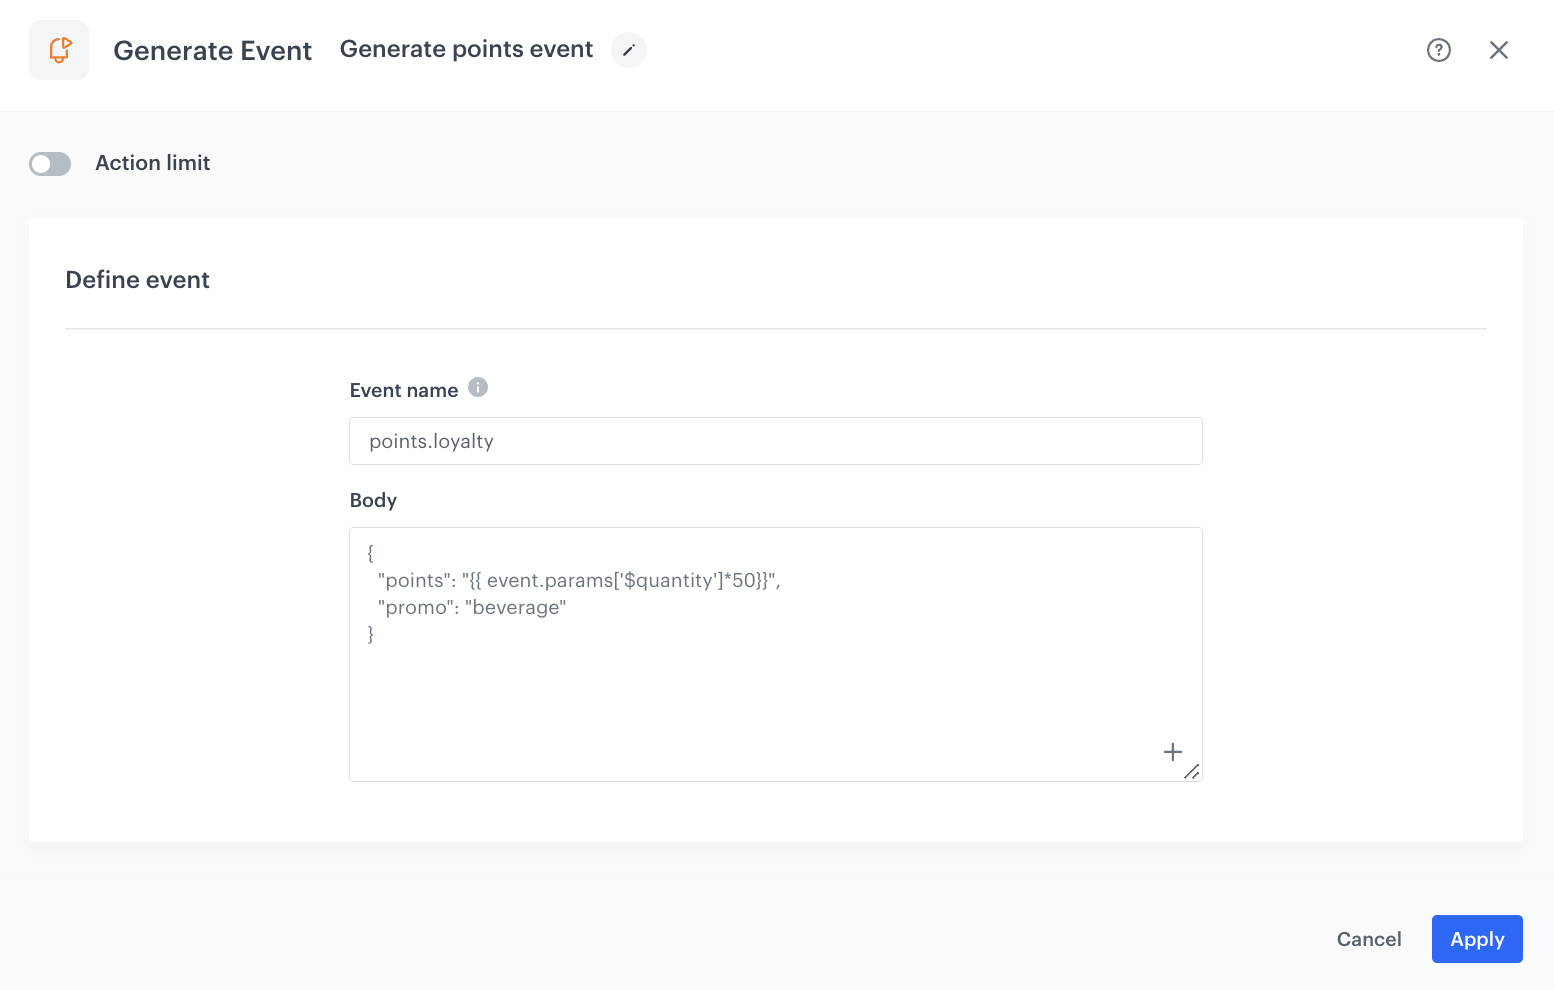
At this stage, an event will be generated with information about the number of points accrued.
1. As the second node of the workflow, add **Generate Event**.
2. In the **Event name** field, enter the name of the event that will be generated on the customer's profile. In this case, it is `points.loyalty`. This event cause counting the points for customers.
4. In the **Body** section, define the parameters of this event, and click **Apply**.
**Example content of **Body** section:**
In the Jinjava code presented above, we multiply the quantity (`$quantity`) of bought products by 50.
The event body is an example. You can add more parameters or change the point calculation formula according to your business needs.
Configuration of the Generate Event node
### Prepare the final settings
---
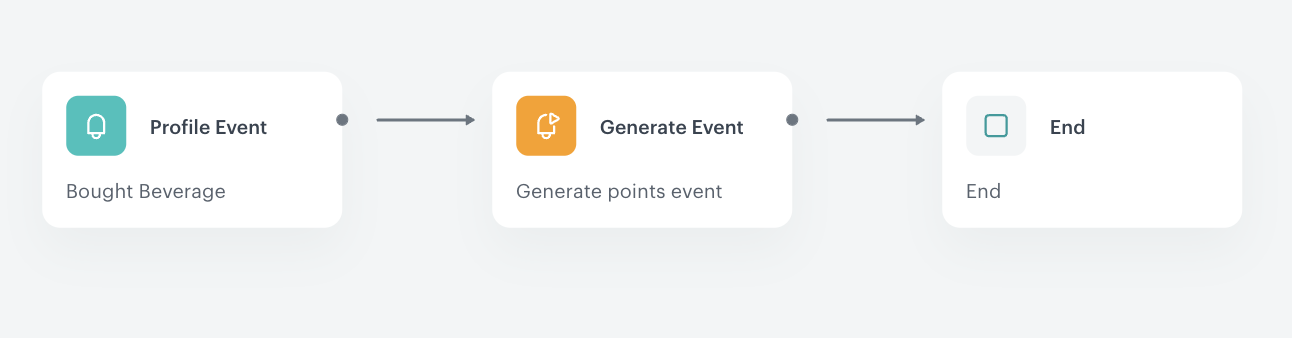
1. Add the **End** node.
2. Launch the workflow by clicking **Save&Run**.
Final configuration of the workflow
## Check the use case set up on the Synerise Demo workspace
---
You can check the configuration of the [workflow in the Synerise Demo workspace](https://app.synerise.com/automations/automation-diagram/b2dc5475-ba2c-4fae-b525-7f5a321db91f).
If you’re our partner or client, you already have automatic access to the **Synerise Demo workspace (1590)**, where you can explore all the configured elements of this use case and copy them to your workspace.
If you’re not a partner or client yet, we encourage you to fill out the contact [form](https://demo.synerise.com/request) to schedule a meeting with our representatives. They’ll be happy to show you how our demo works and discuss how you can apply this use case in your business.
## Read more
---
- [Automation Hub](/docs/automation)
Check our loyalty use cases [here](/use-cases/?ordering=DESC&sortBy=publishDate&filters=tags%3D%3D%22loyalty%22)