This use case describes the process of sending promotions through the email channel. The email template contains a predefined HTML block with promotions which retrieves a Synerise promotion you indicate in the configuration of this block.
The promotions can be easily adapted for different communication channels, but in this scenario, we will focus on email campaigns. Our target audience consists of active users who have made at least one purchase in the past year. The campaign will dynamically deliver the list of active promotions available for a specific user, presenting only offers with a specific tag. This approach is especially important when managing multiple active promotions from different areas but intending to send only those that are tagged with the `home` label within your campaign.
With the power of dynamic HTML blocks, we can seamlessly integrate these promotions into the email templates, ensuring that each recipient receives relevant offers.
## Prerequisites
---
- [Create an email account](/docs/campaign/e-mail/configuring-email-account).
- [Import your product feed to catalog](/use-cases/import-product-feed-to-catalog).
- Implement mobile pushes in your mobile application: [iOS](/developers/mobile-sdk/configuring-push-notifications/ios), [Android](/developers/mobile-sdk/configuring-push-notifications/android).
- [Implement a tracking code](/docs/settings/tool/tracking_codes).
- Implement the [transaction events](/developers/web/transactions-sdk) using [SDK](/developers/web/transactions-sdk) or [API](https://developers.synerise.com/DataManagement/DataManagement.html#operation/CreateATransaction).
## Process
---
In this use case, you will go through the following steps:
1. [Create promotions](/use-cases/promotions-in-email#create-promotions) with specific tag.
3. [Create a segmentation](/use-cases/promotions-in-email#create-a-segmentation) of customers who have made a transaction last year, this group will be the recipients of the email campaign.
4. [Create an email template](/use-cases/promotions-in-email#create-an-email-template).
5. [Create an email campaign](/use-cases/promotions-in-email#create-an-email-campaign).
## Create promotions
---
In this part of the process, create a promotion (or more) which you will insert in the email template. You can create a promotion with the following scopes:
- [For selected items](/docs/ai-hub/promotions/creating-promotions) - you can select items to which you want to apply a discount
- [For entire basket](/docs/ai-hub/promotions/creating-promotions-for-entire-basket) - you can reduce the value of the whole shopping cart if its value matches the fixed price limit,
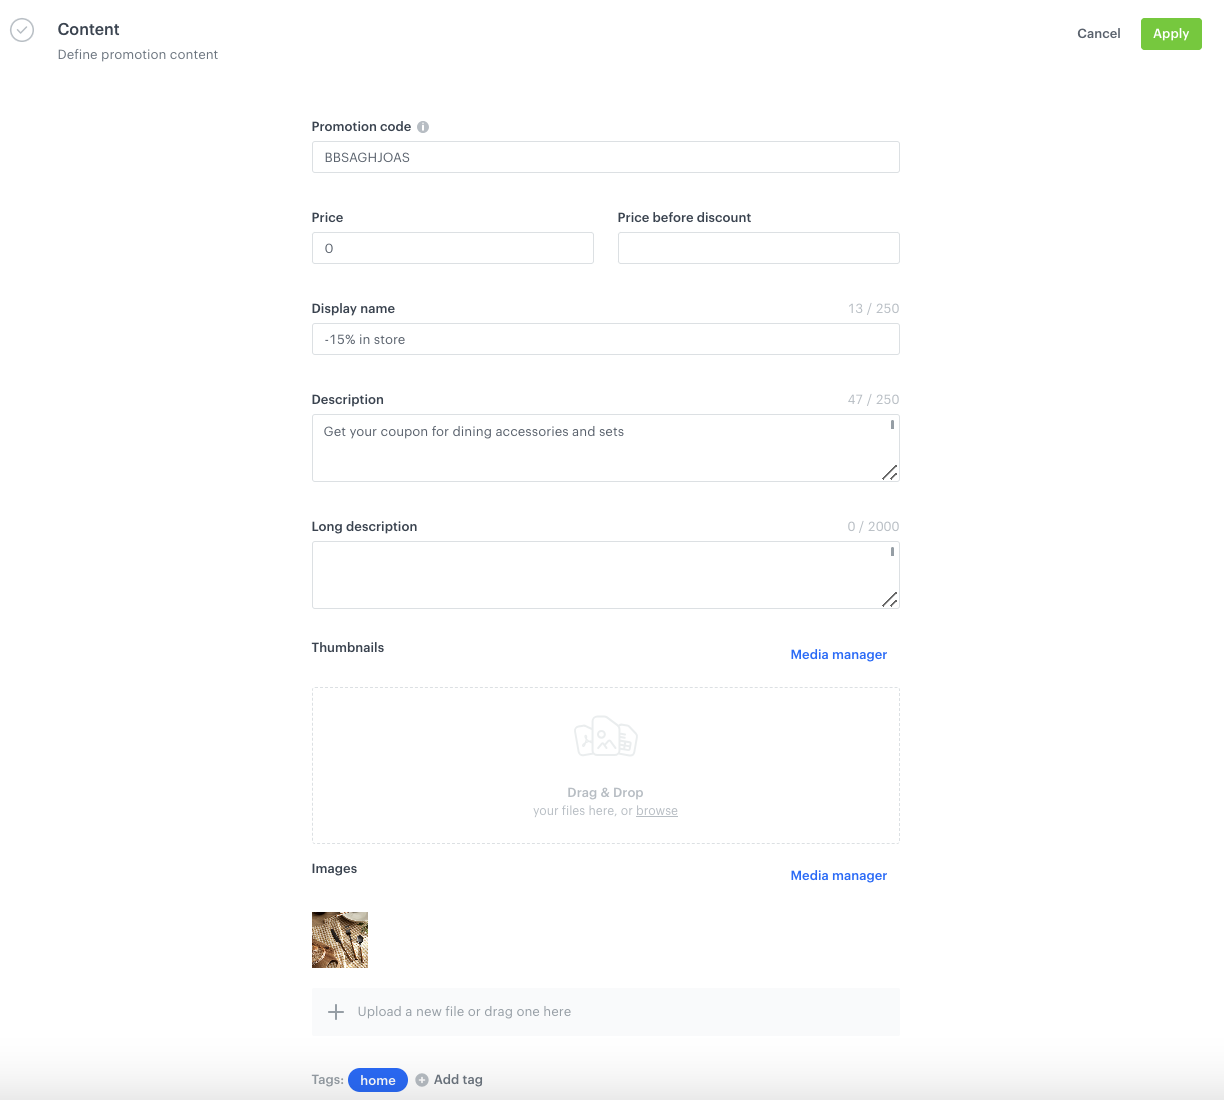
Regardless of the selected promotion scope, in the configuration of the promotion, in the **Content** section, find the **Add tag** field and add a `home` tag.
Example of tag
## Create a segmentation
---
In this part of the process, we will create a group of customers who have made a transaction during the last year. This group will serve as the recipients of an email campaign. It’s important to clarify that these customers will receive the email, rather than being the target audience for a promotion. Additionally, ensure that the conditions set for the Audience in the promotion do not conflict with those of the Audience for the email recipients, to avoid any discrepancies between the two groups.
1. Go to **Decision Hub > Segmentations > New segmentation**.
3. Enter the name of the segmentation.
4. Click **Add condition**.
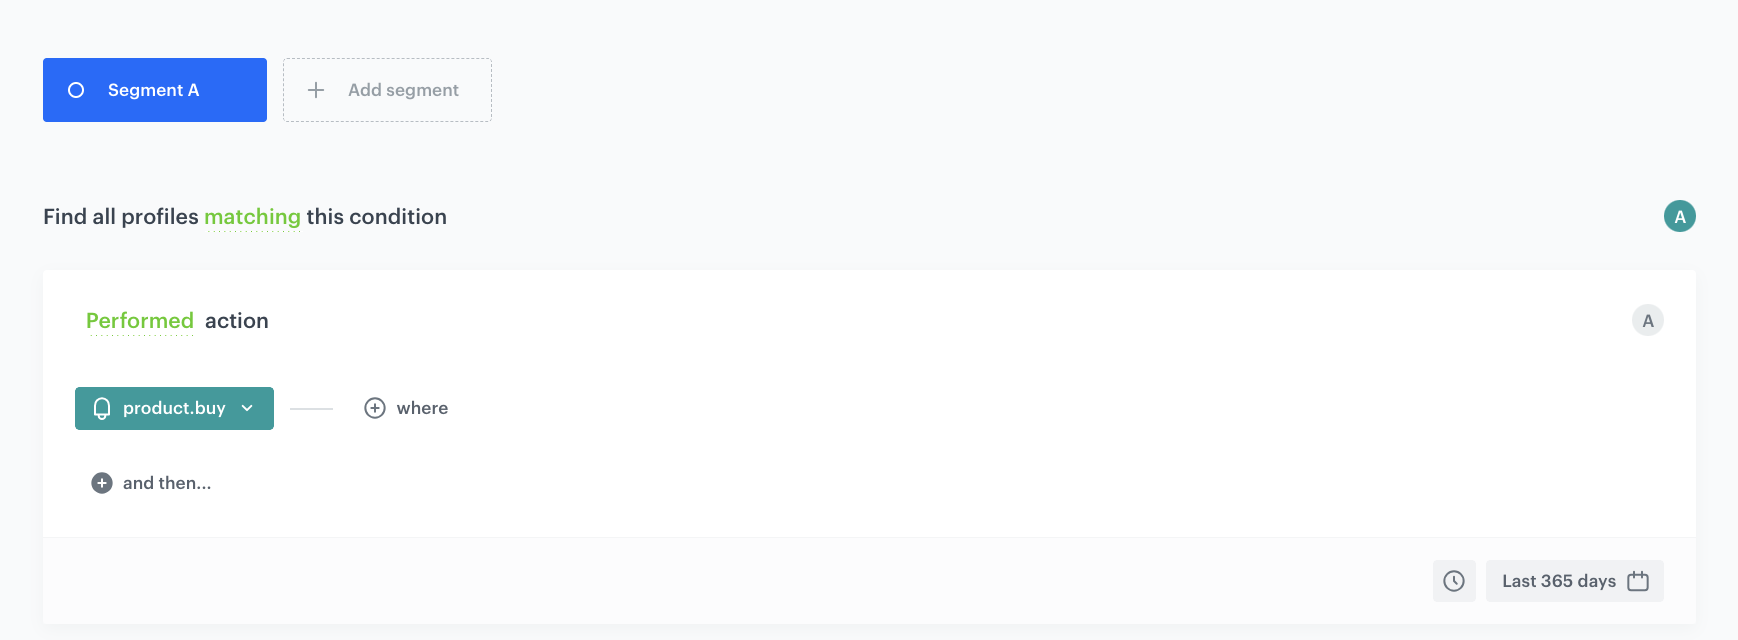
4. From the dropdown list, select the `product.buy` event.
6. From the **Choose operator** dropdown, choose **Boolean**, and then select **Is true**.
7. Using the date picker in the lower-right corner, set the time range to **Relative time range > Last 365 days**. Confirm by clicking **Apply**.
6. Save the segmentation.
Segmentation configuration
## Create an email template
---
To distribute the promotions, you need to prepare an email template that includes the promotion created in the previous step of the process. This step involves incorporating Jinjava code into the email template to fetch the details of the promotion labeled with the `home` tag for which an email recipient is eligible. The instructions for this step include the necessary code.
1. Go to **Experience Hub > Emails > Templates > Drag&drop builder**.
2. From the **Content** section, click **HTML BLOCKS** and add pull it to the chosen place in your template.
2. Click the **Configure** button.
3. Choose the **Predefined blocks** folder where you will find the **Promotions** block.
4. You must edit the template of the predefined block. It already contains a universal reference to a promotion, but we need to narrow down the promotion scope to those which are labeled with the **home** tag. The following changes must be added to the code of the block in the **HTML** section:
- to `{% set fieldsVar = ["code", "params", "name", "status", "images", "params", "description", "headline"] %}`, add `, "tags"`
- replace `{%- if count < noOfItems -%}` with `{%- if count < noOfItems && i.tags|selectattr("name", "equalto", "home")|length > 0 -%}` and if you're using other tag than home, replace `"home"` with the name of your tag
**Below, you can compare the code before and after changes:**
{% set fieldsVar = ["code", "params", "name", "status", "images", "params", "description", "headline", "tags"] %}
   {% promotions fields=fieldsVar %}
   {% set count = 0 %} {%- for i in promotions_result -%}
   {%- if count < noOfItems && i.tags|selectattr("name", "equalto", "home")|length > 0 -%}
{% set fieldsVar = ["code", "params", "name", "status", "images", "params", "description", "headline"] %}
   {% promotions fields=fieldsVar %}
   {% set count = 0 %} {%- for i in promotions_result -%} {%- if count < noOfItems -%}
4. When you finish customizing the block, to use proceed to saving changes in templates, click **Next**.
If you want to save the block for future use, click **Save as**, in **Block name**, enter the name of the block and in **Block folder**, select the folder in which your block will be saved.
5. Save the template by clicking **Save as**.
6. In **Template name**, enter the name of the template.
7. In **Template directory**, select the folder in which the template will be saved.
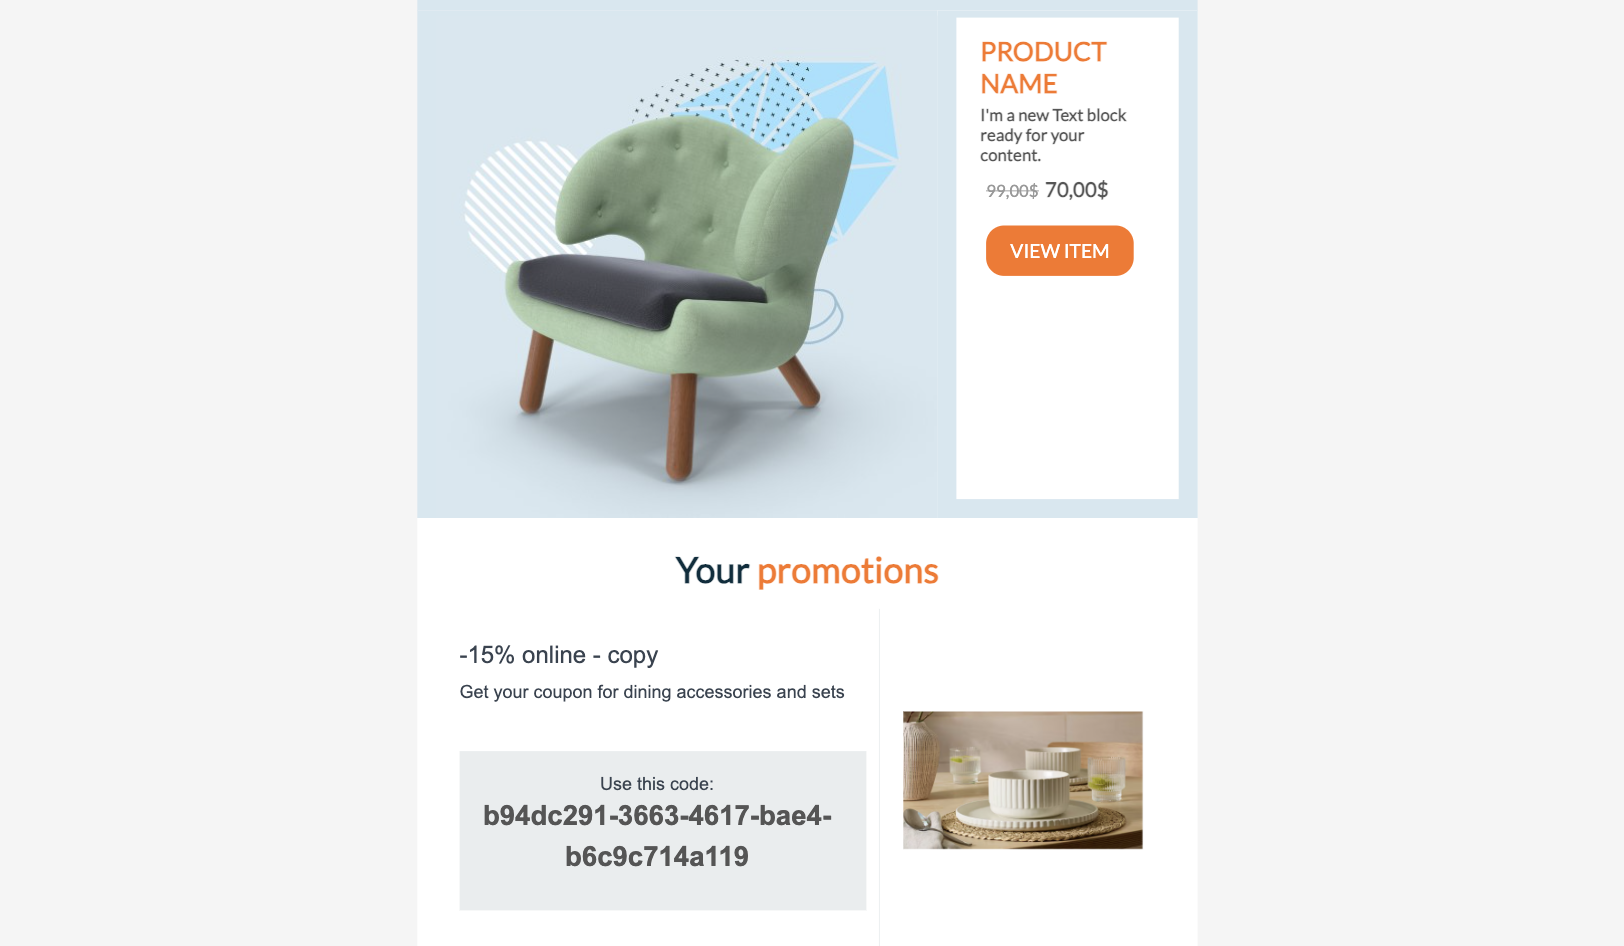
Prepare an email template
## Create an email campaign
---
In this part of the process, you will create an email campaign with the list of the promotions available for the recipient.
1. Go to **Experience Hub > Email campaign > Create new**.
2. In the **Audience** section, choose the [segmentation created in the previous step](/use-cases/promotions-in-email#create-a-segmentation).
Please remember that the predefined HTML block with promotions works for a given customer only if they are in the audience of at least one promotion. If none of the selected promotions are available for the user, the email will not be sent.
4. To confirm you choice, click **Apply**.
3. Configure the **Content** section.
1. In **From email address*, select the email account from which you want to send your message.
2. In **From name**, enter the sender name that is displayed in the mailbox.
2. In the **Subject** field, enter your message subject.
2. Click **Create message** and choose an email template created in the [previous step](/use-cases/promotions-in-email#create-an-email-template).
3. Apply changes.
4. In the **Schedule** section, specify the time when you want to send your communication.
4. You can optionally define **UTM & URL parameters**.
4. Confirm by clicking **Apply**.
## Check the use case set up on the Synerise Demo workspace
---
In the Synerise Demo workspace, you can check:
- [segmentation](https://app.synerise.com/analytics-v2/segmentations/c39f2834-3f44-4f1d-96d8-0ed6fb272221)
- [example promotion](https://app.synerise.com/campaigns/promotions/dad398ae-ca99-421f-88d3-e21dcdf83564)
- [email campaign](https://app.synerise.com/campaigns/email/create/1dd5c37d-da50-42dc-a0aa-7eb48755bab6)
If you’re our partner or client, you already have automatic access to the **Synerise Demo workspace (1590)**, where you can explore all the configured elements of this use case and copy them to your workspace.
If you’re not a partner or client yet, we encourage you to fill out the contact [form](https://demo.synerise.com/request) to schedule a meeting with our representatives. They’ll be happy to show you how our demo works and discuss how you can apply this use case in your business.
## Read more
---
- [Creating email templates](/docs/campaign/e-mail/creating-email-templates)
- [Creating emails](/docs/campaign/e-mail/creating-email-campaigns)
- [HTML blocks](/docs/campaign/e-mail/creating-email-templates/creating-custom-html-block-basic-builder)
- [Promotions](/docs/ai-hub/promotions)
- [Segmentation](/docs/analytics/segmentations)
- [Workflows](/docs/automation).