Bridging the gap between offline purchases and digital engagement is a key challenge for omnichannel retailers. When a customer completes a transaction in a physical store, the experience typically ends at the checkout counter. However, this moment represents a valuable opportunity to deepen the relationship by delivering a rich, personalized follow-up directly in the customer's mobile app.
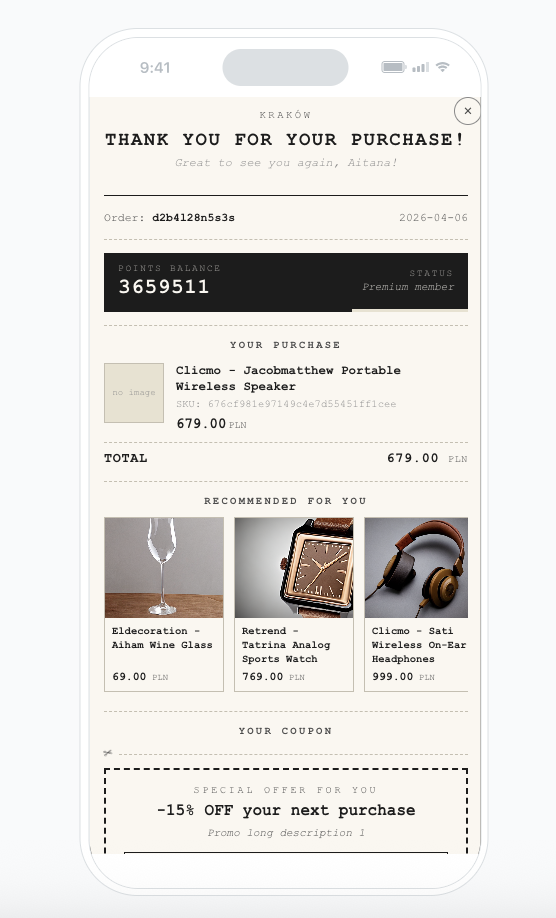
This use case describes how to generate **a personalized digital receipt displayed as an in-app message** shortly after an offline purchase. The receipt consolidates multiple data sources into a single view. The generated receipt includes:
- **Personalized greeting** with the customer's first name
- **Store name** based on the location where the purchase was made
- **Transaction details:** order ID, date, list of purchased products with images, names, SKUs, prices, and total amount
- **Loyalty program status:** current points balance and membership tier with a visual progress bar
- **AI-driven cross-sell recommendations** ("Recommended for you") based on the purchased products
- **Store-specific promotional coupon** with a tap-to-copy code, description, and expiration date
The entire payload is assembled using [Brickworks](/docs/assets/brickworks), which combines customer attributes, aggregates, expressions, external data, AI recommendations, and catalog lookups into a ready-to-render template.
The workflow is triggered by the `transaction.charge` event (indicating an offline purchase), waits briefly via a delay node, and then sends a silent mobile push that triggers the in-app message display. The in-app template renders a receipt-style layout with all the personalized data.
Example of the personalized digital receipt displayed as an in-app message
## Prerequisites
---
- [Implement Synerise SDK in your mobile app](/developers/mobile-sdk).
- Implement the [transaction events](/developers/web/transactions-sdk) using [SDK](/developers/web/transactions-sdk) or [API](https://developers.synerise.com/DataManagement/DataManagement.html#operation/CreateATransaction). The `transaction.charge` event must include a `storeId` parameter identifying the physical store.
- Import a product feed to Synerise. You can find instructions [here](/docs/settings/configuration/ai-engine-configuration/engine-configuration-for-search). Check the [use case](/use-cases/import-product-feed-to-catalog).
- [Configure AI engine](/docs/settings/configuration/ai-engine-configuration/engine-configuration-for-recommendations) for recommendations; enable the cross-sell recommendation type.
- Have a [loyalty program](/use-cases/loyalty-programs-basics) configured in Synerise with points and tiers.
- Create a [catalog](/docs/assets/catalogs/introduction-to-catalogs) mapping store IDs to promotion UUIDs. Each record in this catalog should contain at minimum: a key matching the `storeId` and a `promotion` attribute holding the UUID of the promotion assigned to that store.
- Create [promotions](/docs/campaign/promotions/creating-promotions) in Synerise that will serve as store-specific coupons to be displayed on the receipt.
- Create [API keys](/docs/settings/tool/api#adding-api-keys) with appropriate permissions for the Brickworks external data fields (access to activities API and promotions API).
## Process
---
In this use case, you will go through the following steps:
1. [Create aggregates for transaction data](#create-aggregates-for-transaction-data).
2. [Create an expression for loyalty points balance](#create-an-expression-for-loyalty-points-balance).
3. [Create an expression for loyalty level](#create-an-expression-for-loyalty-level).
4. [Create an AI recommendation for cross-sell products](#create-an-ai-recommendation-for-cross-sell-products).
5. [Create a Brickworks schema](#create-a-brickworks-schema) combining all data sources.
6. [Create the Brickworks record](#create-the-brickworks-record).
7. [Create an in-app campaign](#create-an-in-app-campaign) with the receipt template.
8. [Create a workflow to trigger the in-app via silent push](#create-a-workflow).
## Create aggregates for transaction data
---
In this part of the process, you will create aggregates that retrieve the details of the customer's most recent transaction. These aggregates will be used as default values in the Brickworks schema fields.
### Expression for transaction date
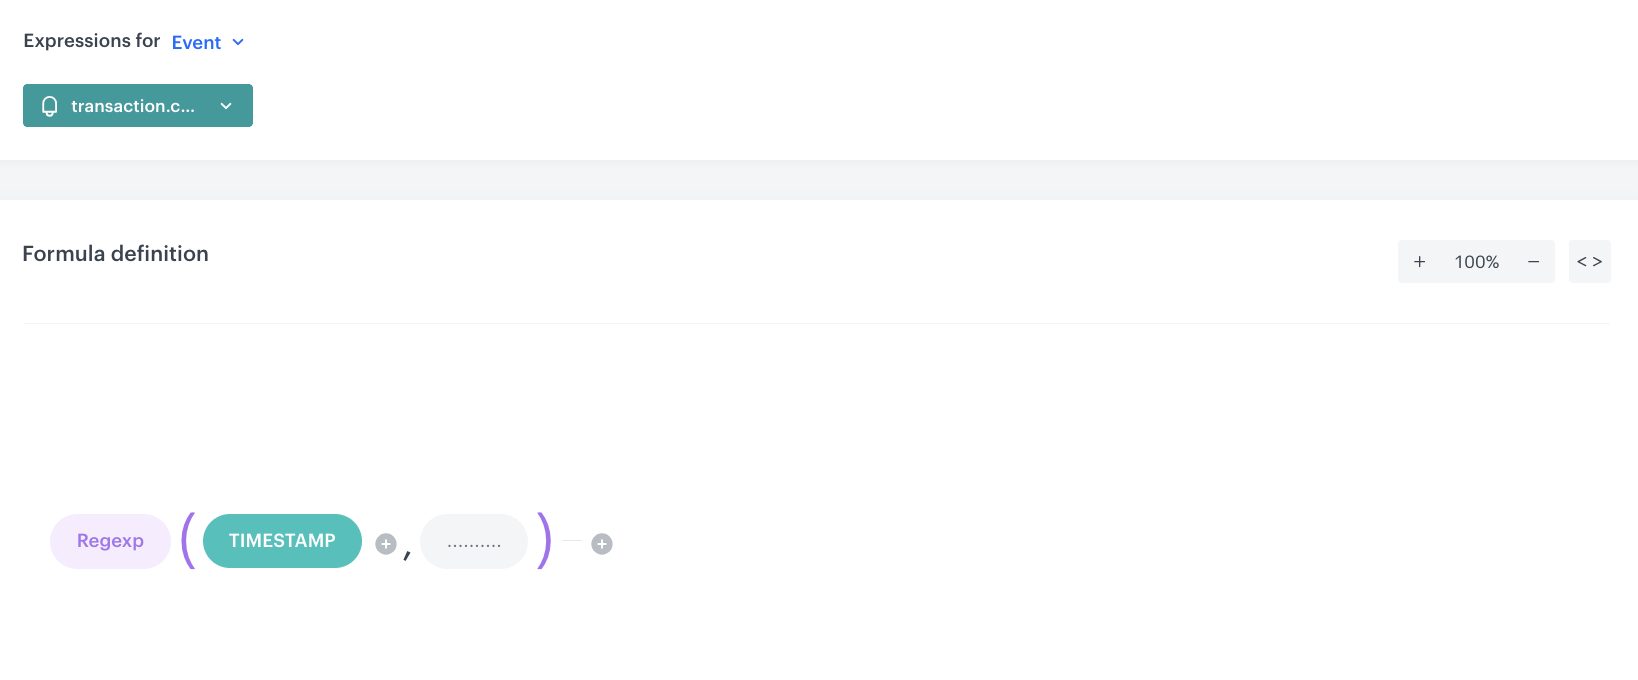
Before creating the aggregate, you need an expression that extracts a human-readable date from the `transaction.charge` event's timestamp. This expression applies a regular expression (Regexp) to the `TIMESTAMP` event attribute of the `transaction.charge` event to parse the date value.
1. Go to **Behavioral Data Hub > Expressions > New expression**.
2. Enter the name of the expression, for example `date [transaction.charge]`.
3. Set **Expressions for** to **Event**.
4. From the event dropdown list, select `transaction.charge`.
5. In the **Formula definition** section, build the following formula presented on the screen below.
6. **TIMESTAMP** is an **Event attribute** of type `TIMESTAMP` from the `transaction.charge` event, and the Regexp pattern extracts the date portion from the timestamp.
7. Save the expression.
Configuration of the date expression for transaction.charge
### Aggregate for last transaction date
This aggregate returns the date of the customer's most recent `transaction.charge` event, using the expression created above.
1. Go to **Behavioral Data Hub > Live Aggregates > Create aggregate**.
2. As the aggregate type, select **Profile**.
3. Enter the name of the aggregate, for example `Last transaction.charge lifetime - date`.
4. Click **Analyze profiles by** and select **Last**.
5. From the **Choose event** dropdown list, select the `transaction.charge` event.
6. As the event parameter, select the expression `date [transaction.charge]` created in the [previous step](#expression-for-transaction-date).
7. Define the period to **Lifetime**.
8. Save the aggregate.
Configuration of the last transaction date aggregate
### Aggregate for last transaction order ID
This aggregate returns the order ID from the customer's most recent `transaction.charge` event.
1. Go to **Behavioral Data Hub > Live Aggregates > Create aggregate**.
2. As the aggregate type, select **Profile**.
3. Enter the name of the aggregate, for example `Last transaction.charge lifetime - $orderId`.
4. Click **Analyze profiles by** and select **Last**.
5. From the **Choose event** dropdown list, select the `transaction.charge` event.
6. As the event parameter, select `$orderId`.
7. Define the period to **Lifetime**.
8. Save the aggregate.
Configuration of the last transaction order ID aggregate
### Aggregate for last transaction amount
This aggregate returns the total amount from the customer's most recent `transaction.charge` event.
1. Go to **Behavioral Data Hub > Live Aggregates > Create aggregate**.
2. As the aggregate type, select **Profile**.
3. Enter the name of the aggregate, for example `Last transaction.charge lifetime - $totalAmount`.
4. Click **Analyze profiles by** and select **Last**.
5. From the **Choose event** dropdown list, select the `transaction.charge` event.
6. As the event parameter, select `$totalAmount`.
7. Define the period to **Lifetime**.
8. Save the aggregate.
Configuration of the last transaction amount aggregate
### Aggregate for last transaction timestamp
This aggregate returns the timestamp of the customer's most recent `transaction.charge` event. The timestamp is used in the in-app template to calculate a time window (±50 seconds) for retrieving the exact `product.buy` events belonging to that transaction via the external data field.
1. Go to **Behavioral Data Hub > Live Aggregates > Create aggregate**.
2. As the aggregate type, select **Profile**.
3. Enter the name of the aggregate, for example `Last transaction.charge lifetime - timestamp`.
4. Click **Analyze profiles by** and select **Last**.
5. From the **Choose event** dropdown list, select the `transaction.charge` event.
6. As the event parameter, select `timeSent`.
7. Define the period to **Lifetime**.
8. Save the aggregate.
Configuration of the last transaction timestamp aggregate
### Aggregate for last store ID
This aggregate returns the store ID from the customer's most recent transaction. It is used in the workflow as an additional parameter in the silent push, enabling the in-app message to display the correct store name and store-specific coupon.
1. Go to **Behavioral Data Hub > Live Aggregates > Create aggregate**.
2. As the aggregate type, select **Profile**.
3. Enter the name of the aggregate, for example `Last transaction storeId`.
4. Click **Analyze profiles by** and select **Last**.
5. From the **Choose event** dropdown list, select the `transaction.charge` event.
6. As the event parameter, select `storeId`.
7. Define the period to **Lifetime**.
8. Save the aggregate.
## Create an expression for loyalty points balance
---
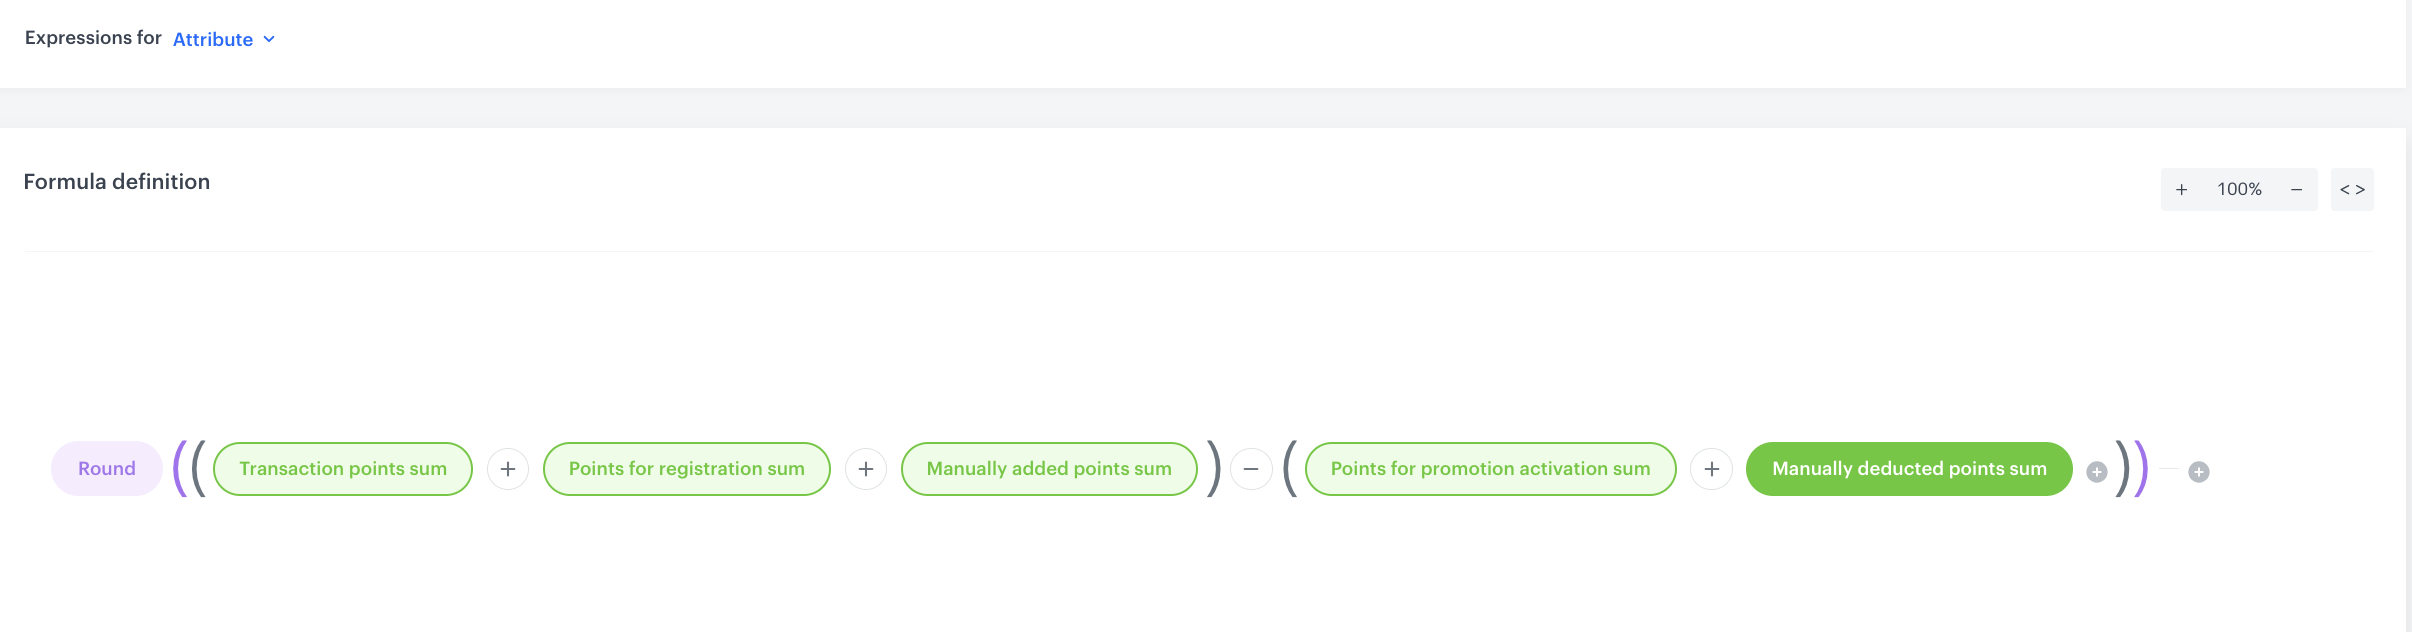
Create an expression that calculates the current loyalty points balance for the customer. The expression sums up all points earned (from transactions, registration, and manual additions) and subtracts all points spent (from promotion activations and manual deductions).
1. Go to **Behavioral Data Hub > Expressions > New expression**.
2. Enter the name of the expression, for example `Loyalty points balance`.
3. In the description, enter `Expression shows current amount of points that user is able to use`.
4. Set **Expressions for** to **Attribute**.
5. In the **Formula definition** section, build the following formula presented on the screen below.
Where each component is a **Profile**-type aggregate:
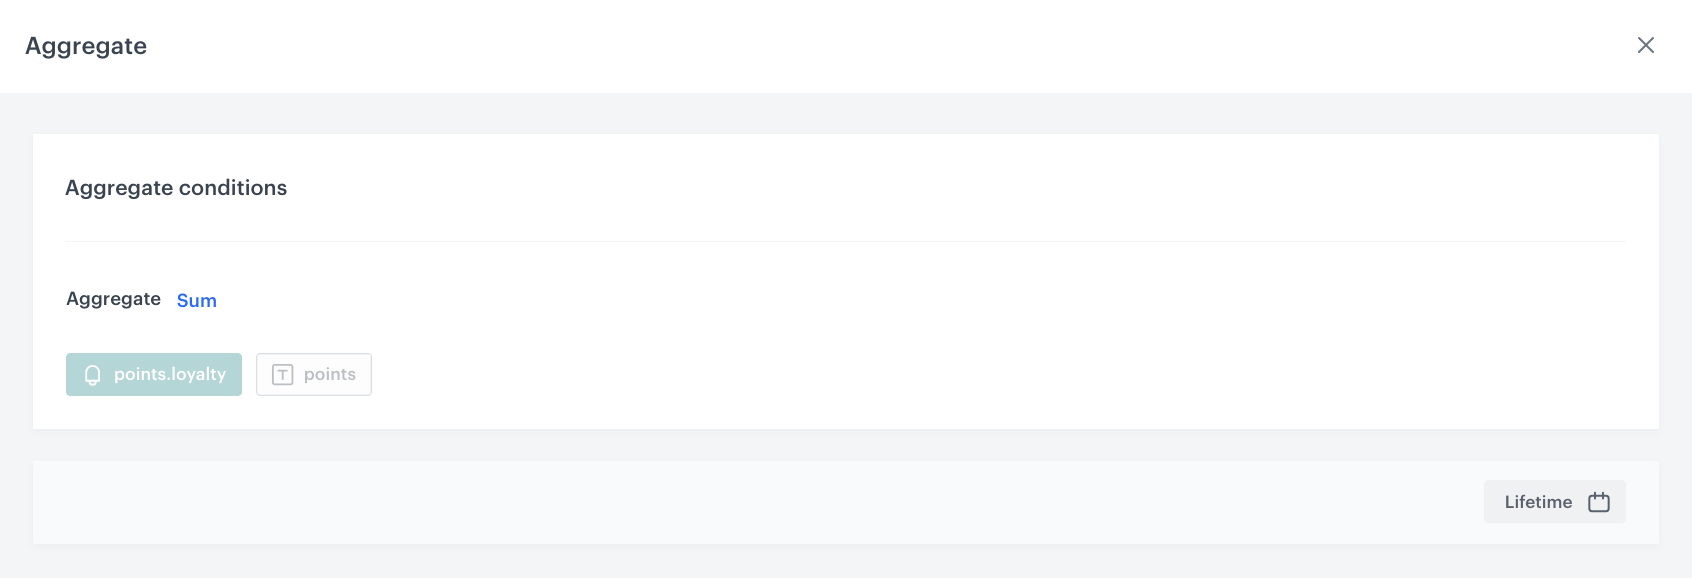
- **Transaction points sum**: Aggregate **Sum** of the `points.loyalty` event, parameter `points`, period **Lifetime**.
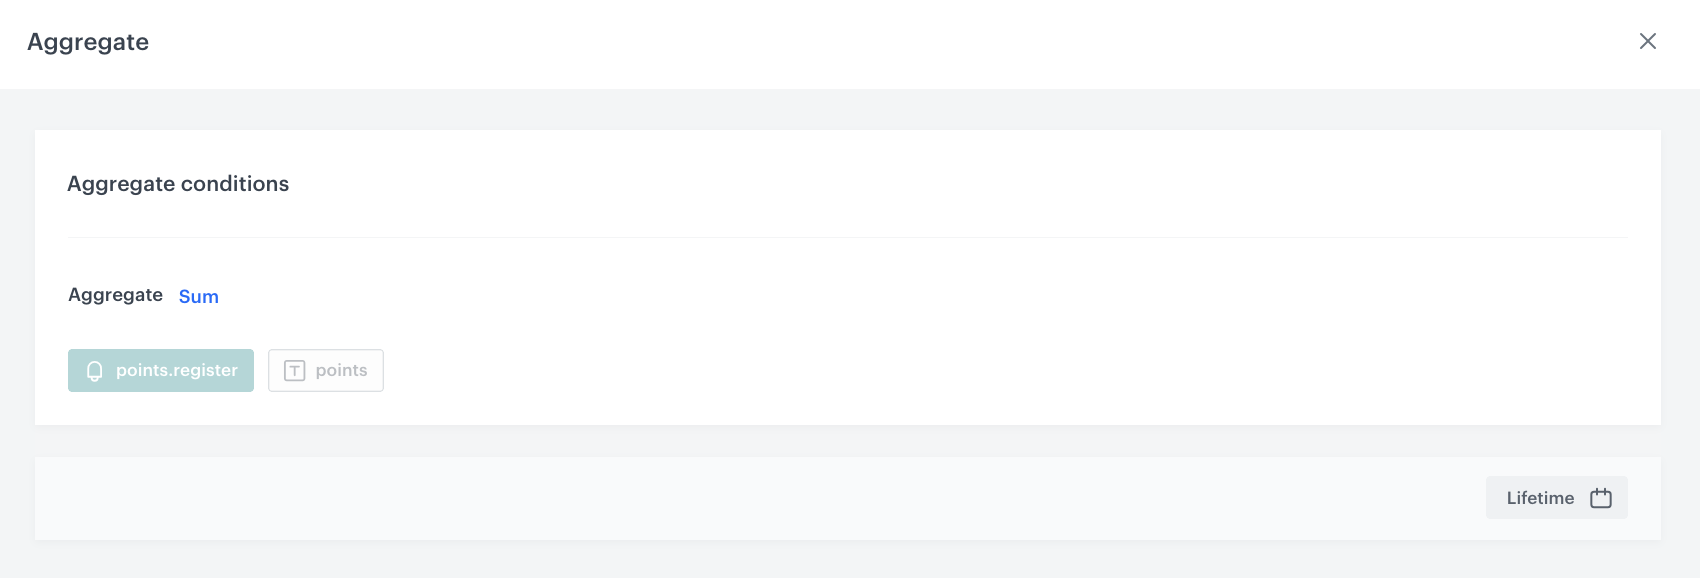
- **Points for registration sum**: Aggregate **Sum** of the `points.register` event, parameter `points`, period **Lifetime**.
- **Manually added points sum**: Aggregate **Sum** of the `points.upcharge` event, parameter `points`, period **Lifetime**.
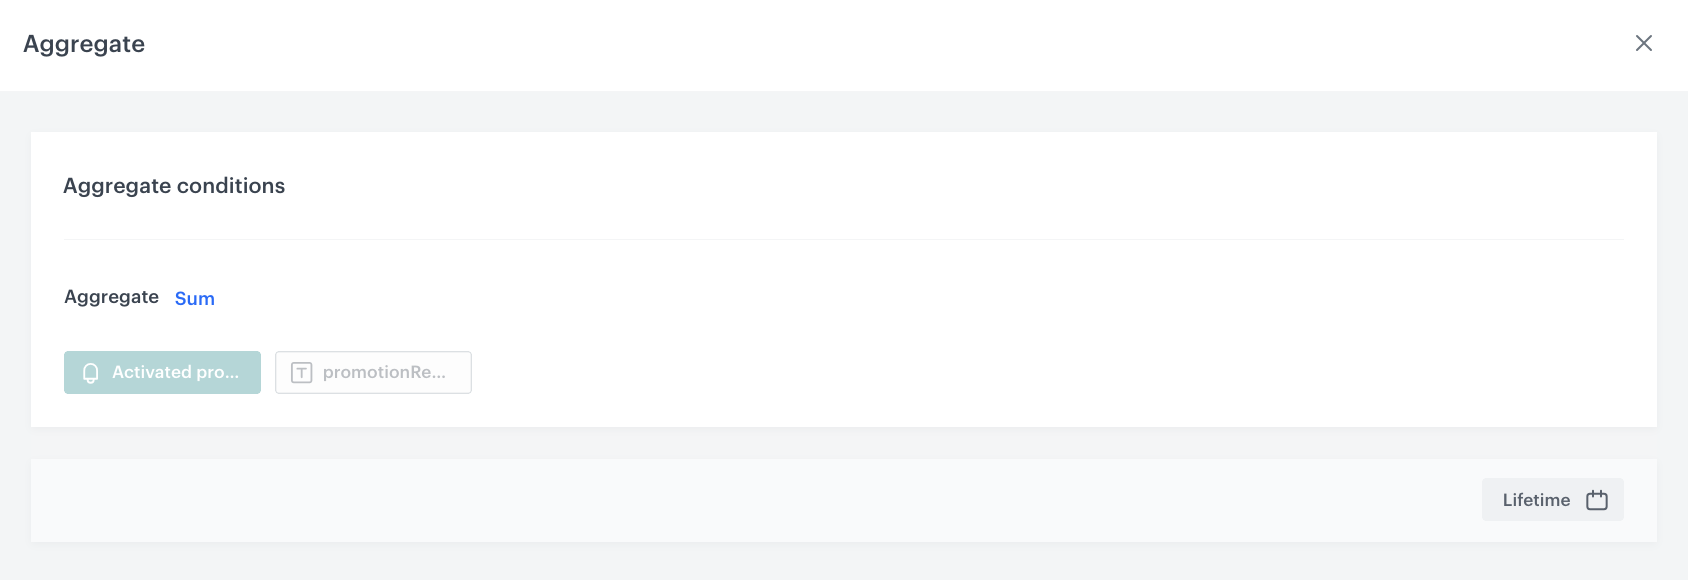
- **Points for promotion activation sum**: Aggregate **Sum** of the `client.activatePromotion` event, parameter `promotionRequireRedeemedPoints`, period **Lifetime**.
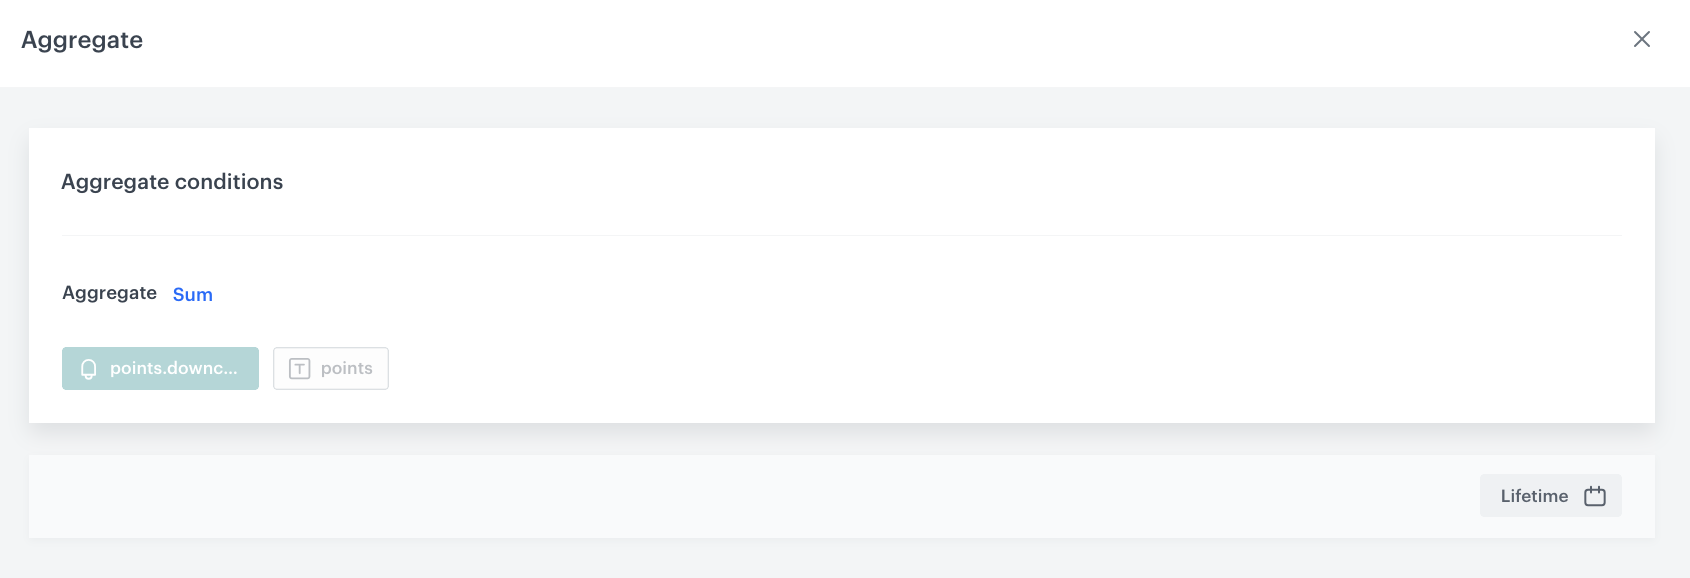
- **Manually deducted points sum**: Aggregate **Sum** of the `points.downcharge` event, parameter `points`, period **Lifetime**.
6. Save the expression.
Formula definition of the loyalty points balance expressionConfiguration of the Transaction points sum aggregate within the expressionConfiguration of the Points for registration sum aggregate within the expressionConfiguration of the Manually added points sum aggregate within the expressionConfiguration of the Points for promotion activation sum aggregate within the expressionConfiguration of the Manually deducted points sum aggregate within the expression
The exact event names and parameter names for the loyalty points aggregates depend on your loyalty program configuration. The names listed above correspond to the Synerise Demo workspace loyalty setup. Adjust them to match your implementation.
## Create an expression for loyalty level
---
Create an expression that returns the customer's current loyalty tier based on conditional logic. The expression evaluates a series of segmentations — each representing a loyalty tier — and returns the corresponding label (for example, "Base member", "Silver member", "Gold member", or "Premium member").
1. Go to **Behavioral Data Hub > Expressions > New expression**.
2. Enter the name of the expression, for example `[UC] Loyalty level`.
3. Set **Expressions for** to **Attribute**.
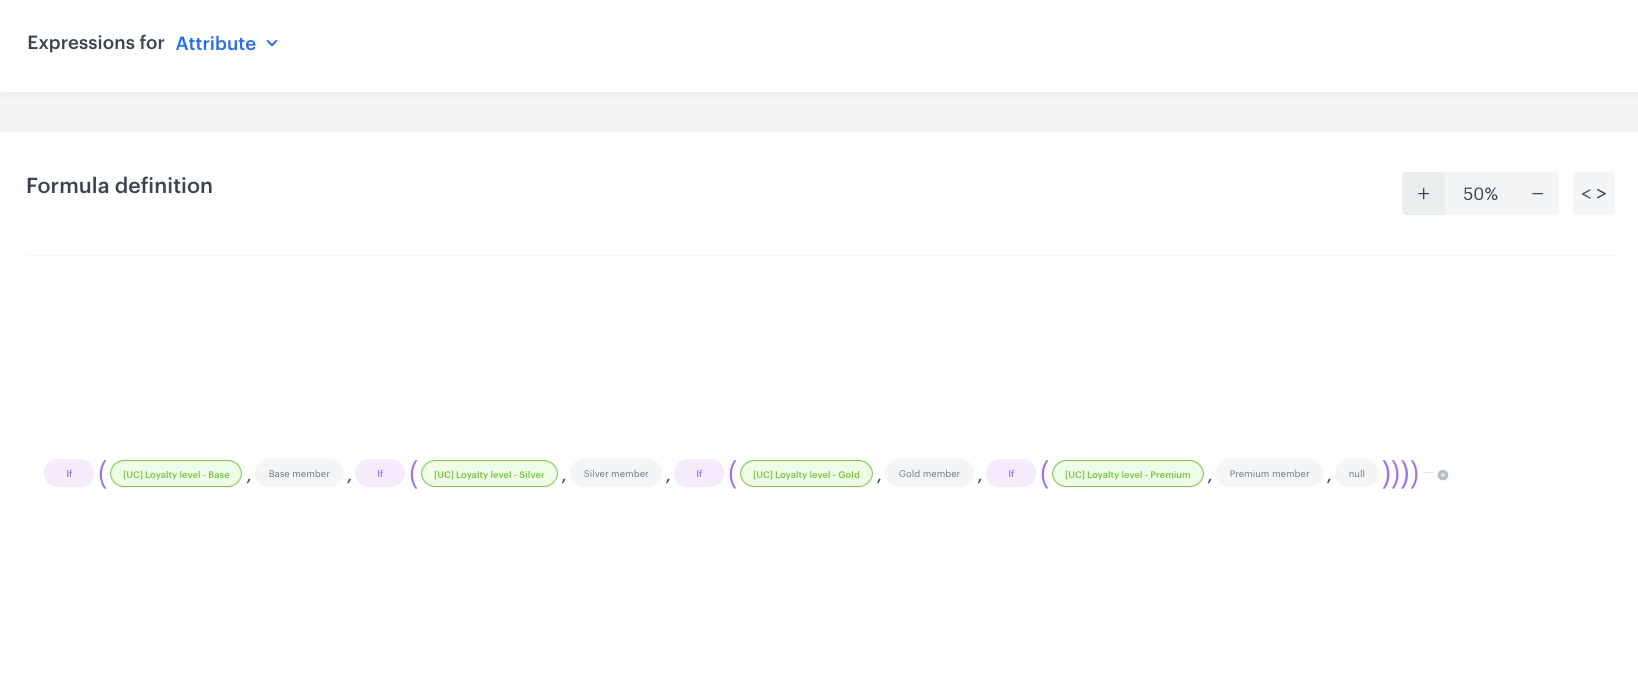
4. In the **Formula definition** section, build a nested conditional (If) formula with the following logic:
`If( [UC] Loyalty level - Base, "Base member", If( [UC] Loyalty level - Silver, "Silver member", If( [UC] Loyalty level - Gold, "Gold member", If( [UC] Loyalty level - Premium, "Premium member", null ) ) ) )`
Each green node (`[UC] Loyalty level - Base`, `[UC] Loyalty level - Silver`, `[UC] Loyalty level - Gold`, `[UC] Loyalty level - Premium`) is a **segmentation** that checks whether the customer falls into the corresponding loyalty tier based on their points balance. The expression evaluates them in order and returns the first matching tier label. If none matches, it returns `null`.
5. Save the expression.
Formula definition of the loyalty level expression
The segmentations referenced in this expression (for example, `[UC] Loyalty level - Gold`) define the point thresholds for each tier. You need to create these segmentations separately in **Decision Hub > Segmentations** before building this expression. Each segmentation should use a condition based on the customer's loyalty points sum (for example, "points sum ≥ 4000 AND points sum < 10000" for the Gold tier). Adjust the thresholds to match your loyalty program requirements.
## Create an AI recommendation for cross-sell products
---
In this part of the process, you will configure a cross-sell (complementary products) recommendation. This recommendation suggests products related to what the customer has just purchased and is displayed in the "Recommended for you" section of the receipt.
1. Go to **AI Hub > (AI Recommendations) Models > Add recommendation**.
2. Enter the name of the recommendation, for example `Recommending complementary products`.
3. In the **Type & Items feed** section, click **Define**.
1. From the **Items Feed** dropdown list, select the item catalog which you configured as a part of [prerequisites](#prerequisites).
2. In the **Type** section, choose the **Cross-sell** recommendation type.
3. Confirm the settings by clicking **Apply**.
4. In the **Items** section, click **Define**.
1. Define the items slot configuration according to your needs.
2. Confirm by clicking **Apply**.
5. In the **Slots and items ordering** section, click **Define**.
1. Set **Slots and items ordering** to **Arrange items in slot order**.
2. Set **Items sorting method within slots** to **Sort by score**.
3. Confirm by clicking **Apply**.
6. Optionally, define the **Boosting** factors.
7. In the **Additional settings** section, click **Define**.
1. Enable **Exclude already bought products** with the **Elastic** option and set the period to **180 days**.
2. Set **Item context from analytics (aggregate, expression)** to an aggregate or expression that returns the SKU of the last purchased product (for example, `Last 1 product.buy sku`).
3. Confirm by clicking **Apply**.
8. In the upper right corner, click **Save**.
## Create a Brickworks schema
---
In this part of the process, you will [create a Brickworks schema](/docs/assets/brickworks/quick-start/creating-a-schema) that serves as a structured container for all the data displayed on the personalized receipt. The schema combines customer attributes, aggregates, expressions, AI recommendations, external API data, and catalog lookups into a single renderable payload.
1. Go to **Data Modeling Hub > Brickworks > New schema**.
2. Choose **Simple Schema**.
3. Enter a name for the schema, in **Display name** for example `Receipt Intelligence`. **API name** is pre-filled with the value from Display name.
4. Optionally, fill in the **Description** field.
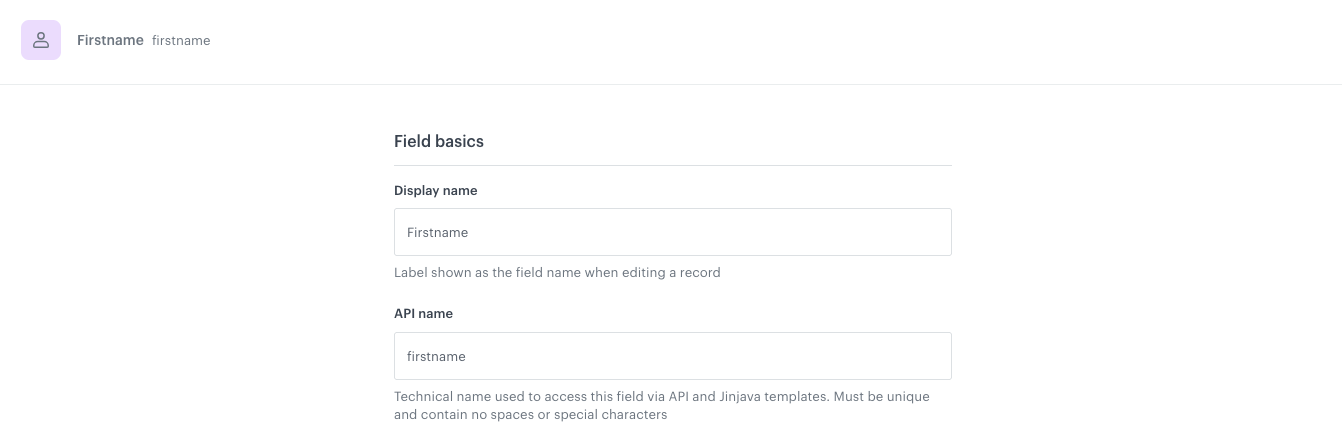
### Add Firstname field
5. Click **Add new field** and choose **Customer attribute**.
6. Complete the fields:
- **Display name**: `Firstname`
- **API name**: `firstname` (pre-filled automatically)
7. Configure the field to return the customer's `firstname` attribute.
8. To save your changes, click **Apply**.
Configuration of the Firstname field
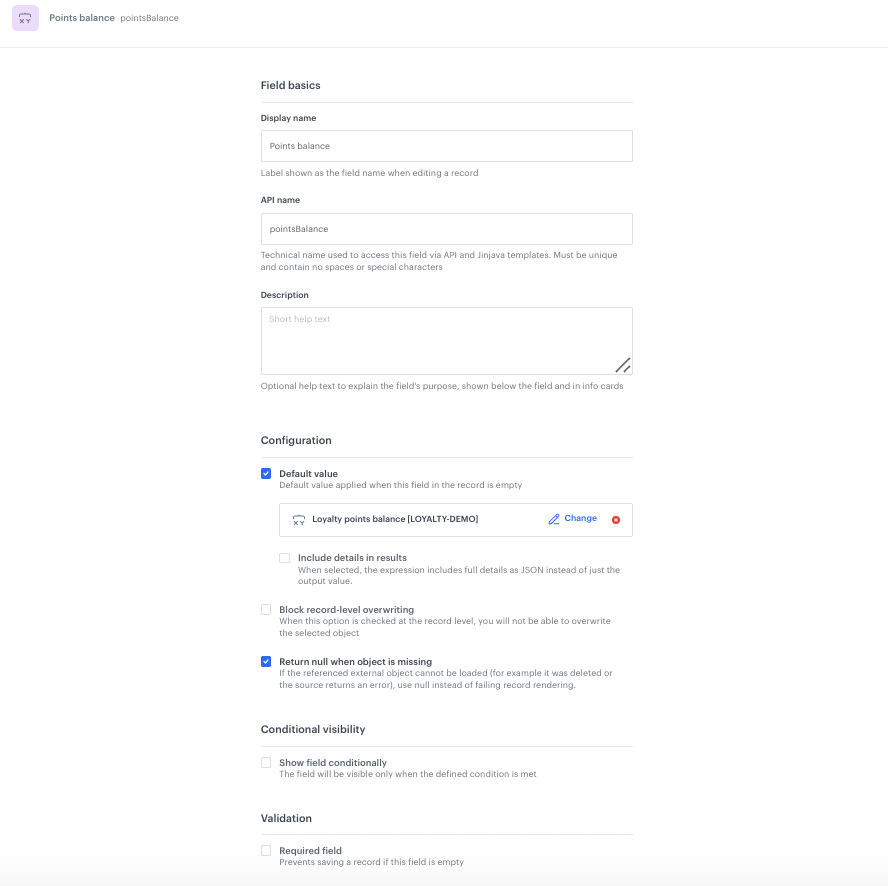
### Add Points balance field
5. Click **Add new field** and choose **Expression**.
6. Complete the fields:
- **Display name**: `Points balance`
- **API name**: `pointsBalance` (pre-filled automatically)
7. In **Configuration**, enable **Default value** and select the expression `Loyalty points balance [LOYALTY-DEMO]` created in the [previous step](#create-an-expression-for-loyalty-points-balance).
8. Enable **Return null when object is missing** to prevent rendering errors if the expression returns no data.
9. To save your changes, click **Apply**.
Configuration of the Points balance field
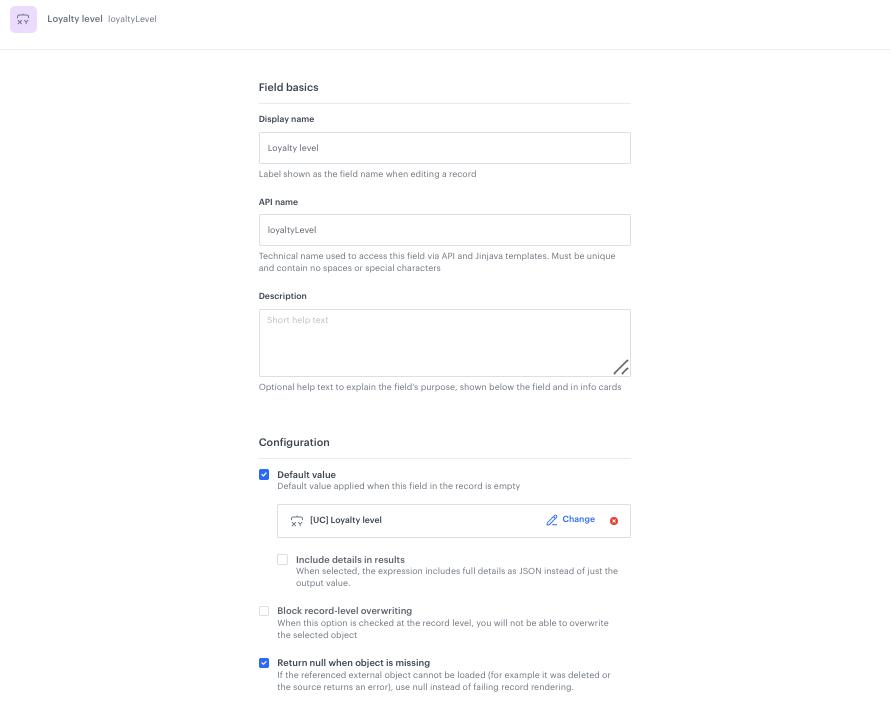
### Add Loyalty level field
5. Click **Add new field** and choose **Expression**.
6. Complete the fields:
- **Display name**: `Loyalty level`
- **API name**: `loyaltyLevel` (pre-filled automatically)
7. In **Configuration**, enable **Default value** and select the expression `[UC] Loyalty level` created in the [previous step](#create-an-expression-for-loyalty-level).
8. Enable **Return null when object is missing**.
9. To save your changes, click **Apply**.
Configuration of the Loyalty level field
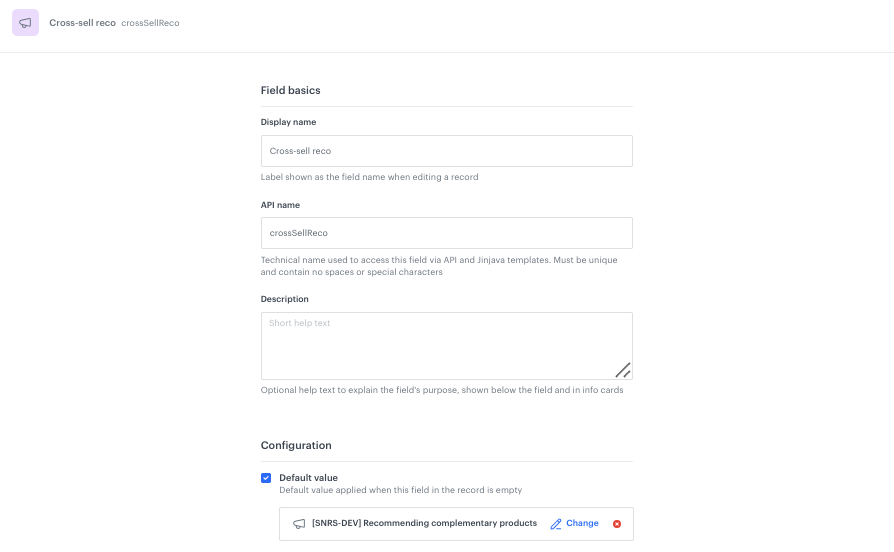
### Add Cross-sell reco field
5. Click **Add new field** and choose **AI Recommendations**.
6. Complete the fields:
- **Display name**: `Cross-sell reco`
- **API name**: `crossSellReco` (pre-filled automatically)
7. In **Configuration**, enable **Default value** and select the AI recommendation `Recommending complementary products` created in the [previous step](#create-an-ai-recommendation-for-cross-sell-products).
8. The **Item context** field can be left empty or configured with a Jinjava expression if you want to pass a specific product context for the cross-sell recommendation.
9. To save your changes, click **Apply**.
Configuration of the Cross-sell reco field
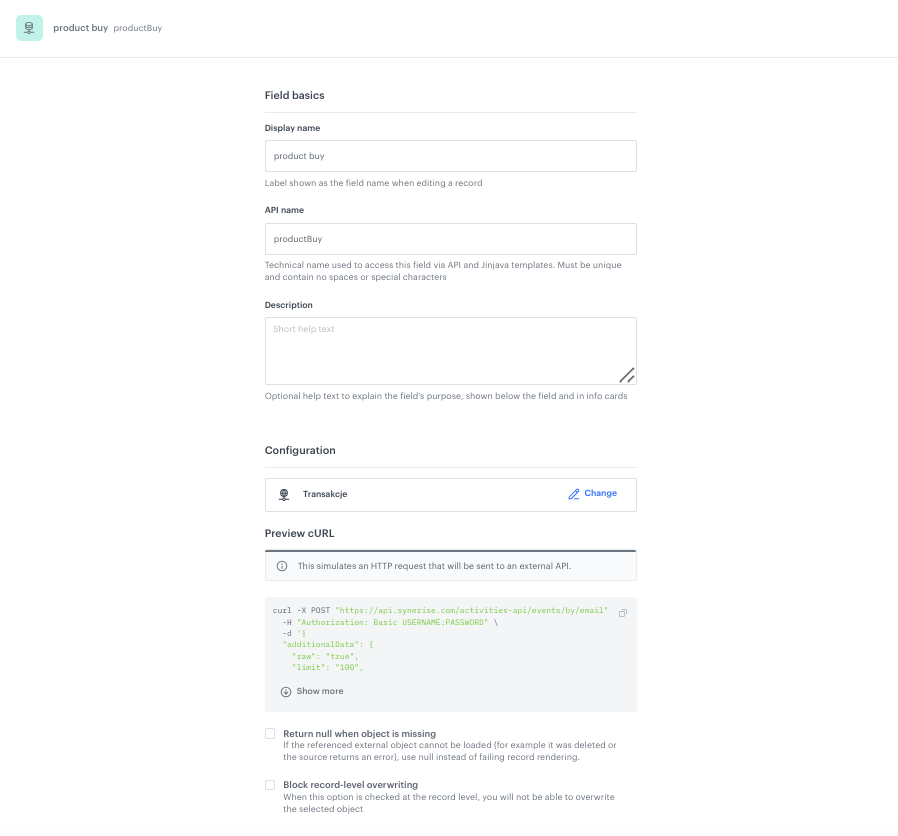
### Add product buy field (External Data)
This field uses an external API call to retrieve the `product.buy` events that belong to the customer's most recent transaction. It uses the transaction timestamp (passed via context) with a ±50 seconds window to identify the exact products from that transaction.
5. Click **Add new field** and choose **External data**.
6. Complete the fields:
- **Display name**: `product buy`
- **API name**: `productBuy` (pre-filled automatically)
7. In **Configuration**, select the external data source (in this example named `Transactions`).
The external data source makes the following API call:
8. To save your changes, click **Apply**.
Configuration of the product buy external data field
The `dateFrom` and `dateTo` context parameters are calculated dynamically in the in-app template code by taking the last transaction timestamp and adding/subtracting 50000 milliseconds (~50 seconds). This ensures only the `product.buy` events belonging to that specific transaction are returned.
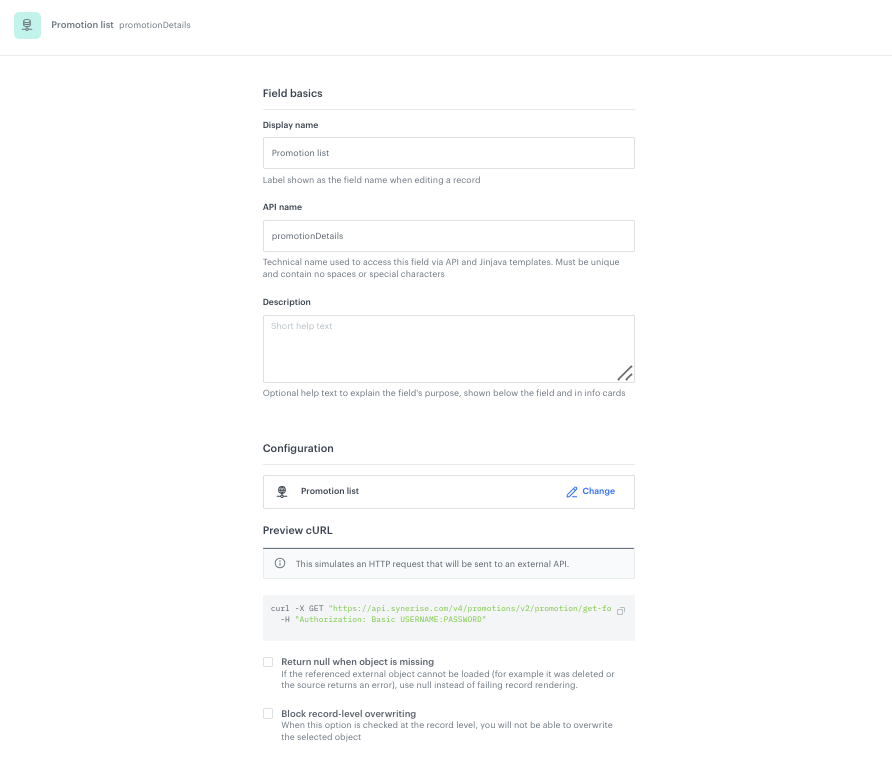
### Add Promotion list field (External Data)
This field uses an external API call to retrieve the list of active and assigned promotions for the current customer. The in-app template then matches the promotion UUID (retrieved from the store-to-promotion catalog) against this list to display the correct store-specific coupon.
5. Click **Add new field** and choose **External data**.
6. Complete the fields:
- **Display name**: `Promotion list`
- **API name**: `promotionDetails` (pre-filled automatically)
7. In **Configuration**, select the external data source (in this example named `Promotion list`).
The external data source makes the following API call:
curl -X GET "https://api.synerise.com/v4/promotions/v2/promotion/get-for-client/clientId/{{customer.id}}?status=ACTIVE,ASSIGNED&fields=code,name,expireAt,discountType,discountValue,uuid,description,expireAt" \
         -H "Authorization: Basic USERNAME:PASSWORD"
8. To save your changes, click **Apply**.
Configuration of the Promotion list external data field
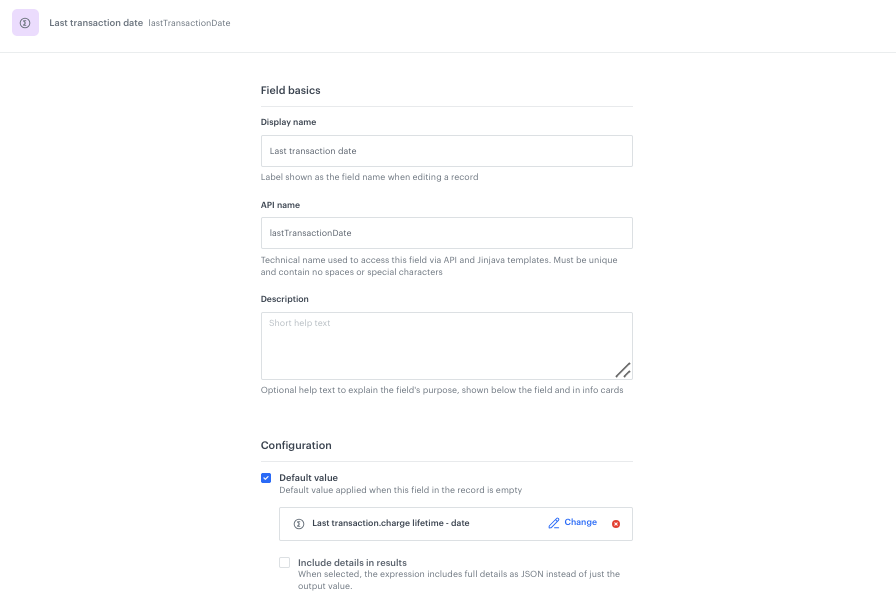
### Add Last transaction date field
5. Click **Add new field** and choose **Expression**.
6. Complete the fields:
- **Display name**: `Last transaction date`
- **API name**: `lastTransactionDate` (pre-filled automatically)
7. In **Configuration**, enable **Default value** and select the aggregate `Last transaction.charge lifetime - date` created in the [earlier step](#aggregate-for-last-transaction-date).
8. To save your changes, click **Apply**.
Configuration of the Last transaction date field
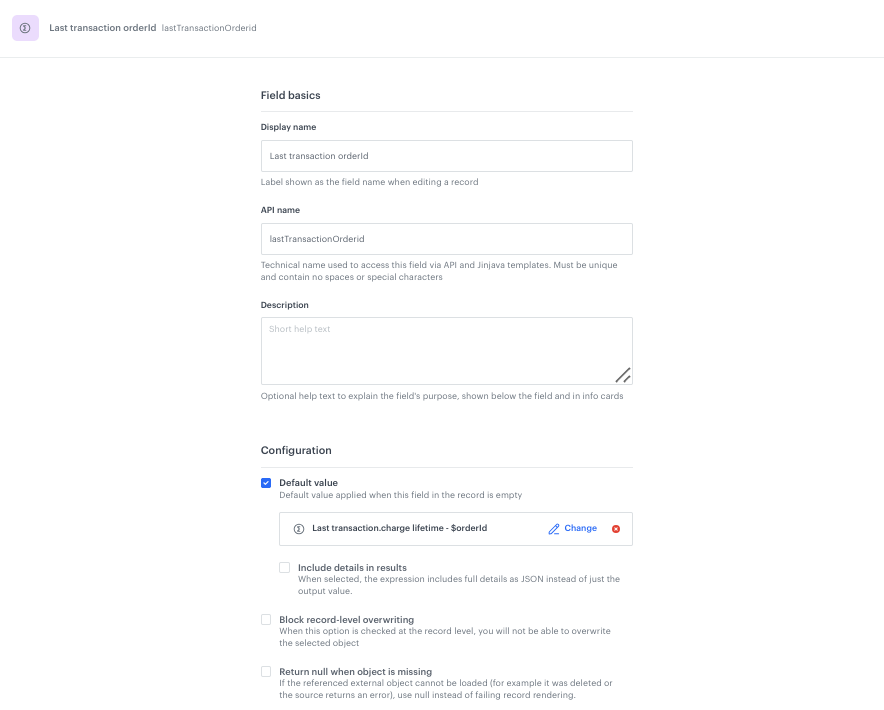
### Add Last transaction orderId field
5. Click **Add new field** and choose **Expression**.
6. Complete the fields:
- **Display name**: `Last transaction orderId`
- **API name**: `lastTransactionOrderId` (pre-filled automatically)
7. In **Configuration**, enable **Default value** and select the aggregate `Last transaction.charge lifetime - $orderId` created in the [earlier step](#aggregate-for-last-transaction-order-id).
8. To save your changes, click **Apply**.
Configuration of the Last transaction orderId field
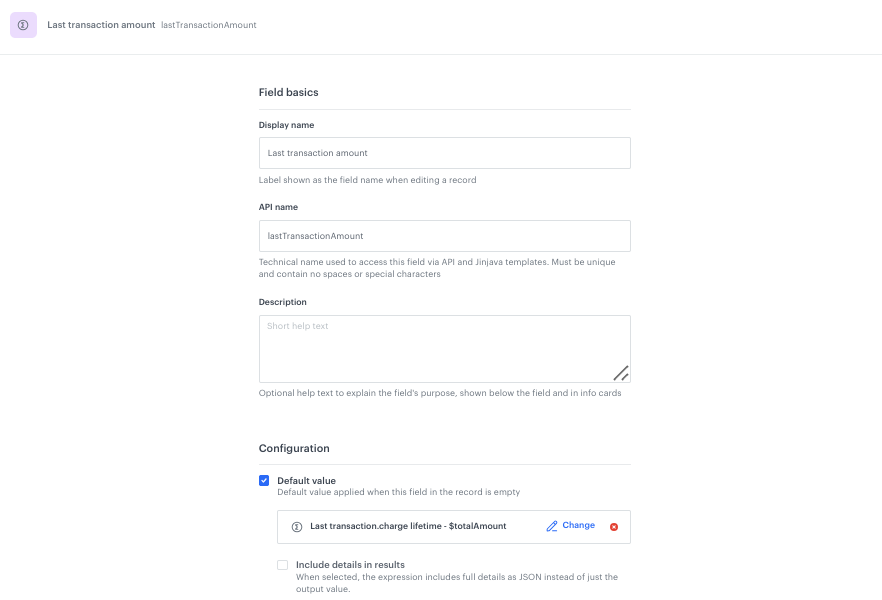
### Add Last transaction amount field
5. Click **Add new field** and choose **Expression**.
6. Complete the fields:
- **Display name**: `Last transaction amount`
- **API name**: `lastTransactionAmount` (pre-filled automatically)
7. In **Configuration**, enable **Default value** and select the aggregate `Last transaction.charge lifetime - $totalAmount` created in the [earlier step](#aggregate-for-last-transaction-amount).
8. To save your changes, click **Apply**.
Configuration of the Last transaction amount field
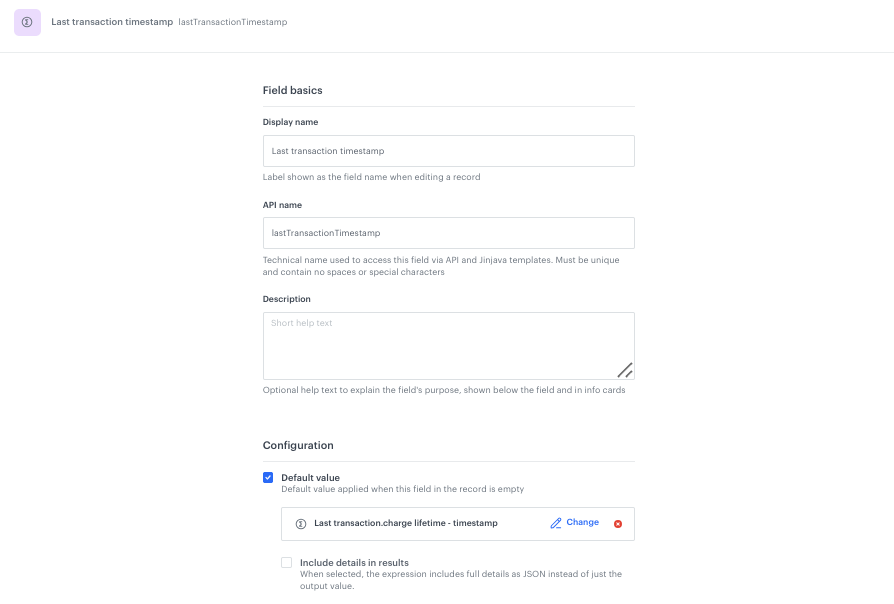
### Add Last transaction timestamp field
5. Click **Add new field** and choose **Expression**.
6. Complete the fields:
- **Display name**: `Last transaction timestamp`
- **API name**: `lastTransactionTimestamp` (pre-filled automatically)
7. In **Configuration**, enable **Default value** and select the aggregate `Last transaction.charge lifetime - timestamp` created in the [earlier step](#aggregate-for-last-transaction-timestamp).
8. To save your changes, click **Apply**.
Configuration of the Last transaction timestamp field
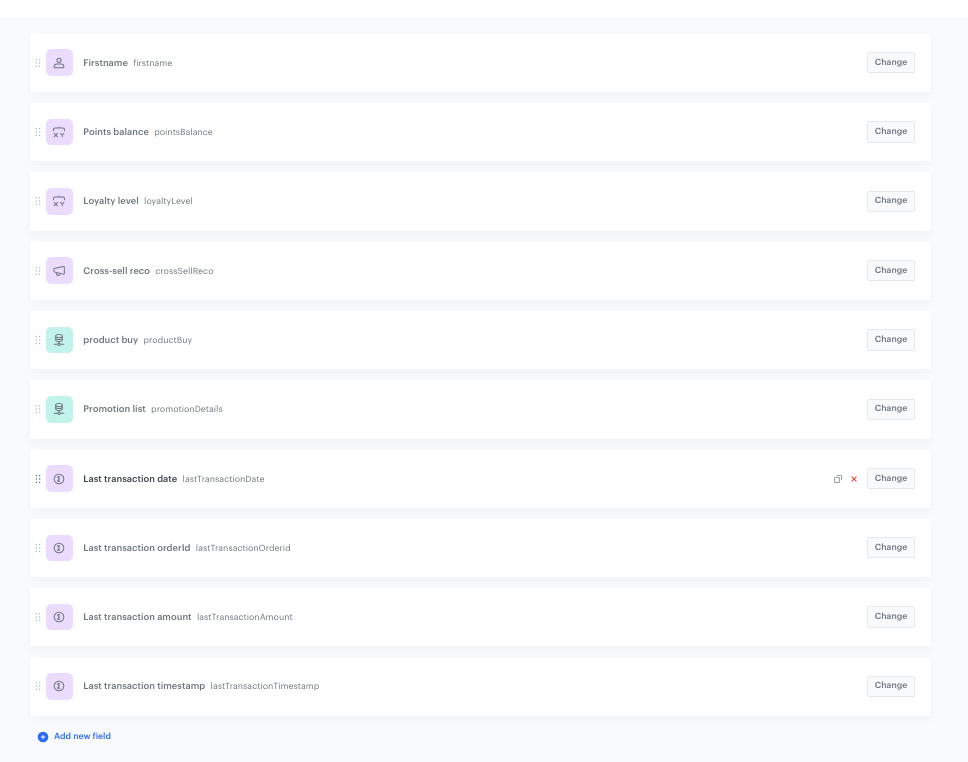
### Overview of all schema fields
Overview of all fields in the Receipt Intelligence Brickworks schema
### Set up the Audience & Settings
1. Click the **Audience & Settings** tab.
2. In the **Audience** section, click **Define**.
3. Choose the schema recipients, in this case, choose **Everyone**.
4. Click **Apply**.
5. In the upper-right corner, click **Save**.
## Create the Brickworks record
---
[Creating a record](/docs/assets/brickworks/quick-start/creating-a-record) fills the schema with actual values. In this case, the record uses dynamic context to resolve all fields at render time based on the requesting customer and their latest transaction.
1. Go to **Data Modeling Hub > Data collections > Select schema**.
2. Choose the [schema created in the previous step](#create-a-brickworks-schema).
3. Click **Add record**.
4. Add a name for the record.
5. Add a slug for the record. Slug is a unique, URL-friendly version of the name. In this case, it is `receiptSimpleSchema1`.
6. The record fields will inherit default values from the schema configuration:
- **Firstname**: `firstname` (customer attribute)
- **Points balance**: [Loyalty points balance [LOYALTY-DEMO]](https://app.synerise.com/analytics/expressions/ff12ecbd-b89f-4e8f-b85e-6854f7fea9c0) (expression)
- **Loyalty level**: `[UC] Loyalty level` (expression)
- **Cross-sell reco**: [Recommending complementary products](https://app.synerise.com/ai-v2/recommendations/ly321Pc82ALq) (AI recommendation)
- **product buy**: `Transactions` (external data)
- **Promotion list**: `Promotion list` (external data)
- **Last transaction date**: [Last transaction.charge lifetime - date](https://app.synerise.com/analytics-v2/aggregates/97739400-4da7-350c-9111-757ff57ac17b) (aggregate)
- **Last transaction orderId**: [Last transaction.charge lifetime - $orderId](https://app.synerise.com/analytics-v2/aggregates/058e59ef-74f1-3073-871b-9377721d91a1) (aggregate)
- **Last transaction amount**: [Last transaction.charge lifetime - $totalAmount](https://app.synerise.com/analytics-v2/aggregates/ef870a4c-1743-3d73-aa85-fae786ff1f42) (aggregate)
- **Last transaction timestamp**: [Last transaction.charge lifetime - timestamp](https://app.synerise.com/analytics-v2/aggregates/6ce58d75-bbe6-3040-94b3-b532138d42a8) (aggregate)
7. Click **Publish** to publish your record.
### Previewing records
After publishing the record, you can [preview the record](/docs/assets/brickworks/quick-start/creating-a-record#previewing-records) for the context of a selected user. This context-driven approach enables your records to adapt dynamically based on the requesting customer and their transaction history.
1. Go to **Data Modeling Hub > Records**.
2. In the header, from the **Select schema** dropdown list, select the schema created previously.
3. Find the record which you want to preview.
4. Enter the record configuration.
5. Click the **Preview context**.
6. From the dropdown list, find a profile for whom you want to generate the record preview.
7. Click **Add parameter** and add the context parameters:
- `storeId` - the ID of the store (for example, `1`)
- `locale` - the locale (for example, `pl-PL`)
- `dateFrom` - the start of the time window for product.buy events (timestamp in milliseconds)
- `dateTo` - the end of the time window for product.buy events (timestamp in milliseconds)
- `currency` - the currency code (for example, `PLN`)
**Result**: You will see a dynamic preview with the customer's first name, loyalty data, transaction details, cross-sell recommendations, and available promotions.
## Create an in-app campaign
---
In this part of the process, you [create an in-app campaign](/docs/campaign/in-app-messages/create-inapp-message) that displays the personalized receipt. The in-app is triggered by a silent push notification sent from the workflow after a purchase.
1. Go to **Experience Hub > In-app messages > Create new**.
2. Enter the name of the in-app, for example `Receipt Intelligence`.
### Define the audience
---
1. In the **Audience** section, click **Define**.
2. Click **Everyone**.
3. To save the audience, click **Apply**.
### Define content
---
In this part of the process, you will create the in-app template from scratch using the code editor. The template is written in HTML, CSS, and JavaScript with Jinjava inserts that dynamically resolve data from the Brickworks schema at render time.
1. In the **Content** section, click **Define**.
2. Click **Create message**.
3. Create a new template.
4. Choose a **code editor**.
**Result:** You are redirected to the code editor where you can write the HTML, CSS, and JavaScript code for the receipt template.
The template code uses Jinjava to assemble the receipt from multiple data sources. Below is a description of the key parts of the template logic and the Jinjava inserts used in each part.
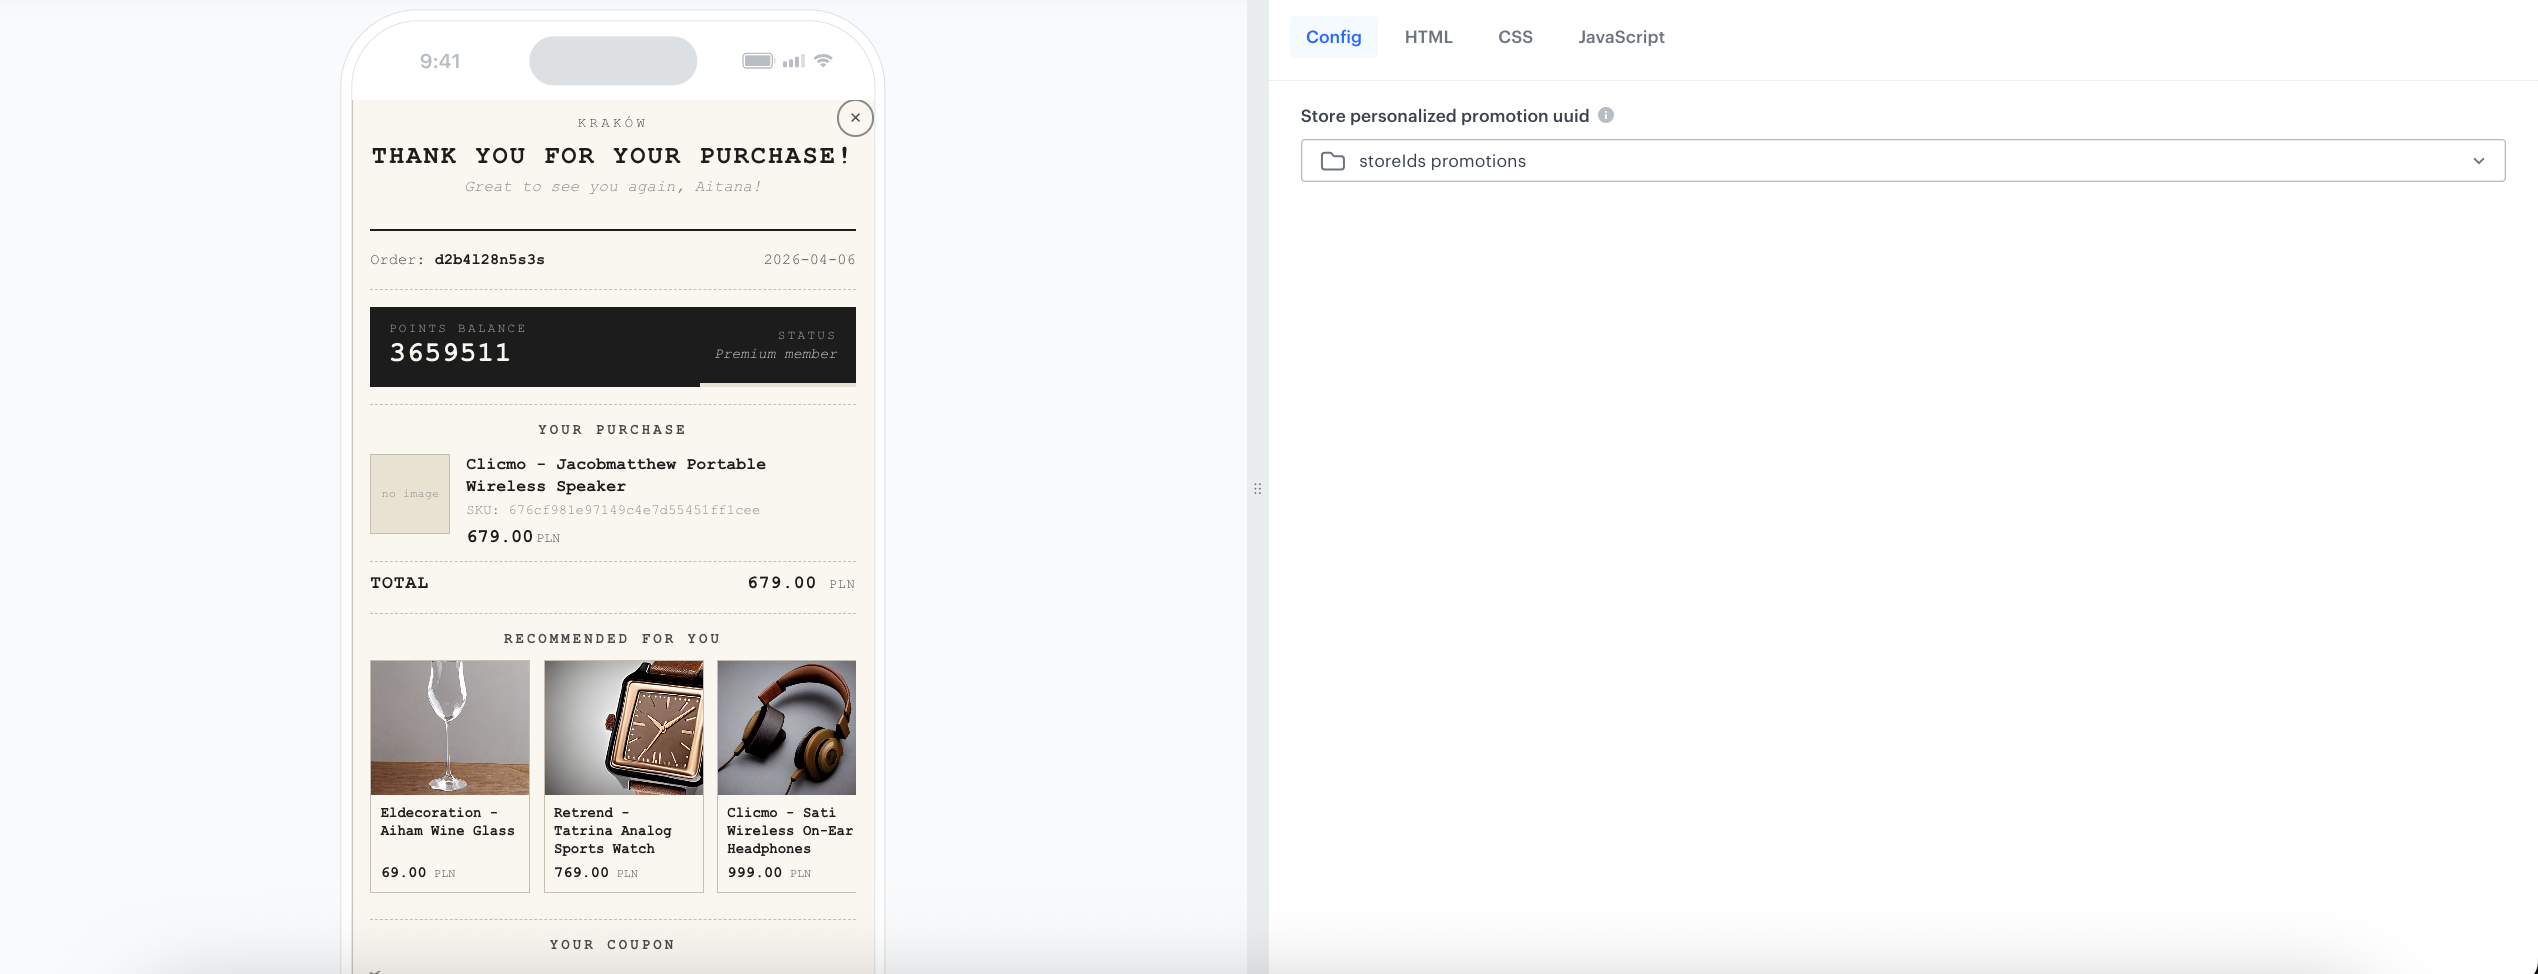
#### Retrieving the store-specific promotion UUID
The template first looks up the promotion UUID assigned to the store where the purchase was made. It does this by querying a catalog that maps store IDs to promotion UUIDs. The store ID is passed as a parameter (`lastStoreId`) via the silent push from the workflow.
{% catalogitemv2.CATALOG_ID(key) %}
{% do promoId.append(catalog_result.promotion) %}
{% endcatalogitemv2 %}
#### Calculating the transaction time window
The template uses the [aggregate for last transaction timestamp](#aggregate-for-last-transaction-timestamp) to retrieve the timestamp of the most recent purchase. It then calculates a ±50 second window around this timestamp. This window is passed as `dateFrom` and `dateTo` context parameters to the Brickworks external data field, ensuring that only the `product.buy` events from that specific transaction are returned.
{% aggregate 6ce58d75-bbe6-3040-94b3-b532138d42a8 %}
  {% set date1 = aggregate_result[0] - 50000 %}
  {% set date2 = aggregate_result[0] - (-50000) %}
#### Generating the Brickworks payload
The template calls the `brickworksgeneratevar` Jinjava tag, passing the schema ID, record ID, and a dynamic context object. This triggers the Brickworks engine to resolve all fields in the schema (customer attributes, expressions, aggregates, AI recommendations, and external data) and return the result as a single `brickworks_result` object.
#### Rendering the receipt sections
The template accesses the resolved data through the `brickworks_result` object and renders each section of the receipt:
- `brickworks_result.firstname` — customer's first name for the greeting
- `brickworks_result.pointsBalance` — loyalty points balance
- `brickworks_result.loyaltyLevel` — loyalty tier label
- `brickworks_result.lastTransactionOrderid` — order ID
- `brickworks_result.lastTransactionDate` — transaction date
- `brickworks_result.lastTransactionAmount` — total amount
- `brickworks_result.productBuy.data` — array of purchased products (iterated with `{% for product in brickworks_result.productBuy.data %}`)
- `brickworks_result.crossSellReco.data` — array of recommended products
- `brickworks_result.promotionDetails.data` — array of available promotions
#### Matching and displaying the store-specific coupon
The template iterates through the list of promotions returned by the external data field and matches the promotion UUID from the catalog lookup. Only the promotion matching the store is displayed to the customer.
The rendered template includes the following visual sections:
- **Header**: Store name, thank-you message, personalized greeting with the customer's first name
- **Transaction details**: Order ID and transaction date
- **Loyalty strip**: Points balance and loyalty tier with a visual progress bar
- **Purchase details**: List of products from the transaction with images, names, SKUs, and prices
- **Total amount**: Sum of the transaction
- **Recommendations**: Horizontally scrollable cross-sell product cards with images, names, and prices
- **Coupon**: Store-specific promotion with a tap-to-copy coupon code, description, and expiration date
- **Footer**: Call-to-action to visit again with the store name
Preview of the in-app receipt message with all personalized sections
#### JavaScript for coupon copy functionality
The code includes JavaScript that enables a tap-to-copy functionality for the coupon code:
5. After completing the template, click **Save this template > Save as**.
6. On the pop-up:
1. In the **Template name** field, enter the name of the template.
2. From the **Template folder** dropdown list, select the folder where the template will be saved.
3. Confirm by clicking **Apply**.
7. To continue the process of configuring the in-app campaign, click **Next**.
8. To save your content changes, click **Apply**.
### Select events that trigger the in-app message display
---
The in-app message is triggered by the silent push notification sent from the workflow. Configure the trigger event according to the content identifier used in the silent push.
1. In the **Trigger events** section, click **Define**.
2. Configure the trigger event to match the silent push content identifier. In our case it will be `transaction.charge`.
3. Click **Apply**.
### Schedule the message and configure display settings
---
1. In the **Schedule** section, click **Define** and set the time when the message will be active.
2. In the **Display Settings** section, click **Change**.
3. Define the **Delay display**, **Priority index** and enable the **Frequency limit** toggle to manage the frequency of the in-app message display.
4. Click **Apply**.
5. Optionally, you can define the UTM parameters and additional parameters for your in-app campaign.
6. Click **Activate**.
## Create a workflow
---
Create a workflow that triggers the in-app receipt display after an offline purchase. The workflow listens for `transaction.charge` events with a `storeId` parameter, waits for a short delay, and then sends a silent mobile push that activates the in-app message with the necessary context parameters.
1. Go to **Automation Hub > Workflows > New workflow**.
2. Enter the name of the workflow, for example `Trigger in-app via silent push after purchase`.
### Define the Profile Event trigger node
---
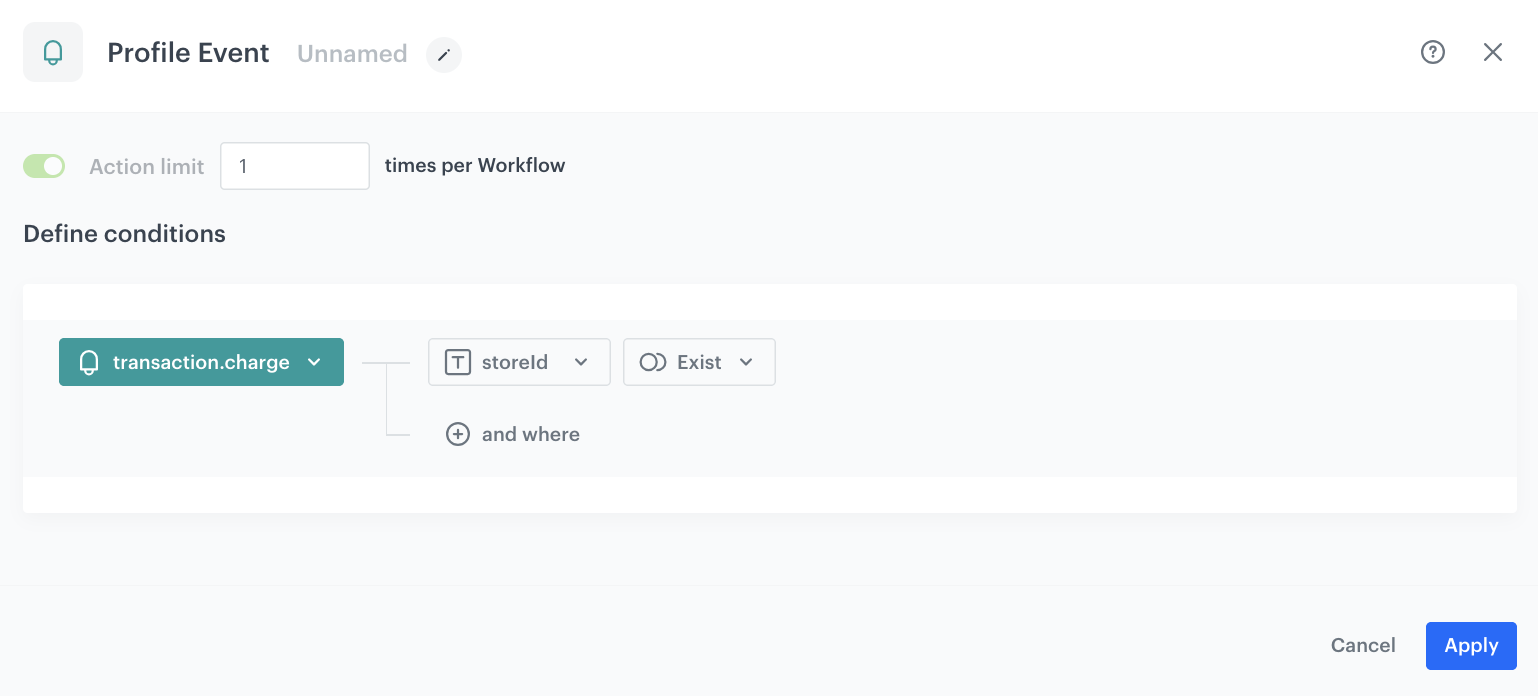
1. As the first node of the workflow, add **Profile Event**. In the configuration of the node:
1. From the **Choose event** dropdown menu, choose the `transaction.charge` event.
2. Click the **+ where** button, from the **Choose parameter** dropdown menu, choose `storeId`.
3. From the **Choose operator** dropdown, choose **Exist**.
2. Confirm by clicking **Apply**.
Configuration of the Profile Event node
### Configure the Delay node
---
1. As the next node, add **Delay**.
2. Set the delay duration according to your business needs (for example, a few minutes to allow all transaction data to be processed and indexed).
3. Confirm by clicking **Apply**.
### Configure the Send Mobile Push node
---
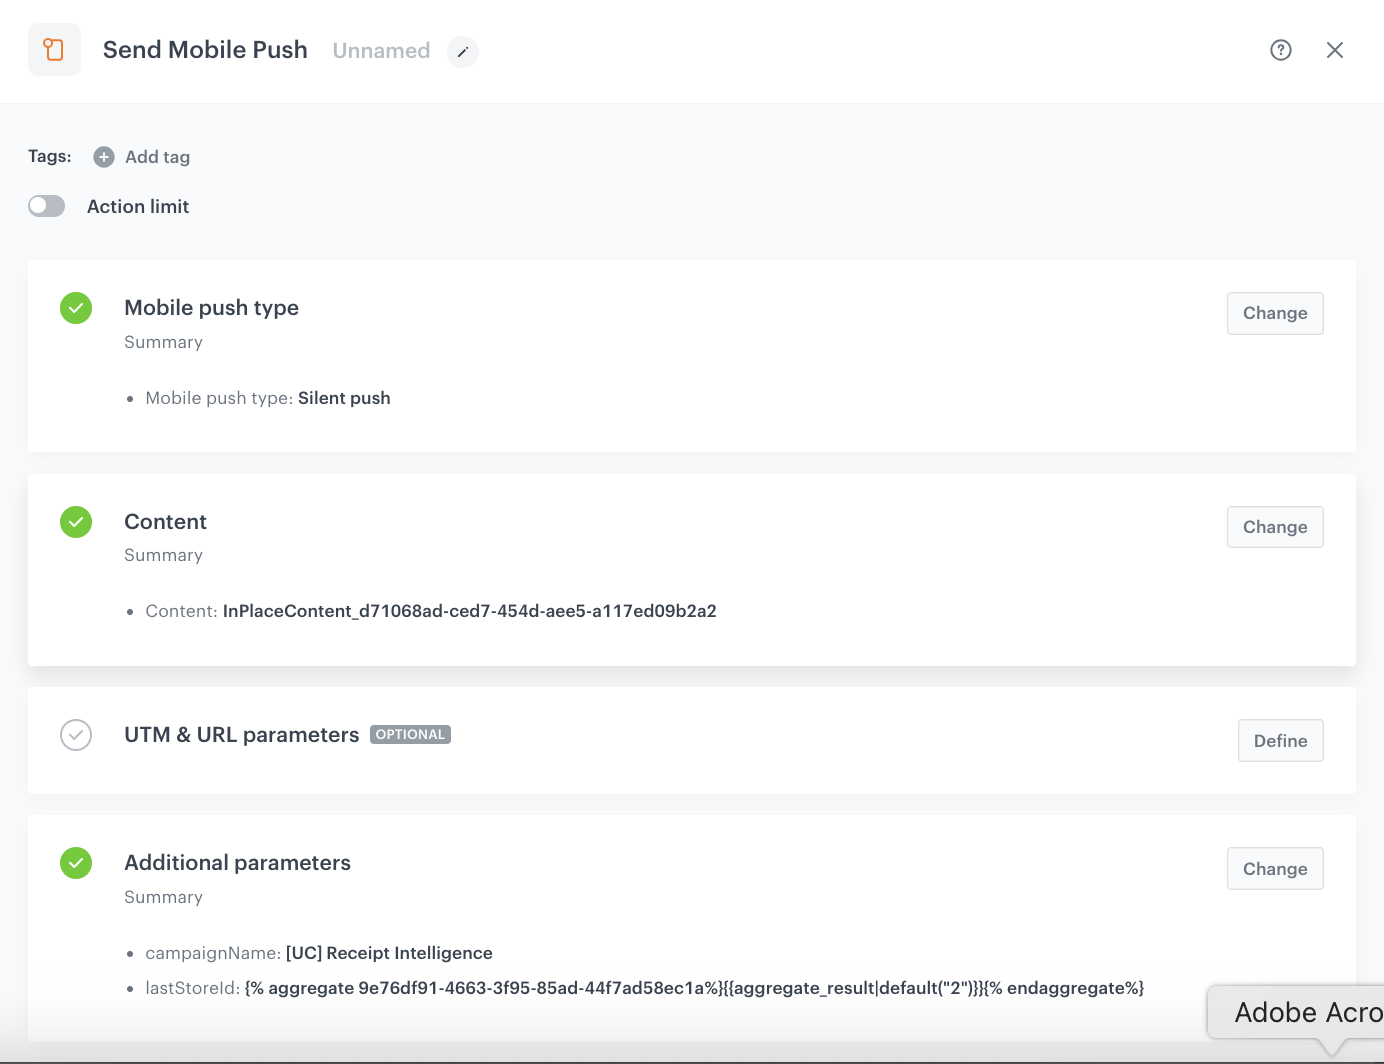
1. As the next node, add **Send Mobile Push**. In the configuration of the node:
1. In the **Mobile push type** section, click **Change** and select **Silent push**.
2. In the **Content** section, click **Change** and select the in-place content linked to the in-app campaign.
3. In the **Additional parameters** section, add two custom parameters:
- **Parameter**: `campaignName`, **Value**: `[UC] Receipt Intelligence`
- **Parameter**: `lastStoreId`, **Value**: Insert the [aggregate for last store ID](#aggregate-for-last-store-id) created earlier. The value uses the Jinjava aggregate insert to dynamically resolve the store ID for each customer.
4. Confirm by clicking **Apply**.
Configuration of the Send Mobile Push node with additional parameters
The `lastStoreId` parameter is critical — it is passed to the in-app template as context and used to look up the store name and the store-specific promotion UUID from the catalog. The value is retrieved dynamically using the aggregate that returns the last `storeId` from the `transaction.charge` event.
### Add the finishing node
---
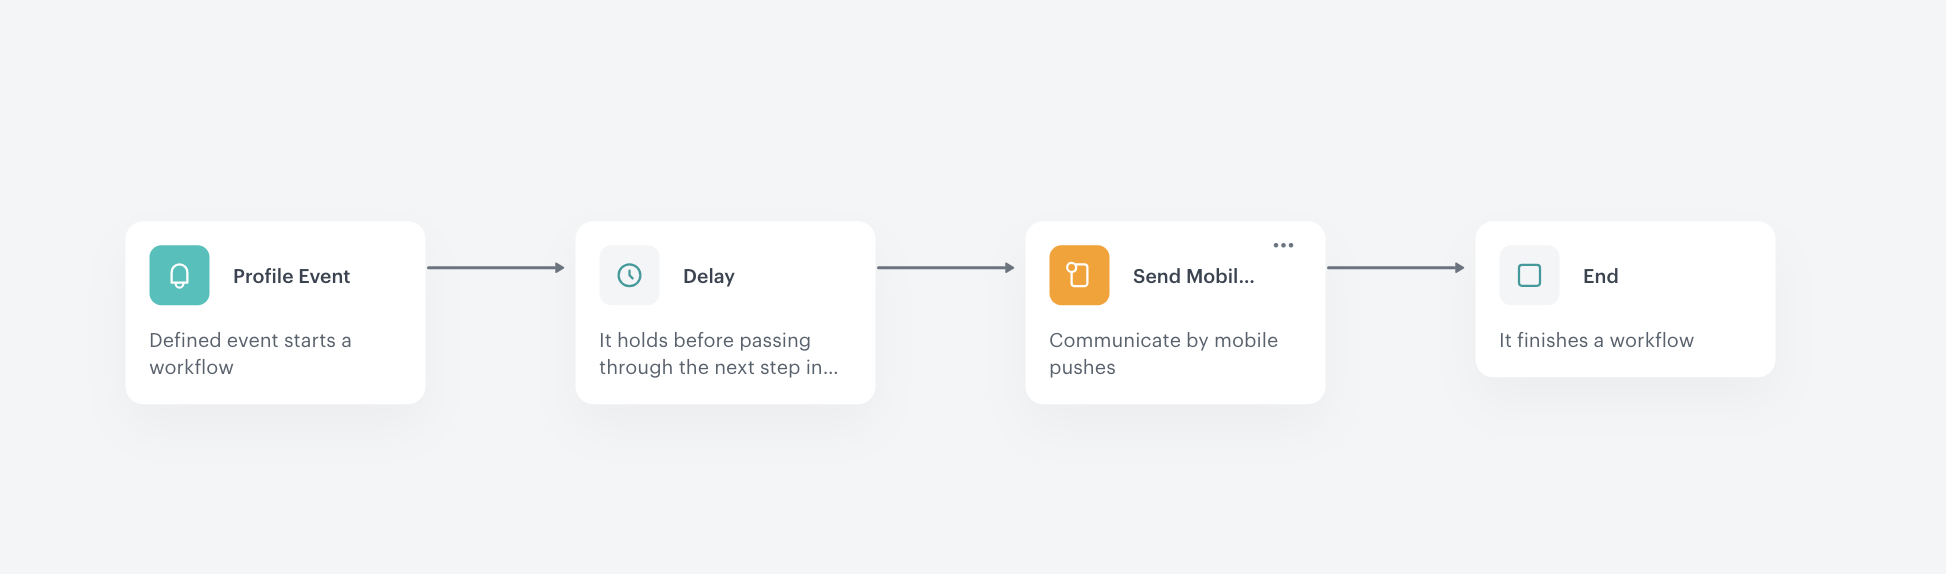
1. Add the **End** node.
2. In the upper right corner, click **Save & Run**.
The complete workflow: Profile Event → Delay → Send Mobile Push → End
## What's next
---
After implementing this use case, you can extend the receipt experience in several ways:
- Add a **store locator** link in the footer to help customers find the store for their next visit.
- Include a **feedback survey** link to gather post-purchase satisfaction data.
- Extend the template with **loyalty program milestones** (for example, showing how many points until the next tier).
- Reuse the Brickworks schema across other channels such as email or web push for a consistent post-purchase experience.
## Check the use case set up on the Synerise Demo workspace
---
You can check the configuration of each step directly in the Synerise Demo workspace:
- [Aggregate: Last transaction.charge lifetime - timestamp](https://app.synerise.com/analytics-v2/aggregates/6ce58d75-bbe6-3040-94b3-b532138d42a8)
- [Aggregate: Last transaction.charge lifetime - $totalAmount](https://app.synerise.com/analytics-v2/aggregates/ef870a4c-1743-3d73-aa85-fae786ff1f42)
- [Aggregate: Last transaction.charge lifetime - $orderId](https://app.synerise.com/analytics-v2/aggregates/058e59ef-74f1-3073-871b-9377721d91a1)
- [Aggregate: Last transaction.charge lifetime - date](https://app.synerise.com/analytics-v2/aggregates/97739400-4da7-350c-9111-757ff57ac17b)
- [Expression: Loyalty points balance [LOYALTY-DEMO]](https://app.synerise.com/analytics/expressions/ff12ecbd-b89f-4e8f-b85e-6854f7fea9c0)
- [AI Recommendation: Recommending complementary products](https://app.synerise.com/ai-v2/recommendations/ly321Pc82ALq)
- [Brickworks schema and record](https://app.synerise.com/assets/brickworks/schemas/480b5a15-8b55-4645-9fc2-13962e88f551/records/18d3296f-8016-4933-b0aa-9ead88243bac)
- [In-app campaign](https://app.synerise.com/communications/in-app/0cabb677-bcda-4f97-b46d-127d1106e0b2/content-manager/template/editor?variant=0)
- [Workflow](https://app.synerise.com/automations/workflows/automation-diagram/da894e1f-c44a-4f6b-81e5-053803cb73b7)
If you’re our partner or client, you already have automatic access to the **Synerise Demo workspace (1590)**, where you can explore all the configured elements of this use case and copy them to your workspace.
If you’re not a partner or client yet, we encourage you to fill out the contact [form](https://demo.synerise.com/request) to schedule a meeting with our representatives. They’ll be happy to show you how our demo works and discuss how you can apply this use case in your business.
## Read more
---
- [Aggregates](/docs/analytics/aggregates)
- [Brickworks](/docs/assets/brickworks)
- [AI Recommendations](/docs/ai-hub/recommendations-v2)
- [Catalogs](/docs/assets/catalogs/introduction-to-catalogs)
- [Expressions](/docs/analytics/expressions)
- [In-app messages](/docs/campaign/in-app-messages)
- [Automation Hub](/docs/automation)
- [Loyalty programs](/use-cases/loyalty-programs-basics)
- [Mobile push](/docs/campaign/Mobile/mobile_campaign)
- [Promotions](/docs/campaign/promotions/creating-promotions)