Mobile apps are a powerful marketing channel for many businesses. They help companies to conveniently connect with customers, keep them engaged and build the best possible online experience for them. It is another great channel for offering personalized offers to customers that make them feel closer to the brand.
To build the most enjoyable customer experience possible, it's a great idea to differentiate designed campaigns among customers who meet specific criteria. For example, differentiation based on the customer's level of activity in the app.
This use case refers to a scenario where customers are divided into different segmentations - completely new to the app and those returning. The segmentation the customer belongs to will determine the type of recommendation they receive at the end.
## Prerequisites
---
- [Implement Synerise SDK in your mobile application](/developers/mobile-sdk).
- Implement `product.view` event in your [mobile application](/developers/mobile-sdk/event-tracking#product-viewed)
- [Create two different recommendation campaigns](/docs/ai-hub/recommendations-v2) that will be directed to new and returning customers. Ex. top products for new customers, personalized products for returning customers. You can add additional [filters](/docs/ai-hub/recommendations-v2/recommendation-filters) if needed.
- [Create two documents](/docs/assets/documents/introduction-to-documents) with the recommendation campaigns created before.
Exemplary content of a document
Where "campaignId" is the ID of your recommendation.
## Process
---
1. [Prepare segmentations](/use-cases/recommendations-for-new-and-returning-users#prepare-segmentations) for new and returning users.
2. [Create screen views](/use-cases/recommendations-for-new-and-returning-users#create-screen-views) with dedicated documents with AI campaigns created before.
## Prepare segmentations
---
In this part of the process, create segmentations for new and returning users. This use case considers a returning user as a user who viewed at least two products in the mobile application. Users who do not match this condition are considered new. This logic is exemplary and may vary depending on your business needs.
### Segmentation for returning users
1. Go to **Decision Hub > Segmentations > New segmentation**.
2. Give the segmentation a meaningful name, for example `Returning users`.
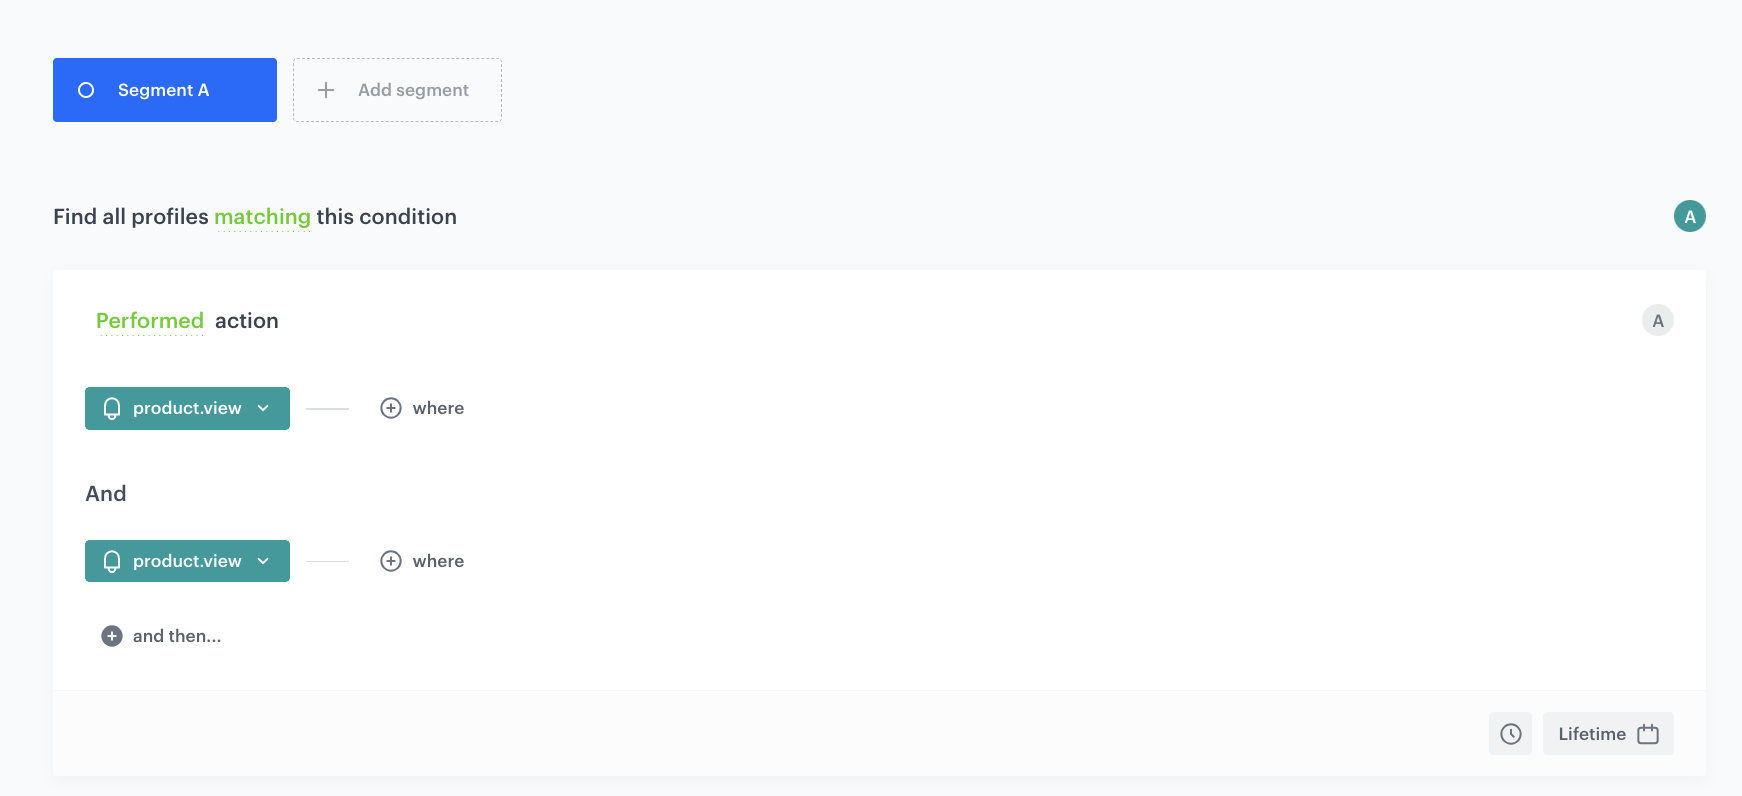
3. Click **Choose filter** and select the **product.view** event.
4. Click **Add funnel step** and select the **product.view** event once again.
5. As the date range, select **Lifetime**.
6. Click **Apply**.
An example of segmentation of returning users
### Segmentation for new users
1. Go to **Decision Hub > Segmentations > New segmentation**.
2. Give the segmentation a meaningful name, for example `New users`.
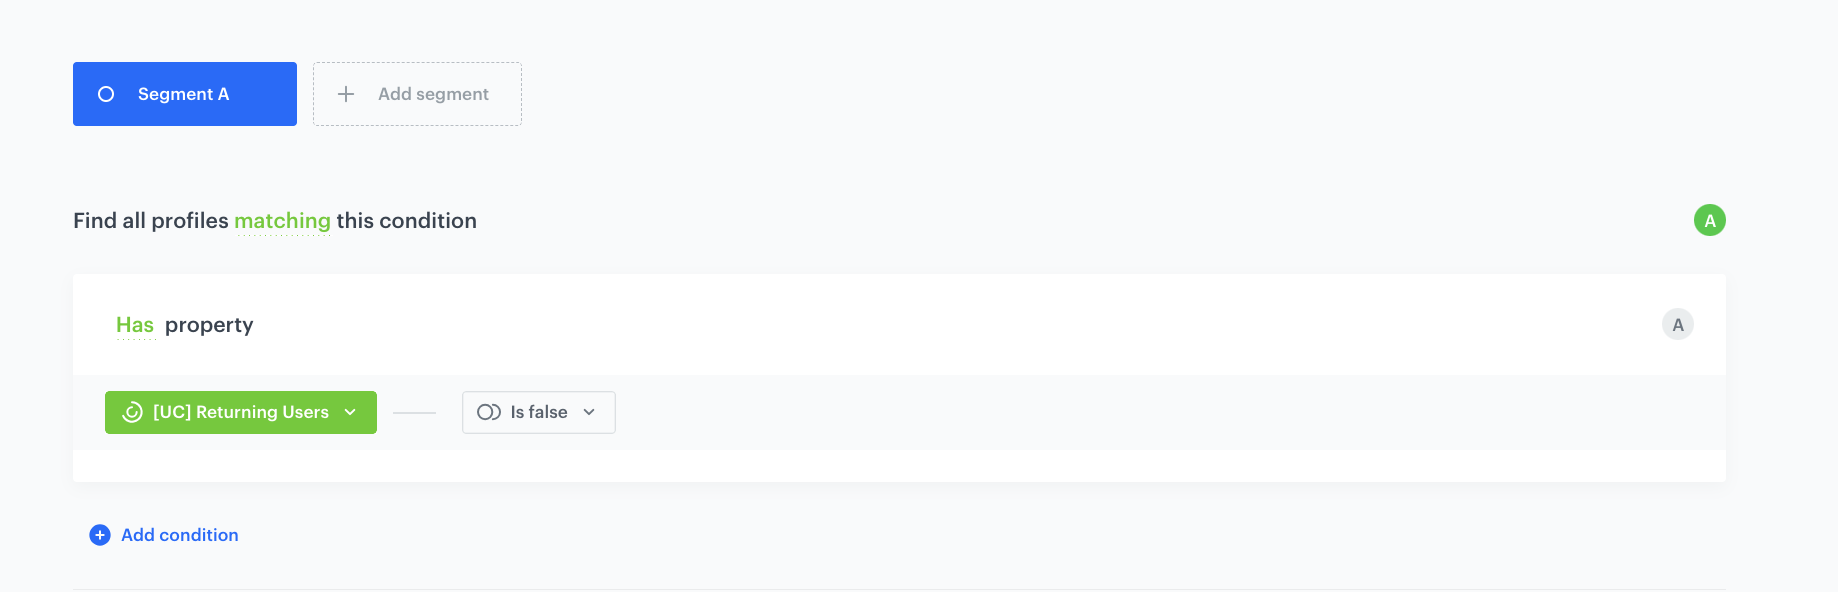
3. Click **Choose filter** and select the segment you created in the [previous step](/use-cases/recommendations-for-new-and-returning-users#segmentation-for-returning-users).
4. From the **Choose operator** dropdown list, select **Is false (Boolean)**.
5. Click **Apply**.
An example of segmentation of new users
## Create screen views
---
In this part of the process, create screen views for the segmentations defined in the previous steps. Thanks to this, while fetching the screen views, the mobile application automatically receives content dedicated for a certain user.
### Create a screen view for returning users
Create a screen view for returning users using the documents with recommendations targeted to those users.
1. Go to **Experience Hub > Screen views > Create screen view**.
2. Enter the name of the screen view.
3. Optionally, to let other users know about the purpose of this screen view, write a short description.
4. To define the recipients of your screen view, in the **Audience** section click the **Define** button and choose the [returning users segmentation](/use-cases/recommendations-for-new-and-returning-users#segmentation-for-returning-users).
5. Confirm your choice by clicking the **Apply** button.
6. To create the content of your screen view, in the **Content** section click the **Define** button.
7. Prepare and paste the JSON code with the collection of dashboards you want to include in the screen view. The code needs to define the way of presenting the dashboards (for example, as a vertical list).
8. Below the code text field, select the document with the recommendation for returning users by clicking the **Add document** button.
9. To define the schedule of the screen view, in the **Schedule** section click the **Define** button.
10. From the Timezone dropdown list, select a timezone for the schedule.
11. Select the start date by performing one of the following actions:
- To launch the screen view immediately, select the **Immediately** option.
- To select the start date:
1. Select the **Scheduled** option.
2. Click the **Select time** field.
3. Pick a date and select time.
4. Confirm by clicking **Apply**.
Screen views schedule overrides the schedule of individual documents.
12. **Optional**: In the **Type of period** section, define the times of day, days of the week, or days of the month when the screen view is active.
13. To complete the process, click the **Publish** button.
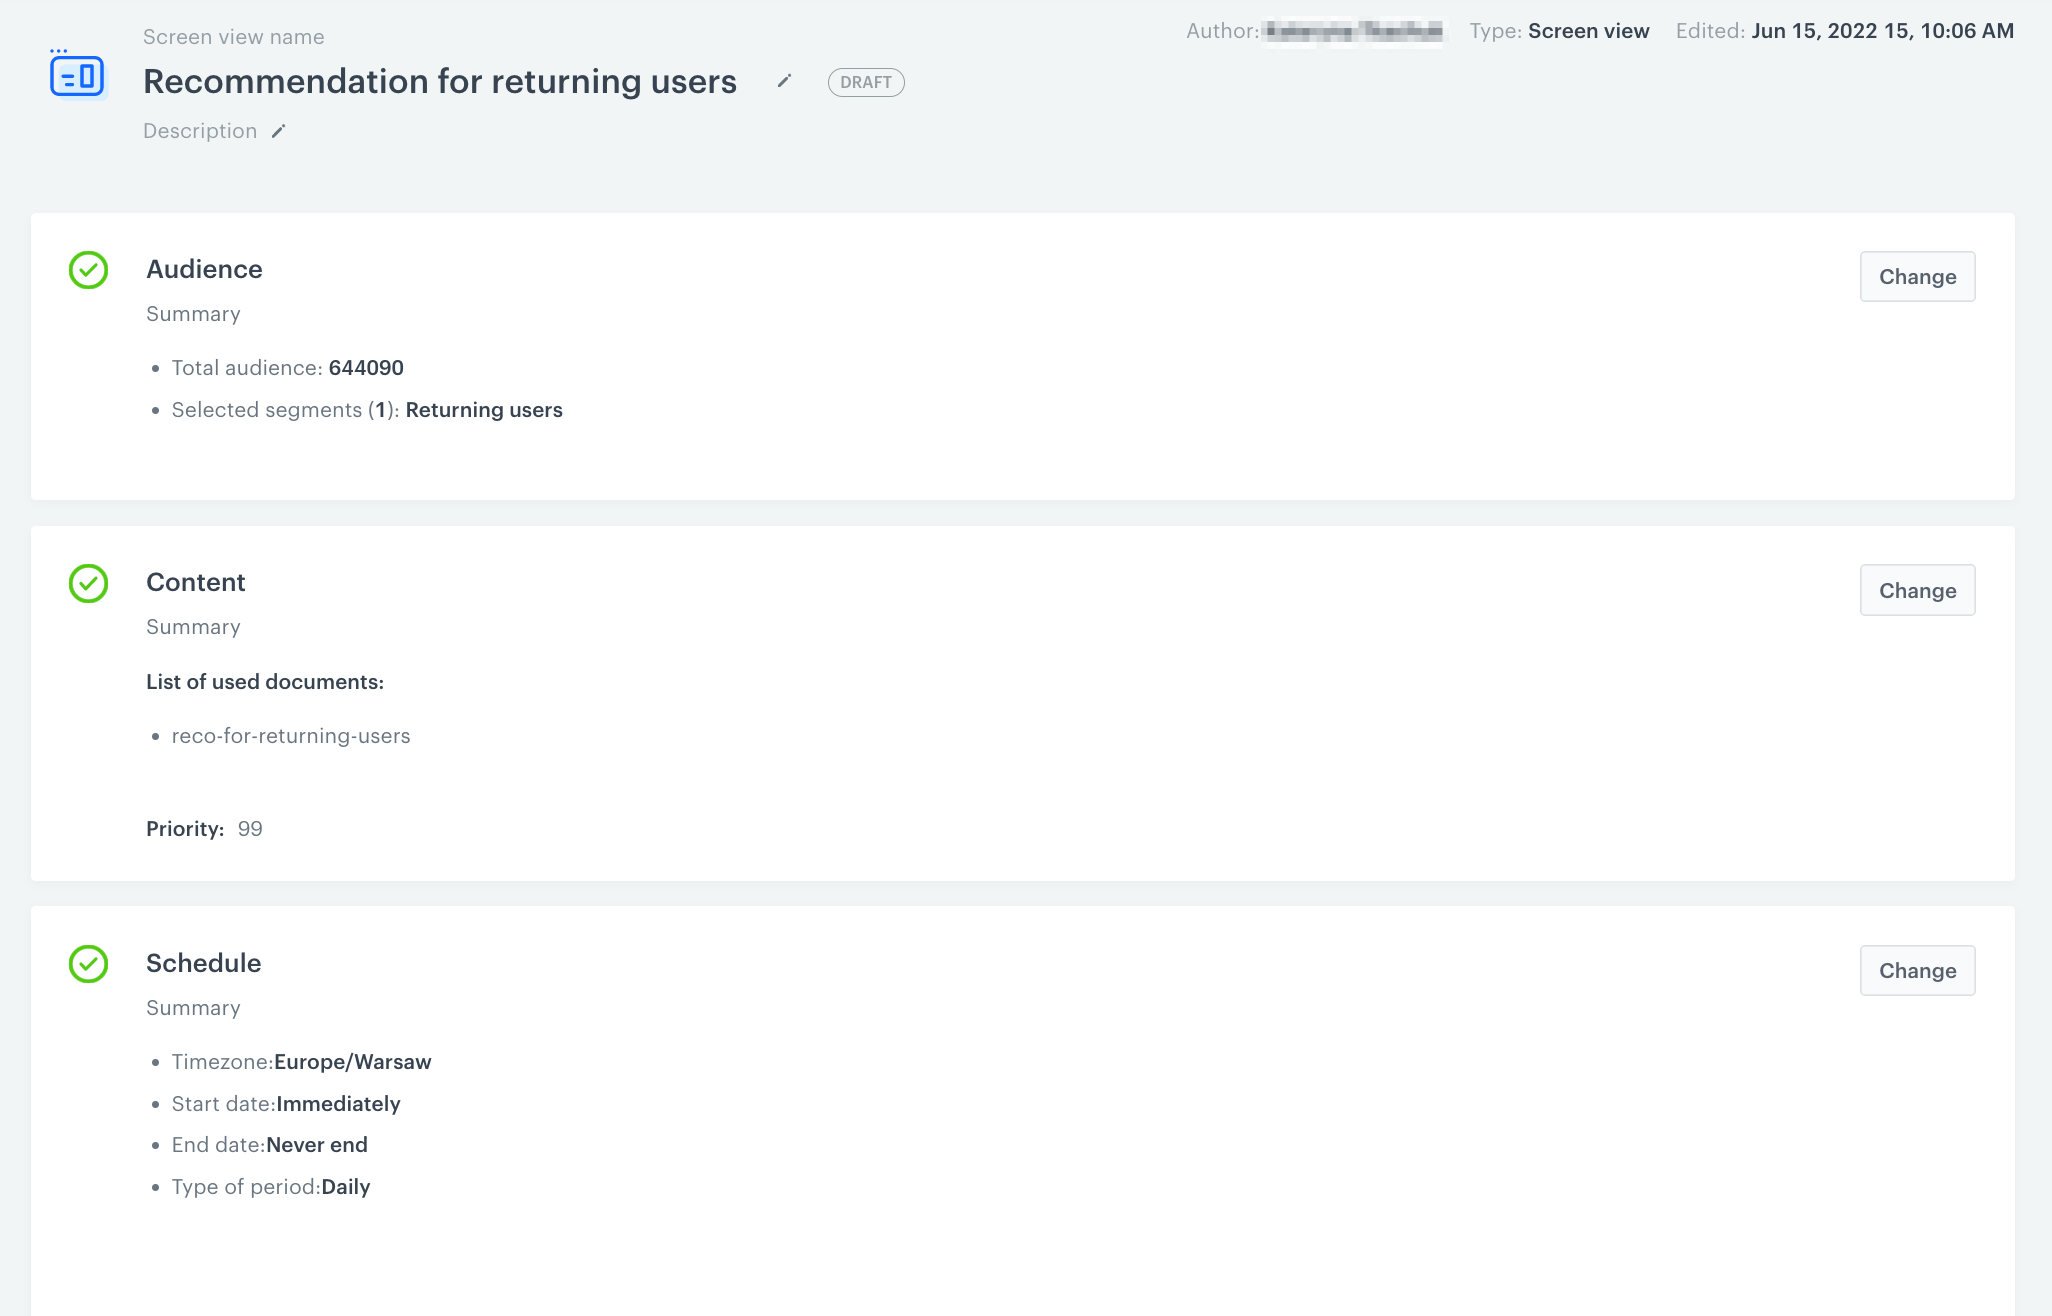
The configuration of the screen view for returning users
### Create a screen view for new users
Create a screen view for new users using the recommendation documents targeted to those users.
1. Go to **Experience Hub > Screen views > Create screen view**.
2. Enter the name of the screen view.
3. Follow the same steps mentioned in the [previous step](/use-cases/recommendations-for-new-and-returning-users#create-a-screen-view-for-returning-users) using the [segmentation of new users](/use-cases/recommendations-for-new-and-returning-users#segmentation-for-new-users) and relevant document dedicated to those users.
## What's next
---
For a campaign to be visible in a mobile app, it must fetch screen views and display defined campaigns using the appropriate SDK Method for [iOS](/developers/mobile-sdk/method-reference/ios/content#generate-screen-view) and [Android](/developers/mobile-sdk/method-reference/android/content#generate-screen-view), [React Native](/developers/mobile-sdk/method-reference/react-native/content#generate-screen-view), [Flutter](/developers/mobile-sdk/method-reference/flutter/content#generate-screen-view).
## Check the use case set up on the Synerise Demo workspace
---
You can also check the configuration for [returning users](https://app.synerise.com/analytics-v2/segmentations/2ebfc8cb-a030-41f7-af7b-b19cc165b532) and [new users](https://app.synerise.com/analytics-v2/segmentations/605f7434-8544-4a1d-a0c0-6ba4c49aff3e) directly in the Synerise Demo workspace.
If you’re our partner or client, you already have automatic access to the **Synerise Demo workspace (1590)**, where you can explore all the configured elements of this use case and copy them to your workspace.
If you’re not a partner or client yet, we encourage you to fill out the contact [form](https://demo.synerise.com/request) to schedule a meeting with our representatives. They’ll be happy to show you how our demo works and discuss how you can apply this use case in your business.
## Read more
---
- [Documents](/docs/assets/documents/introduction-to-documents)
- [Recommendations](/docs/ai-hub/recommendations-v2)
- [Screen views](/docs/campaign/screen-views/introduction-to-screen-views)
- [Segmentations](/docs/analytics/segmentations/introduction-to-segmentations)