Businesses offering made-to-order personalized products have very specific customer journeys. Instead of selling ready-made items from stock, they allow shoppers to configure products step by step, choosing dimensions, colors, finishes or other attributes tailored to their individual needs. This model is especially common in industries such as home & decor, automotive, jewelery or custom apparel.
While product configurators unlock powerful personalization, they also introduce a challenge. Configuring a custom product often requires time, consideration or even consultation, especially since personalized items are usually non-returnable and come with higher price points. As a result, many customers pause the process or abandon the configuration before completing the purchase.
In this use case, you’ll create a complete scenario for saving and recovering abandoned configurations. By allowing users to send a configuration link to their email via a simple form, you can trigger a follow-up communication flow that reminds them about their unfinished product. If the purchase is not completed, the scenario can end with an incentive such as a voucher to encourage conversion.
Additionally, by collecting configuration attributes, you can use Synerise’s AI to recommend similar products from the same category with comparable features, helping customers make a final decision and increasing the chances of recovery.
## Prerequisites
---
- [Implement SDK to a website](/developers/web/installation-and-configuration).
- [Configure an email account](/docs/settings/configuration/email-account).
- [Configure AI engine](/docs/settings/configuration/ai-engine-configuration/engine-configuration-for-recommendations).
- [Configure an item catalog for recommendations](/docs/settings/configuration/ai-engine-configuration/engine-configuration-for-recommendations). Enable similar items recommendations.
- Implement a custom event for saving configuration details, which will be available in the customer profile.
In this example, the event is called `configuration.saved`.
Implement custom events in your [mobile application](/developers/mobile-sdk/event-tracking#product-added-to-favorites) or [website](/developers/web/event-tracking#declarative-tracking-custom-events).
- Optionally, you can create a [voucher pool](/docs/assets/code-pools).
## Process
---
In this use case, you will go through the following steps:
1. [Create a dynamic content template](/use-cases/saving-configuration#create-a-dynamic-content-template) which displays the saving configuration form on the website.
2. [Create an aggregate](/use-cases/saving-configuration#create-an-aggregate) returning configuration details.
3. [Create an AI recommendation](/use-cases/saving-configuration#create-an-ai-recommendation) returning similar items.
4. [Create an email template](/use-cases/saving-configuration#create-an-email-template) with the link to saved configuration details and similar product recommendations.
5. [Create a workflow](/use-cases/saving-configuration#create-a-workflow) which sends your customers an email with saved configuration details after submitting the form.
## Create a dynamic content template
---
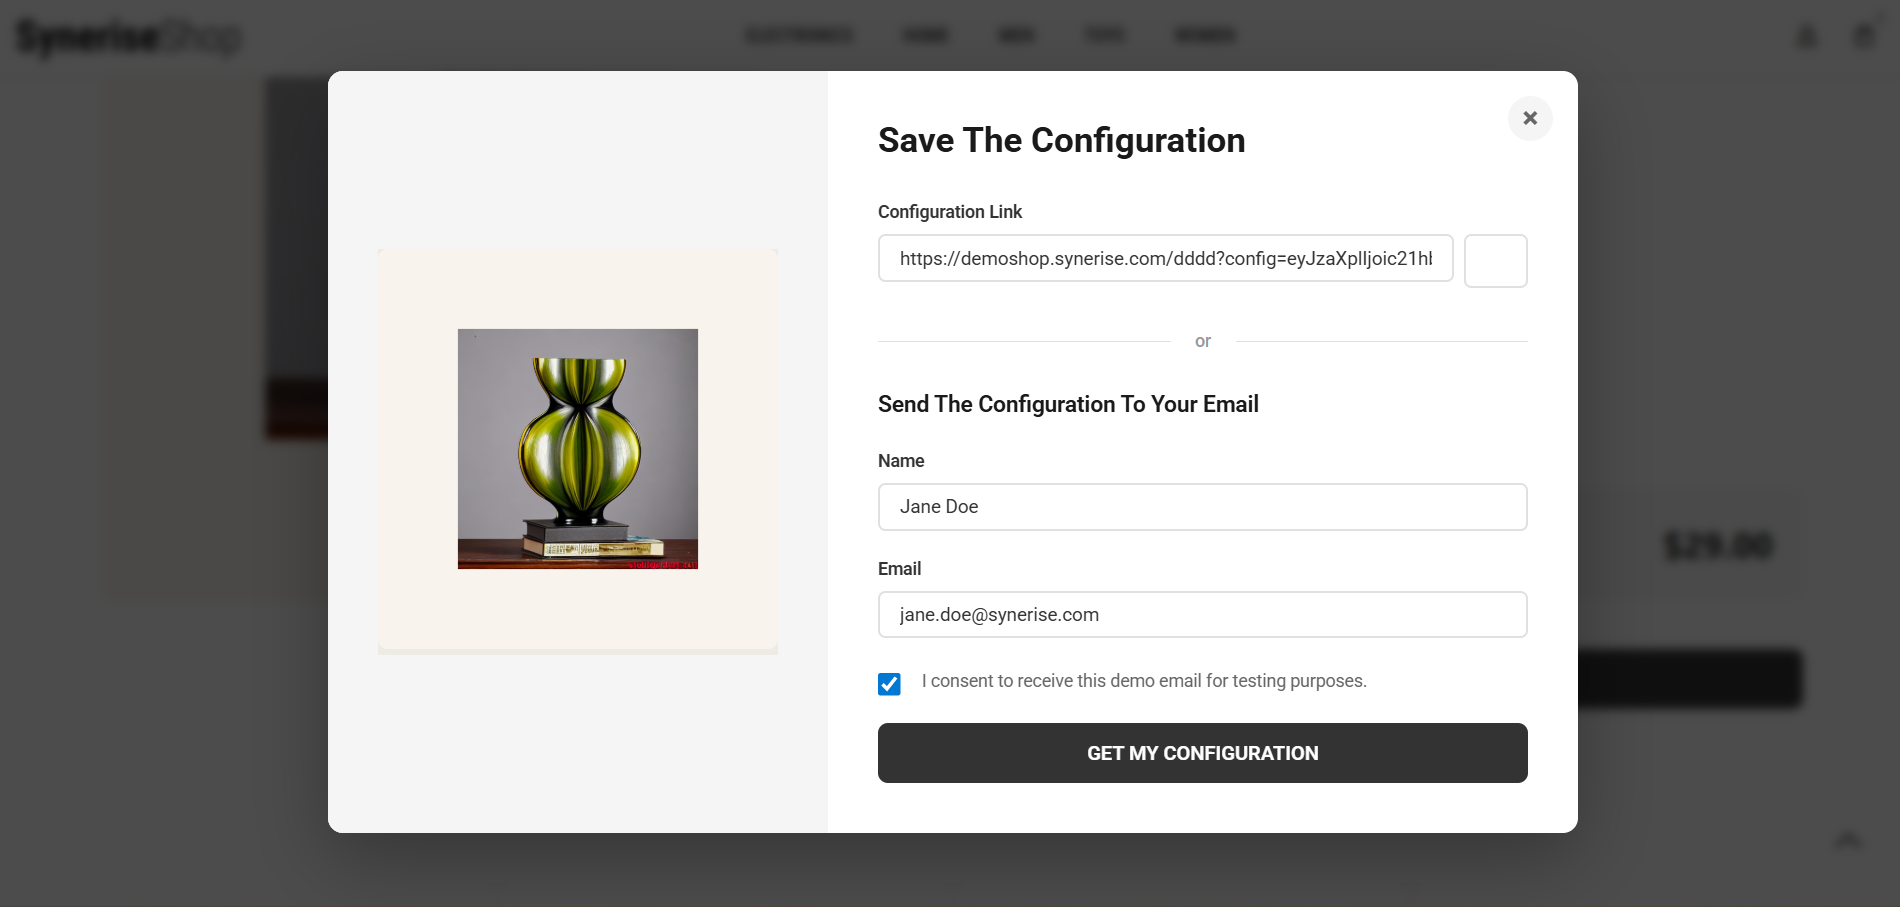
Create a dynamic content template that displays a button on your website leading to a form. The form should include a direct link to the saved configuration and additional fields for the customer’s name and email address. After providing consent, the user receives a link to their configuration via email. This dynamic content will generate the `configuration.saved` event on the customer's profile which stores the selected configuration attributes, such as color, size, and other chosen options, as parameters. You can use a [ready-made template](https://app.synerise.com/campaigns/dynamic-content/content-manager/template/247451) available on the Synerise Demo workspace.
1. Go to **Experience Hub > Dynamic content > Create new**.
2. Enter the name of the dynamic content.
3. Choose **Insert Object** type.
4. As the audience, select **everyone**.
5. In the **Content** section, select **Simple message**, and specify the CSS selector where you want to insert your campaign.
6. In the **Content** tab, click **Create Message**.
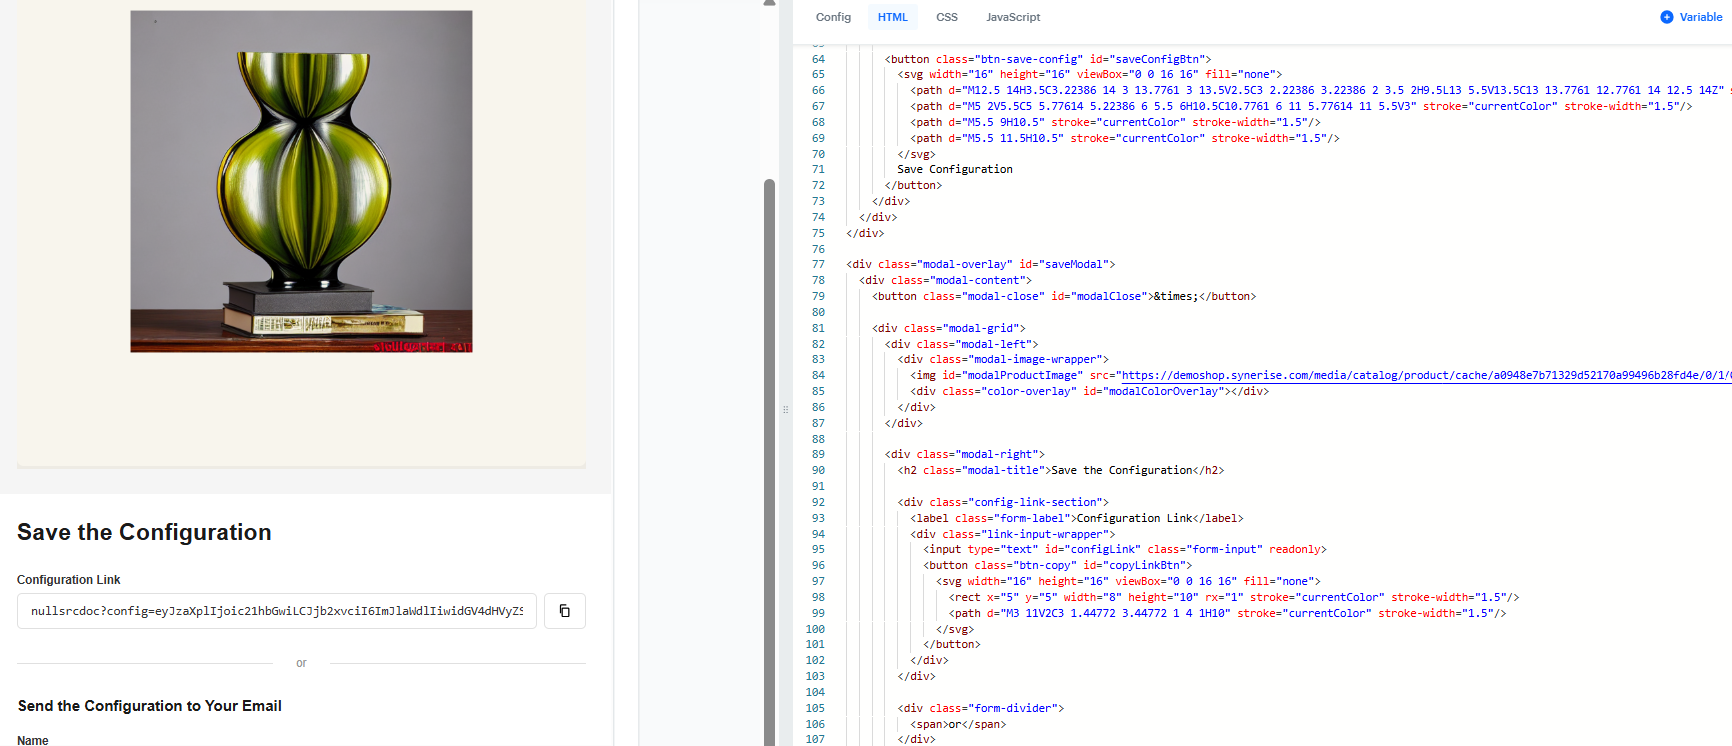
7. In the code editor, create a dynamic content based on your preferences and your own CSS styles. The JavaScript should track the configuration options selected at each step and save them as parameters within the `configuration.saved` event.
8. Save the template.
9. In the **Schedule** section, select the date when the dynamic content is activated.
10. In **Display settings**, configure the settings based on your business needs.
11. Confirm by clicking **Apply**.
12. Optionally, you can define the UTM parameters in the **UTM & URL parameters** section. Otherwise, click **Skip step**.
13. Activate the dynamic content.
Configuration of the dynamic content template
## Create an aggregate
---
Create an aggregate which returns the product data from the saved configuration and which will be later used in the email template.
1. Go to **Behavioral Data Hub > Live Aggregates > Create aggregate**.
2. As the aggregate type, select **Profile**.
3. Enter the name of the aggregate.
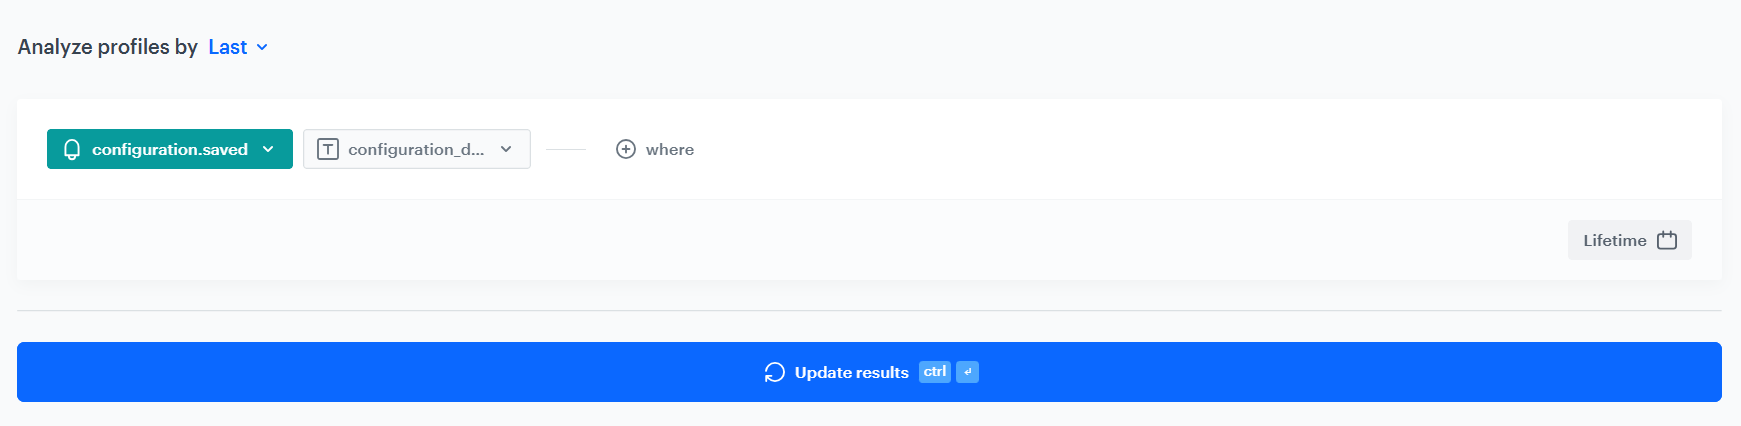
4. Click **Analyze profiles by** and select **Last**.
5. From the **Choose event** dropdown list, select the `configuration.saved` event.
6. As the event parameter, select `configuration_data`.
7. Define the period which the aggregate will analyze. Confirm your choice with the **Apply** button.
8. Click **Save**.
Configuration of the aggregate returing the product data from the saved configuration
## Create an AI recommendation
---
In this part of the process, you will configure a similar items recommendation which will be later used in the email template.
1. Go to **AI Hub > (AI Recommendations) Models > Add recommendation**.
2. Enter the name of the recommendation (it is only visible on the list of recommendations).
3. In the **Type & Items feed** section, click **Define**.
4. From the **Items feed** dropdown list, select an item feed.
5. In the **Type** section, choose the **Similar items** recommendation type.
6. Confirm the settings by clicking **Apply**.
7. In the **Items** section, click **Define**.
1. Click **Add slot**.
2. Define the minimum and maximum number of items that will be recommended to the customer in each slot.
3. Optionally, define [Static filters](/docs/ai-hub/recommendations-v2/creating-recommendation-campaign#static-filters) and [Elastic filters](/docs/ai-hub/recommendations-v2/creating-recommendation-campaign#elastic-filters).
4. Confirm by clicking **Apply**.
8. Optionally, you can define the **Boosting** factors and settings in the **Additional settings** section.
9. In the right upper corner, click **Save**.
## Create an email template
---
You can use a [ready-made template with an HTML block](https://app.synerise.com/campaigns/email/content-manager/template/249686) (available on the Synerise Demo workspace). Copy it and edit according to your needs. In the configuration, we will use the [aggregate](#create-an-aggregate) and [AI recommendation](#create-an-ai-recommendation) created in the previous steps.
1. Go to **Experience Hub > Email**.
2. On the left pane, click **Templates** and from the list of template folders, select **USE CASE**.
4. Select **[UC] Saving product configuration** template.
**Result**: You are redirected to the code editor.
4. Edit the template according to your needs. Use the [aggregate](#create-an-aggregate) and [recommendation](#create-an-ai-recommendation) created in the previous steps.
To add all product configuration data using a single aggregate, use [Jinjava's dedicated “split” filter](/developers/inserts/filter#split) to separate such information
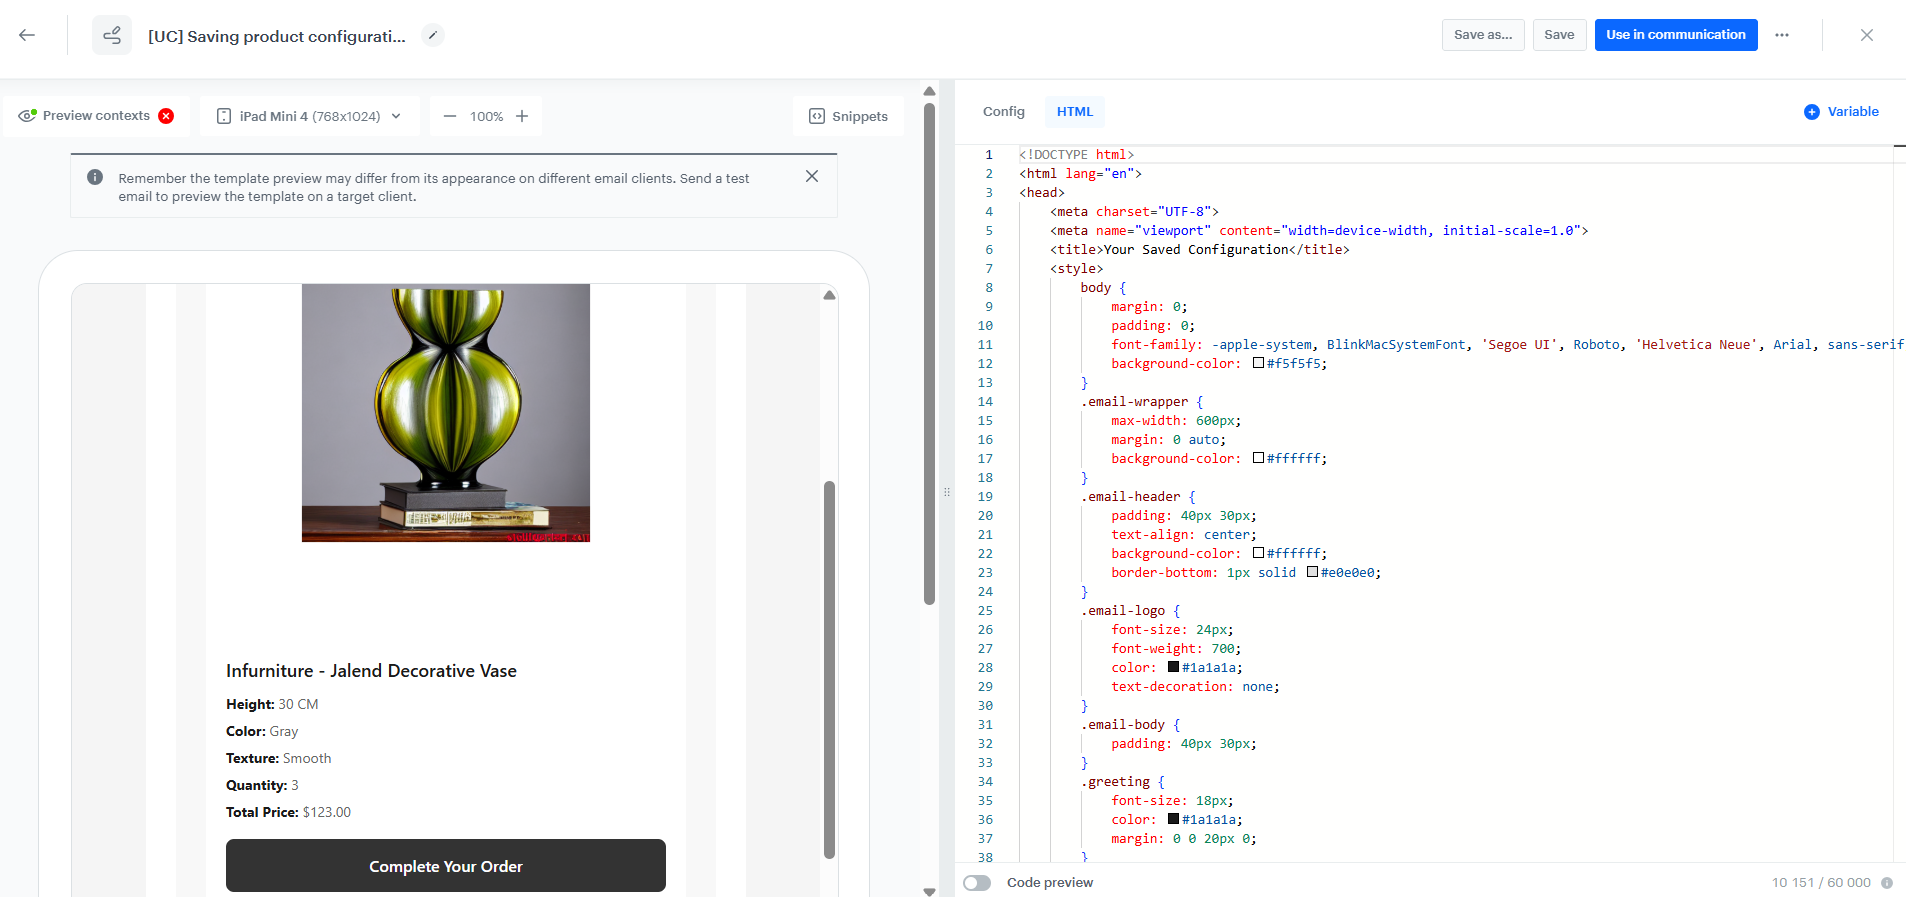
5. After you make changes to the template, you can check the preview.
1. Click the **Preview contexts** button on the upper left side.
2. Enter the ID of a customer.
3. Click **Apply**.
Configuration of the email template
6. If the template is ready, click the arrow next to **Use in communication** in the upper right corner, and from the dropdown select **Save as**.
7. On the pop-up:
1. In the **Template name field**, enter the name of the template.
2. From the **Template folder** dropdown list, select the folder where the template will be saved.
3. Confirm by clicking **Save**.
8. Repeat all the steps to create an additional message which will serve as a reminder of an abandoned configuration. Optionally, you can create a [voucher pool](/docs/assets/code-pools) and assign a discount as an incentive to complete the order.
## Create a workflow
---
In this step, create a workflow which sends customers an email with their saved configuration details.
1. Go to **Automation Hub > Workflows > New workflow**.
2. Enter the name of the workflow.
### Define the Profile Event trigger node
At this stage, you will configure conditions that launch the workflow. As a trigger, we will use the `configuration.saved` event, which is generated after submitting the form.
1. As the first node of the workflow, add **Profile Event**. In the configuration of the node:
1. From the **Choose event** dropdown menu, choose `configuration.saved` event.
2. Confirm by clicking **Apply**.
### Define the first Delay node
---
This node creates a 10 seconds delay before moving to the next condition of the workflow. It helps you minimize the risk that possible server errors or delays will influence your workflow.
1. Add the **Delay** node. In the node settings:
1. In the **Delay** field, type `10`.
2. From the dropdown list, choose **Second**.
2. Click **Apply**.
### Configure the first Send Email node
At this stage, you will send an email with confirmation for users who fill out the form requesting sending configuration link to their email address.
1. As the next node, add **Send Email**. Configure it according to your business needs.
2. Configure the Sender details section.
3. Configure the Content section.
1. In the **Subject** field, enter your message subject.
2. In the **Template** section, choose the template [email template](#create-an-email-template) prepared in the previous step.
3. You can define **UTM & URL parameters**.
4. Confirm by clicking **Apply**.
### Define the second Delay node
---
This node creates delay before checking whether the transaction has been made prior to sending a reminder. In our case, we assumed it will be 24 hours.
1. Add the **Delay** node. In the node settings:
1. In the **Delay** field, type `24`.
2. From the dropdown list, choose **Hours**.
2. Click **Apply**.
### Define the Profile Filter node
As the next step, add the **Profile Filter** node, which checks if the customer made a transaction in the last 24 hours. If the customer has not made a purchase, we will send them a reminder email, optionally with a discount coupon, and if they have, then the workflow ends.
1. Add the **Profile Filter** node.
2. Select **New Audience**, click **Define conditions**, change **Find all profiles matching this condition** to **Find all profiles not matching this condition** and from the **Add condition** dropdown list, select the `transaction.charge` event.
3. As the date range, select **Last 24 hours**. Confirm your choice with the **Apply** button.
4. To the *matched* path, add the **Send Email** node.
5. To the *not matched* path, add the **End** node.
6. Click **Apply**.
### Configure the second Send Email node
At this stage, you will send an email with reminder for users who filled out the form requesting sending configuration link to their email address and didn't make any purchase within last 24 hours.
1. As the next node, add **Send Email**. Configure it according to your business needs.
2. Configure the Sender details section.
3. Configure the Content section.
1. In the **Subject** field, enter your message subject.
2. In the **Template** section, choose the template [email template](#create-an-email-template) prepared in the previous step.
3. You can define **UTM & URL parameters**.
4. Confirm by clicking **Apply**.
### Add the finishing node
1. Add the **End** node.
2. In the upper right corner, click **Save & Run**.
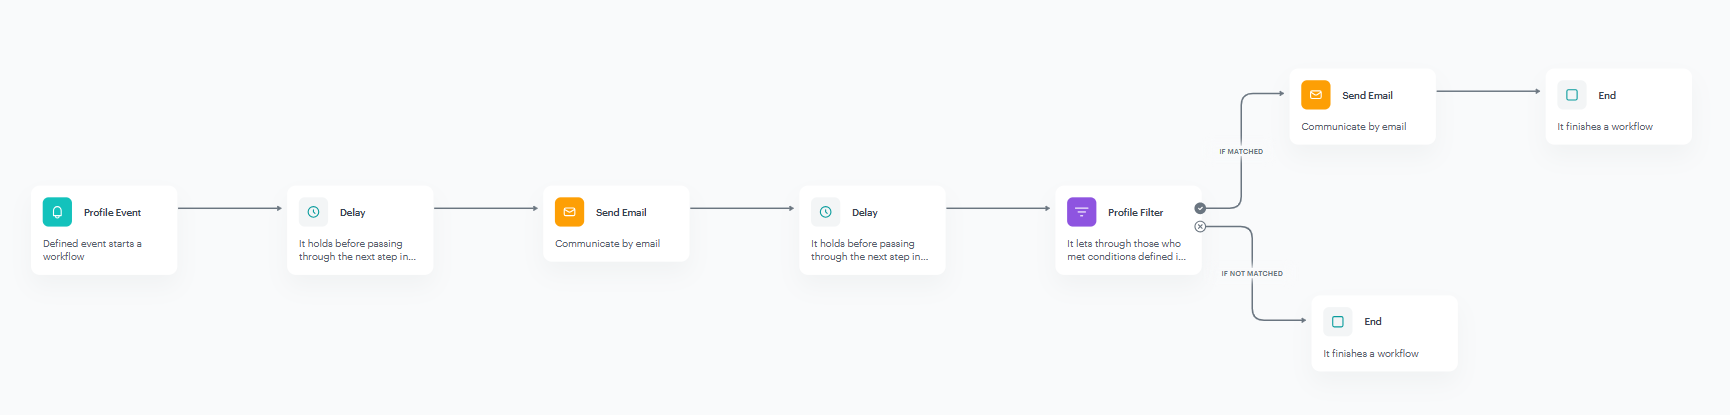
Automation settings
## Check the use case set up on the Synerise Demo workspace
---
You can check all the analytics and templates directly in the Synerise Demo workspace:
- [dynamic content](https://app.synerise.com/campaigns/dynamic-content/content-manager/template/247451) displaying the saving configuration form on the website
- [aggregate](https://app.synerise.com/analytics-v2/aggregates/c0855ca3-458b-32fb-83e9-ab066d4ea131) returning configuration details
- [AI recommendation](https://app.synerise.com/ai-v2/recommendations/FV5PIcmhmN0p) returning similar items
- [email template](https://app.synerise.com/campaigns/email/content-manager/template/249686) containing the link to saved configuration details and, optionally, similar product recommendations
- [workflow](https://app.synerise.com/automations/workflows/automation-diagram/85b7824c-616d-4bb9-8097-6ad8b35a2b34) sending an email with saved configuration details after submitting the form
If you’re our partner or client, you already have automatic access to the **Synerise Demo workspace (1590)**, where you can explore all the configured elements of this use case and copy them to your workspace.
If you’re not a partner or client yet, we encourage you to fill out the contact [form](https://demo.synerise.com/request) to schedule a meeting with our representatives. They’ll be happy to show you how our demo works and discuss how you can apply this use case in your business.
## Read more
---
- [Aggregates](/docs/analytics/aggregates)
- [Dynamic content](/docs/campaign/dynamiccontent)
- [Dynamic content template builder](/docs/campaign/dynamiccontent/dynamic-content-template-builder)
- [Email templates](/docs/campaign/e-mail/creating-email-templates)
- [Recommendations](/docs/ai-hub/recommendations-v2)
- [Voucher pools](/docs/assets/code-pools)