Automation capabilities in the area of data transformation can be used to update and change large amounts of data in a fast, advanced way, eliminating the process of manually adjusting the whole file. All transformations are performed on a sample file in desired format.
In this use case, you will find out how to transform and import customer data from a .JSON file with data transformation and workflows.
In this use case, you will make the following modifications to the sample file:
Edit values:
replace the value of the city attribute from blank to unknown; if the city attribute is defined, keep the existing city,
replace the en, es, fr values of the language attribute with English, Spanish, French, respectively,
replace the value of payment_cash and payment_online attributes from 1/0 to cash/Null and online/Null.
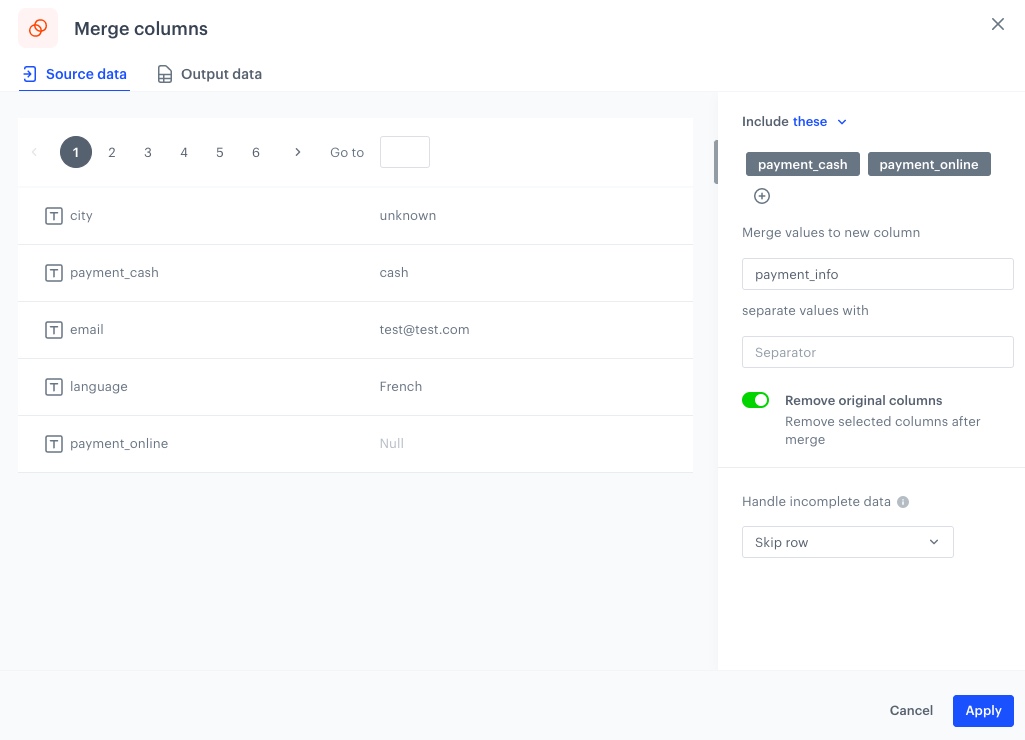
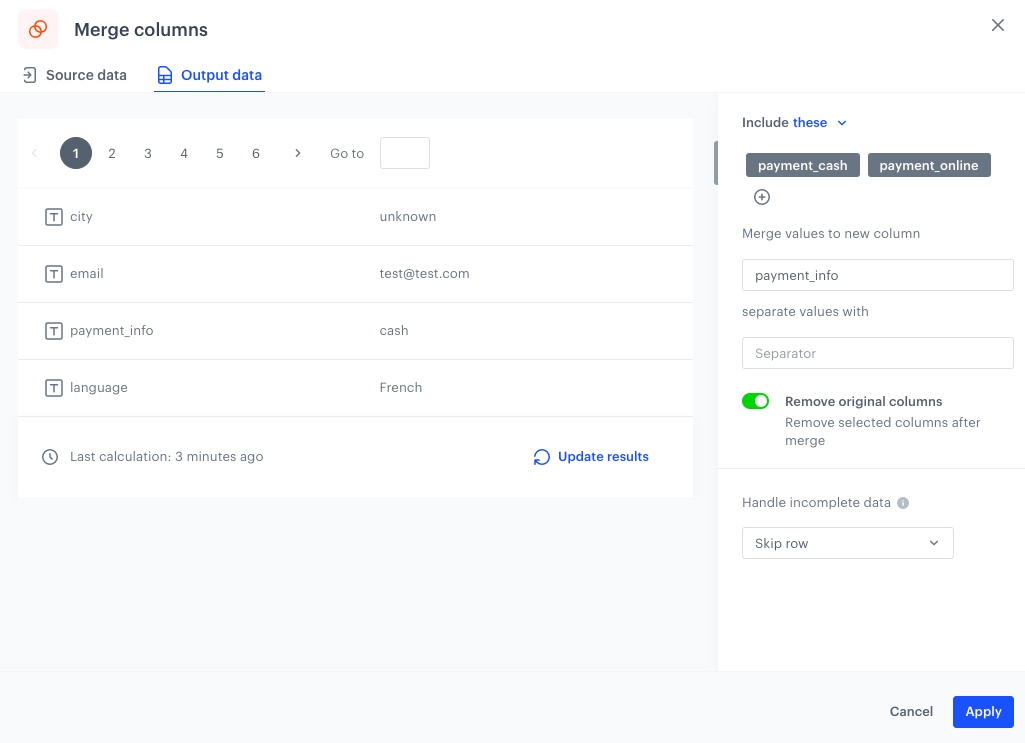
Merge payment_cash and payment_online attributes into the payment_info attribute.
Input data in use case
In this use case, we use two files:
the complete .JSON file with your customer database. Make sure you include one of the required parameters: clientID, uuid, email, customId. The only requirement for JSON files is that they must be UTF-8 encoded.
Prepare a sample JSON file with data you want to import. Below you will find an example how such a a file can look. Example JSON file might look like this
If your data is complete, you can skip transforming data. But if you need to modify the file with data before an import to Synerise, you can modify the data in Automation Hub > Data Transformation. To do so, create a sample of your data and include all attributes you want to modify. If you miss the attributes in the sample file, but import the actual data with them, the data will be imported as delivered in the actual file.
In this part of the process, you define the rules of modifying data before sending it to Synerise, so the data is consistent. Each of the following sub-steps describes the individual changes performed on the file.
Go to Automation Hub > Data Transformation > Create transformation.
Enter the name of the workflow.
Before you proceed with selecting sample data and defining transformation rules, optionally, you can select a goal to help you structure the data. If you want to create a transformation diagram without a specific goal and you know the structure of the output data, skip this step.
Goals will suggest you the required fields needed to perform the import into Synerise.
Add input data
This node allows you to add a data sample. In further steps, you define how the data must be modified. Later, when this transformation is used in the workflow, the system uses the rules created with the sample data as a pattern for modifying actual data.
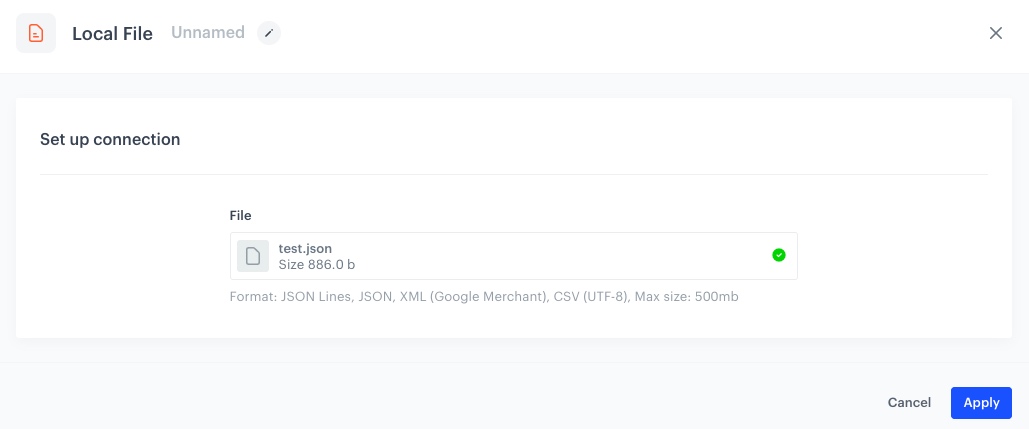
Click the Add input node on the canvas.
On the pop-up, click Upload a new file or drag one here.
Upload the .JSON file.
You can preview the file, then click Apply.
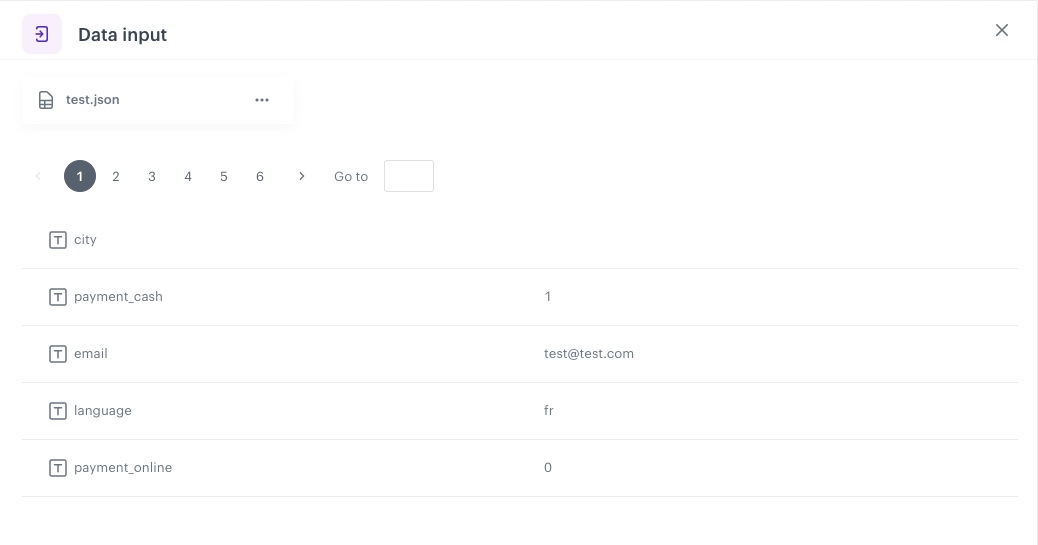
Result: The Data input view is filled with data from the sample.
Data input of the sample file
Handle missing data
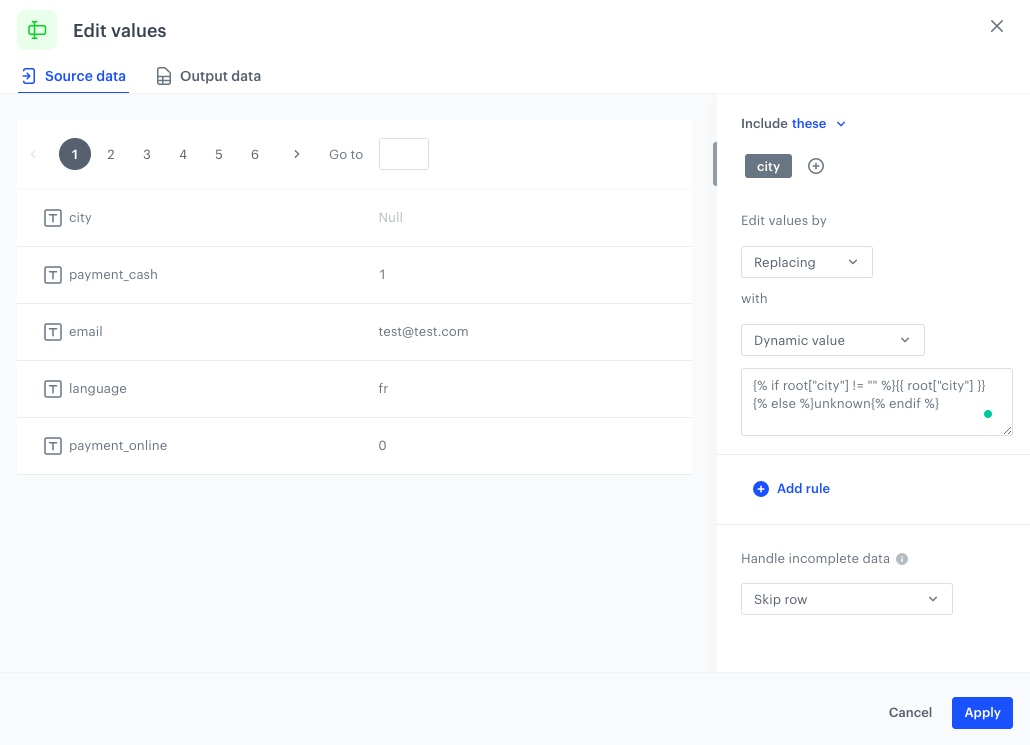
In this part of the process, you will use the Edit values node to edit the city attribute values with Jinja code to keep the existing city and add the unknown value to the blanks.
Add the Edit values node.
In the configuration of the node:
Click Add rule.
Click Add column.
Select the city column.
Under Edit values by, from the dropdown list, select Replacing.
Under with, from the dropdown list, select Dynamic value.
In the Type value field, paste the following Jinja code:
The configuration of the Edit values node
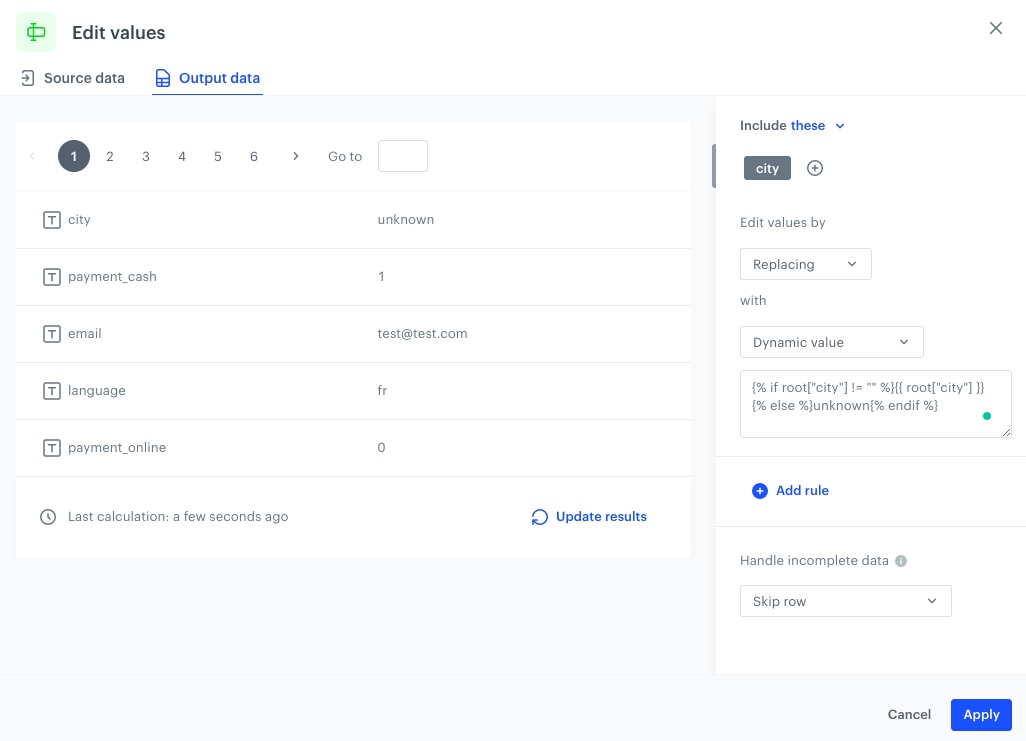
As a result, in the Output data tab, you will get an updated file: Output data after applying Edit values node
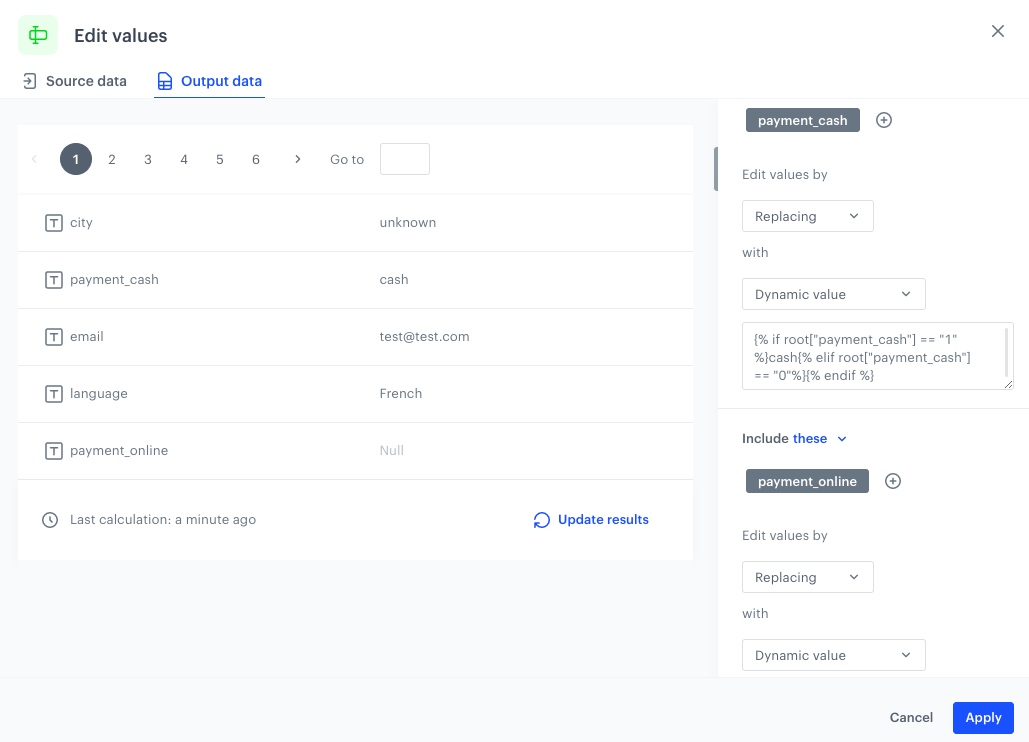
Change data
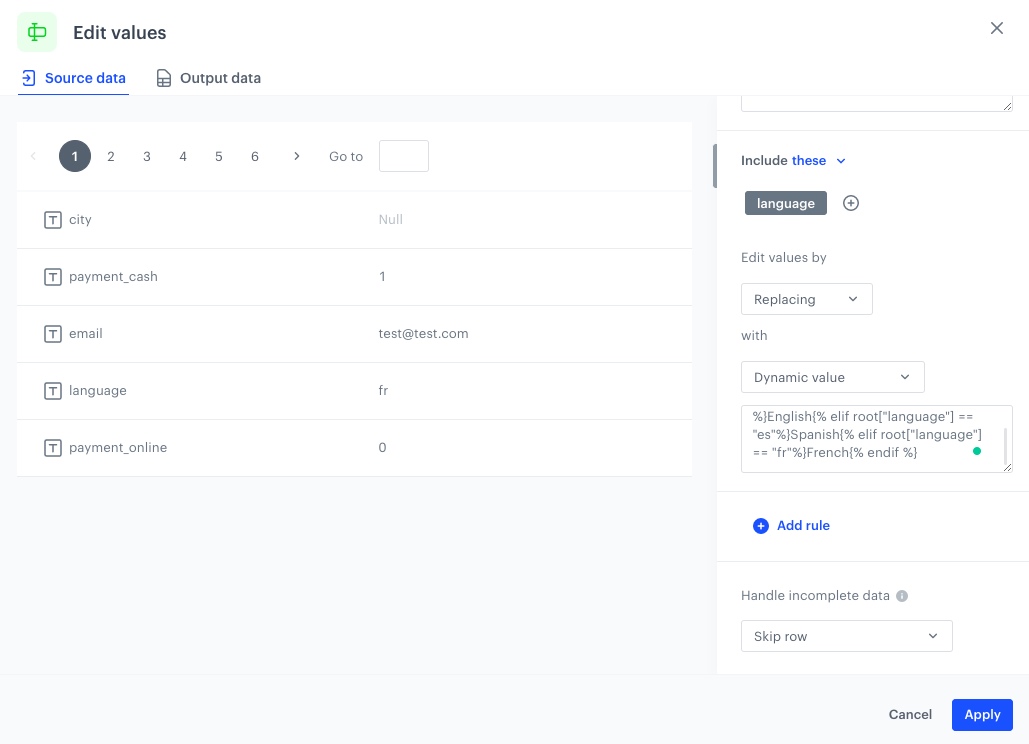
In this part of the process you will use the same Edit values node created in the previous part of the process, to also edit the language, payment_cash and payment_online attributes values with jinjava code to change the data. You will change the language attribute value from "en" to "English" and so on. In case of payment_cash and payment_online attributes you will change “1/0“ values to “cash/Null“ and "online/Null" to later merge them into payment_info attribute.
In the configuration of the node:
Click Add rule.
Click Add column.
Select the language column.
Under Edit values by, from the dropdown list, select Replacing.
Under with, from the dropdown list, select Dynamic value.
In the Type value field, paste the following Jinja code:
If you’re our partner or client, you already have automatic access to the Synerise Demo workspace (1590), where you can explore all the configured elements of this use case and copy them to your workspace.
If you’re not a partner or client yet, we encourage you to fill out the contact form to schedule a meeting with our representatives. They’ll be happy to show you how our demo works and discuss how you can apply this use case in your business.
 Automation Hub > Data Transformation > Create transformation.