Quantiles are often used to describe the distribution of data. Segmenting customers based on quantiles is a powerful way to identify groups of customers with similar characteristics. This can be useful for a variety of business purposes, such as targeted marketing, product development, and customer service.
In this use case you will create three segments of around 500, 700 and 1250 customers with marketing agreement with the help of quantiles in metrics. Customers will be assigned to a segment based on how their Client ID value meets the condition of quantiles. It is a simple way to create fixed size segments according to your business needs, for example to divide base into specific groups when sending emails, or when a 3rd party tool accepts a fixed maximum number of users.
## Prerequisites
---
Implement solutions that collect marketing agreements from various touch points with your customers.
## Process
---
In this use case, you will go through the following steps:
1. [Create a segmentation](#create-a-segmentation) of customers with enabled newlsetter agreement.
2. [Create a metric](#create-a-metric) that returns the Client ID value which meets the condition of set quantile.
3. [Create a segmentation of 500 customers](#create-a-segmentation-of-500-customers).
4. [Create a segmentation of 700 customers](#create-a-segmentation-of-700-customers).
5. [Create a segmentation of 1250 customers](#create-a-segmentation-of-1250-customers).
## Create a segmentation
---
In this part of the process, we create a group of customers with enabled newlsetter agreement. This segmentation will be used in a metric in the next step, and later divided into smaller segments of 500, 700 and 1250 customers.
1. Go to **Decision Hub > Segmentations > New Segmentation**.
2. Enter the name of the segmentation.
3. From the **Add condition** dropdown list, select the **Email agreement** attribute.
4. Click the **Choose** button, and from the list of operators, choose **Equal**, and then select **enabled**.
5. Save the segmentation.
Email marketing agreement segmentation configuration
6. In the **Preview** section, check the number of customers in the segmentation and make a note of it. In our case it is 2564.
## Create a metric
---
In this part of the process create a metric with quantile that returns the value of client's Custom ID which meets the condition of this quantile. The metric reuses as a filter [the segmentation you created in the previous part of the process](#create-a-segmentation).
A quantile is a value that divides a ranked set of data into equal parts. In this case, we get the quantile value by dividing the desired number of customers in the segment by all customers with the email agreement enabled. In our case, we want to have a segment of 500 customers from [the segmentation you created in the previous part of the process](#create-a-segmentation), which consists of 2564 customers:
`500/2564≈0,19`
`0,19` is the value of our quantile.
1. Go to **Decision Hub > Metrics > New metric**.
2. Enter the name of the metric.
3. As a metric kind, select **Simple metric**.
4. As **Type**, select **Profile**.
5. As the **Aggregator**, set **Quantile**. As the value, set the quantile for the first group which will be ~ `0,19`.
6. From the **Choose value** dropdown list, select **CLIENT_ID**.
7. Click **Enable filter**.
1. Click **Choose filter** and from the dropdown list, select [the segmentation you created in the previous part of the process](#create-a-segmentation).
2. Click **Choose operator** and from the dropdown list, select **Is true**.
3. Click **Apply**.
8. Click **# Format** and deselect **Use 1000 separator**.
9. Save the metric.
10. In the **Preview** section, check the **CLIENT_ID** value, it is approximately the client ID of the 500th customer with an email agreement enabled.
Make a note of it. In our case it is `2527582910.8`. For further use, remove numbers after the dot.
## Create a segmentation of 500 customers
---
Using the [the segmentation](#create-a-segmentation) and [the metric](#create-a-metric) you created in the previous part of the process, you will create a segmentation of 500 customers from the initial segmentation. This segment contains all customers with Client ID values below the the client ID's value of the 500th customer.
1. Go to **Decision Hub > Segmentations**.
2. Duplicate [the segmentation you created in the previous part of the process](#create-a-segmentation).
3. Rename the segmentation.
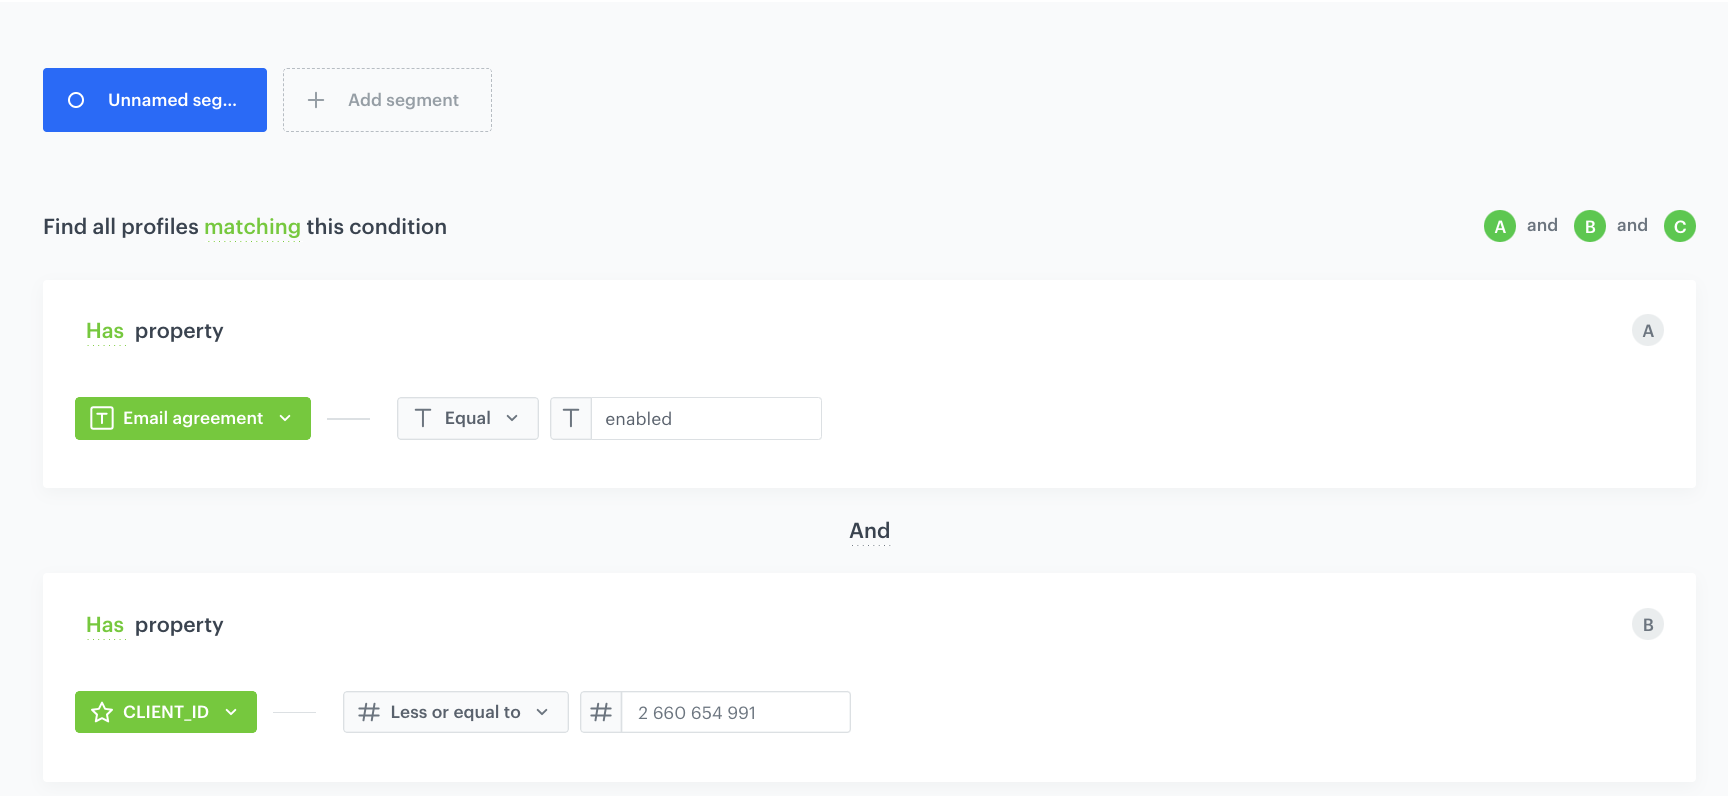
4. Click **Add condition**, and from the dropdown list, select **CLIENT_ID**.
5. Click the **Choose** button, and from the list of operators, choose **Less or equal to**.
6. As the **Value**, type the CLIENT_ID value from [the metric you created in the previous part of the process](#create-a-metric), in our case `2527582910`.
7. Save the segmentation.
500 customers with email marketing agreement segmentation configuration
## Create a segmentation of 700 customers
---
Using the [the segmentation of 500 customers](#create-a-segmentation-of-500-customers) you created in the previous part of the process, and a modified metric, you will create a segmentation of 700 customers [from the initial segmentation](#create-a-segmentation). This segment contains all customers with Client ID numbers below the value of the 1200th Client's ID with the exclusion of the segmentation of 500 customers.
We want to have a segment of 700 customers from [the initial segmentation you created in the previous part of the process](#create-a-segmentation), and we don't want to include the customers from [the segmentation of 500 customers](#create-a-segmentation-of-500-customers). To calculate the quantile:
`(700+500)/2564≈0,46`
`0,46` is the value of our quantile.
### Create a metric
1. Go to **Decision Hub > Metrics**.
2. Duplicate [the metrics you created in the previous part of the process](#create-a-metric).
3. Rename the metric.
4. Change the value of quantile to two groups summed, which in our case is `~0,46`.
5. Save the metric.
6. In the **Preview** section, check the **CLIENT_ID** value, and make a note of it. In our case it is `2660654991.9`. For futher use, remove the commas and numbers after the dot.
### Create a segmentation
1. Go to **Decision Hub > Segmentations**.
2. Duplicate [the segmentation of 500 customers you created in the previous part of the process](#create-a-segmentation-of-500-customers).
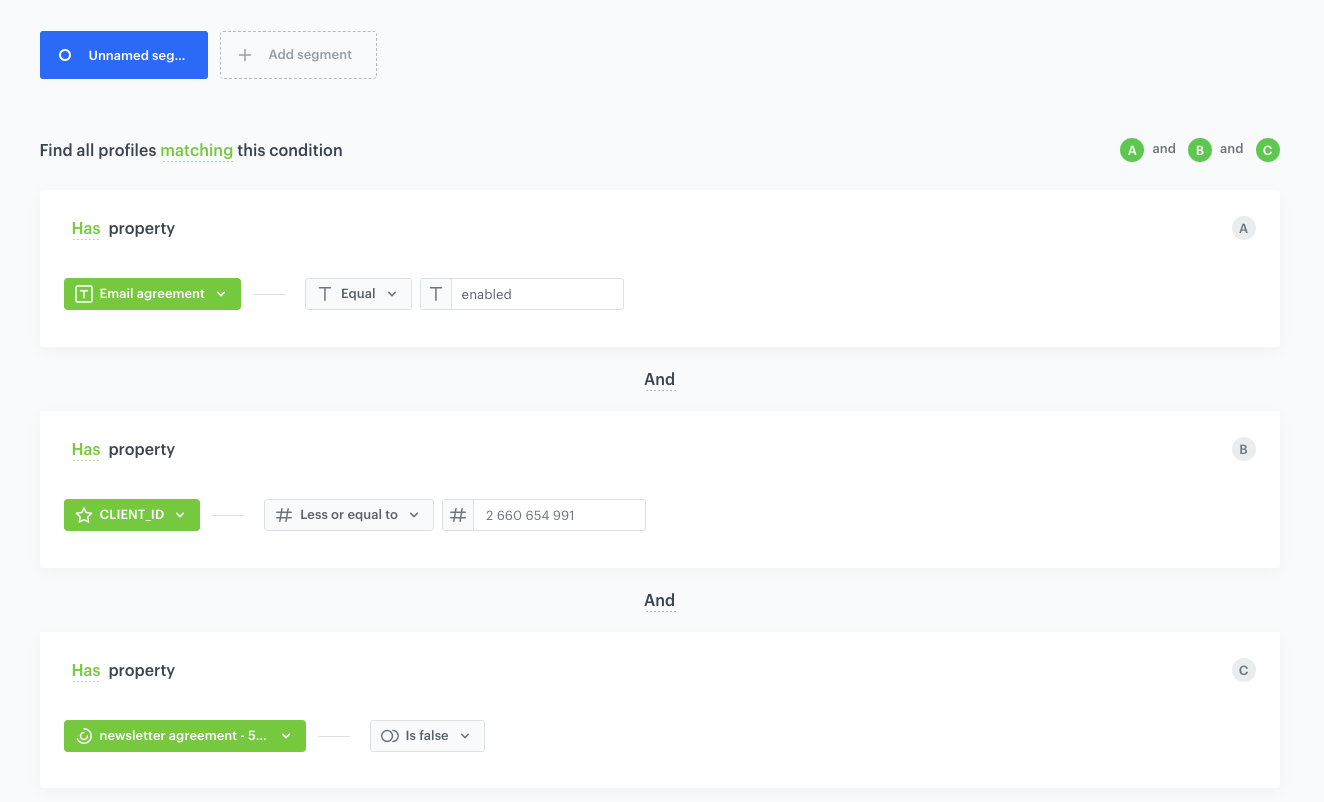
3. Rename the segmentation.
4. Change the CLIENT_ID value to [the metric result you created in in this step](#create-a-segmentation-of-700-customers), in our case `2660654991`.
4. Click **Add condition**, and from the dropdown list, select [the segmentation of 500 customers you created in the previous part of the process](#create-a-segmentation-of-500-customers).
5. Click the **Choose** button, and from the list of operators, choose **Is false**.
7. Save the segmentation.
700 customers with email marketing agreement segmentation configuration
## Create a segmentation of 1250 customers
---
Using the [the segmentation of 700 customers](#create-a-segmentation-of-700-customers) you created in the previous part of the process you will create a segmentation of 1250 customers [from the initial segmentation](#create-a-segmentation). This segment contains all customers with Client ID numbers above the value of the 1200th Client's ID with the exclusion of previously created segmentations.
1. Go to **Decision Hub > Segmentations**.
2. Duplicate [the segmentation of 700 customers you created in the previous part of the process](#create-a-segmentation-of-700-customers).
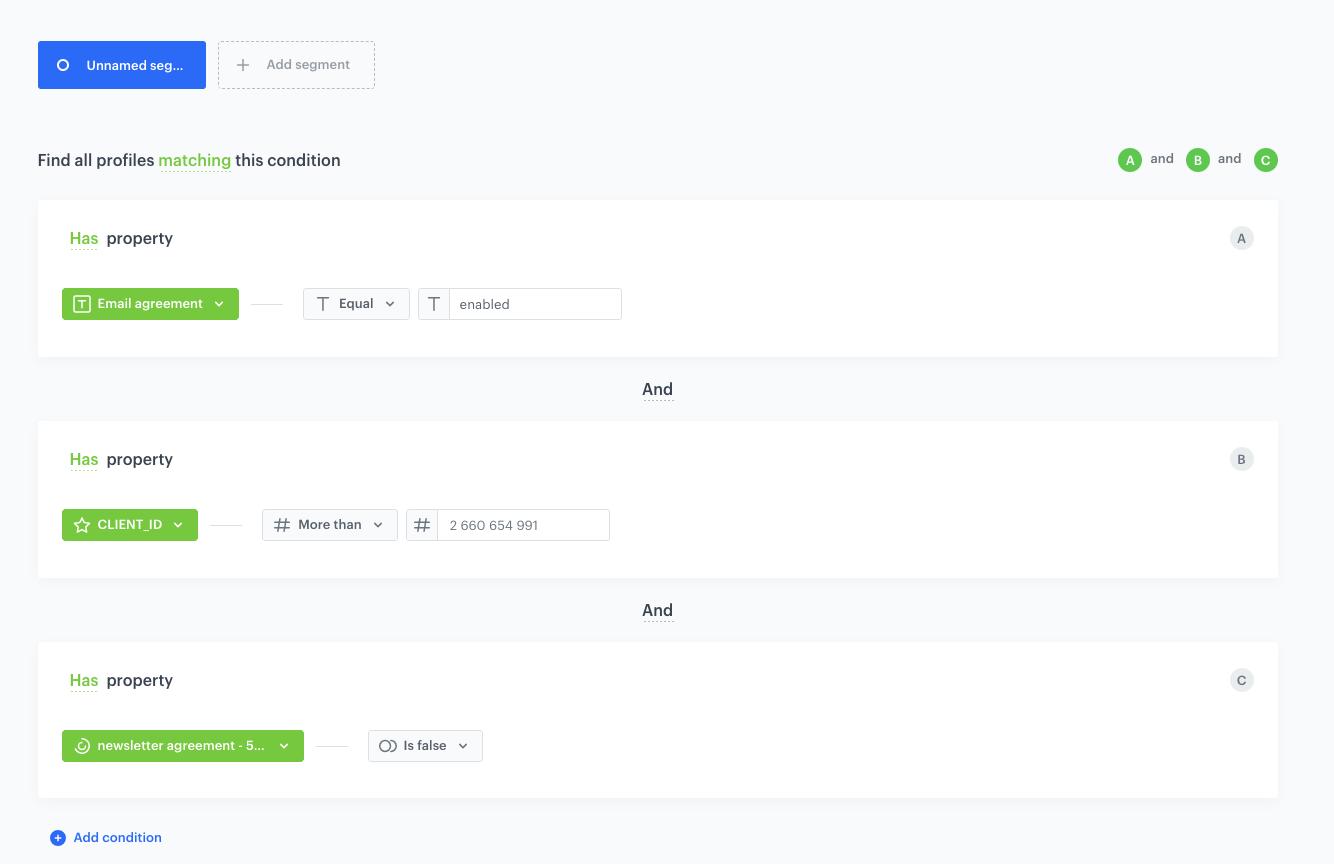
3. Rename the segmentation.
4. Change the **CLIENT_ID** operator to **More than**.
5. Save the segmentation.
1250 customers with email marketing agreement segmentation configuration
## Check the use case set up on the Synerise Demo workspace
---
You can check the configuration of each step directly in the Synerise Demo workspace:
- [Segmentation of customers with marketing aagreement](https://app.synerise.com/analytics-v2/segmentations/2bc65c4b-6995-48d5-bd62-54b58cf1456f)
- [Metric for 500 customers](https://app.synerise.com/analytics/metrics/b4a537e9-ba5a-4a23-ba07-bac195d47d01)
- [Segmentation of 500 customers with marketing agreement](https://app.synerise.com/analytics-v2/segmentations/3ef7ceab-6dc3-42e8-bda8-524106e10083)
- [Metric for 700 customers](https://app.synerise.com/analytics/metrics/f4a403cd-f7a7-4f11-93c4-00bb2821cbcf)
- [Segmentation of 700 customers with marketing agreement](https://app.synerise.com/analytics-v2/segmentations/47422b14-4842-4b27-a109-ea8d1e0c7d40)
- [Segmentation of 1250 customers with marketing agreement](https://app.synerise.com/analytics-v2/segmentations/b28da5bc-10ee-418f-9b14-5e707853ea73)
If you’re our partner or client, you already have automatic access to the **Synerise Demo workspace (1590)**, where you can explore all the configured elements of this use case and copy them to your workspace.
If you’re not a partner or client yet, we encourage you to fill out the contact [form](https://demo.synerise.com/request) to schedule a meeting with our representatives. They’ll be happy to show you how our demo works and discuss how you can apply this use case in your business.
## Read more
---
- [Metrics](/docs/analytics/metrics)
- [Segmentation](/docs/analytics/segmentations)