Synerise allows you to collect data from any touchpoint with a customer. With advanced Synerise Analytics, you can create precise customer segments that you can use not only in Synerise, but also pass them to external tools. Using Synerise's seamless integration with Azure Blob Storage, you can transfer any data collected in Synerise and use it in other Microsoft tools.
In this use case, we will export a database of customers at risk of churn to Azure Blob Storage. To create a segmentation of customers at risk of churn, we will use the RFM analysis results from [this use case](/use-cases/rfm-analysis). This is just an example. You can export any other data types according to your needs, such as transactions, event data, metrics results, aggregates, expressions, reports, and much more.
## Prerequisites
---
- You must have an account on Azure AD.
- Create an RFM analysis thanks to which you will be able to define the segmentation of customers at risk of churn. You'll find a detailed process for creating the RFM analysis in [this use case](/use-cases/rfm-analysis).
The churn risk segmentation shown in this use case is just an example. You can create any other segmentation using your own rules according to your specific assumptions and business needs.
## Process
---
In this use case, you will go through the following steps:
- [Create a segmentation of customers](/use-cases/send-profiles-to-azure-blob-storage#create-a-segmentation-of-customers-at-risk-of-churn) at risk of churn.
- Create a workflow that sends selected customer profiles to Azure Blob Storage.
## Create a segmentation of customers at risk of churn
---
In this part of the process, create a segmentation of customers at risk of churn based on the RFM segmentation you created earlier.
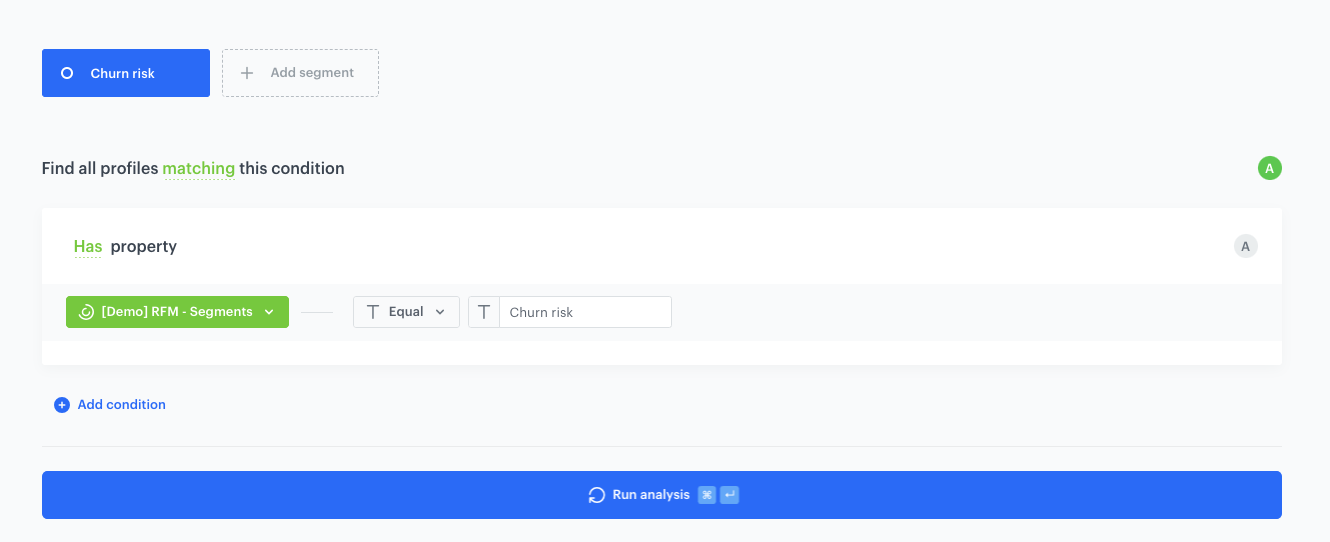
1. Go to **Decision Hub > Segmentations > New segmentation**.
2. Enter the name of the segment.
3. Choose **Add condition** and find the RFM segmentation you created earlier.
4. Select the **Equal** operator and in the right field enter the name of the sub-segment that defines the customers at risk of churn. In this use case, it's `Churn risk`
5. Save the segment.
Segmentation settings
## Prepare a workflow
---
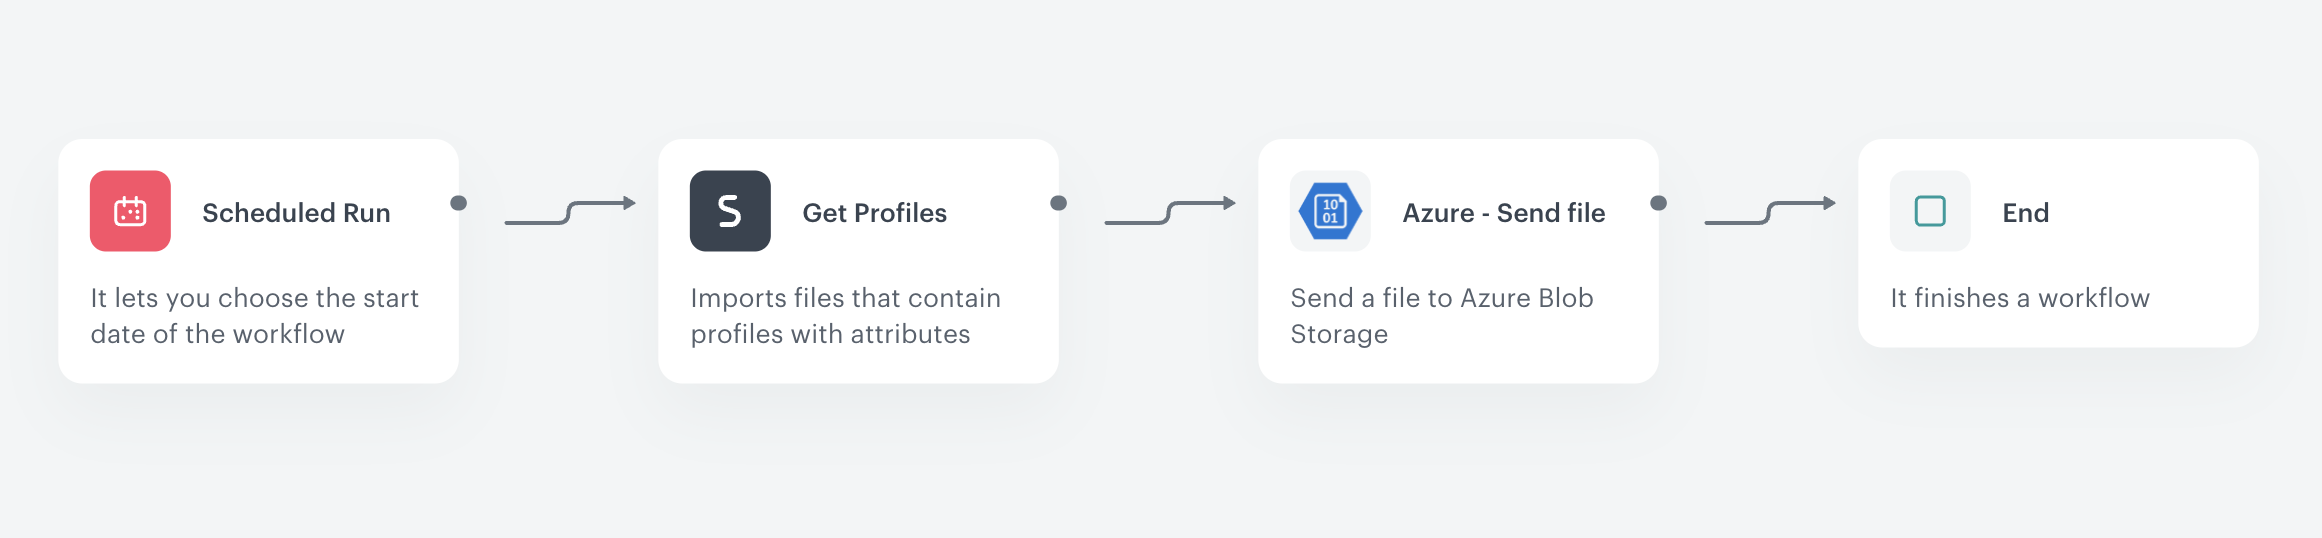
As the final part of the process, create a workflow which sends the customers' data to Azure Blob Storage every day.
1. Go to **Automation Hub > Workflows > New workflow**.
2. Enter the name of the workflow.
### Define the launch date
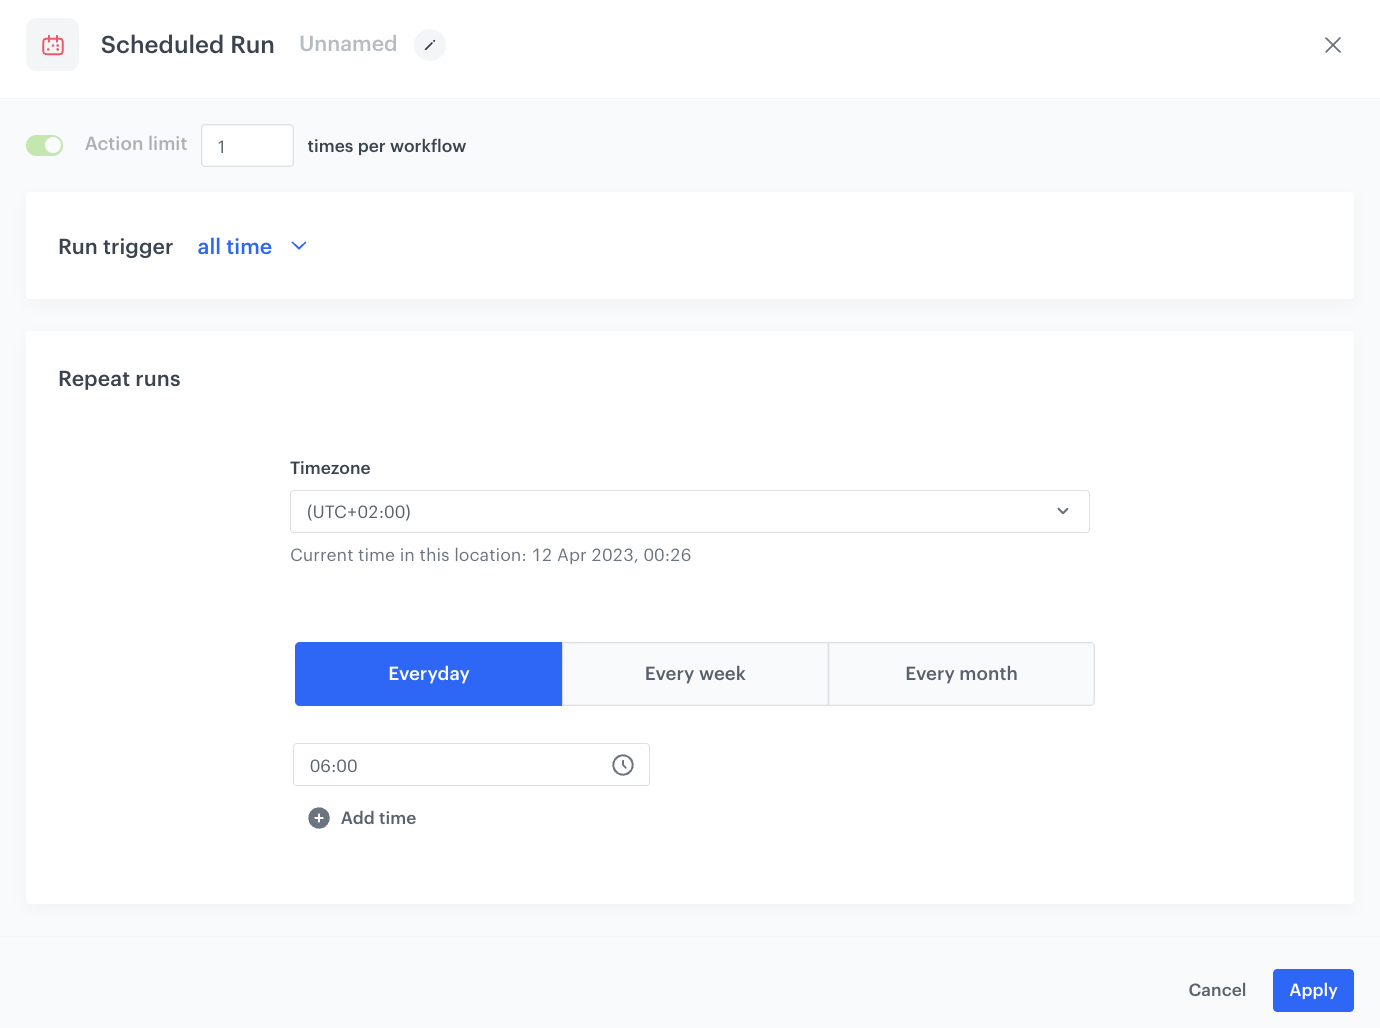
3. As the trigger node, add **Scheduled Run**.
4. In the configuration of the node:
1. Leave the **Run trigger** option at default (**all time**).
2. From the **Timezone** dropdown list, select the time zone consistent with the timezone selected for your workspace.
3. Define the frequency of the workflow (for example, every day at 6.00 A.M.).
The workflow will automatically launch at the scheduled time.
4. Confirm by clicking **Apply**.
The configuration of the Scheduled Run node
### Select customers to export
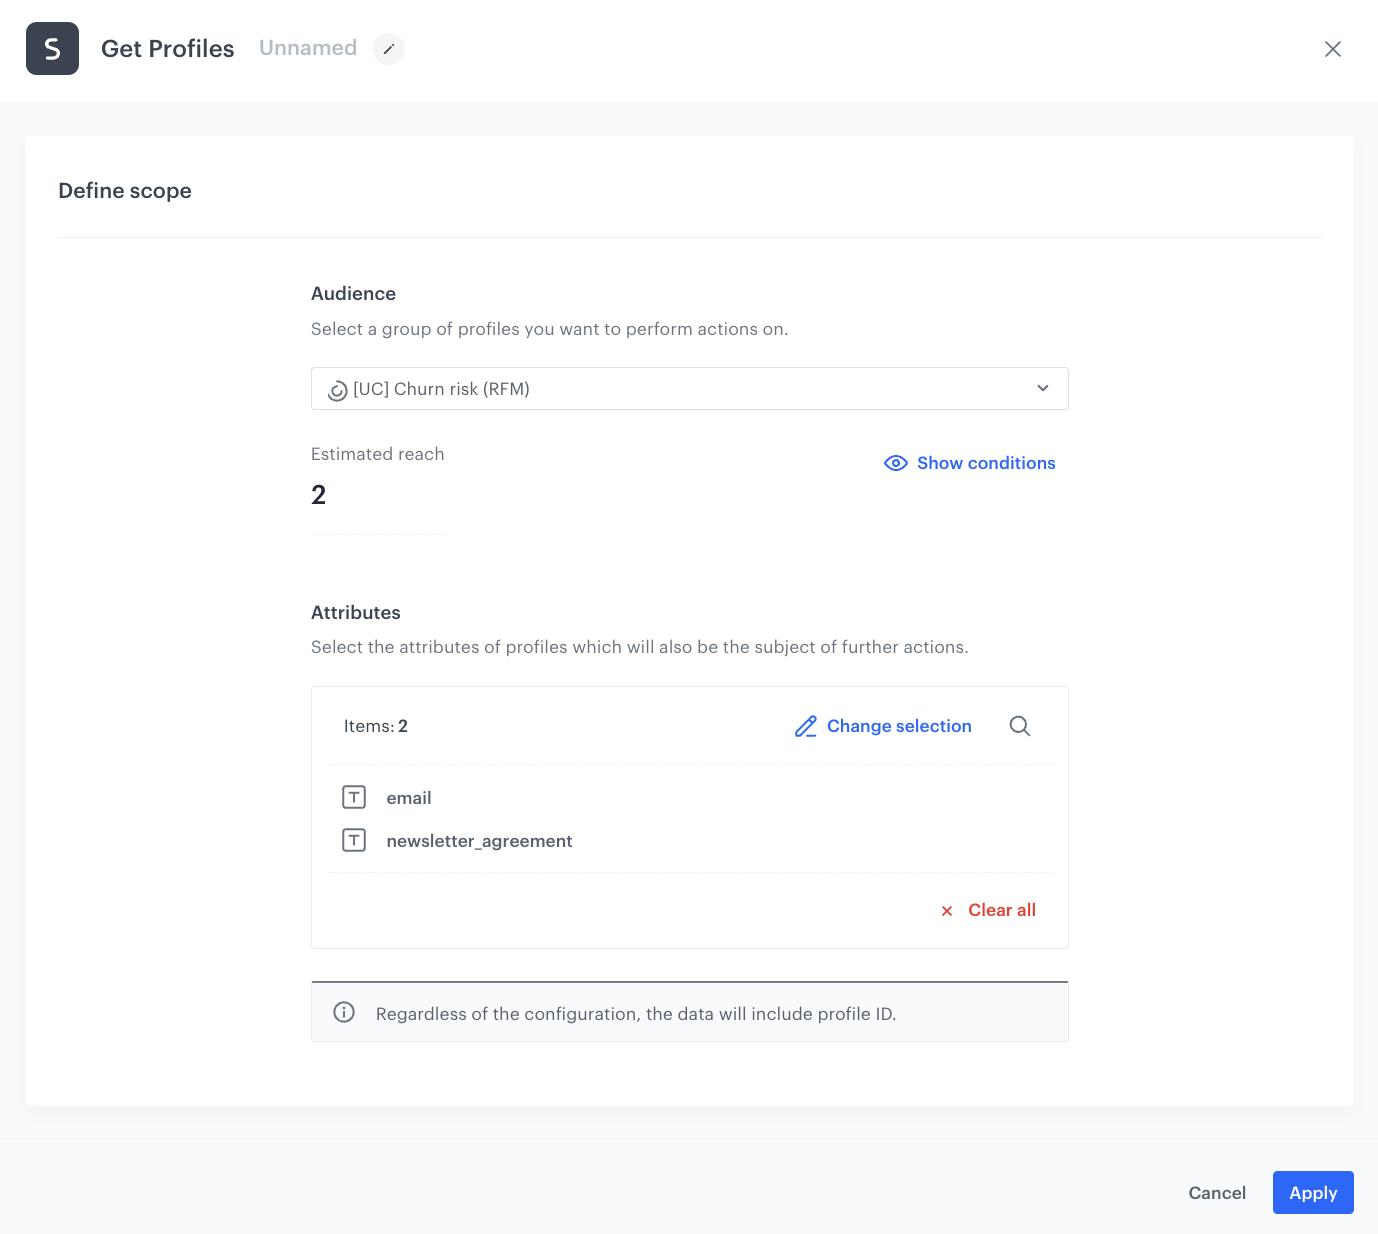
5. Add a **Get Profiles** node.
6. In the configuration of the node:
1. Select the segmentation you [created in the first part of the process](/use-cases/send-profiles-to-azure-blob-storage#create-a-segmentation-of-customers-at-risk-of-churn).
2. In the **Attributes** section, select the profile attributes which you want to export.
In the example, `email` and `newsletter_agreement` are selected.
3. Confirm by clicking **Apply**.
The configuration of the Get Profiles node
### Configure Send file to Azure Blob Storage node
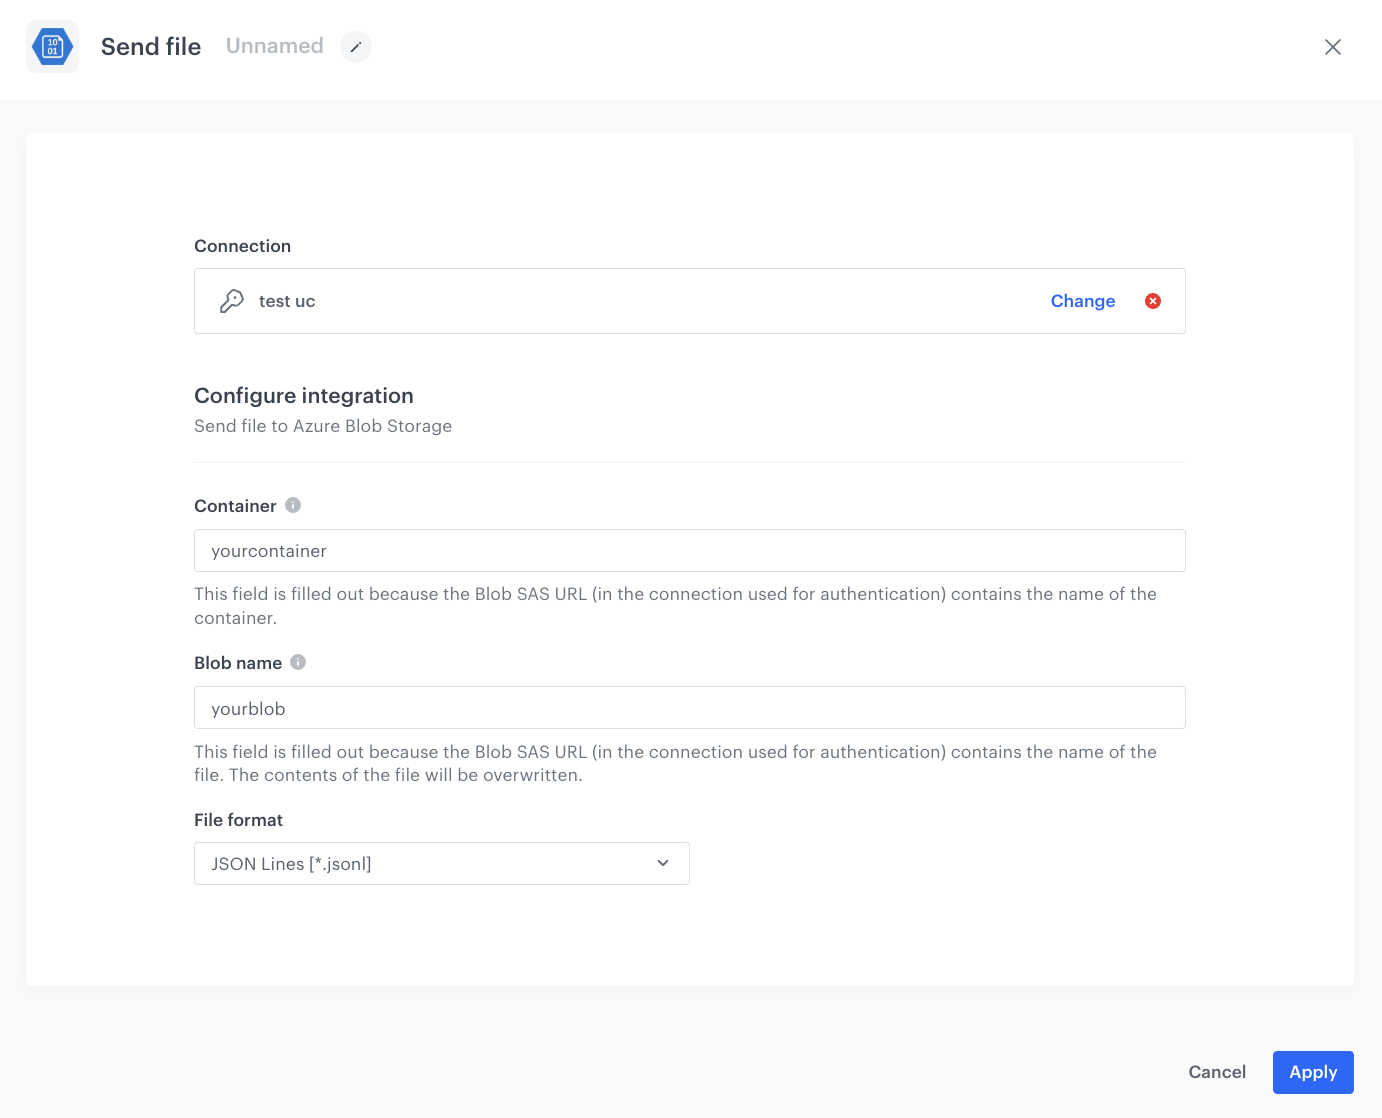
1. Click **Azure Blob Storage > Send File**.
2. Click **Select connection**.
3. From the dropdown list, select the connection.
- If no connections are available or you want to create a new one, see [Create a connection](/docs/automation/integration/azure-blob-storage/send-file-azure-blob-storage#create-a-connection).
- If you selected an existing connection, proceed with the integration settings.
1. In the **Container** field, enter the name of an existing container in your storage.
If this field is already filled out, it means that the URL used in the [connection](/docs/automation/integration/azure-blob-storage/send-file-azure-blob-storage#create-a-connection) settings contains the name of the container.
2. In the **Blob name** field, enter the name of the blob (file) you want to send to the storage.
If this field is already filled out, it means that the URL used in the [connection](/docs/automation/integration/azure-blob-storage/send-file-azure-blob-storage#create-a-connection) settings contains the name of the blob. In such case, the contents of the blob will be overwritten.
5. From the **File format** dropdown list, select the format in which the file will be sent to the storage.
6. Confirm by clicking **Apply**.
The configuration of the Send File node
### Add the finishing node
12. Add the **End** node.
13. In the upper right corner, click **Save & Run**.
The workflow configuration
## Check the use case set up on the Synerise Demo workspace
---
You can check the configuration of each item created in this use case on our Synerise Demo workspace:
- [Segmentation](https://app.synerise.com/analytics-v2/segmentations/d0dc46f2-ac98-4264-a5ed-4627d85117ae)
- [Workflow](https://app.synerise.com/automations/automation-diagram/997d7492-37ea-4fcc-922b-57bf850f79ae)
If you’re our partner or client, you already have automatic access to the **Synerise Demo workspace (1590)**, where you can explore all the configured elements of this use case and copy them to your workspace.
If you’re not a partner or client yet, we encourage you to fill out the contact [form](https://demo.synerise.com/request) to schedule a meeting with our representatives. They’ll be happy to show you how our demo works and discuss how you can apply this use case in your business.
## Read more
---
- [RFM analysis](/use-cases/rfm-analysis)
- [Send File](/docs/automation/integration/azure-blob-storage/send-file-azure-blob-storage)
- [Segmentations](/docs/analytics/segmentations)
- [Workflows](/docs/automation)