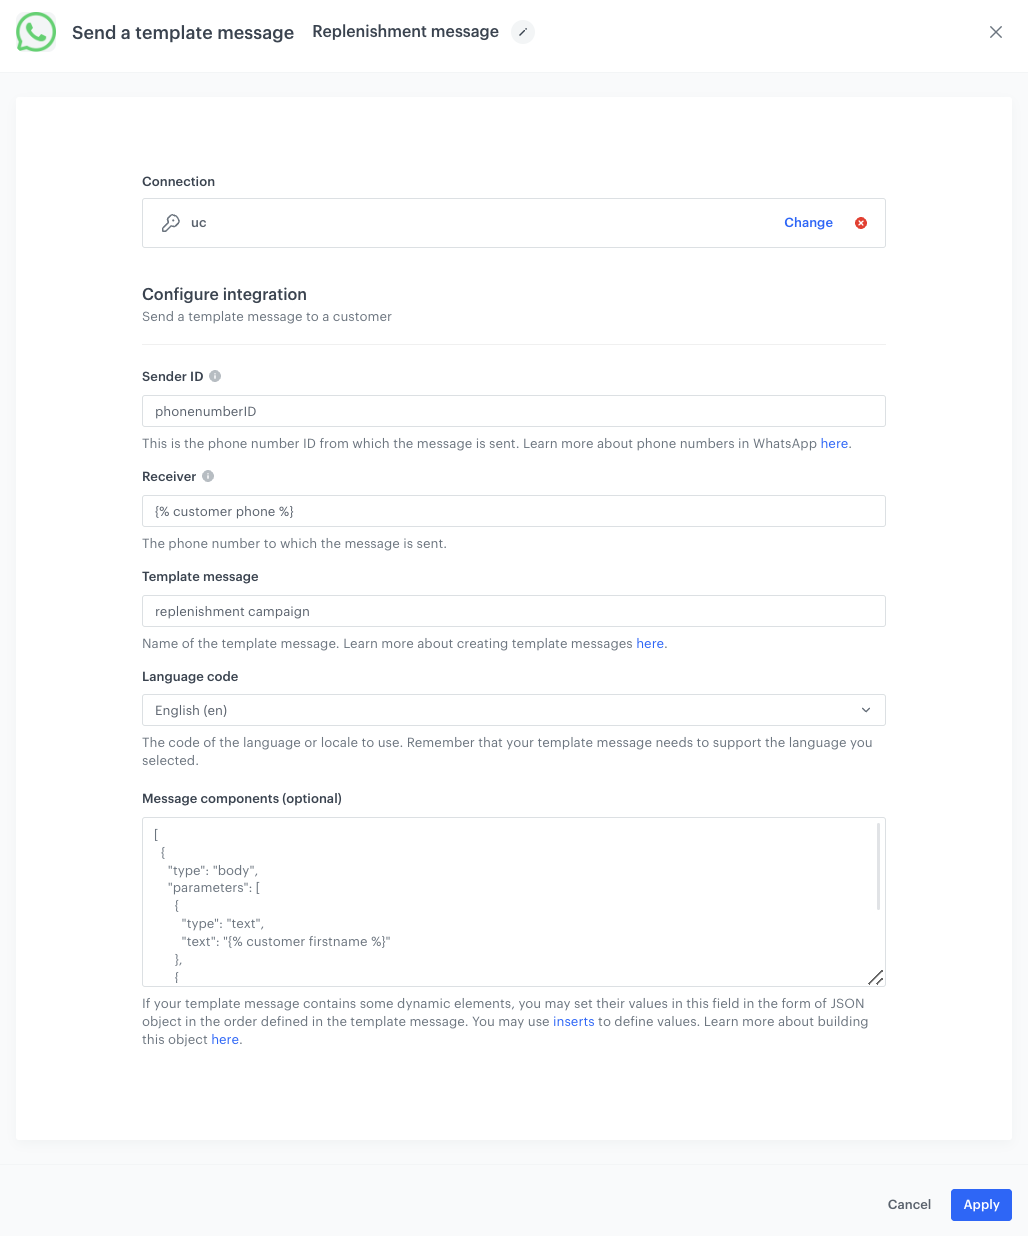
[
{
"type": "body",
"parameters": [
{
"type": "text",
"text": "{% customer firstname %}"
},
{
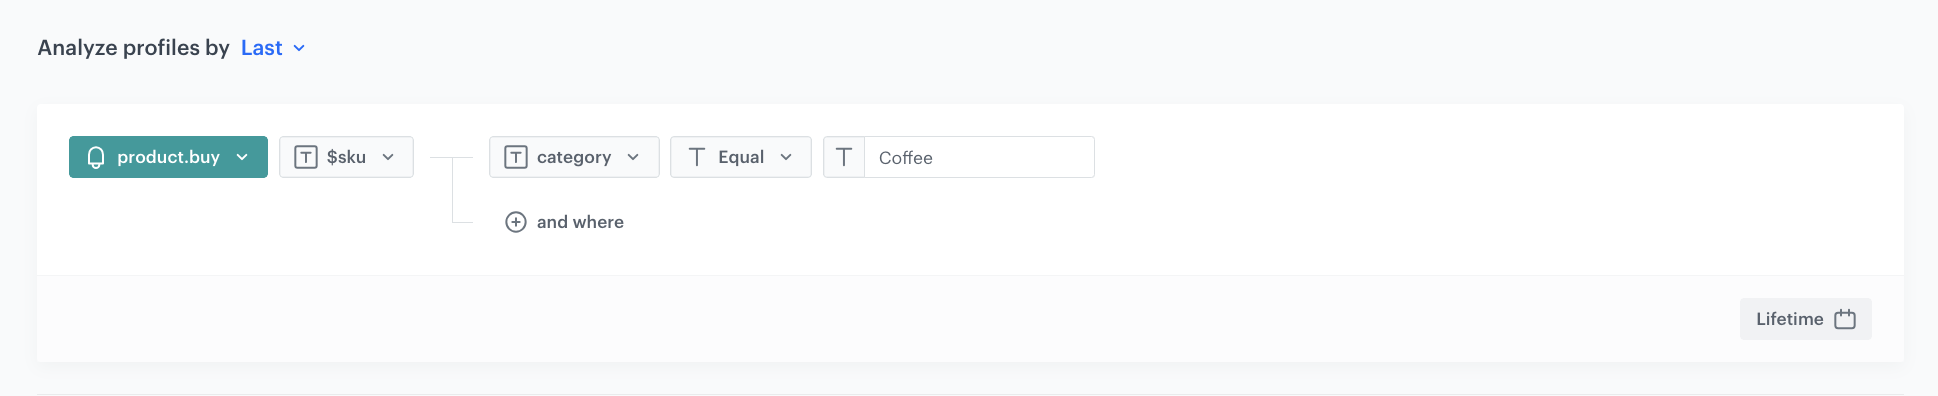
"type": "text",
"text": "{% aggregate c37acfe7-08a1-345c-a3e7-da795bb6a326 %}{% for item in aggregate_result %}{% catalog.store-1(item).name %}{% endfor %}{% endaggregate %}"
},
{
"type": "text",
"text": "{% voucher %} 8c3c8fd3-e7e9-487d-ba89-0b7824f65f33 {% endvoucher %}"
}
]
},
{
"type": "button",
"parameters":
"index": "0",
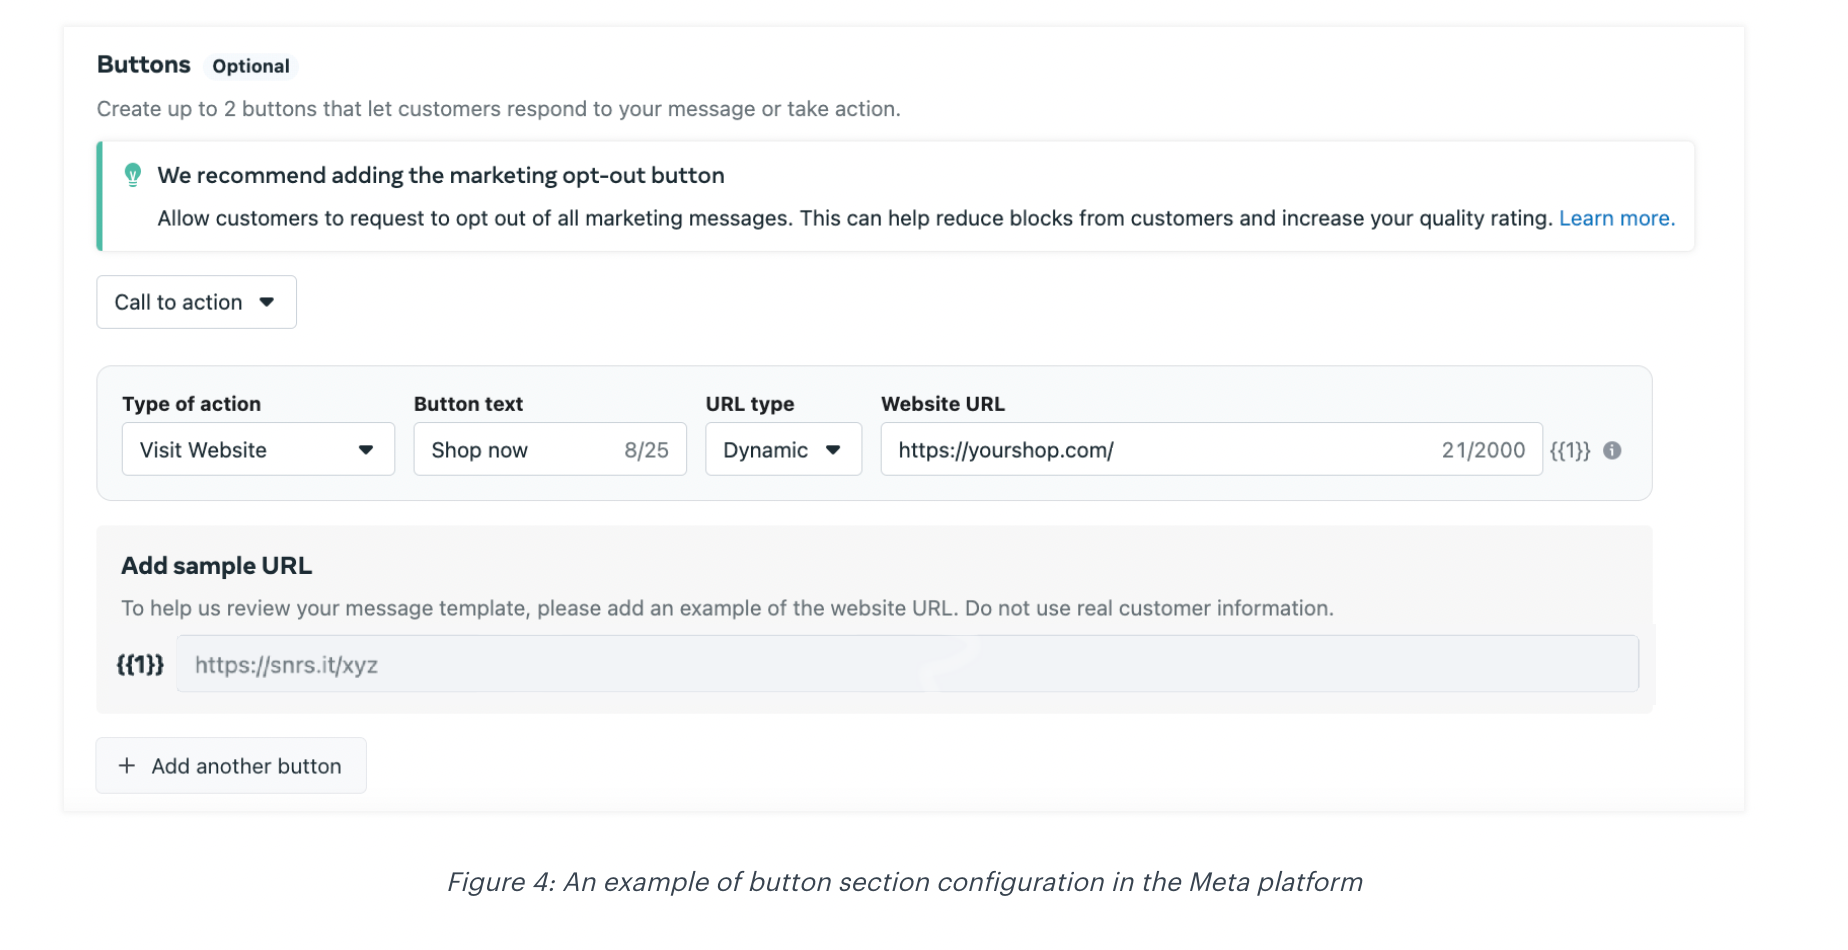
"sub_type": "url", [
{
"type": "url",
"text": "{% aggregate c37acfe7-08a1-345c-a3e7-da795bb6a326 %}{% for item in aggregate_result %}{% catalogvar.store-1(item).url %}{{ catalog_result|replace('https://yourshop.com', '') }}{% endcatalogvar %}{% endfor %}{% endaggregate %}"
}
]
},
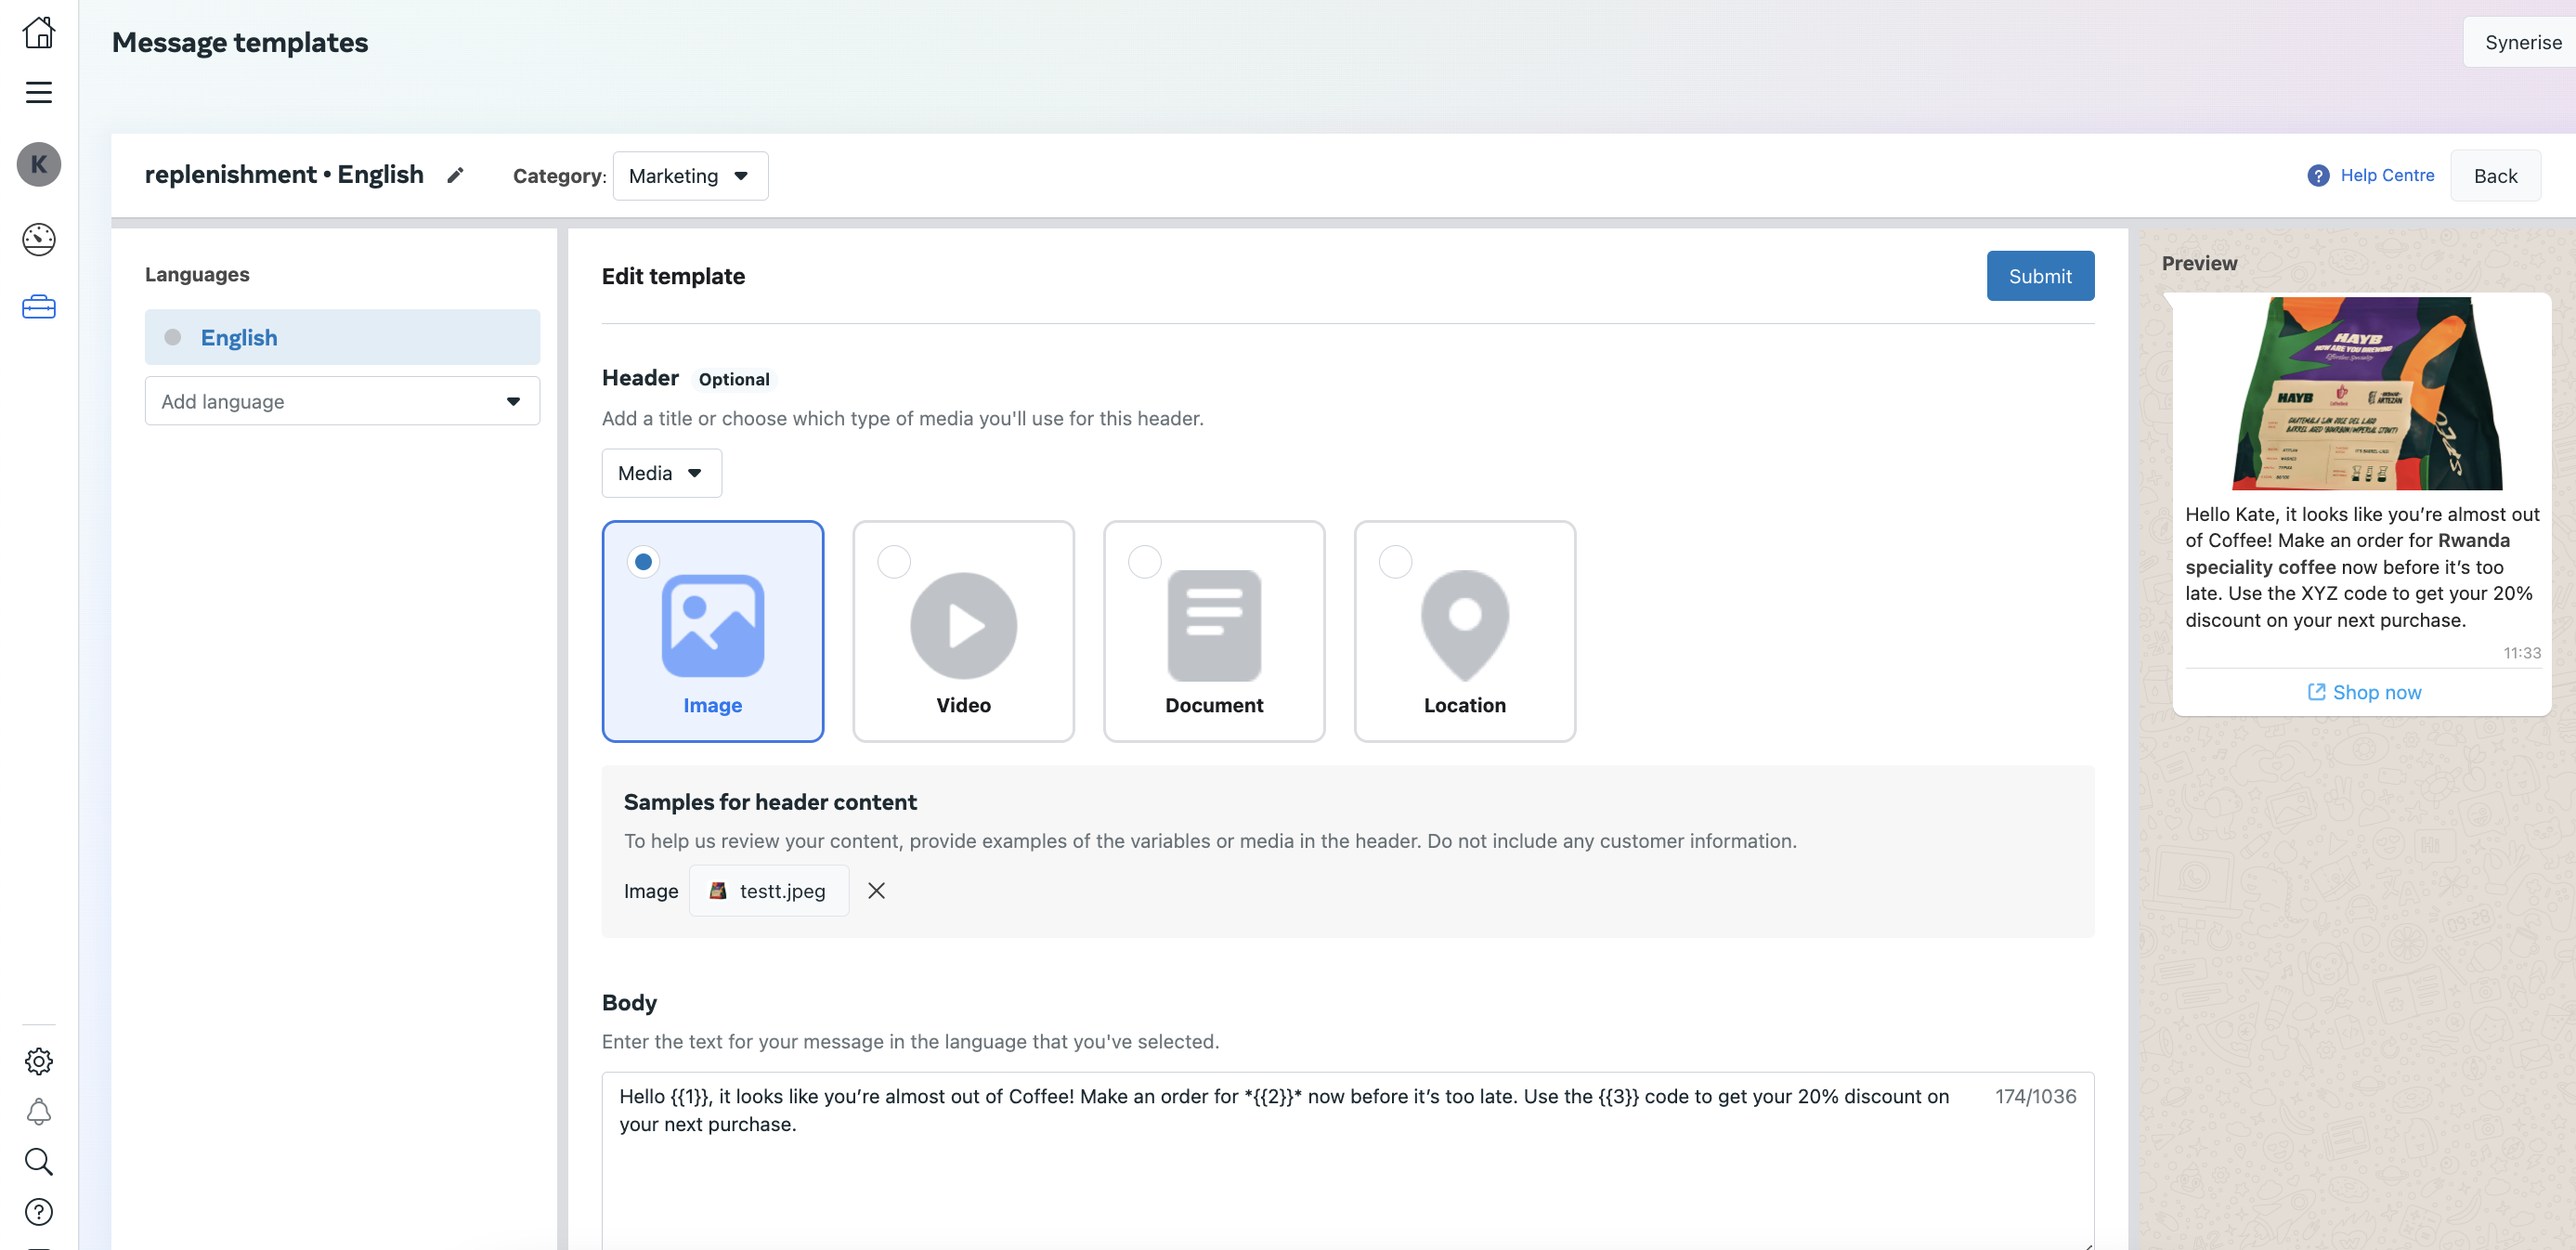
{
"type": "header",
"parameters": [
{
"type": "image",
"image": {
"link": "{% aggregate c37acfe7-08a1-345c-a3e7-da795bb6a326 %}{% for item in aggregate_result %}{% catalogvar.store-1(item).image %}{{ catalog_result }}{% endcatalogvar %}{% endfor %}{% endaggregate %}"
}
}
]
}
]