


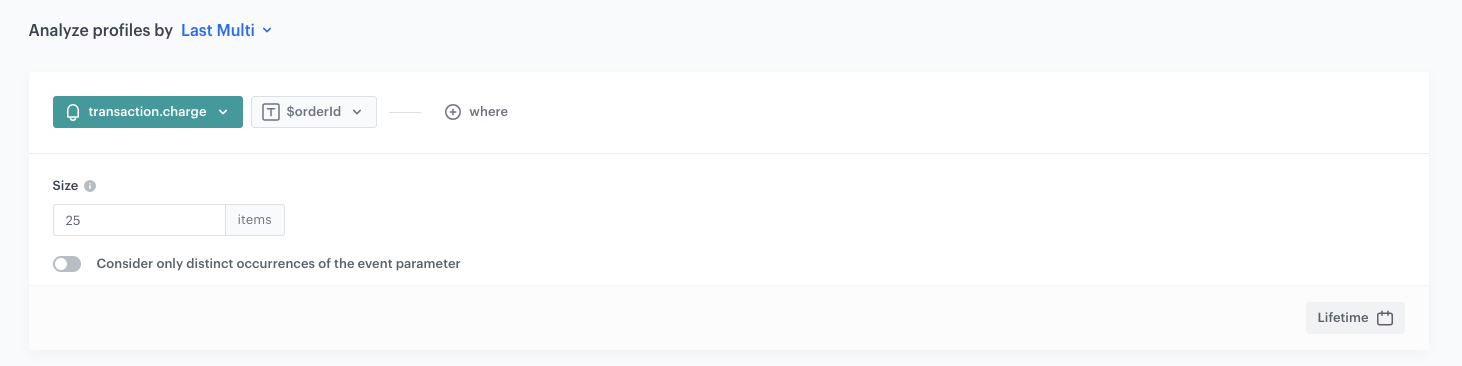
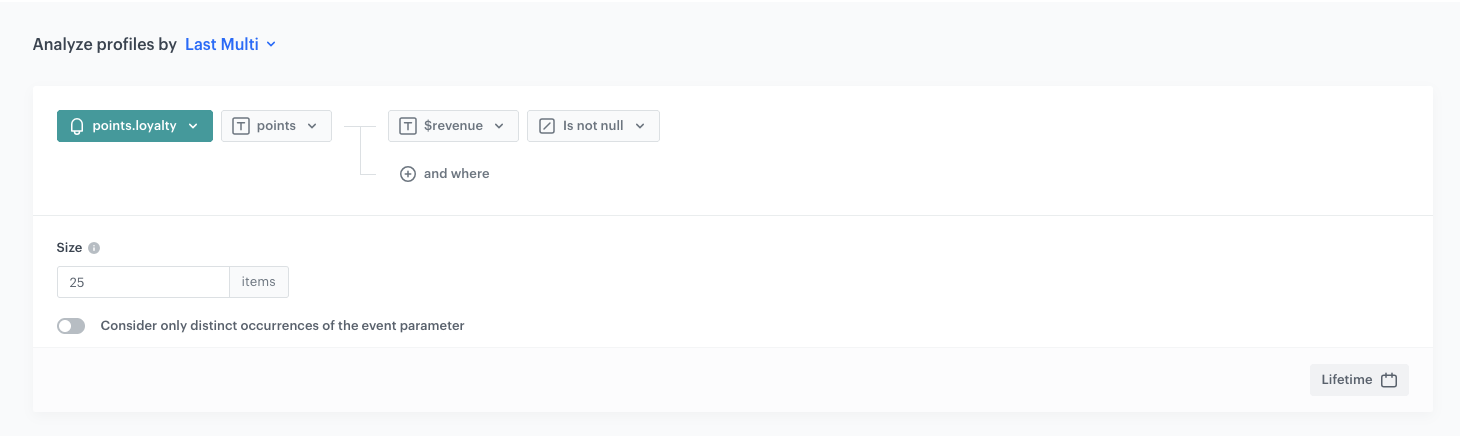
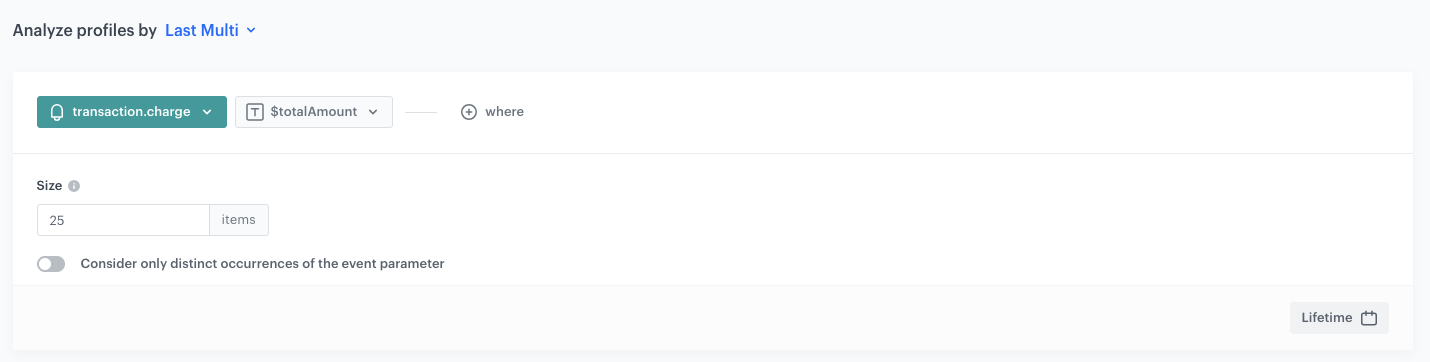
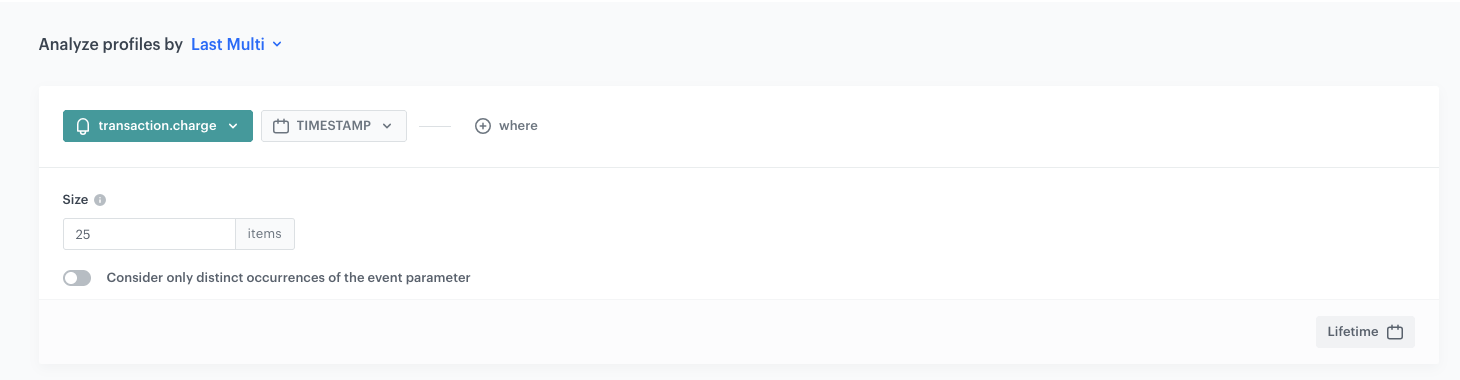

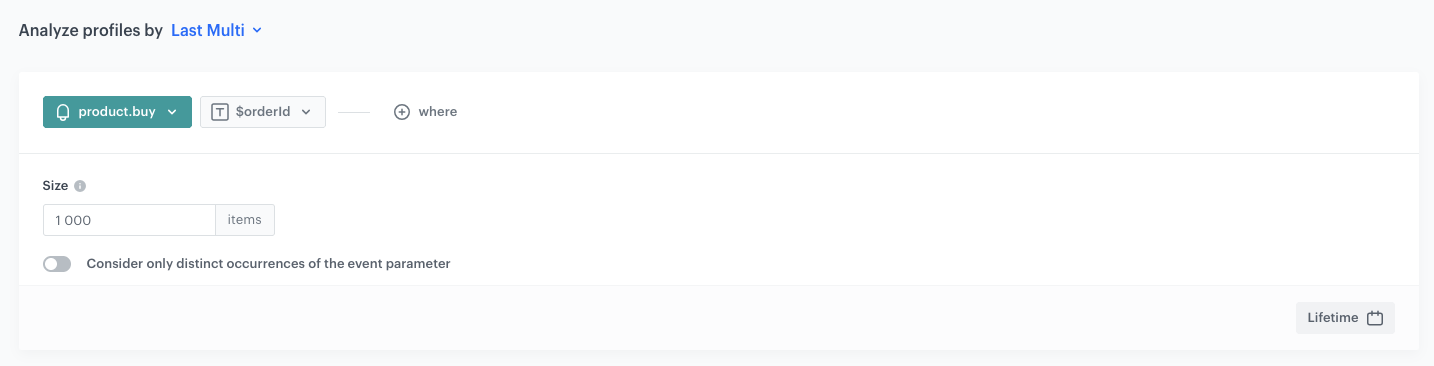
{% set txn_ids = [] %}{% set txn_points = [] %}{% set txn_amounts = [] %}{% set txn_dates = [] %}{% set buy_names = [] %}{% set buy_order_ids = [] %}{% aggregate TRANSACTION_IDS_AGGREGATE_HASH %}{%- for res in aggregate_result -%}{% do txn_ids.append(res) %}{%- endfor -%}{% endaggregate %}{% aggregate TRANSACTION_POINTS_AGGREGATE_HASH %}{%- for res in aggregate_result -%}{% do txn_points.append(res) %}{%- endfor -%}{% endaggregate %}{% aggregate TRANSACTION_AMOUNTS_AGGREGATE_HASH %}{%- for res in aggregate_result -%}{% do txn_amounts.append(res) %}{%- endfor -%}{% endaggregate %}{% aggregate TRANSACTION_DATES_AGGREGATE_HASH %}{%- for res in aggregate_result -%}{% set splitDate = res|split(':') %}{% set splitDateLength = splitDate|length %}{% set finalDate = splitDate[0:splitDateLength-1]|join(':') ~ splitDate[splitDateLength-1] %}{% set finalDateFormatted = datetimeformat(finalDate|strtotime("yyyy-MM-dd'T'HH:mm:ss.SSSZ"), '%b %d, %Y') %}{% do txn_dates.append(finalDateFormatted) %}{%- endfor -%}{% endaggregate %}{% aggregate PRODUCT_NAMES_AGGREGATE_HASH %}{%- for res in aggregate_result -%}{% do buy_names.append(res) %}{%- endfor -%}{% endaggregate %}{% aggregate PRODUCT_ORDER_IDS_AGGREGATE_HASH %}{%- for res in aggregate_result -%}{% do buy_order_ids.append(res) %}{%- endfor -%}{% endaggregate %}{% set orders = [] %}{% for i in range(txn_ids | length) %}{% set order_id = txn_ids[i] %}{% set products = [] %}{% for j in range(buy_order_ids | length) %}{% if buy_order_ids[j] == order_id %}{% set _ = products.append(buy_names[j]) %}{% endif %}{% endfor %}{% set _ = orders.append({'orderId': order_id,'date': txn_dates[i],'amount': txn_amounts[i],'loyaltyPoints': txn_points[i],'products': products}) %}{% endfor %}{{ orders | reverse | tojson }}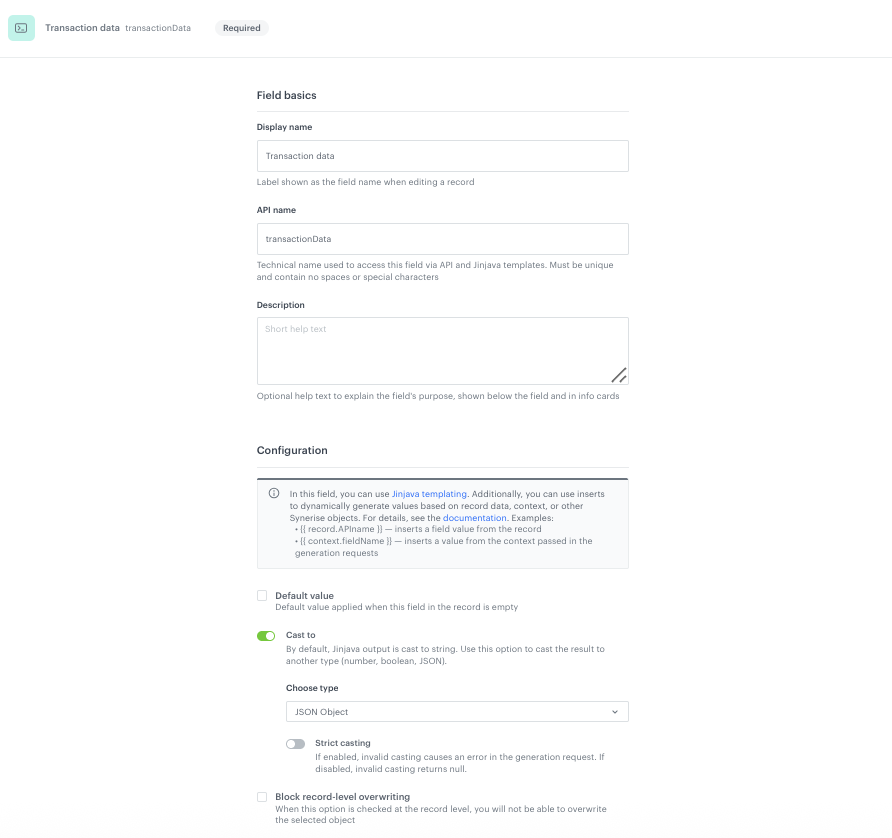
{% brickworksgeneratevar schemaId=SCHEMA_ID recordId=RECORD_ID %}
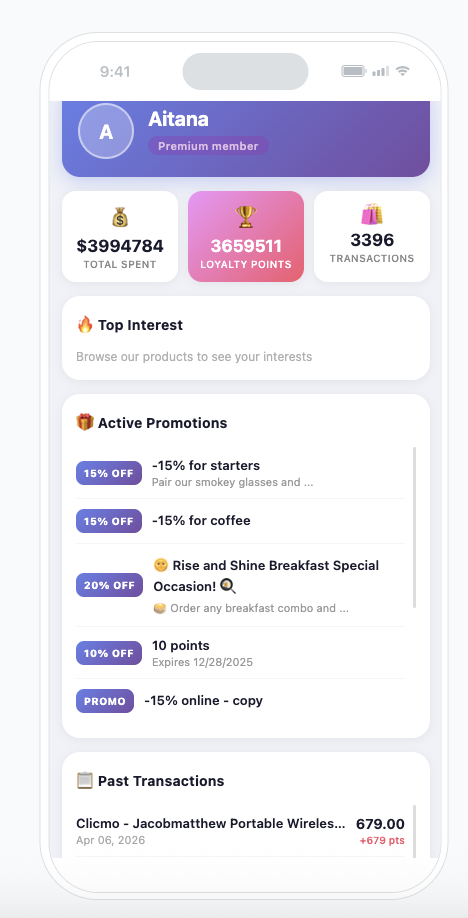
<div class="profile-container">
<button id="close-btn" onclick="SRInApp.close()">×</button>
<div class="profile-header">
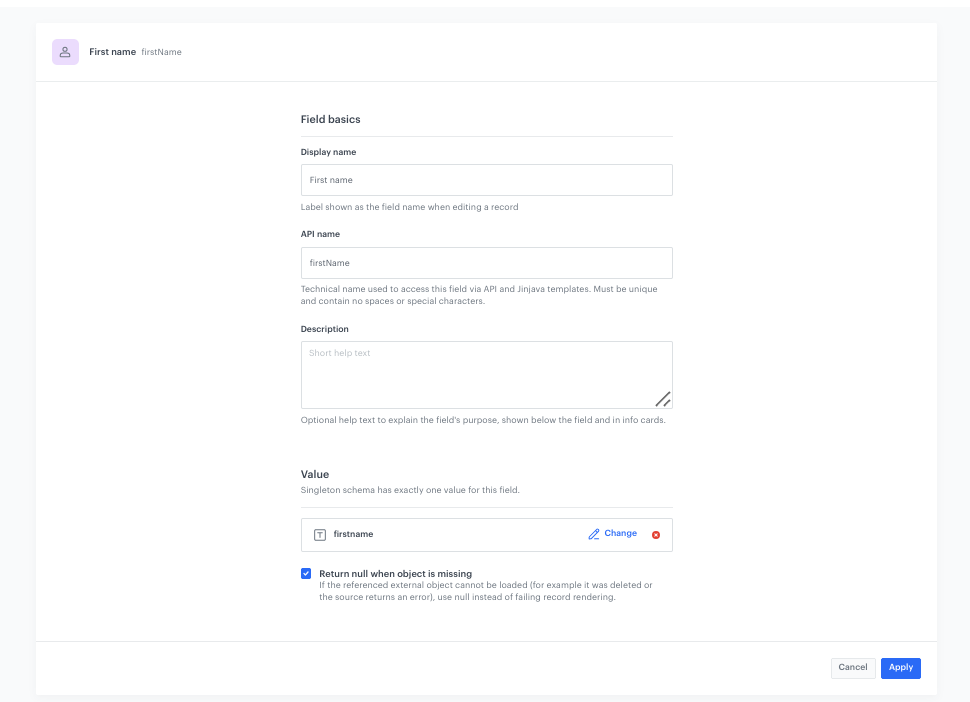
<div class="avatar">{{ brickworks_result.firstName|default('P')|truncate(1, true, '') }}</div>
<div class="header-info">
<h1 class="user-name">{{ brickworks_result.firstName|default('Profile') }}</h1>
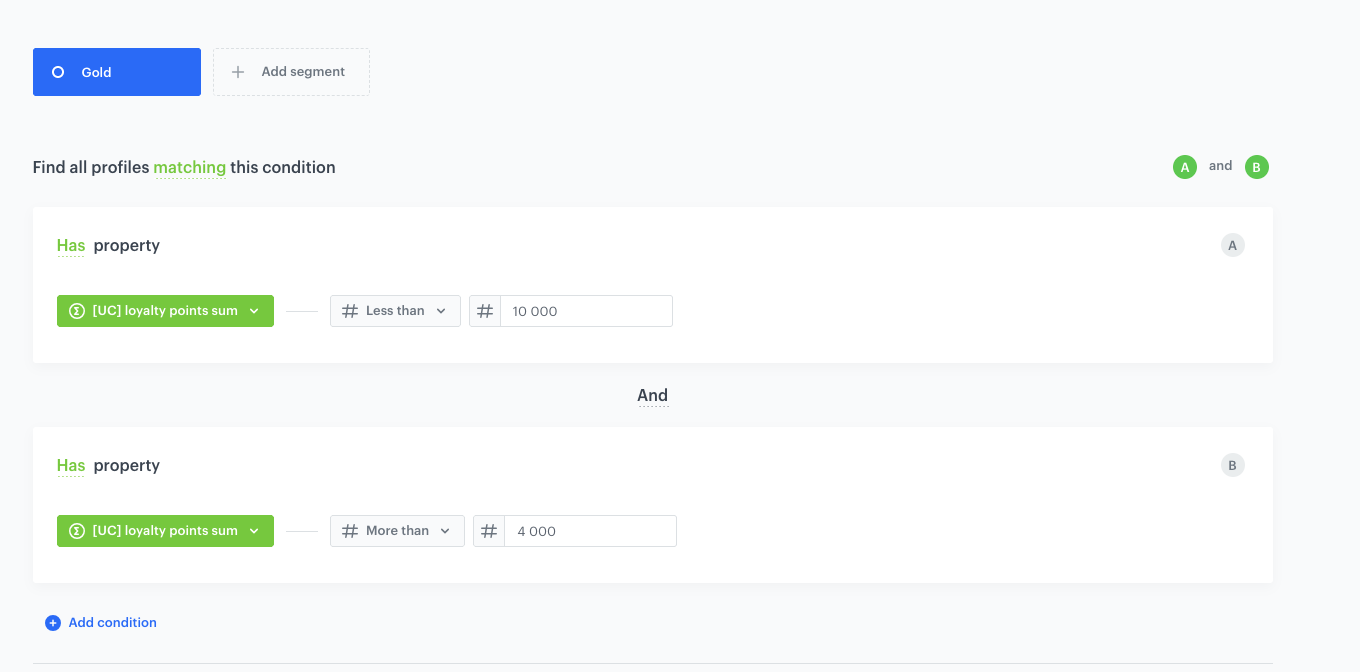
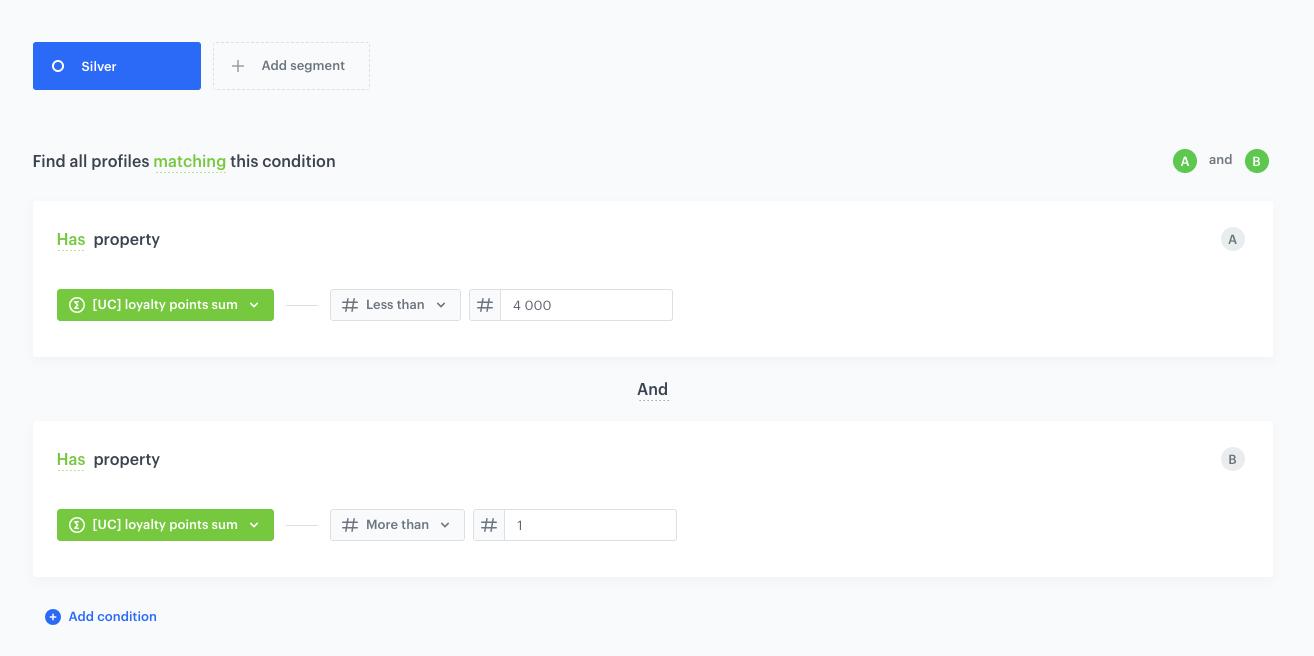
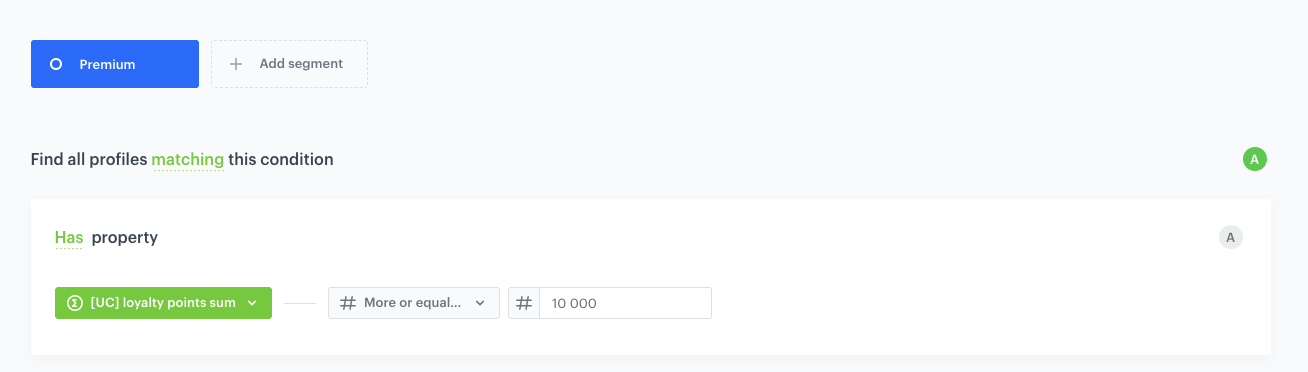
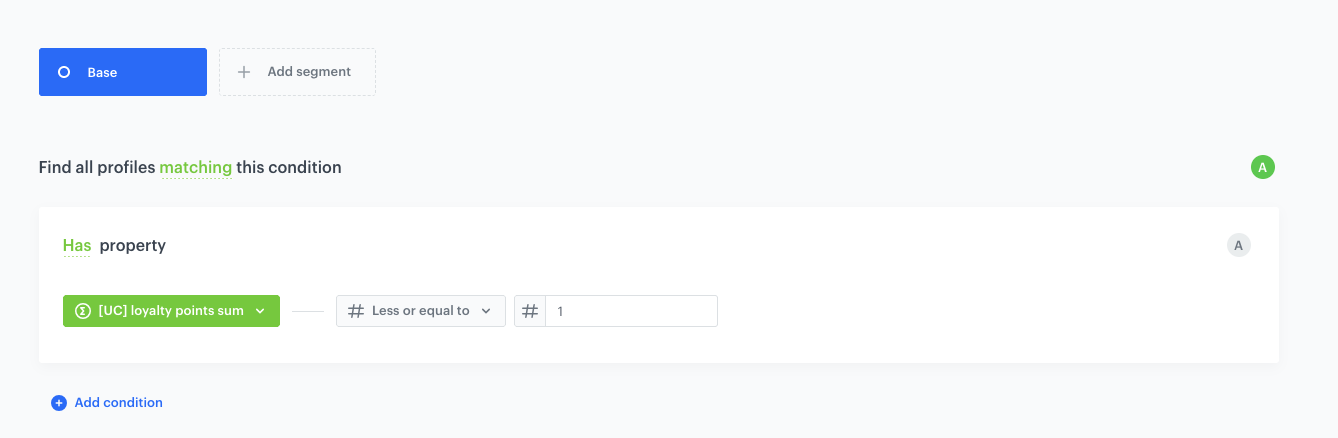
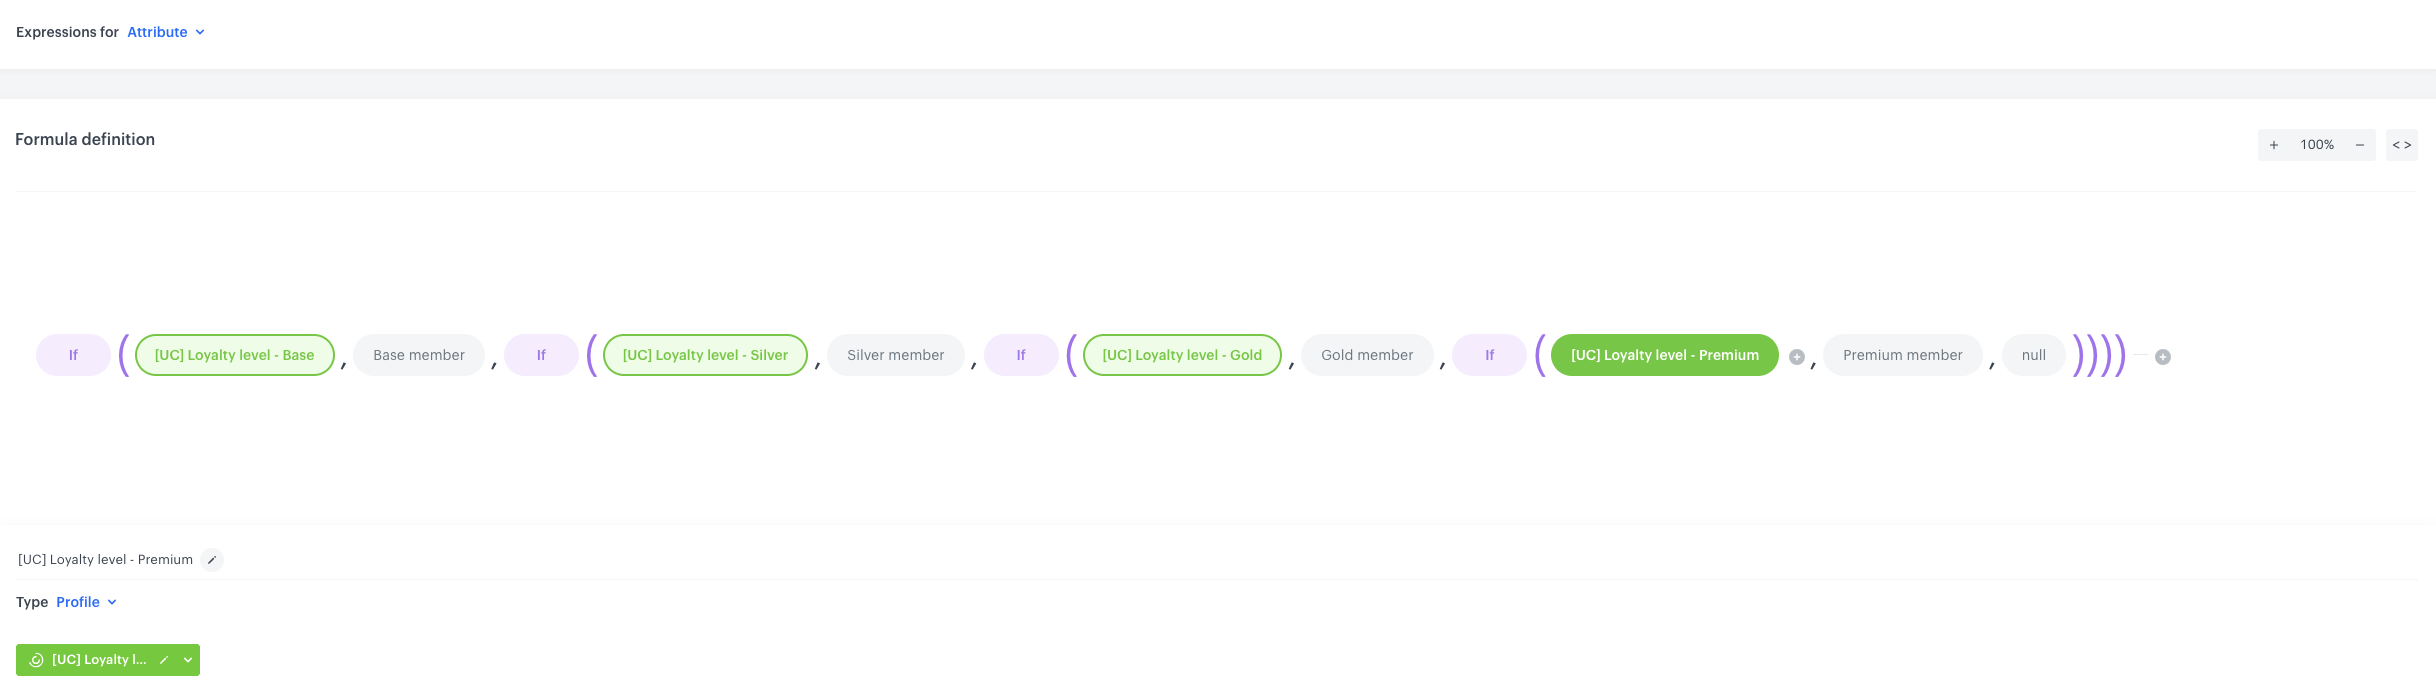
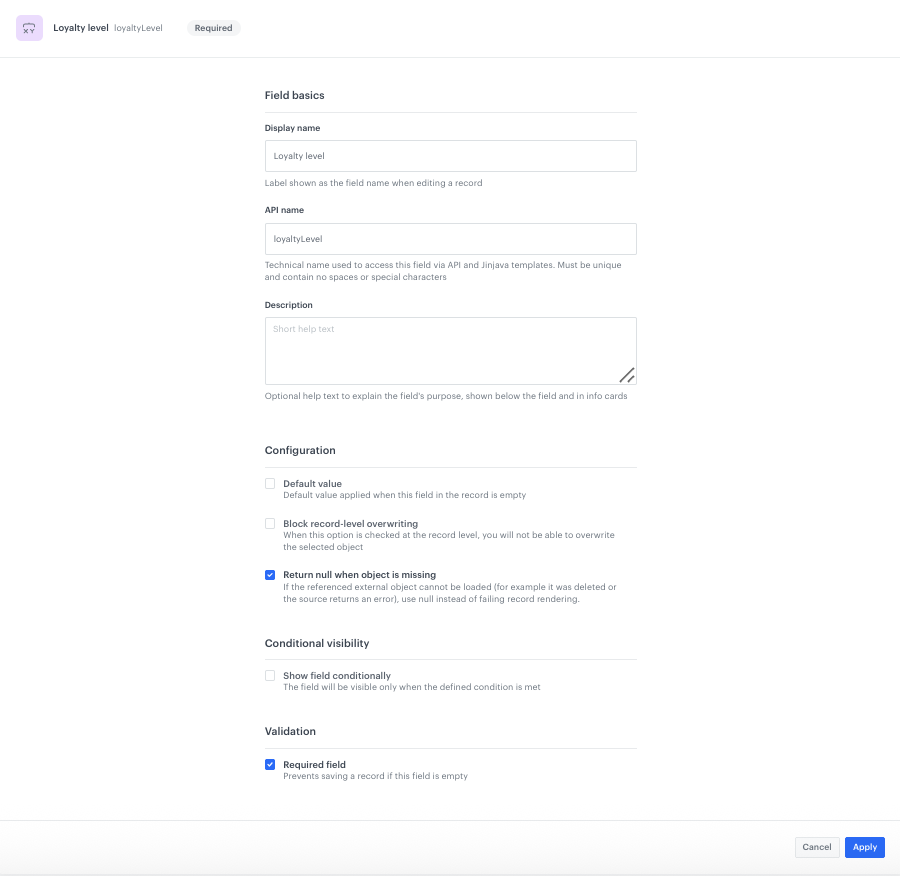
<span class="member-badge {{ brickworks_result.loyaltyLevel | lower | replace(' ', '-') }}">{{ brickworks_result.loyaltyLevel }}</span>
</div>
</div>
<div class="stats-row">
<div class="stat-card">
<div class="stat-icon">💰</div>
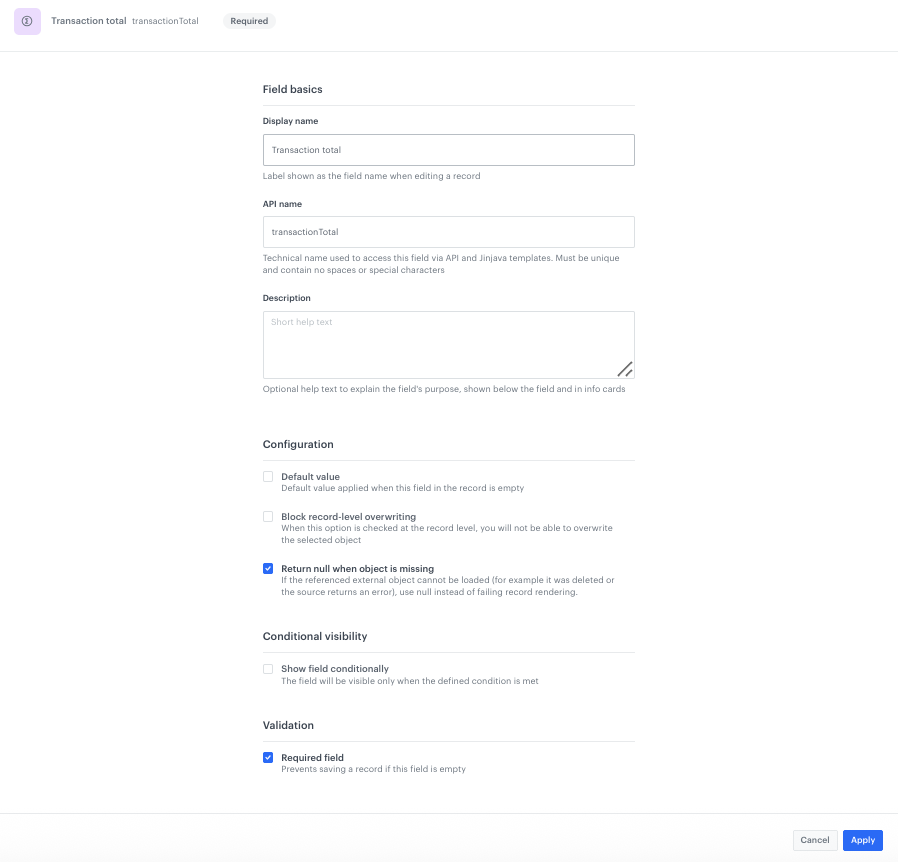
<div class="stat-value">${{ brickworks_result.transactionTotal|default('0') }}</div>
<div class="stat-label">Total Spent</div>
</div>
<div class="stat-card highlight">
<div class="stat-icon">🏆</div>
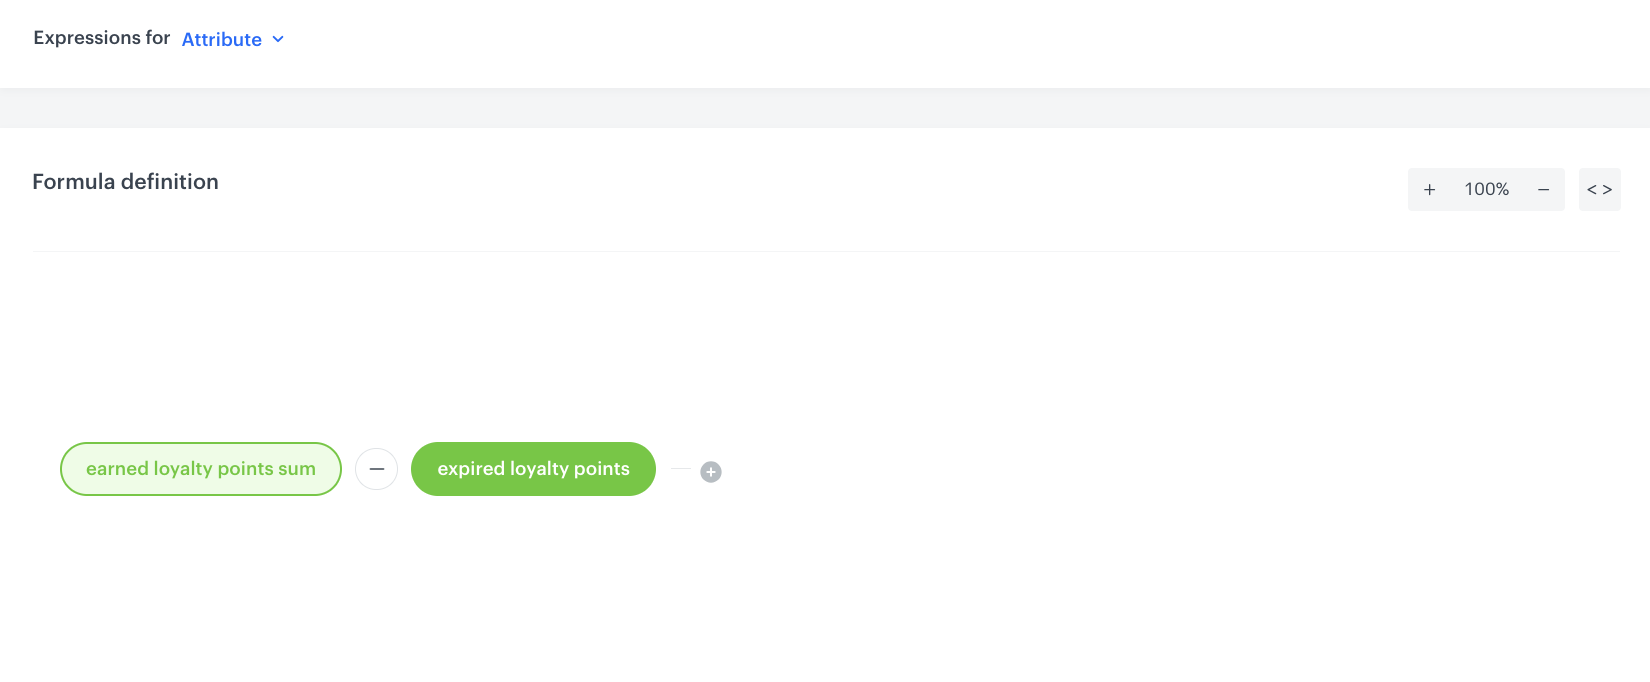
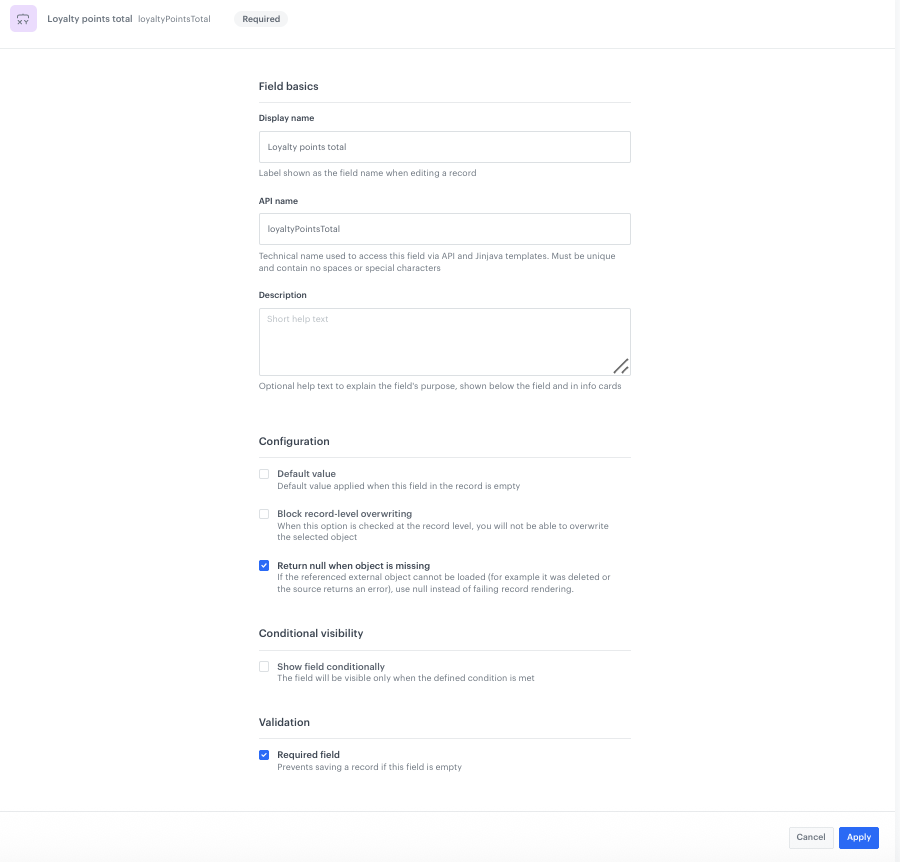
<div class="stat-value">{{ brickworks_result.loyaltyPointsTotal|default('0') }}</div>
<div class="stat-label">Loyalty Points</div>
</div>
<div class="stat-card">
<div class="stat-icon">🛍</div>
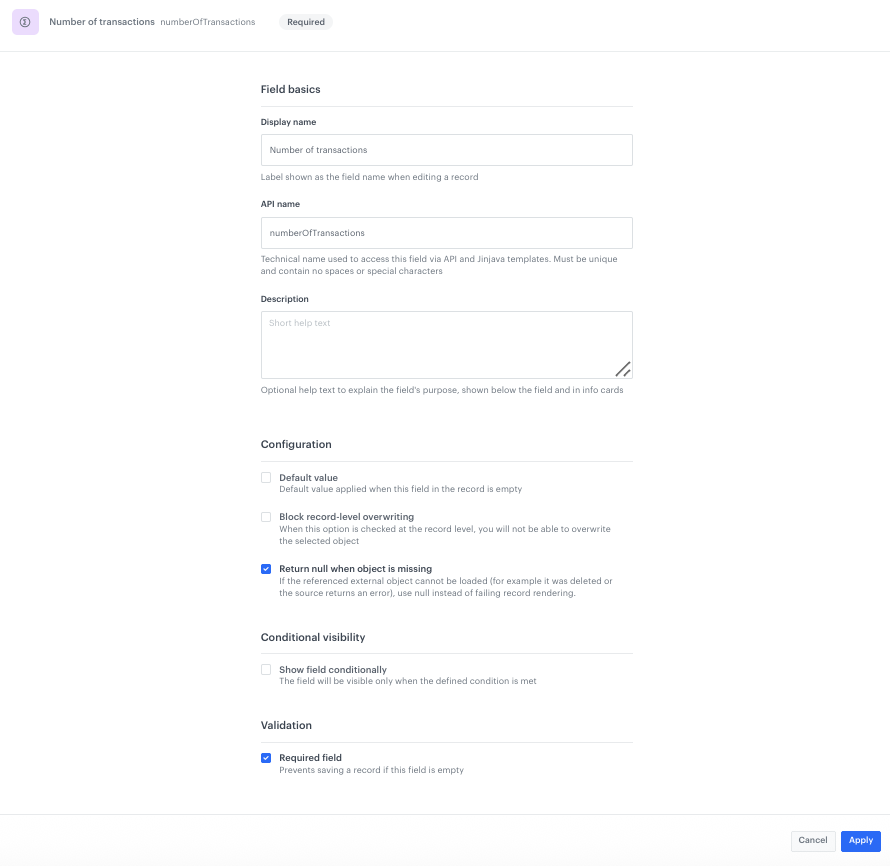
<div class="stat-value">{{ brickworks_result.numberOfTransactions|default('0') }}</div>
<div class="stat-label">Transactions</div>
</div>
</div>
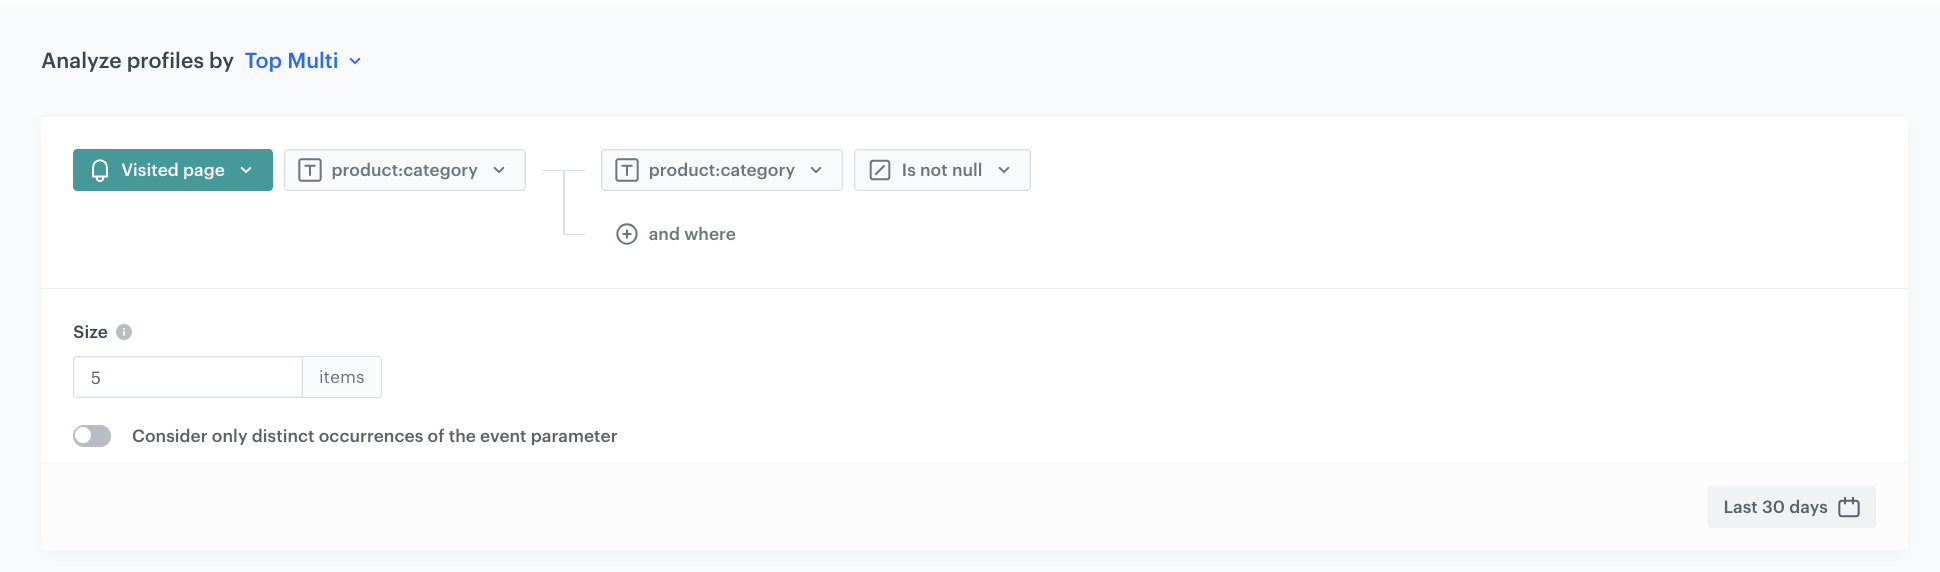
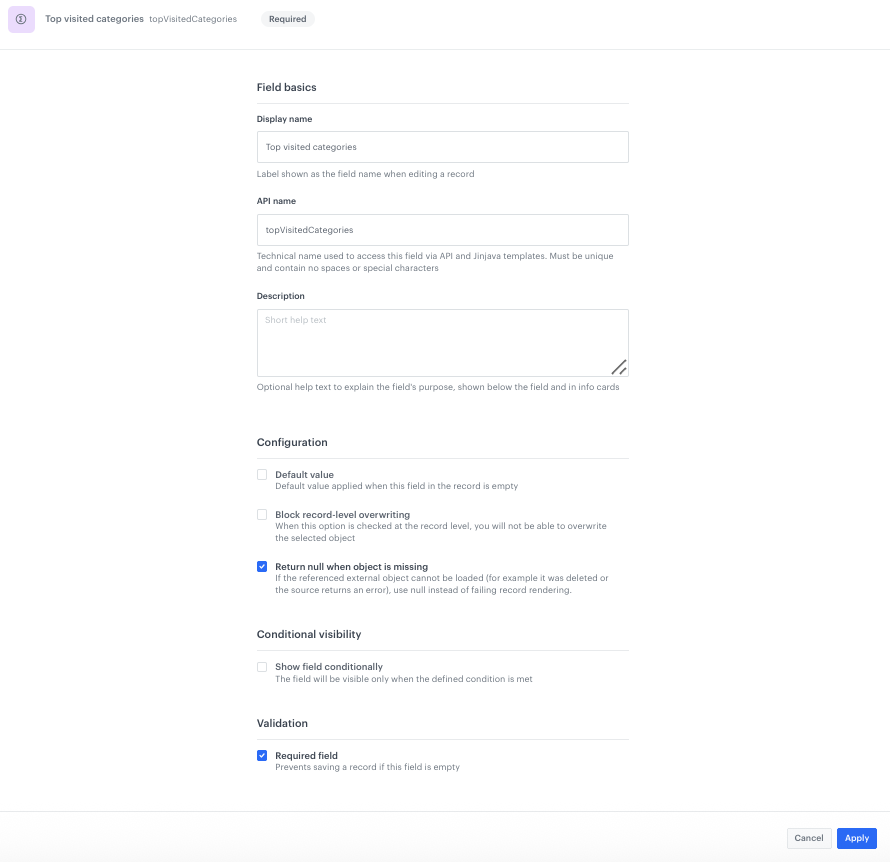
{% set topVisitedCategories = brickworks_result.topVisitedCategories %}
<div class="section-card">
<div class="section-title">🔥 Top Interest</div>
<div class="interest-bar">
{%- if topVisitedCategories|length > 0 -%}
{%- for category in topVisitedCategories -%}
{% set splitCategory = category[0]|split('Default Category > ') %}
<div class="interest-item">
<span class="interest-label">{{ splitCategory[1] }}</span>
</div>
{%- endfor -%}
{%- else -%}
<p class="empty-message">Browse our products to see your interests</p>
{%- endif -%}
</div>
</div>
<div class="section-card">
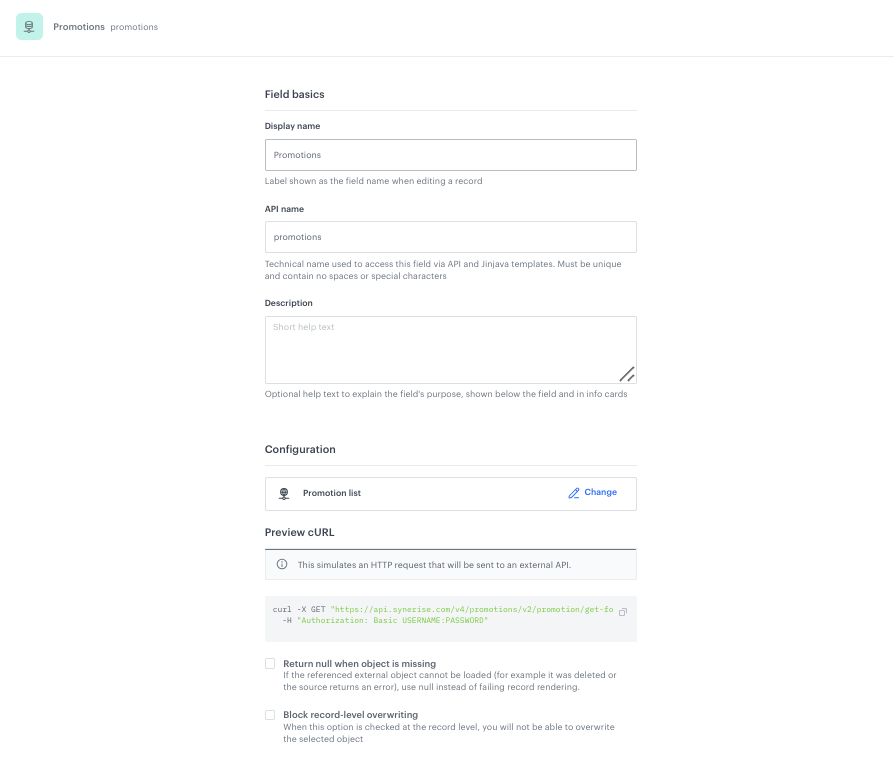
<div class="section-title">🎁 Active Promotions</div>
<div class="promo-list">
{%- if brickworks_result.promotions.data|length > 0 -%}
{%- for promo in brickworks_result.promotions.data -%}
<div class="promo-item">
<div class="promo-badge">{%- if promo.discountType != "NONE" -%}{{ promo.discountValue }}{%- endif -%}{%- if promo.discountType == "PERCENT" -%}% OFF{%- elif promo.discountType == "AMOUNT" -%}$ OFF{%- else -%}PROMO{%- endif -%}</div>
<div class="promo-info">
<div class="promo-name">{{ promo.name }}</div>
<div class="promo-exp">{{ promo.description|truncate(35) }}</div>
</div>
</div>
{%- endfor -%}
{%- else -%}
<p class="empty-message">There are no promotions available for you</p>
{%- endif -%}
</div>
</div>
<div class="section-card">
<div class="section-title">📋 Past Transactions</div>
<div class="transactions-list">
{%- if brickworks_result.transactionData|length > 0 -%}
{%- for transaction in brickworks_result.transactionData -%}
<div class="tx-item">
<div class="tx-info">
<div class="tx-name">{{ transaction.products | join(', ') }}</div>
<div class="tx-date">{{ transaction.date }}</div>
</div>
<div class="tx-right">
<div class="tx-amount">{{ transaction.amount }}</div>
<div class="tx-points">+{{ transaction.loyaltyPoints }} pts</div>
</div>
</div>
{%- endfor -%}
{%- else -%}
<p class="empty-message">You haven't made any transactions yet</p>
{%- endif -%}
</div>
</div>
</div>
{% endbrickworksgeneratevar %}