Below you will find cURL with a ready request, which you can use in the Postman tool, where:
token - authorization token
firstName - voucher pool name
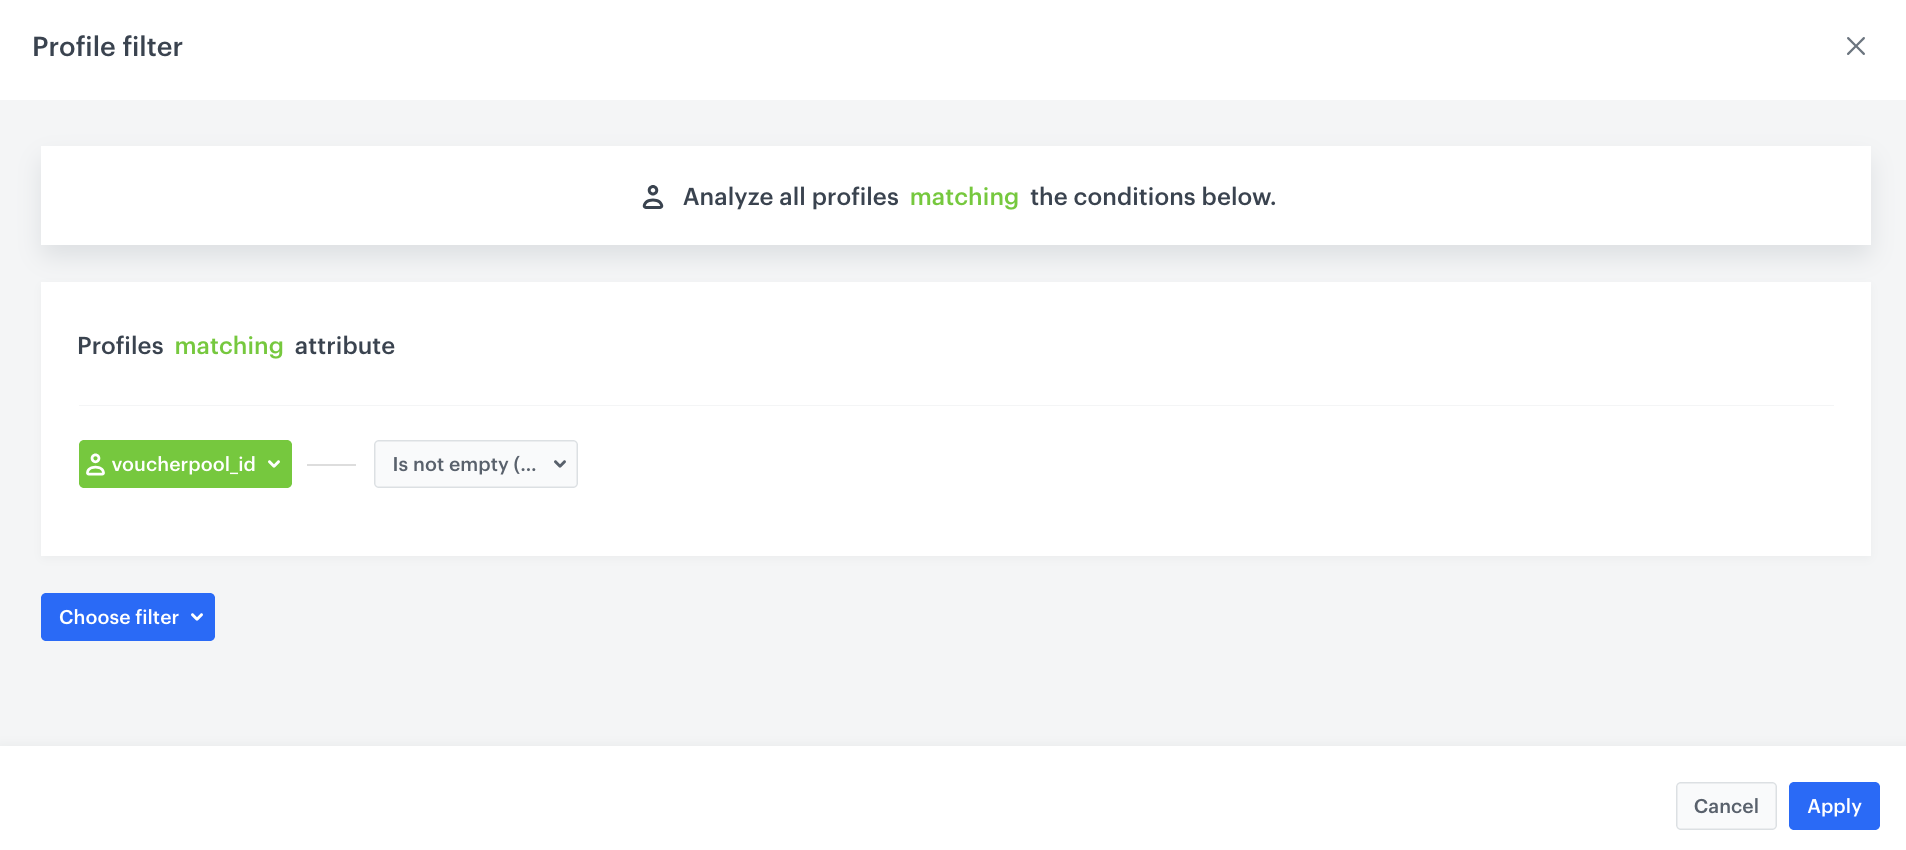
voucherpool_id - voucher pool ID for a specific pool (in Data Modeling Hub > Voucher Pools, enter the details of the voucher to retrieve its ID from the URL)
customId - voucher pool ID for a specific voucher (in Data Modeling Hub > Voucher Pools, enter the details of the voucher to retrieve its ID from the URL)
optionally, tag in this case is voucher_campaign
curl --location --request POST 'https://api.synerise.com/v4/clients/batch' \ --header 'Accept: application/json' \ --header 'Api-Version: 4.4' \ --header 'Authorization: Bearer xxx' \ --header 'content-type: application/json' \ --data-raw '[ { "customId": "Insert a voucher pool ID here", "firstName": "Insert a voucher pool name", "agreements": { }, "attributes": { "voucherpool_id": "Insert a voucher pool ID here" }, "tags": [ "voucher_campaign" ] } ]'In this code we used the specific method from our API. Read also about the authorization process.
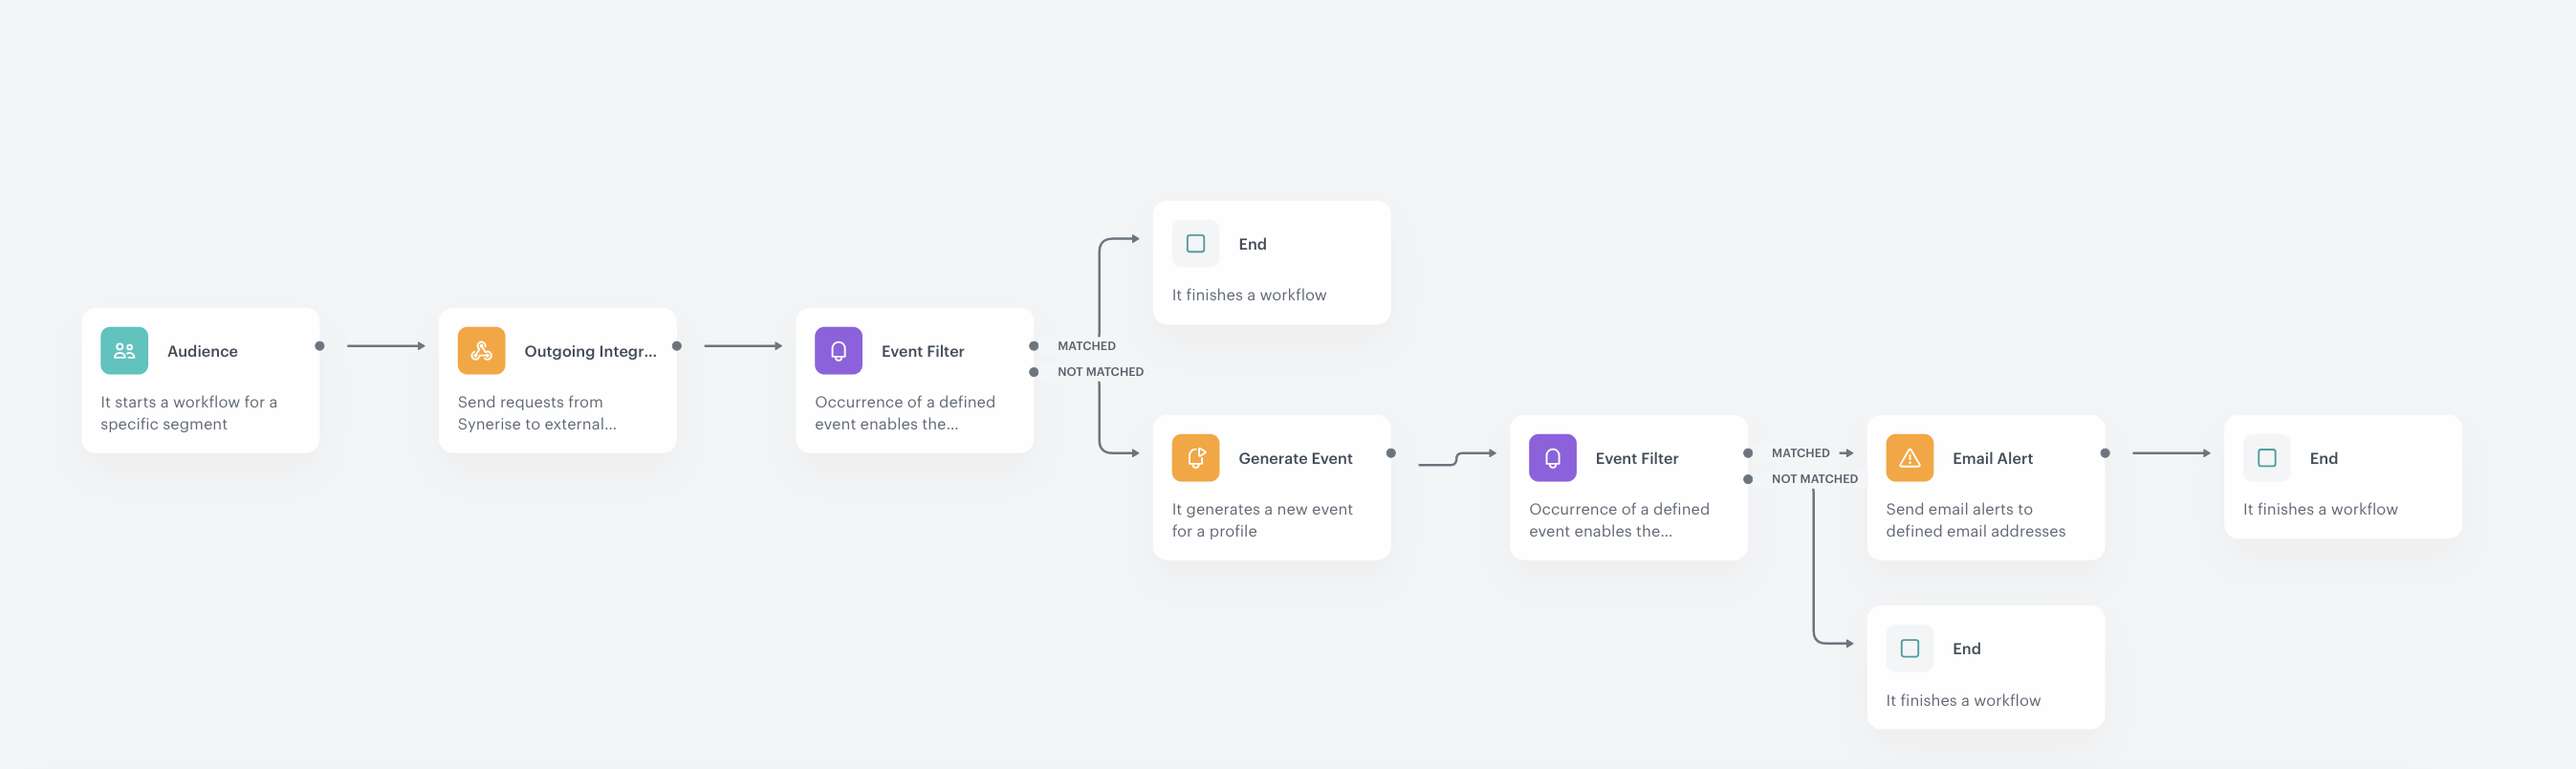
Send this request as many times as you need, just changing the voucherpool_id, firstName, and customId parameters. The voucher pools created in Behavioral Data Hub > Profiles will be available on the list of unrecognized profiles.
{%set link = "https://app.synerise.com/assets/vouchers/pools/*/coupons"%}
<p>{{customer.firstname}},</p>
<h1> Alert for Voucher pool: {{customer.firstname}} </h1>
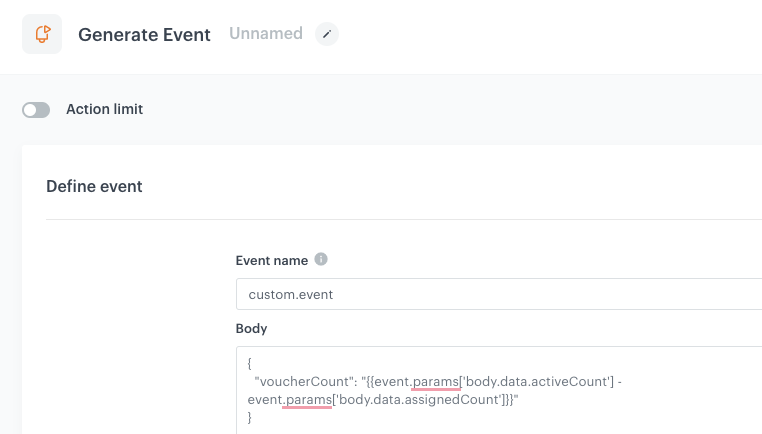
<p> Remaining: {{ event.params['voucherCount'] }} vouchers </p>
<a href='{{link|replace("*",customer.voucherpool_id)}}'>
<p> Link to voucher pool {{customer.firstname}} </p></a>