Propensity, Best Fit and Lookalikes prediction models require configuration of AI engine.
The Lookalikes model will be ready to use as soon as you select the item feed, however, for the Propensity and Best Fit models you must additionally. There is no option to enable Propensity and Best Fit separately.
To configure AI engine, you must perform the following steps in a given order:
- Adding item feed
- Selecting an item feed
- Grouping feed attributes
- Selecting filterable attributes
- Enabling propensity and best fit predictions
You can use the same item catalog for lookalikes, propensity, and best fit predictions, AI Search, and recommendations.
Adding item feed
The first step is selecting the feed from which items will be sourced. You can either select a catalog that contains a feed or use Google Merchant Feed. Make sure, the item feed includes the following attributes:
title- The name of the itemcategory- The category of the item
You can read about requirements for item feed:
- uploaded to a catalog
- pulled from an URL
Grouping feed attributes is available for this feed type.
If you previously configured a feed which you want to use now, you can omit this step.
- We recommend using Google Merchant XML instead of XML files due to the size limits (an XML file cannot exceed 10 MB).
- If you're enabling AI engine for visual similarity recommendation model, select the item feed which contains less than 1,000,000 items.
- Go to Settings > AI engine configuration.
- Click Add feed.
Result: A pop-up appears.
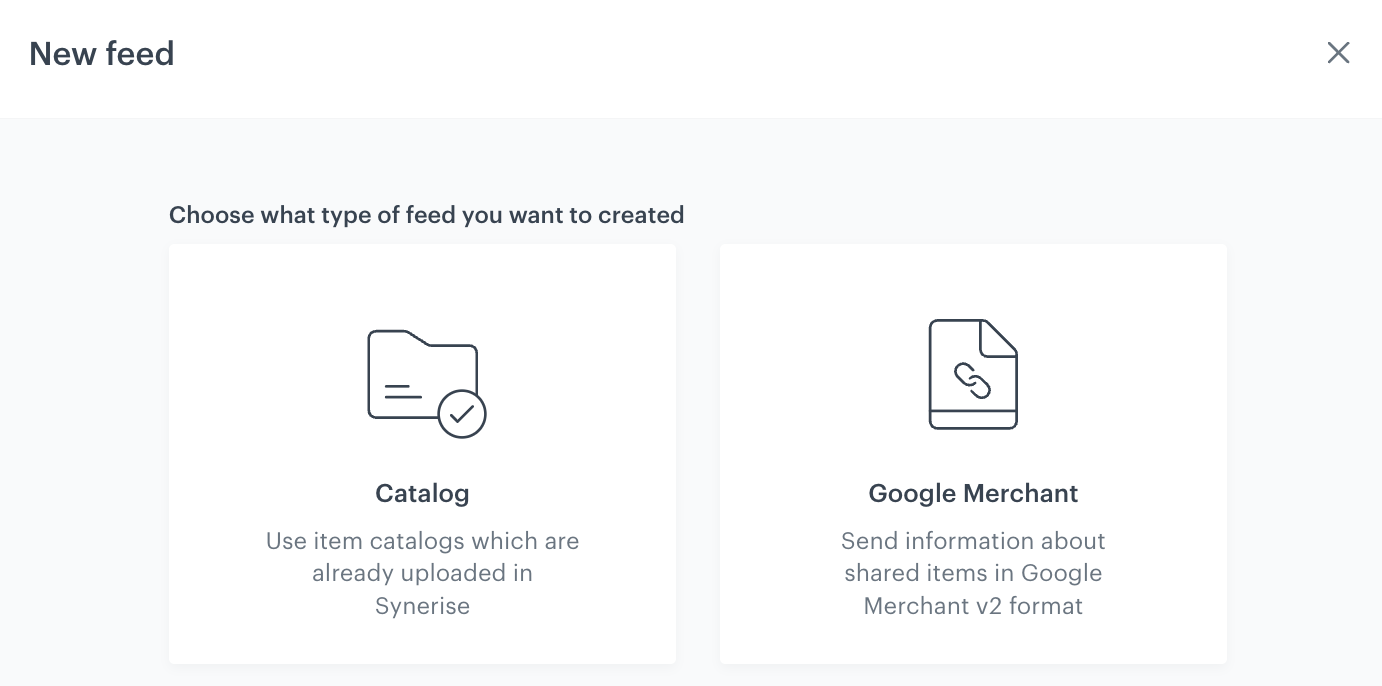
A pop-up with feed type selection Select the product feed you want to use.
- Catalog
- On the pop-up, select the type of catalog:
- Data catalog
- Metadata catalog
- From the dropdown list, select a catalog.
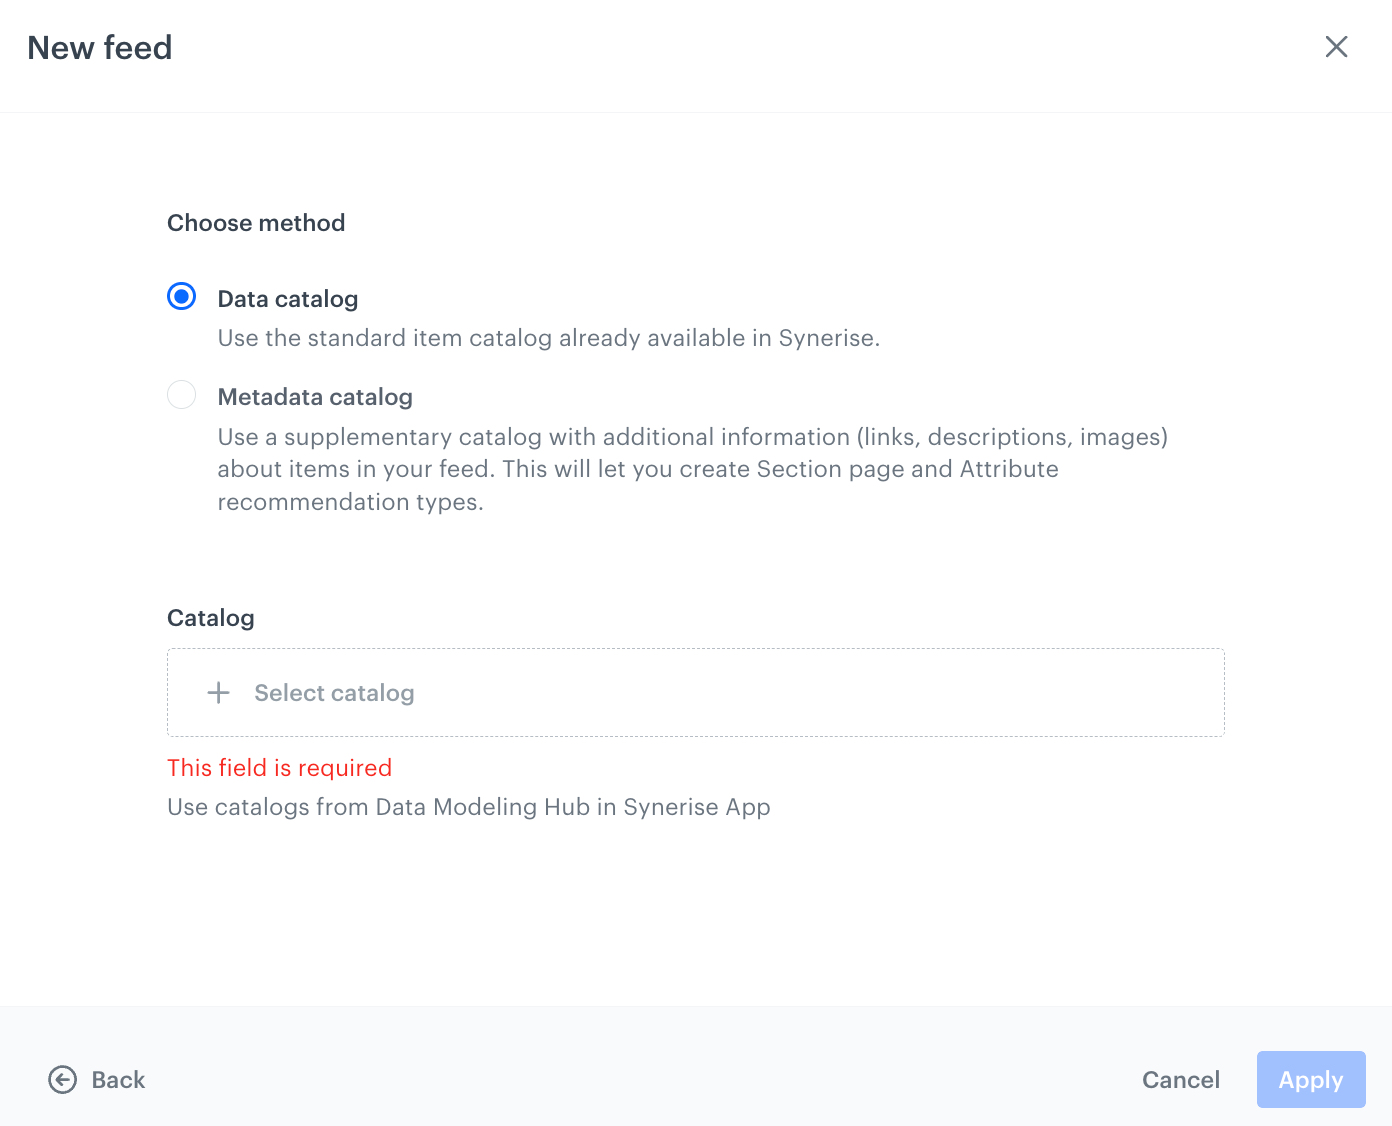
A pop-up with catalog type selection - Confirm by clicking Apply.
Result: An item feed based on the contents of the selected catalog appears on the list in Settings > AI Engine configuration.
- On the pop-up, select the type of catalog:
- Google Merchant
Include the Last-Modified header to enable detection of whether the product feed import is necessary, this will help you reduce data transmission costs.
1. Provide the following information: - the link to the Google Merchant feed (**Feed link**), - the name of the field (**Feed name**), this name will be visible on the list of item feeds in Synerise in **Settings > AI Engine Configuration** - the frequency of pulling updates from the feed to Synerise (**Interval**), - authentication type (**Authentication type**), - username and password (**Basic** authentication type) - username, password, token type, URL (**Bearer** authentication type) <figure><img src="/api/docs/image/e32a804e54dbcd2b8813da305f7295a7fe170faa/docs/settings/_gfx/google-merchant-feed.png" class="medium" alt="A pop-up with configuration of pulling data from Google Merchant Feed"><figcaption>A pop-up with configuration of pulling data from Google Merchant Feed</figcaption></figure> 2. Proceed to the next step by clicking **Next**. 3. If you want to group feed attributes, enable the toggle. Further [grouping settings are defined](#grouping-feed-attributes) after adding the feed. Grouping feed attributes refers to organizing the attributes or fields within an item feed into logical groups. Instead of treating each product variant — such as different sizes or colors — as a separate item in the feed, all variants of a product are combined and grouped into a single item. <figure><img src="/api/docs/image/e32a804e54dbcd2b8813da305f7295a7fe170faa/docs/settings/_gfx/grouping.png" class="medium" alt="A pop-up with enabling grouping feed attributes"><figcaption>A pop-up with enabling grouping feed attributes</figcaption></figure> <div class="admonition admonition-warning"><div class="admonition-icon"><svg xmlns="http://www.w3.org/2000/svg" fill="none" viewBox="0 0 24 24" stroke="currentColor" stroke-width="2.5"><path stroke-linecap="round" stroke-linejoin="round" d="M12 9v2m0 4h.01m-6.938 4h13.856c1.54 0 2.502-1.667 1.732-2.5L13.732 4c-.77-.833-1.964-.833-2.732 0L4.082 16.5c-.77.833.192 2.5 1.732 2.5z" /></svg></div><div class="admonition-body"><div class="admonition-content"> This action is irreversible after applying. </div></div></div> 4. Confirm by clicking **Apply**. **Result**: The feed appears on the list in **Settings > AI Engine configuration**.- Catalog
Selecting item feed
- In Settings > AI Engine Configuration, on the list of feeds, click the feed you added according to the Adding item feed procedure.
The configuration form opens. In the Item catalog section, the feed you are configuring is selected automatically and you can proceed to the next part of the configuration.
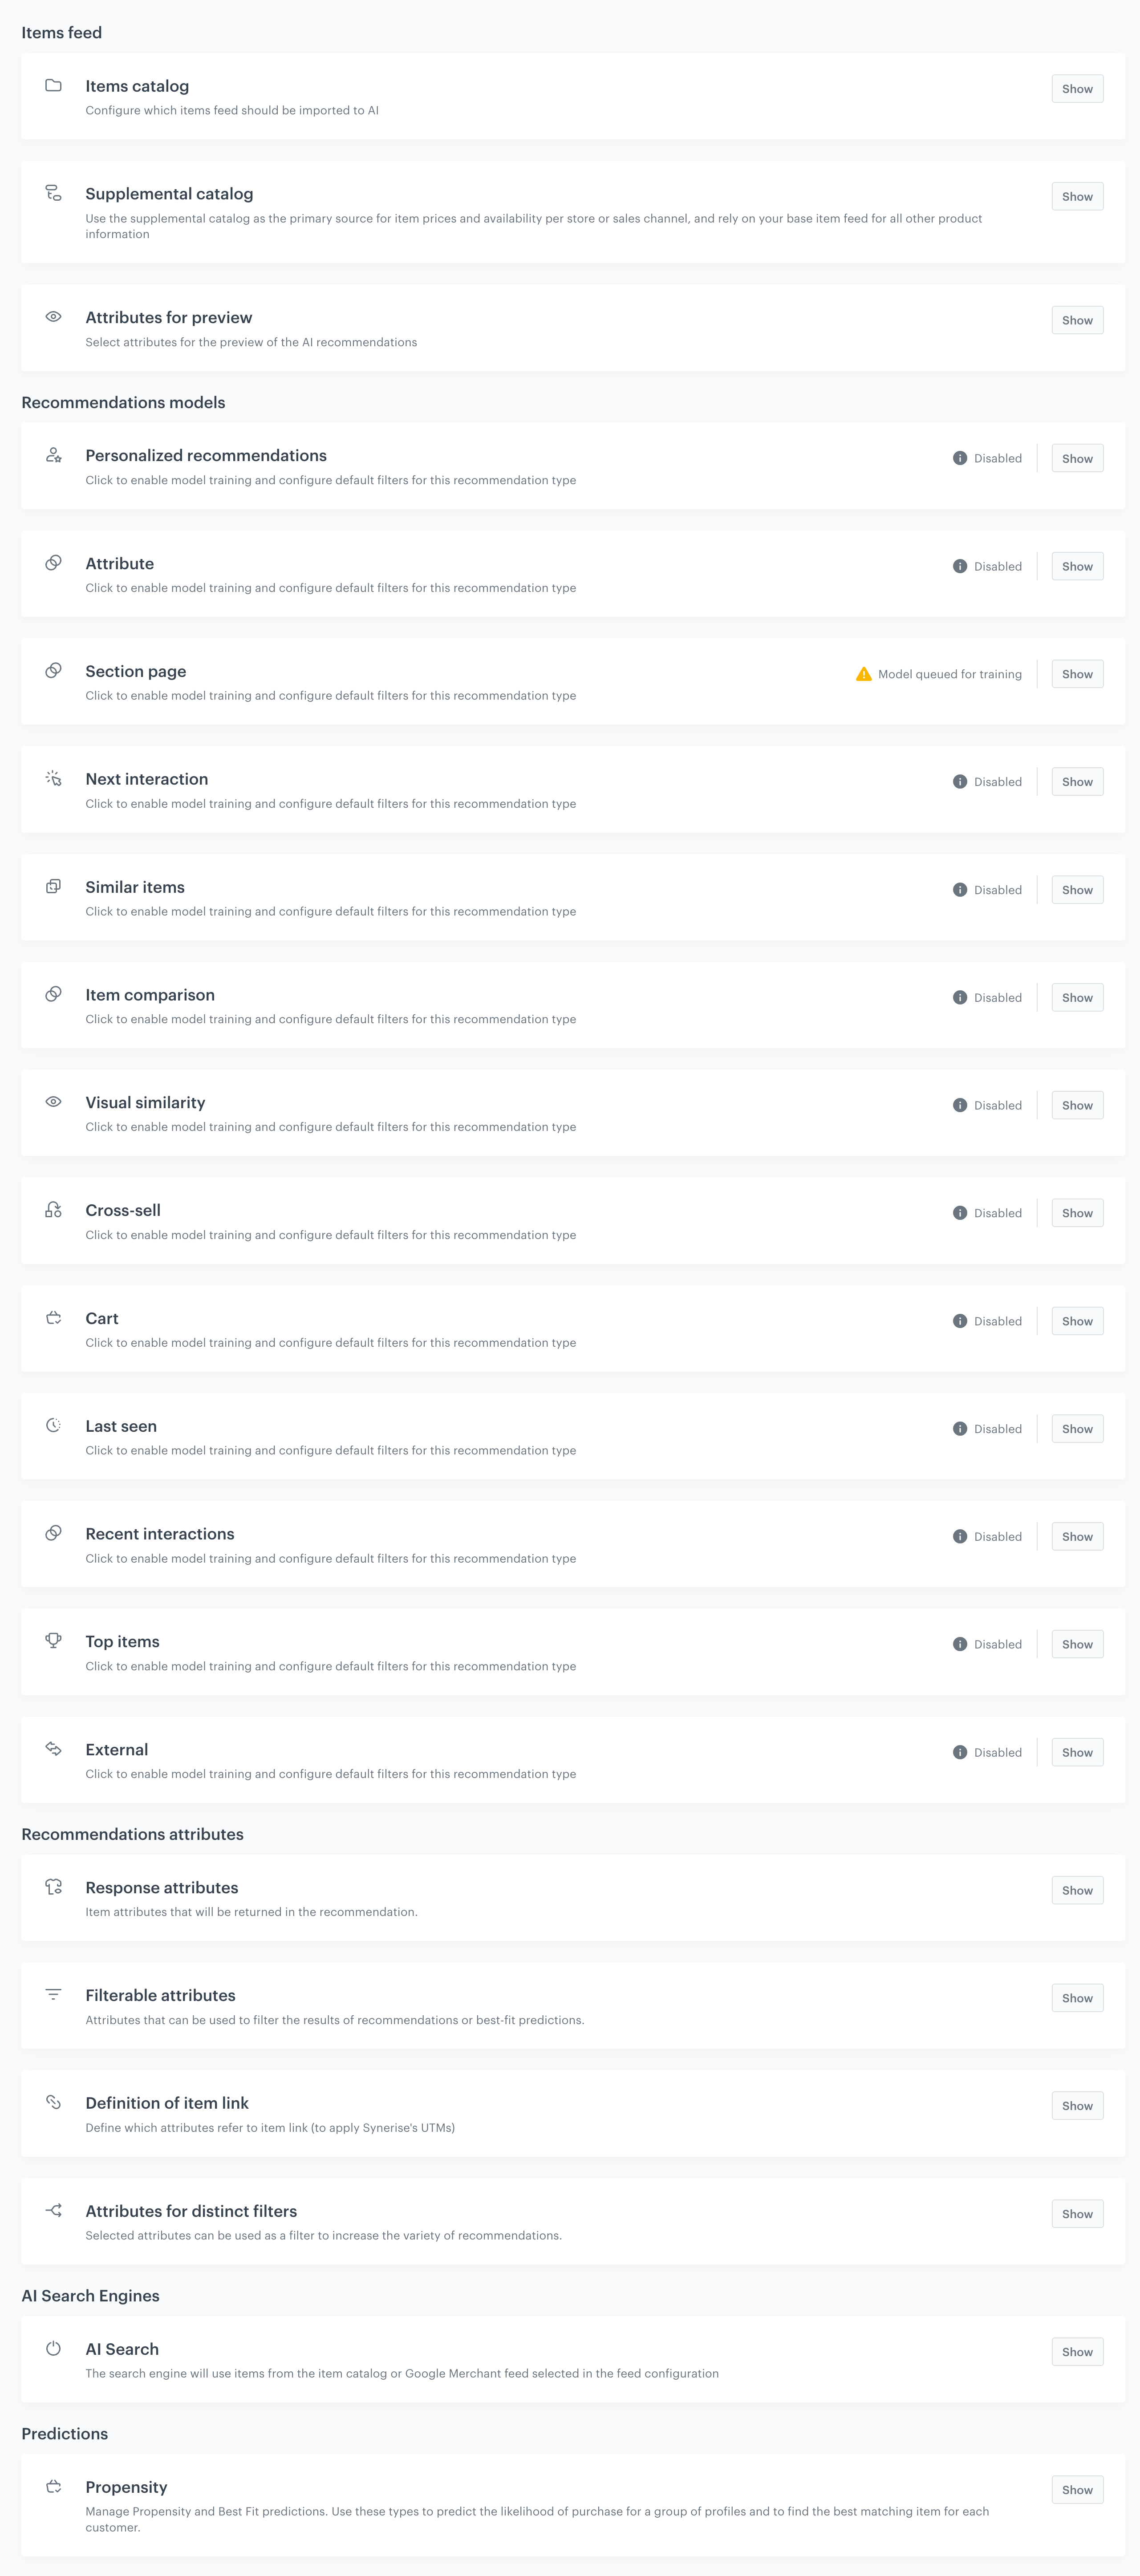
Blank model configuration form
Supplemental catalogs are used exclusively for recommendations. When you add a supplemental catalog and connect it to an item feed, the attributes from the supplemental catalog become available as Supplemental attributes in the recommendation filters.
Grouping feed attributes
This option is available only for feeds from Google Merchant XML files.
Grouping feed attributes organizes attributes or fields within an item feed into logical groups. Instead of treating each product variant — such as different sizes or colors — as a separate item in the feed, all variants of a product are combined and grouped into a single item.
During this grouping process, a "base" product is selected as representative. This is done by first gathering all products that share the same itemGroupId, then grouping them by category, and finally selecting the first product from the largest category group to serve as the base.
Null values and empty attribute values are not handled and will not appear in the grouped results.
When adding such a feed to Synerise, you must enable the grouping of feed attributes. Please note that enabling grouping is irreversible.
- In the Grouping feed attributes section, click Show.
Result: Grouping rules are shown. The system automatically prepares grouping rules. - Verify the proposed grouping rules.
When configuring the grouping of feed attributes, you must map source fields to target fields using one of the following aggregators. Each aggregator determines how values from multiple items are combined:
Aggregator Description Example Aggregated Result or Performs a logical OR on boolean values. Returns trueif any value istrue, otherwisefalse.true, false, falsetruearrayDistinct Aggregates unique, non-null values into an array, removing duplicates. "41", "42", "41", "42"["41", "42"]arrayFlatten Flattens nested arrays into a single array combining all elements. ["123", "456"], ["456", "789"]["123", "456", "456", "789"]array Aggregates values into an array, preserving order. "41", "42"["41", "42"]single Selects the first non-null value from the list. For the availabilityattribute, the aggregated result will be a boolean value."PROD123", "PROD124"["PROD123"] To add your own rule, click Add rule.
- In the Source filed dropdown, select an item attribute from the feed pulled from Google Merchant.
- From the Aggregator dropdown list, select the aggregator based on which attribute values will be combined.
- In the Target field dropdown list, select the attribute which will hold the aggregated values. You can create an attribute.
- Confirm by clicking Apply.
Selecting filters
In this part of the process, you will define the attributes for filtering items. Attributes selected in this section become available for use in filters in the Propensity predictions settings and are also accessible in Decision Hub.
Every day, attributes added to Filterable attributes are automatically deleted if they fulfill all of the following conditions:
- They were added to filterable attributes more than 10 days ago.
- They are not used in any search or suggestion index configuration.
- They are not set as filters or boosting rules in any recommendation campaign.
- They are not set as a default filter in any recommendation configuration.
- They are not used as additional filters in any recommendation API/SDK request.
- On the Filterable attributes tab, click Show.
- Click Select attributes.
- Select the checkboxes next to the attributes which you want to use for filtering the recommendation results.
Recommended: Don't usetitleordescriptionas filterable attributes. Using these attributes as filterable has a negative impact on performance. - Confirm by clicking Apply.
Result: You will be able to filter the items by the attributes you have just added.
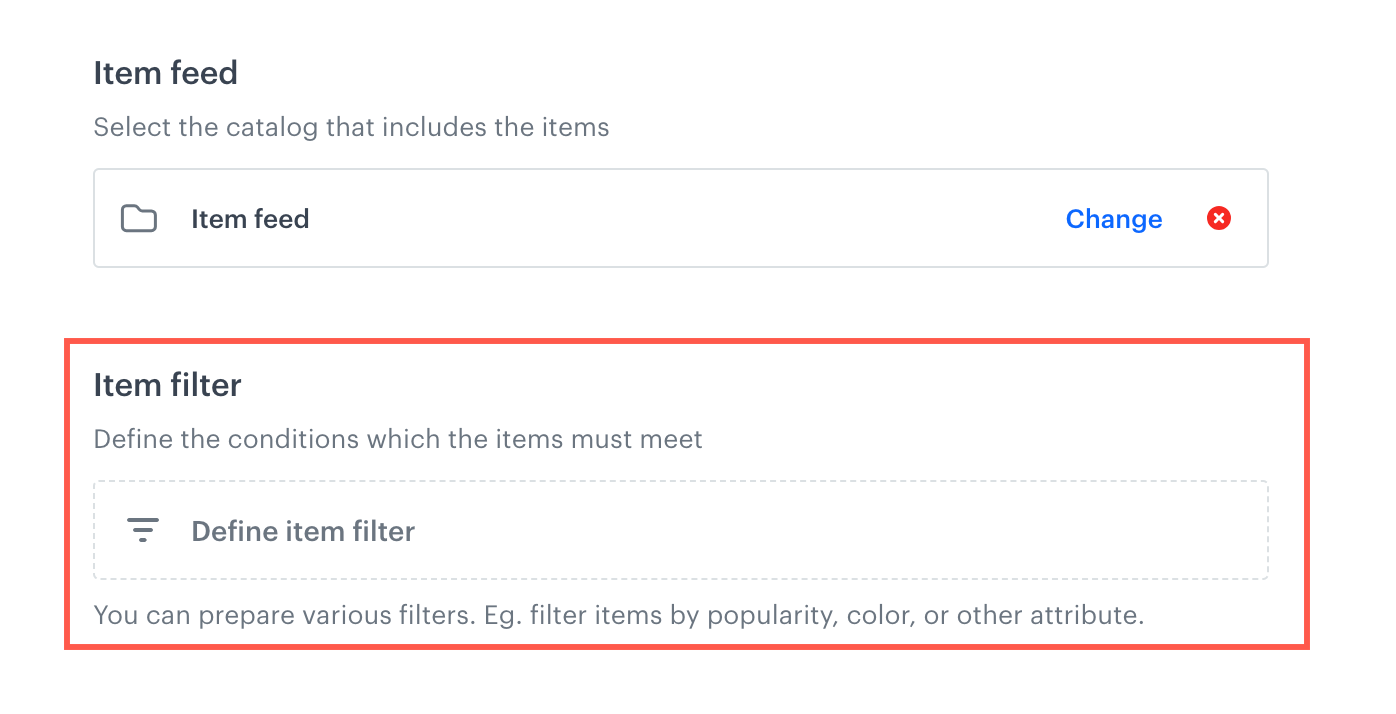
Item filter section in the settings of the Propensity prediction
Enabling propensity and best fit predictions
In this part of the process, you will enable the usage of items from the product feed for preparing the Propensity and Best Fit predictions.
To be able to filter the items for predictions, make sure you selected attributes which will be available for filtering.
- In the Propensity and Best Fit tab, click Show.
- Set the toggle to Enabled.
Removing item feed
You can remove item feeds from the list. While removing item feeds, any Synerise objects that rely on the feed as a source of information (such as predictions, recommendations, AI search) will be automatically disabled. Prior to confirming the removal operation, you will be presented with a list of objects that are currently using the feed to be removed. The feed will be removed after 7 days from confirming the action. During this transitional period, the feed and the objects associated with it will remain active. In the case of a feed within a catalog, the contents of the catalog will be deleted, while the catalog itself will be retained.
- Go to Settings > AI engine configuration.
- Next to the name of the feed you want to remove, click

- From the dropdown list, select Delete.
Result: A pop-up appears with the list of objects that are currently using the feed. - To confirm the operation, click Yes, delete feed.