You can integrate your website built on the Shopify platform. The scope of integration involves the transmission of the following data from Shopify to Synerise:
- information about the customers (their activity, identification of a customer, customer data update, customer logging in and out),
- information about the transactions (purchase, cart status),
- information about the items (item updates, adding and removing items)
Scope of tracked events
The table below contains the list of events tracked by default.
| Data scope | Action | Location of data in Synerise |
|---|---|---|
| Customers | A customer logs in to their account on your website | In the client.login event generated on the profile card in Behavioral Data Hub > Profiles |
| Customers | A customer logs out to their account on your website | In the client.logout event generated on the profile card in Behavioral Data Hub > Profiles |
| Customers | A customer makes changes to their account (for example, updates information about birthday, location, and so on). | In the profile.updated event generated on the profile card in Behavioral Data Hub > Profiles |
| Customers | A customer changes their marketing agreements. | In the marketingAgreement.turnOn / marketingAgreement.turnOff / newsletter.unsubscribe events generated on the profile card in Behavioral Data Hub > Profiles |
| Orders | An item is added to a cart | In the product.addToCart generated on the profile card in Behavioral Data Hub > Profiles |
| Orders | An item is removed from the cart | In the product.removeFromCart event generated on the profile card in Behavioral Data Hub > Profiles |
| Orders | A summary of the cart’s current contents | In the cart.status event generated on the profile card in Behavioral Data Hub > Profiles |
| Orders | A transaction is made and paid | In the transaction.charge event generated on the profile card in Behavioral Data Hub > Profiles |
| Products | A product is updated | A catalog with the item feed will be updated (Data Modeling Hub > Catalogs). If the catalog doesn't exist yet, a catalog with shopify - {Your_Store_Name} name will be created. |
| Products | A product is added | A catalog with the item feed will be updated with new items (Data Modeling Hub > Catalogs). If the catalog doesn't exist yet, a catalog with shopify - {Your_Store_Name} name will be created. |
| Products | A product is removed | A catalog with the item feed will be updated (Data Modeling Hub > Catalogs). If the catalog doesn't exist yet, a catalog with shopify - {Your_Store_Name} name will be created. |
Prerequisites
- Contact the Synerise support to enable the Shopify integration in the Synerise workspace.
- You must have access to admin panel in the Shopify platform.
- Create a tracking code in the Synerise portal
Configuration in Shopify
Implement tracking codes in your shop
In this part of the process, you will need to implement Synerise tracking codes in two places:
- A pixel in the Shopify admin panel
- The store's theme's code
Adding a pixel with the tracking code
- Go to Admin panel > Settings > Customer events.
Result: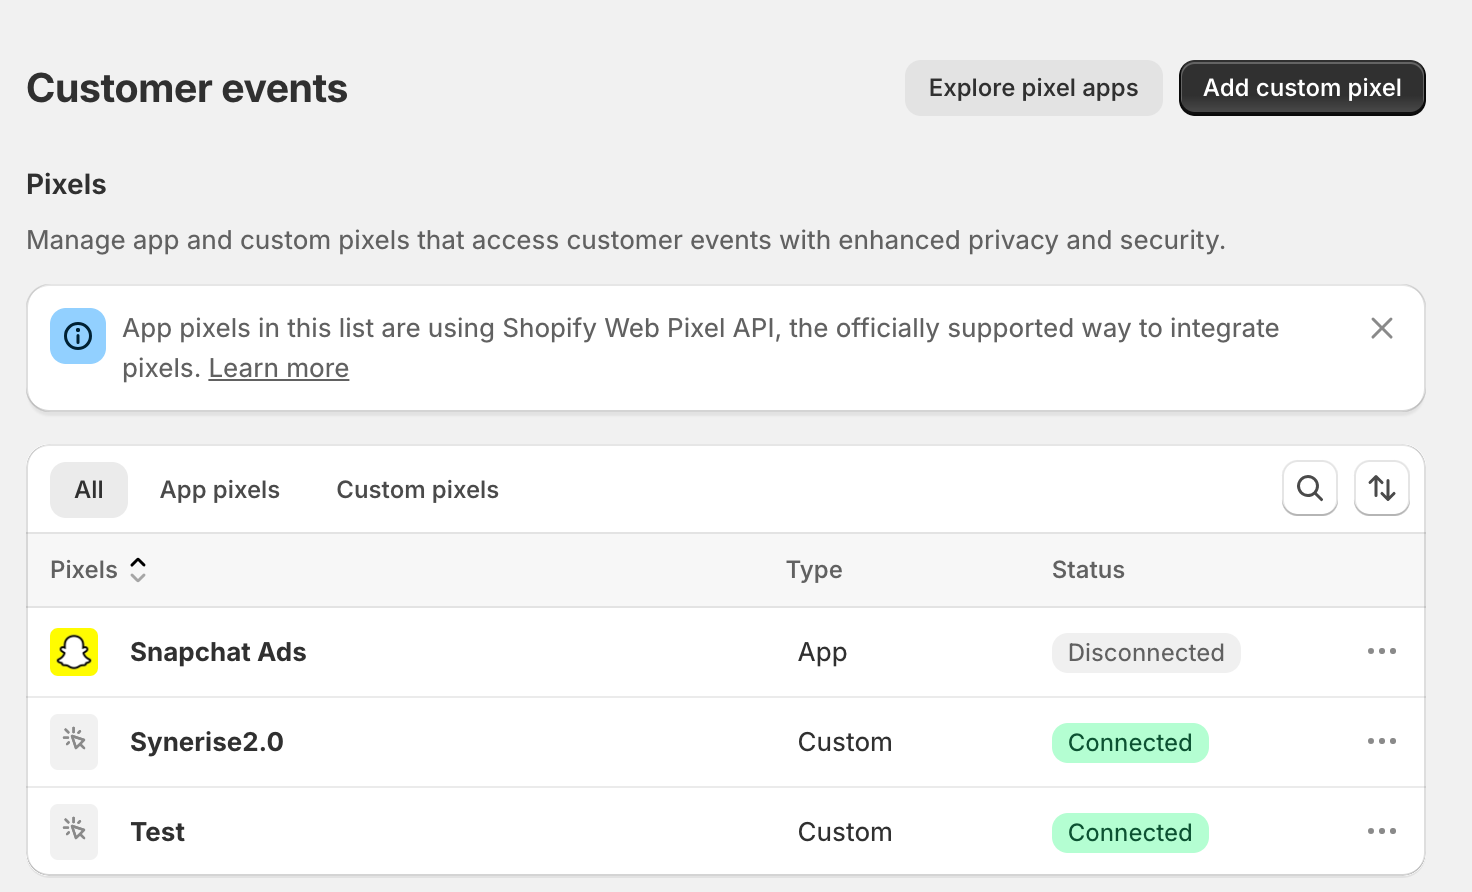
The customer events view - Click Add custom pixel.
Result: A pop-up appears. - In the Pixel name field, enter the name of the pixel.
This is only for identifying the pixel on the list of pixels. - Click Add pixel.
Result: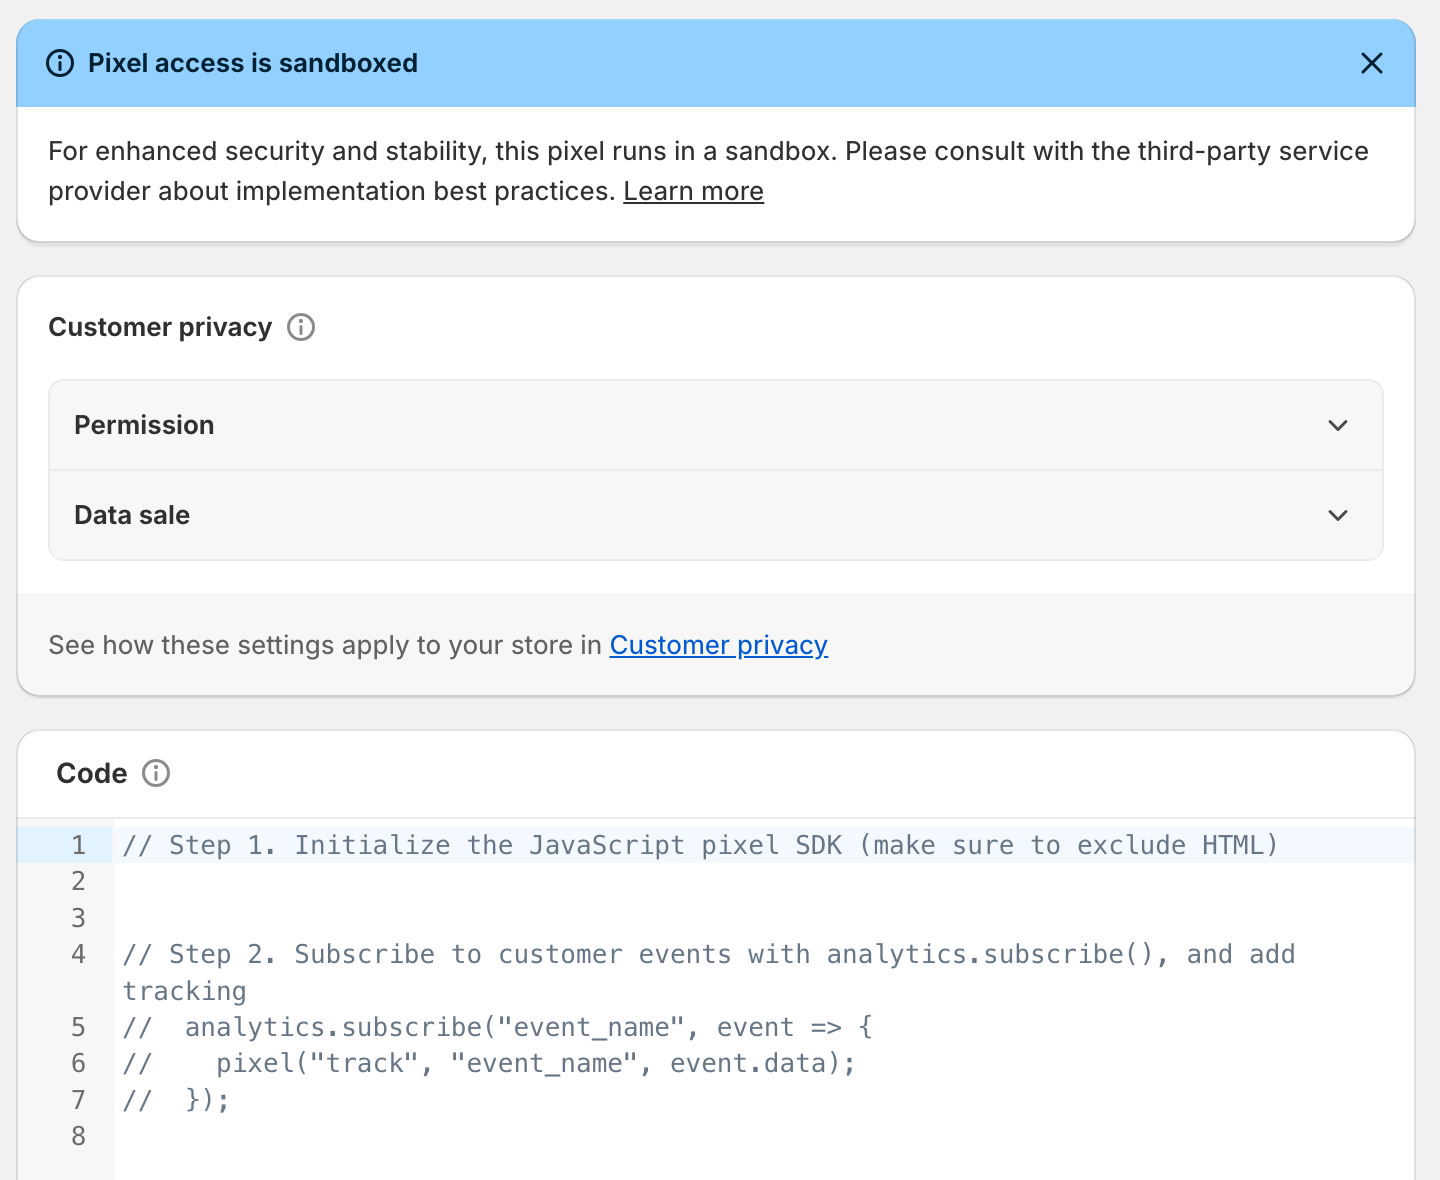
Configuration of a pixel - Leave the settings in the Customer privacy section at default.
- In the Code section, enter the Synerise tracking code from the Tracking code for Shopify pixel section which you created as a part of prerequisites.
- In the upper right corner, click Save.
- At the bottom of the Code section, click Connect.
Result: Tracking of the following customer activities starts:- adding or removing an item from the cart
These two activities generateproduct.addToCartandproduct.removeFromCartevents in the Synerise platform on the card of a customer. These activities also generate acart.statusevent. The parameters of all these events contain the IDs of the products. - viewing a page - This activity generates a
page.visitevent and triggers tracking the cart status. The basket contents are saved in the browser's local storage (in a_snrs_cart_stateparameter), so when a customer visits the website, the contents of their cart are checked as well as the list of IDs of product they visited. - logging in and logging out - These activities generate
client.loginevent andclient.logoutevent events, respectively
- adding or removing an item from the cart
Adding the tracking code to the store theme code
- In the Shopify admin panel, go to Online Store > Themes.
- On the theme you currently use, click the Customize button.
- In the upper left corner, click the three dot icon.
Result: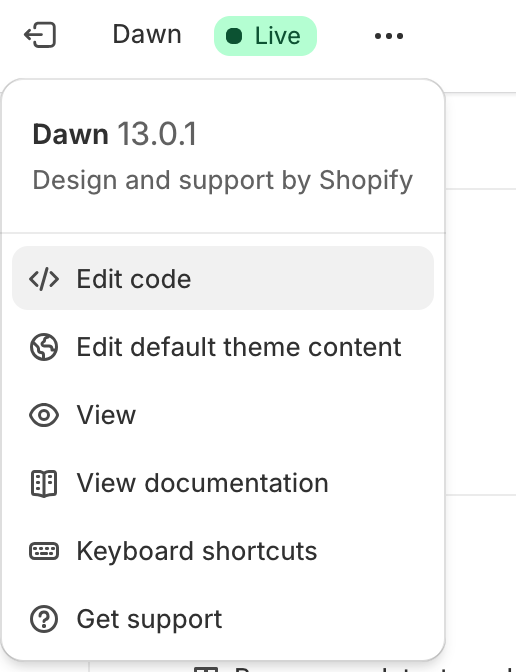
After clicking the three dots icon, a dropdown appears - From the dropdown list, select Edit code.
- In
theme.liquid.html, enter the Synerise tracking code from the Tracking code for store's theme code section which you created as a part of prerequisites. - Save the changes.
Result:- When a customer visits a product page, a
page.visitevent with the item's SKU is generated. - All other activities defined in the Scope of tracked events are tracked.
- dynamic content can be used on the store website.
- When a customer visits a product page, a
Create custom application
Synerise supports the 2024-04 version and higher versions of the Shopify API.
- Go to the Shopify administration panel.
- Create a custom application according to the instruction in the Shopify documentation. Set the following permissions for the custom application:
read_customers,read_products,read_orders,write_script_tags,write_pixels,read_pixels,read_customer_events
- Install the custom application.
Result: A window with API key, API secret, and Admin access token is displayed. - Keep the view open.
You will need the data for the configuring the plugin in the Synerise platform. This is the only time you can view the API Admin access token.
Configuration in Synerise
- In Synerise, go to Settings > Apps & Services.
- On the list, find Shopify and click Show.
If Shopify is not listed, contact the Synerise support to enable the Shopify integration in your Synerise workspace.
- From the Select connection dropdown list, select the connection.
If you haven't established a connection yet, see Create a connection.
Create a connection
After you installed the custom application in Shopify, use its data to establish a connection.
- In the Shop name field, enter the name of your shop.
You can find it in the URL, for example:https://[myshopname].myshopify.com - In the Shopify API key field, enter the API key from the API key and Secret key section in the custom application.
- In the Secret key field, enter the Secret key from the API key and Secret key section in the custom application.
- In the Admin token field, enter the value of the API Admin access token field from the custom application.
- Click Next.
- In the Integration name field, enter the name of your integration.
It will be visible on the connection list only. - Make a connection by clicking Apply.
Enabling ongoing synchronization
You can start synchronizing data between your shop and Synerise once the connection has been made. The synchronization runs in real-time. If you want to synchronize historical data, see "Synchronizing historical data" section.
To start automatic synchronization of a specific scope, enable the respective option on the interface (Customers, Orders, Products).
In the "Scope of tracked events" section of this article, you can check the events which will be sent to Synerise as a result of enabling ongoing synchronization.
Synchronizing historical data
To send historical records from your shop to Synerise, you must manually initiate the historical data synchronization process. This process doesn't occur automatically.
In the "Scope of tracked events" section of this article, you can check the events which will be sent to Synerise as a result historical data synchronization.
- In the Synchronize historical data section, click Add synchronization.
Result: A pop-up appears. - On the pop-up, in the Synchronization name field, enter the name of the synchronization.
It will only be visible on the list of historical data synchronizations. - From the Data type dropdown list, select scope of data you want to synchronize:
- Customers
- Orders
- Products
In the table at the beginning of this article, you can see what kind of information is synchronized and in what form they are available in the Synerise platform.
- In the From field, enter the date from which you want to import data to Synerise.
- In the To field, enter the date to which you want to import data to Synerise.
- Start the import by clicking Launch.